Leveling a bathroom floor for tile installation is a crucial step in ensuring a professional and durable finish. The process begins with thorough preparation. Start by removing the existing floor covering and inspecting the subfloor for any damage, unevenness, or signs of moisture. Repair any issues found before proceeding. Next, check for levelness using a straightedge or level tool. Identify any low spots or high areas, as these irregularities can affect the tile installation. If the floor has significant variations, it may be necessary to use a self-leveling compound to create a smooth and level surface.
Images about How To Level A Bathroom Floor For Tile
How To Level A Bathroom Floor For Tile

Before applying the self-leveling compound, it is essential to clean the subfloor thoroughly. Remove any dust, debris, or loose particles that could interfere with the bonding of the compound. Additionally, it’s advisable to prime the subfloor with a suitable primer to enhance the adhesion of the self-leveling compound. Once the preparation is complete, mix the self-leveling compound according to the manufacturer’s instructions. Pour the compound onto the floor and spread it evenly using a trowel or a gauge rake. Work quickly, as self-leveling compounds have a limited working time. Allow the compound to settle and level itself, filling in low spots and creating a smooth, even surface.

After the self-leveling compound has cured, it’s essential to check the floor again for any remaining imperfections. If minor irregularities are present, these can often be addressed with a patching compound or by spot-leveling with thin-set mortar. However, for larger problem areas, it may be necessary to repeat the self-leveling process. Once the floor is deemed level and all repairs are complete, it’s time to install a cement backer board or an appropriate underlayment for tile installation. This layer adds stability to the floor and provides a secure base for the tile. Follow the manufacturer’s guidelines for installing the backer board, ensuring proper spacing and fastening.
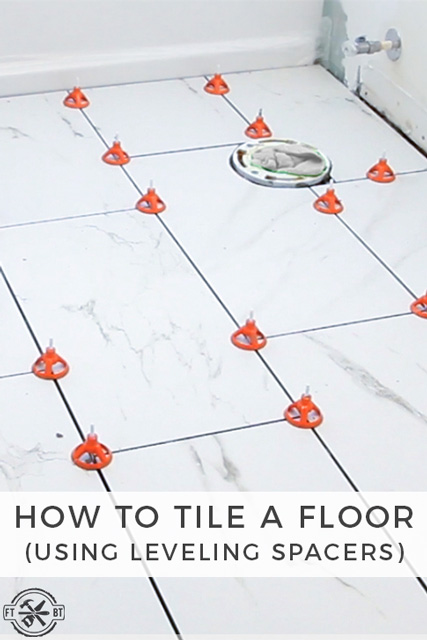
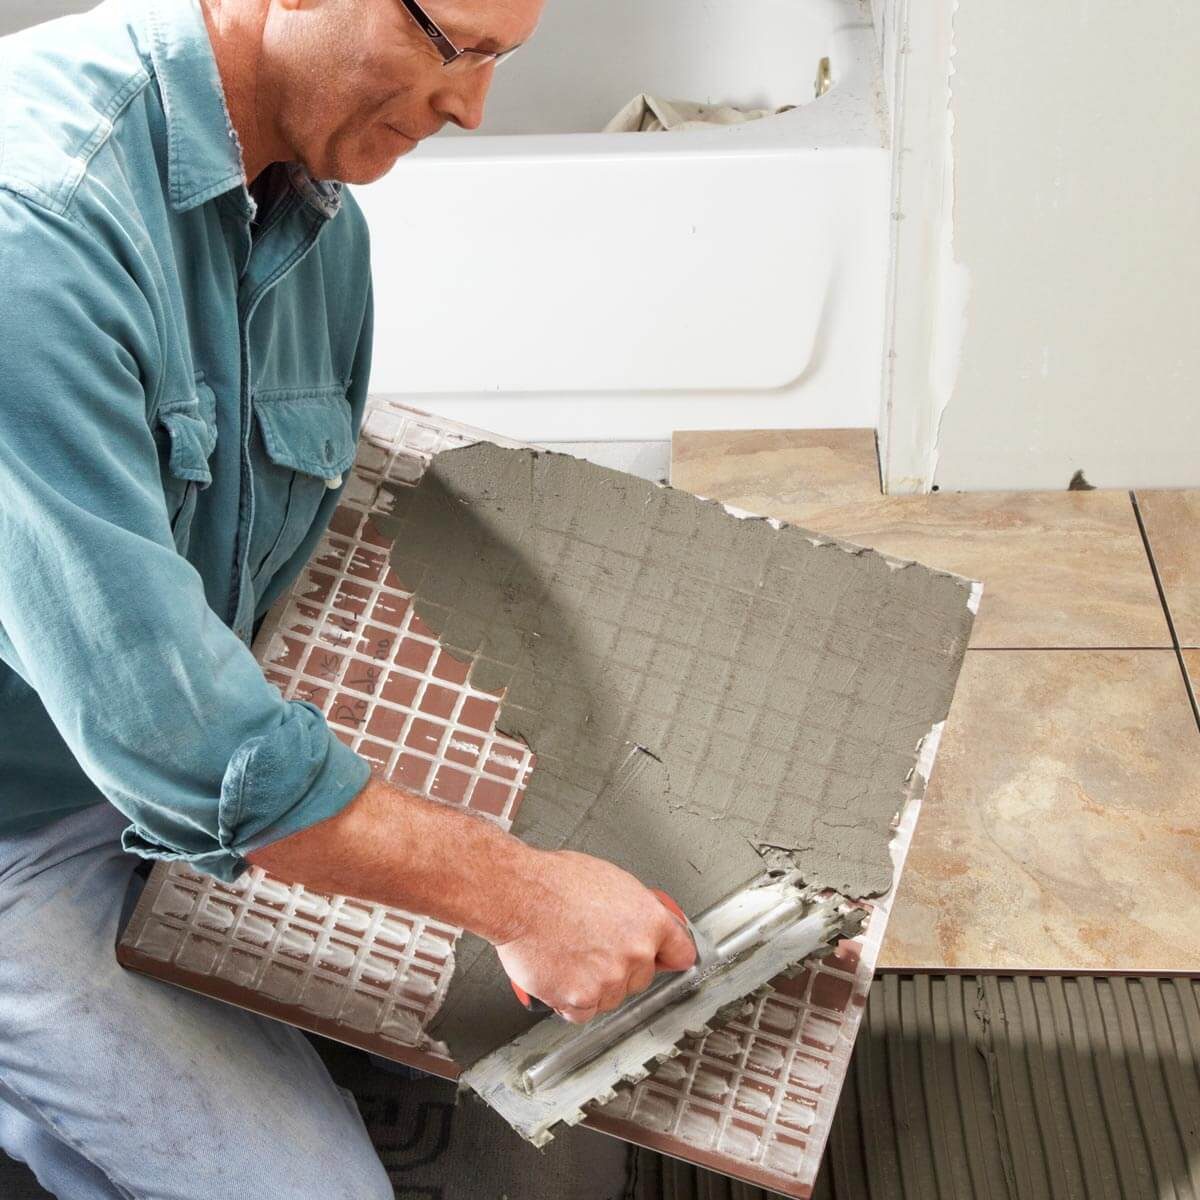
Before laying the tiles, plan the layout carefully to achieve a balanced and aesthetically pleasing design. Start tiling from the center of the room and work outward, using tile spacers to maintain consistent gaps between tiles. Use a high-quality mortar to secure the tiles to the backer board, pressing them firmly into place. After the mortar has set, apply grout to fill the gaps between the tiles. Properly leveling the bathroom floor is crucial not only for the appearance of the finished tile but also for the longevity of the installation. A level and stable surface ensures that the tiles adhere properly and that the floor remains durable and resistant to cracks or other issues over time.
Tiling Tips for Bathrooms – Bower Power
How to Tile a Bathroom Floor with Wickes

How to Tile a Bathroom Floor FixThisBuildThat
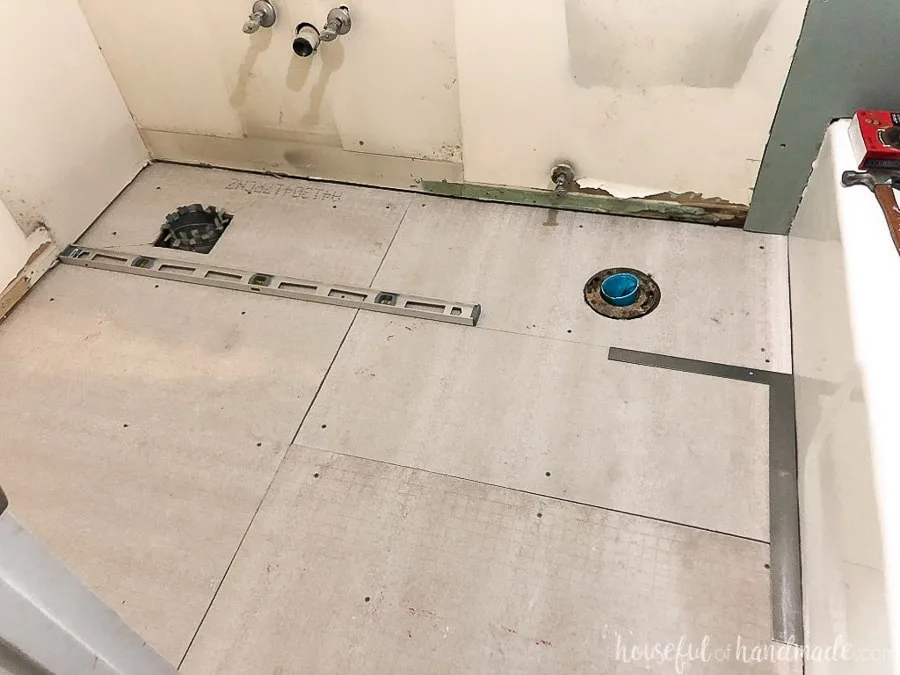
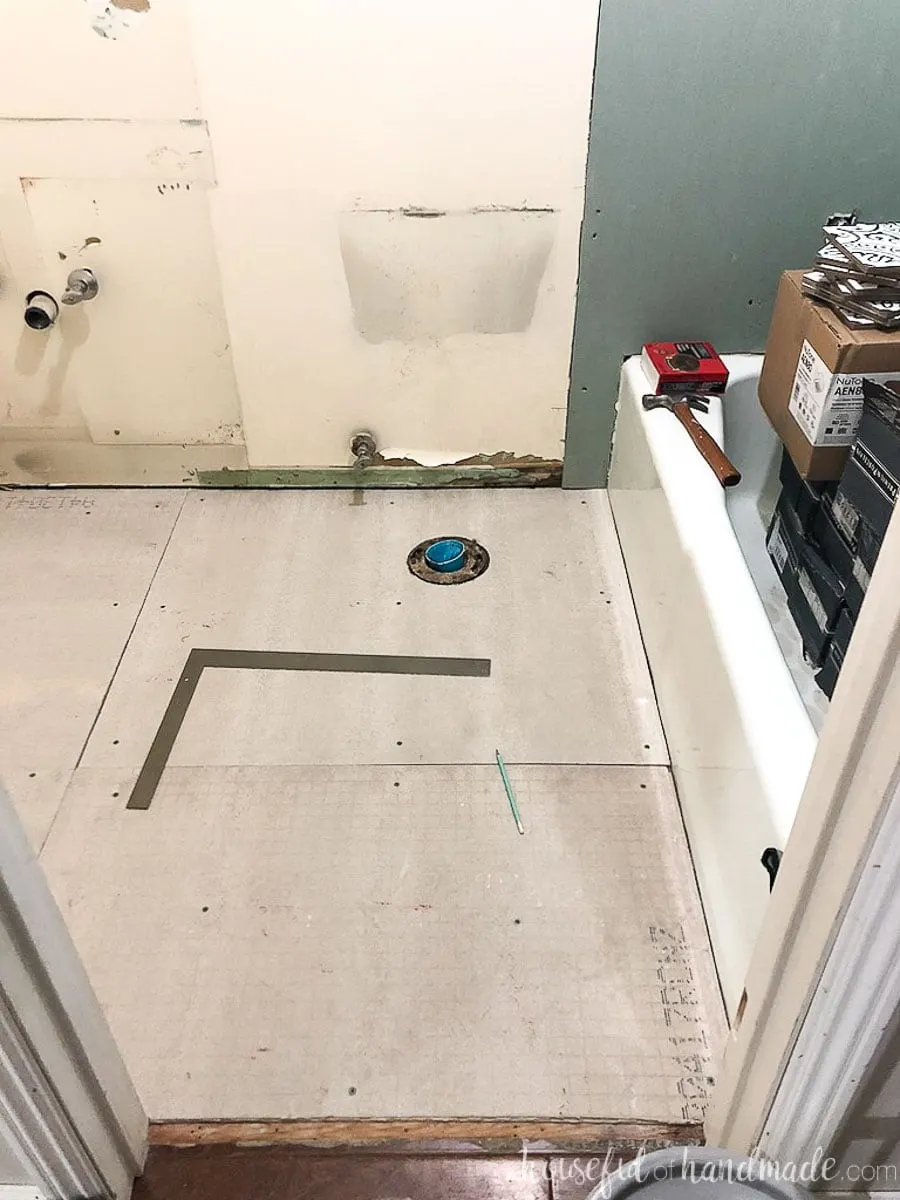
Laying Floor Tiles in a Small Bathroom – Houseful of Handmade
How to Level Old Plywood Floor Before Laying Ditra and Tile DIY

How to Prepare a Subfloor for Tile Installation
How to Tile a Bathroom FloorNext to Curbless Showers — by Home Repair Tutor

How to Level a Subfloor Before Laying Tile
Laying Floor Tiles in a Small Bathroom – Houseful of Handmade
How to Lay Tile: Install a Ceramic Tile Floor In the Bathroom (DIY)
Related Posts:
- Reglazing Bathroom Floor Tiles
- Colorful Bathroom Floor Tile
- Vinyl Flooring For Bathrooms
- Bathroom Flooring Ideas
- Bathroom Floor Patterns
- Bathroom Tile Floors
- Modern Vinyl Bathroom Flooring
- Mosaic Bathroom Floor Tiles
- Wood Bathroom Floor
- 1930s Bathroom Floor Tile
How To Level A Bathroom Floor For Tile
Laying a bathroom tile floor is a great way to improve the look and feel of your home. But it’s important to make sure the floor is properly prepared first, or else you risk having an uneven surface and tiles that do not last. In this article, we’ll show you how to level a bathroom floor for tile by walking you through the process step by step.
Preparing the Subfloor
Before you start tiling your bathroom floor, it is essential that you prepare the subfloor first. Subfloors are typically made of plywood or concrete, and you should make sure that they are clean, dry, and level before laying any tiles.
Start by inspecting the subfloor for any signs of damage like water damage or rot. If there is any damage, repair it with concrete patch or wood filler. Next, make sure that the subfloor is clean and free of any dirt and dust. Vacuum it thoroughly and then wipe it down with a damp cloth to remove any remaining debris.
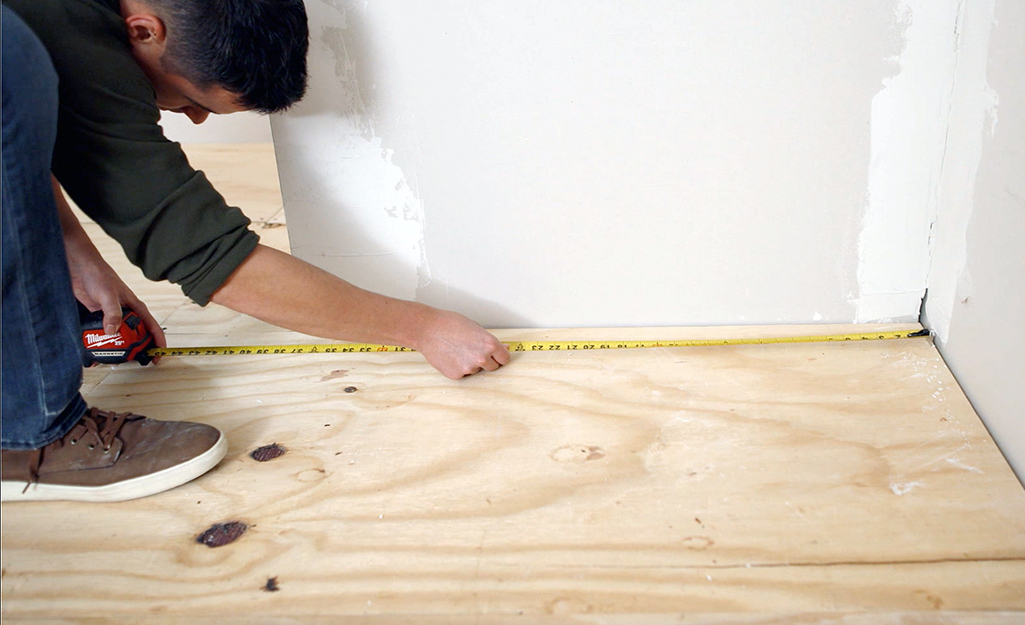
Once the subfloor is dry and clean, use a straight edge to check for any high or low spots in the floor. If there are any spots that are more than ¼ inch off from the rest of the floor, use a self-leveling compound to even them out. The self-leveling compound should be applied evenly in thin layers until all of the high or low spots have been filled in. Allow the compound to dry completely before continuing with the next step.
Installing Backer Board
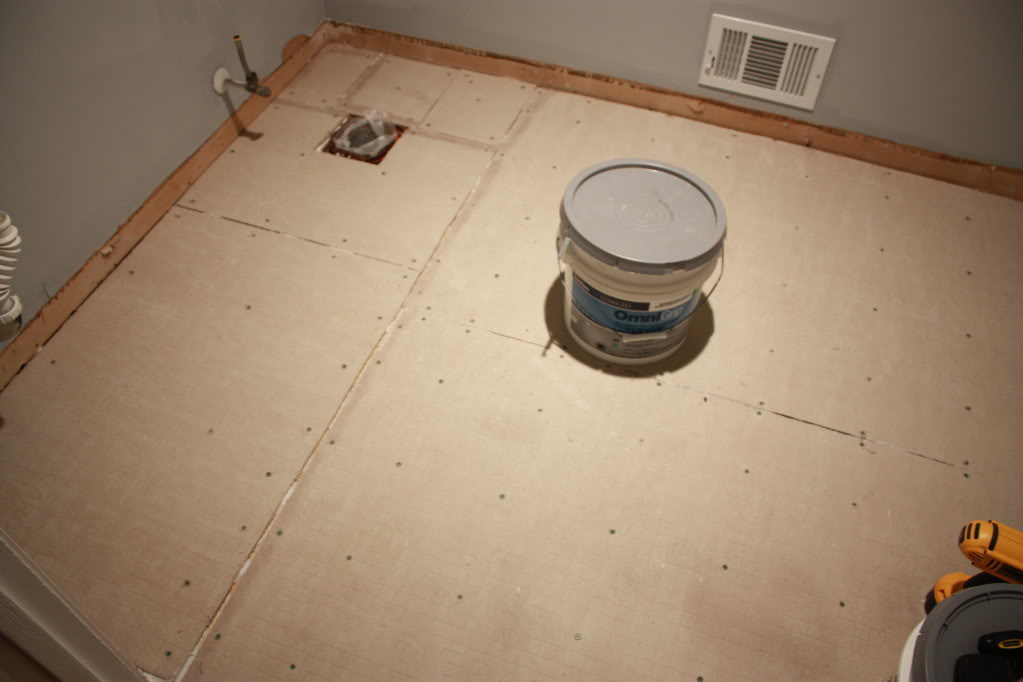
Once the subfloor has been leveled, the next step is to install backer board over it. Backer board is a type of cement board that provides a stable base for tile installation and helps prevent moisture from getting into the tile.
Start by measuring and cutting your pieces of backer board so that they fit snugly in your bathroom floor space. Lay out your backer boards on top of the subfloor and use a chalk line to make sure they are installed in a straight line. Secure each piece with screws every 8 inches along all four edges. Once all of your backer boards have been installed, fill in any spaces between them with thinset mortar and allow it to dry completely.
Testing for Levelness
Before you can begin tiling your bathroom floor, you need to make sure that it is level one last time. Place a 4-foot long straight edge across your backer boards and check for any high or low spots along its length. If there are any spots that are more than ¼ inch off from the rest of the surface, use a self-leveling compound to fill them in until they are even with the rest of your floor. Allow the compound to dry completely before starting on your tile installation.
FAQs About Leveling Bathroom Floors For Tile
Q: What type of subfloor should I use?
A: Most bathroom floors are made of either plywood or concrete, but it’s best to check with a professional before deciding which type of subfloor is right for your project.
Q: How do I check for levelness?
A: The best way to check for levelness is to lay down a 4-foot long straight edge across your floor and look for any high or low spots that are more than ¼ inch off from the rest of your floor surface.
Q: What type of material should I use to fill in high or low spots?
A: Self-leveling compound is best used to fill in any high or low spots on your bathroom floor before tiling it.