When I started planning my bathroom renovation two years ago, I was convinced I needed expensive ceramic tile or natural stone to create the spa-like retreat I’d been dreaming about. After researching costs and installation complexity, I stumbled upon modern vinyl flooring options that completely changed my perspective. The luxury vinyl tiles I eventually chose look so convincingly like marble that guests consistently ask about my “beautiful stone floors.” Not only did I save thousands compared to genuine stone, but I also gained practical benefits like warmth underfoot, easy maintenance, and complete waterproof protection. My vinyl bathroom floor has exceeded every expectation and proven that modern materials can deliver luxury aesthetics without the traditional drawbacks or costs.
Waterproof Luxury Vinyl Tile Options
My search for the perfect bathroom flooring led me to discover that not all vinyl is created equal. True waterproof luxury vinyl tile (LVT) features a rigid core construction that prevents water penetration even at the seams and edges. I learned this distinction after initially considering cheaper vinyl options that claimed water resistance but weren’t truly waterproof. The investment in genuine waterproof LVT proved crucial when my toilet supply line leaked, flooding the bathroom floor with no damage whatsoever to the flooring.
The construction technology in modern waterproof vinyl impressed me with its engineering sophistication. The multilayer design includes a waterproof vinyl core, photographic wear layer, and protective topcoat that work together to create an impermeable barrier. I chose 6mm thick planks with rigid SPC (Stone Plastic Composite) cores that provide dimensional stability even in high-humidity environments. The click-lock installation system creates watertight seams that prevent moisture infiltration between planks.
Stone and ceramic look-alikes dominated my selection process because the realism has become absolutely stunning. I chose a marble-look pattern with subtle veining that’s indistinguishable from natural stone to most observers. The high-definition printing and textured surfaces create authentic tactile experiences that convince both eyes and hands. The variety available allowed me to find patterns that perfectly matched my design vision while delivering performance that surpasses natural materials in bathroom applications.
Design Styles and Pattern Selection
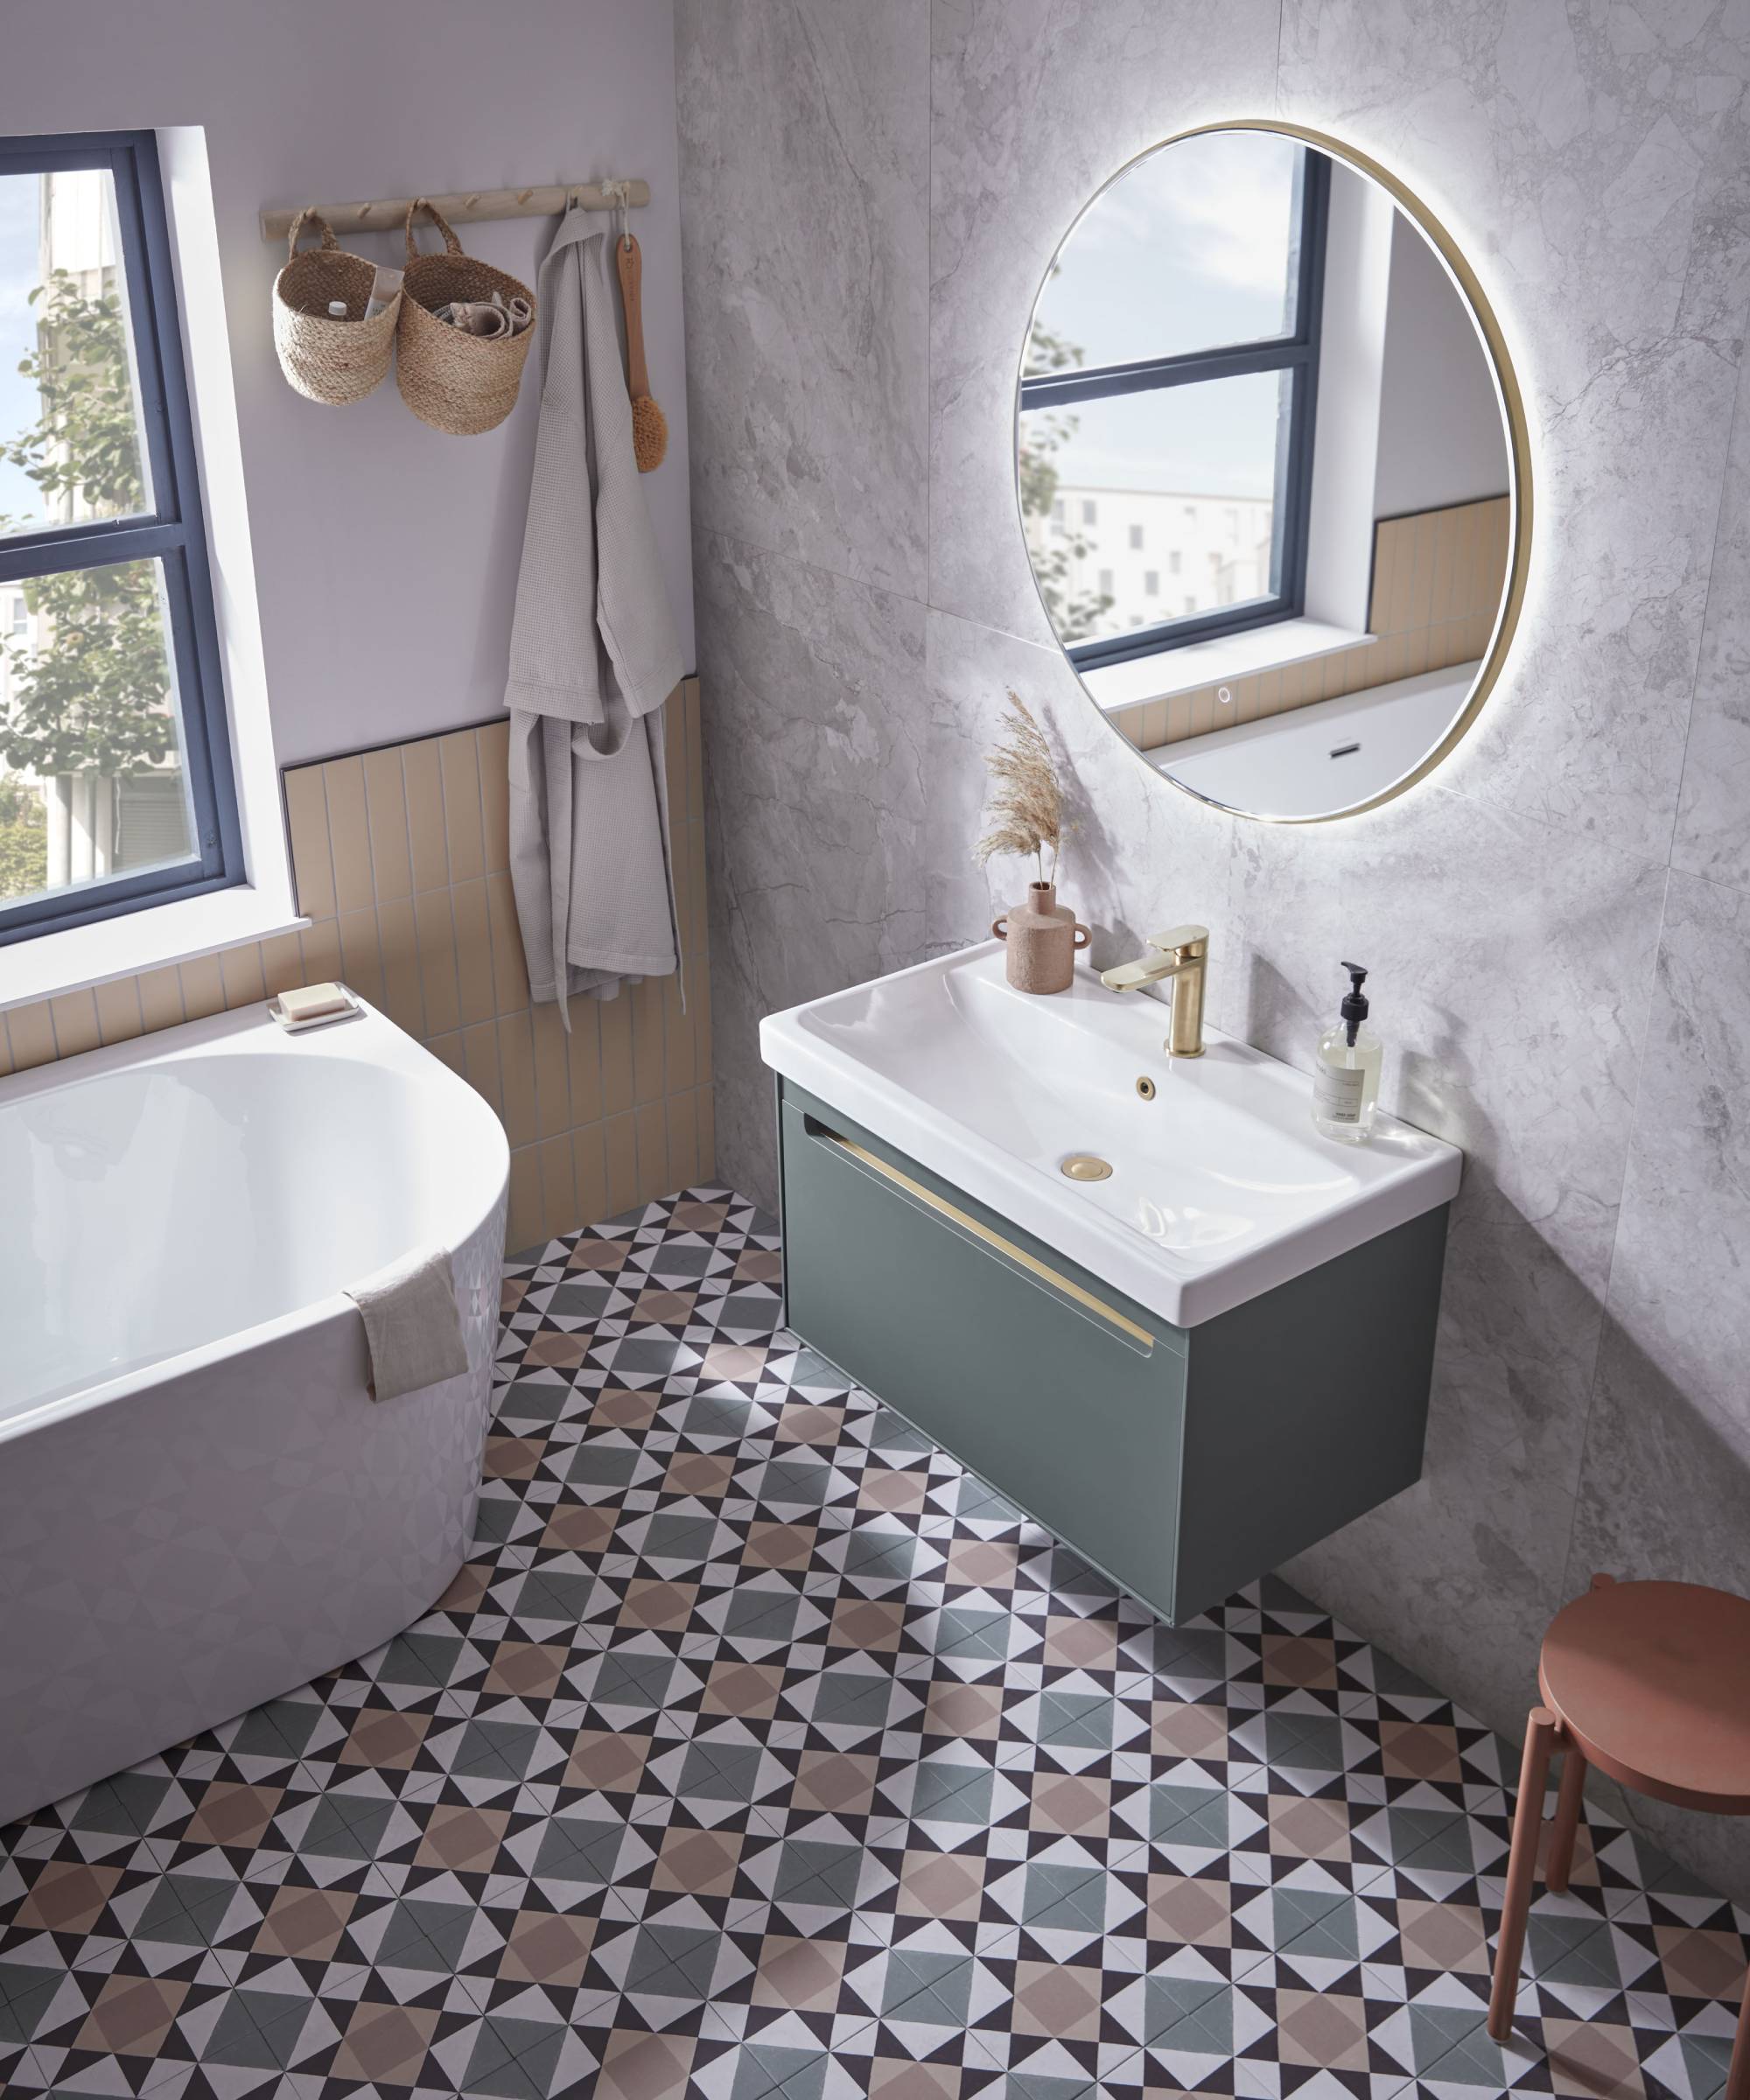
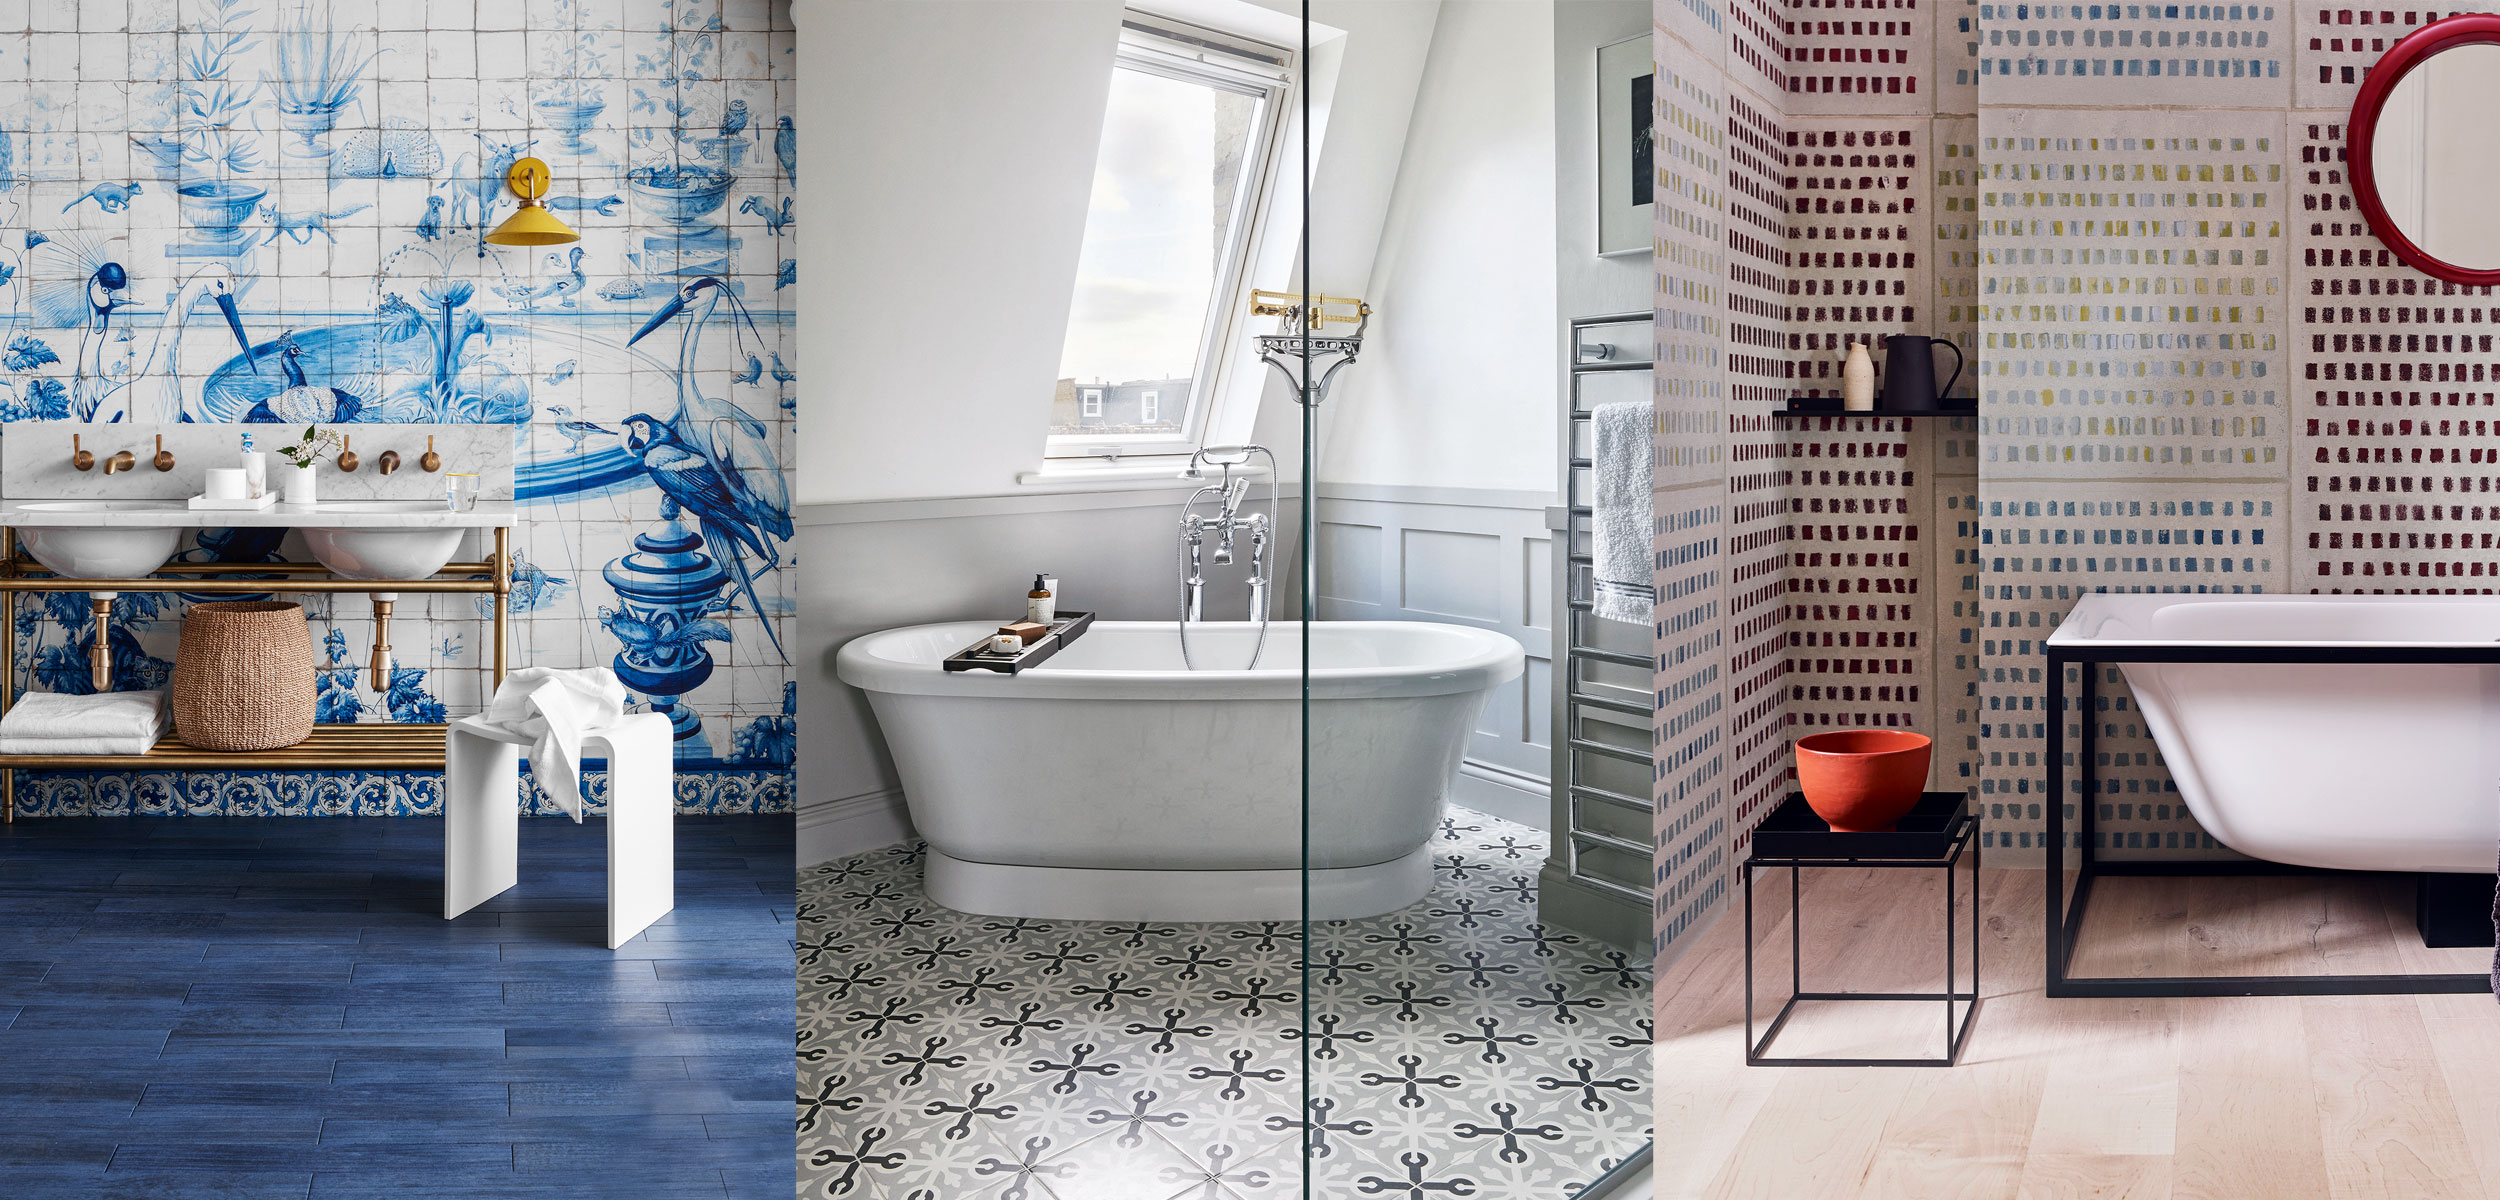
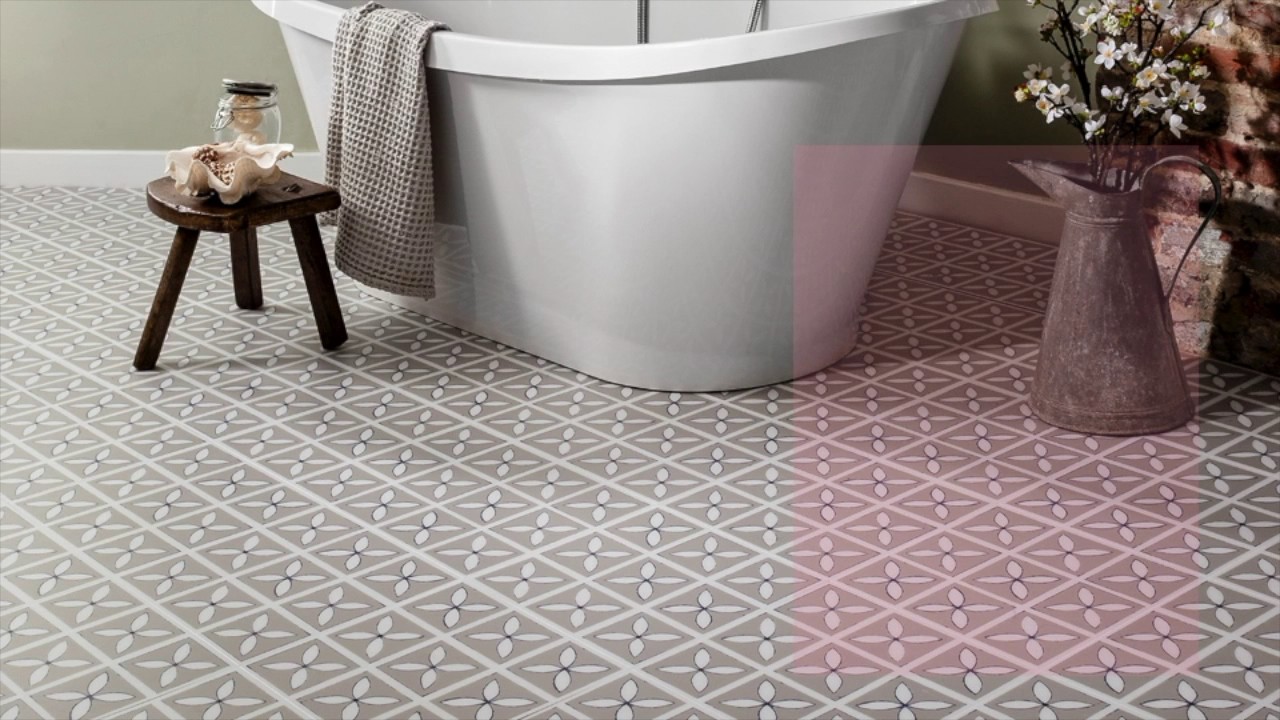
Contemporary geometric patterns caught my attention initially, offering bold designs that create dramatic focal points in modern bathrooms. I considered large-format rectangular tiles in solid colors that would create clean, minimalist lines. The geometric options included hexagons, chevrons, and subway tile patterns that add visual interest without overwhelming small bathroom spaces. However, I ultimately decided these trendy patterns might feel dated in a few years, leading me toward more timeless choices.
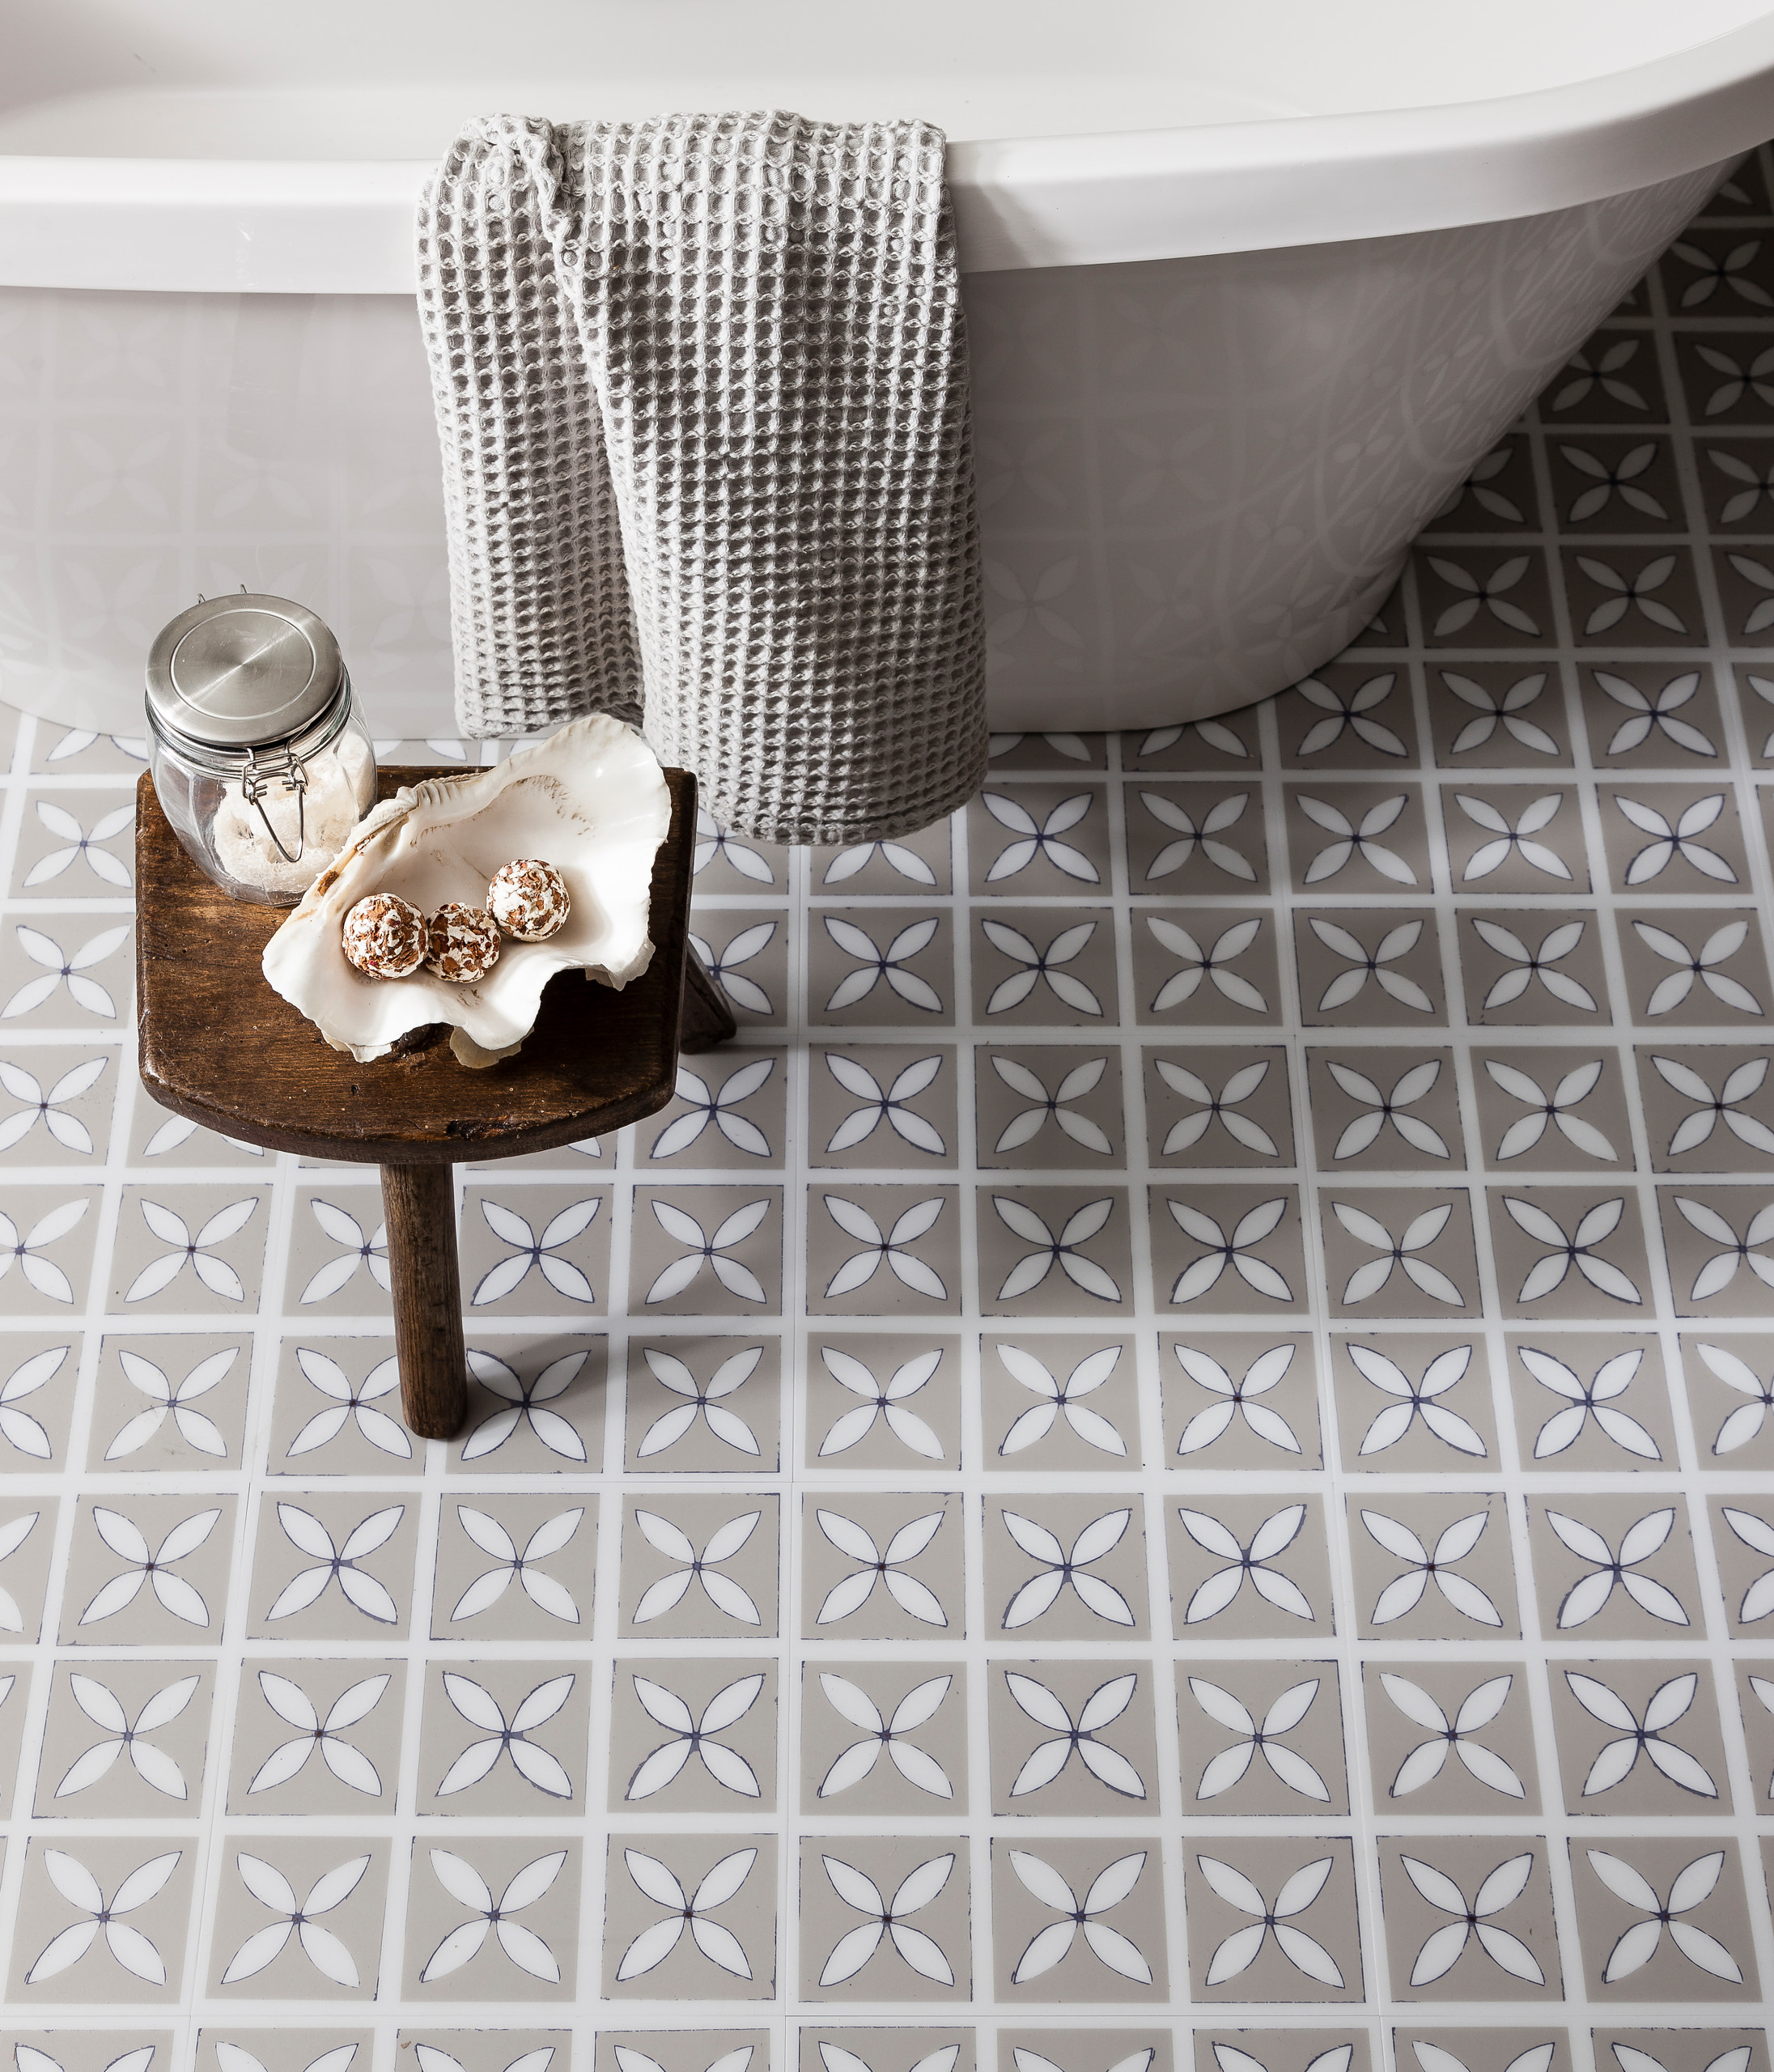
Natural stone looks provided the perfect balance of sophistication and longevity in my bathroom design. I selected a Carrara marble pattern with soft gray veining that complements both traditional and contemporary décor styles. The realistic texture includes subtle variations and natural imperfections that make each plank unique. The neutral color palette works beautifully with any accent colors I choose for towels, artwork, and accessories, giving me decorating flexibility for years to come.
Wood-look vinyl offered another appealing option that I seriously considered for creating a spa-like, organic atmosphere. The weathered oak and reclaimed wood patterns looked incredibly realistic and would have added warmth to the space. However, I decided against wood looks in my bathroom because I worried about the psychological association with moisture damage, even though modern vinyl wood patterns are completely waterproof. The choice came down to personal preference rather than performance concerns.
Installation Techniques and DIY Tips
Subfloor preparation became my most important installation step after researching common vinyl flooring failures. I spent two full days ensuring my bathroom subfloor was perfectly level, dry, and structurally sound. Any dips or rises would telegraph through the vinyl and create wear points or visual imperfections. I used self-leveling compound to address minor irregularities and replaced a section of subfloor that had previous water damage. This preparation work prevented problems that could have required a complete reinstallation later.
The click-lock installation system proved much easier than I anticipated after watching several online tutorials. I started installation in the center of the room and worked outward to ensure even expansion gaps around the perimeter. The planks clicked together satisfyingly, creating strong joints that feel solid underfoot. I used spacers to maintain consistent gaps at walls and fixtures, allowing for thermal expansion and contraction. The floating installation doesn’t require adhesive, making future removal or replacement much simpler.
Cutting around fixtures and obstacles required patience and the right tools for professional-looking results. I used a fine-tooth saw for straight cuts and a multi-tool for curved cuts around toilet bases and pedestal sinks. Templates made from cardboard helped me achieve precise fits around complex shapes. I learned to cut planks face-up to prevent chipping on the visible surface. Taking time for careful measuring and cutting made the difference between a DIY installation that looks professional versus obviously homemade.

Maintenance and Cleaning Advantages
Daily maintenance has proven incredibly simple compared to my previous ceramic tile floor with its grout lines that trapped dirt and required constant scrubbing. My vinyl bathroom floor needs only quick sweeping or vacuuming to remove hair and debris, followed by damp mopping when needed. The seamless surface means no grout to clean, seal, or replace over time. Spills and splashes are wiped up immediately without staining or penetrating the surface, making cleanup effortless even after messy activities like hair dyeing.
Deep cleaning requires nothing more than standard floor cleaners and basic techniques. I use a pH-neutral cleaner designed for luxury vinyl, though mild dish soap works equally well for routine cleaning. The protective wear layer resists stains from cosmetics, medications, and personal care products that would permanently mark other flooring materials. I’ve accidentally spilled nail polish, hair dye, and various bathroom cleaners without any lasting damage or discoloration to the vinyl surface.
Long-term maintenance costs remain minimal compared to traditional bathroom flooring materials. There’s no periodic sealing required like natural stone, no grout replacement like ceramic tile, and no refinishing like hardwood. The durable wear layer maintains its appearance and performance for decades with basic care. I budget nothing for maintenance beyond standard cleaning supplies, whereas my previous tile floor required annual grout sealing and periodic professional cleaning to look its best.

Cost Comparison and Budget Benefits
Material costs for quality waterproof luxury vinyl surprised me with their affordability compared to premium alternatives. I paid $4 per square foot for high-end vinyl that looks like expensive marble, compared to $12-15 per square foot for genuine stone. The 300% savings on materials alone justified my choice, but the additional benefits made vinyl an even better value. The total material cost for my 60-square-foot bathroom was under $300, compared to $800-900 for comparable natural stone.
Installation savings compounded the material cost advantages significantly. Professional tile installation would have cost $8-12 per square foot in my area, while I completed the vinyl installation myself over a weekend. The click-lock system requires no special tools, adhesives, or professional skills that ceramic or stone installation demands. Even hiring a professional installation for vinyl typically costs half as much as tile work due to the simpler process and faster completion times.
Long-term value considerations make vinyl flooring an even smarter financial choice. The durability and low maintenance requirements mean decades of service without major expenses. Natural stone requires periodic sealing, potential crack repairs, and professional cleaning that add up over time. The warranty on quality vinyl flooring often exceeds that of natural materials, providing additional financial protection. When I calculate total cost of ownership over 20 years, vinyl delivers superior value despite any initial material cost differences.

Performance in High-Moisture Environments
Humidity resistance has exceeded my expectations throughout two years of testing in my steamy master bathroom. Unlike laminate flooring that can swell and warp in high-humidity conditions, my waterproof vinyl maintains perfect dimensional stability. The shower produces significant steam during daily use, but the vinyl shows no signs of expansion, buckling, or edge lifting. The bathroom’s exhaust fan helps, but I’ve tested the limits with long, hot showers that fog the entire room without any flooring issues.
Temperature stability impressed me during seasonal changes and radiant heating installation. Vinyl flooring handles temperature fluctuations better than many alternatives, expanding and contracting minimally with thermal changes. I installed electric radiant heating mats under the vinyl, creating a luxuriously warm floor during cold winter mornings. The heating system works perfectly through the vinyl without causing any damage, warping, or discoloration to the surface or structure.
Water exposure testing happened accidentally when my toilet supply line failed, flooding the bathroom with several inches of water for hours before I discovered it. Traditional flooring materials would likely have suffered permanent damage requiring replacement. My vinyl floor remained completely unaffected, drying out with no warping, staining, or other damage. This real-world test convinced me that waterproof vinyl provides superior protection compared to supposedly water-resistant alternatives like sealed tile or treated wood.

How does modern vinyl flooring handle bathroom humidity and moisture?
My waterproof luxury vinyl has performed flawlessly in high-humidity conditions for two years. Unlike laminate or wood that can warp, genuine waterproof vinyl maintains perfect stability even with daily steamy showers. The key is choosing true waterproof vinyl with rigid cores rather than water-resistant options. Even flooding caused no damage when properly installed.
Is luxury vinyl flooring suitable for families with children and pets?
Absolutely! The durability has impressed me with two kids and a dog using the bathroom daily. The stain-resistant surface handles everything from nail polish to pet accidents without permanent damage. The smooth surface is easy to sanitize and doesn’t harbor bacteria like grout lines. Kids love the warm, comfortable surface compared to cold tile floors.

How long does modern vinyl bathroom flooring typically last?
Quality luxury vinyl comes with 15-25 year warranties, and I expect mine to last even longer with proper care. The wear layer protects against scratches, stains, and fading that would damage other materials. Unlike tile that may crack or wood that can rot, vinyl maintains its appearance and performance consistently. The initial investment pays off through decades of reliable service.
Can I install radiant heating under vinyl bathroom flooring?
Yes! I successfully installed electric radiant heating mats under my vinyl floor. The stable material handles temperature changes well without warping or damage. The heating feels wonderful through the vinyl surface, creating spa-like comfort during cold mornings. Just ensure your vinyl is rated for radiant heating applications and follow manufacturer guidelines for temperature limits.

How does vinyl flooring compare to ceramic tile for bathroom applications?
Vinyl offers significant advantages over ceramic tile in my experience. It’s warmer and more comfortable underfoot, completely waterproof without grout concerns, and much easier to install and maintain. While tile has traditional appeal, vinyl’s performance benefits and cost savings make it superior for practical bathroom use. The appearance quality rivals expensive tile at a fraction of the cost.
What should I look for when selecting vinyl flooring for bathroom use?
Choose genuine waterproof luxury vinyl with rigid cores, not just water-resistant options. Look for thick wear layers (20+ mil) for durability and realistic textures for authenticity. Ensure proper subfloor preparation and adequate expansion gaps during installation. I recommend established manufacturers with strong warranties and proven bathroom performance. Quality makes a significant difference in long-term satisfaction.

Vinyl bathroom flooring ideas
Bathroom Flooring Luxury Vinyl Bathroom Flooring LVT
Vinyl Flooring Bathroom – Photos & Ideas
Cozy Vinyl Flooring – Bathroom ideas flooring, vinyl flooring

Modern monochrome bathroom with geometric vinyl floor tiles

Modern Vinyl Flooring – 9 Designs For The Most Stylish Of Homes

Related Posts: