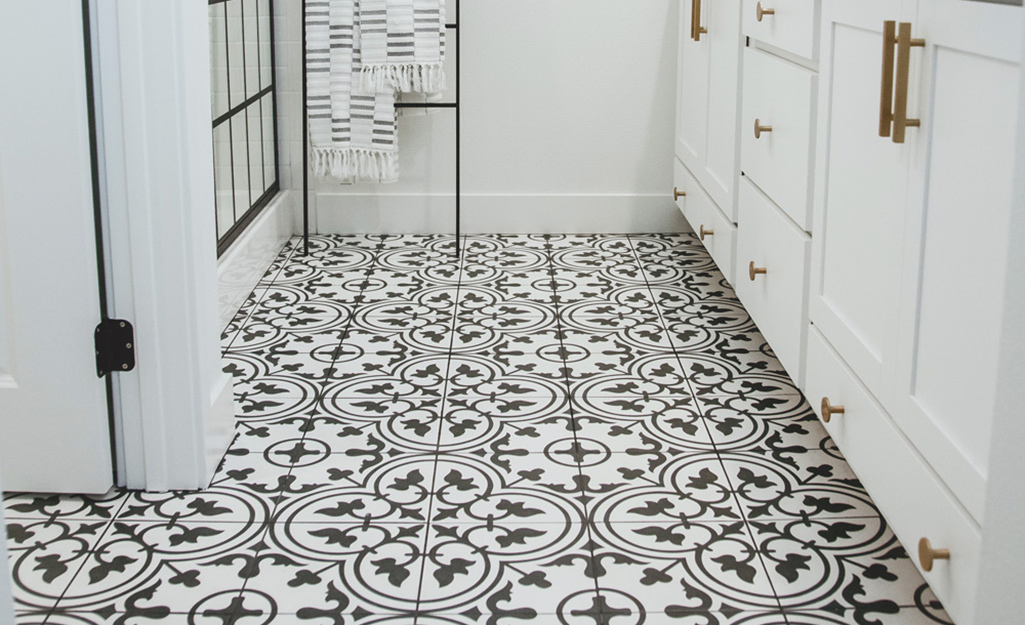
When I first stood in my outdated bathroom, staring at those cracked ceramic tiles from the 1980s, I knew something had to change. The floor was not just ugly, it was practically begging for a makeover. After months of research and countless Pinterest boards, I discovered that the right floor pattern could completely transform the space. From classic subway layouts to bold geometric designs, I learned that bathroom floor patterns aren’t just about function; they’re about creating a space that makes you smile every morning when you brush your teeth.
Choosing Waterproof Luxury Vinyl: My Game-Changing Decision
I’ll be honest, when I first heard “vinyl flooring,” I pictured those cheap stick-on tiles from college apartments. How wrong I was! Modern luxury vinyl plank (LVP) and luxury vinyl tile (LVT) are completely different animals. When I visited my local flooring store, I was amazed by the options that looked identical to real hardwood and natural stone. The sales associate showed me planks with such realistic wood grain that I had to touch them to believe they weren’t the real thing.
What sold me wasn’t just the appearance; it was the practicality. My bathroom gets steamy, my kids splash water everywhere, and I need something that could handle moisture without warping or growing mold. The waterproof core in quality luxury vinyl was exactly what I needed. Unlike laminate, which can swell if water seeps through the seams, proper luxury vinyl is completely impervious to moisture. I chose a product with a rigid core that wouldn’t expand or contract with temperature changes.
The installation process was surprisingly straightforward. Most luxury vinyl uses a click-lock system that floats over the subfloor, meaning I didn’t need adhesives or nails. I spent one weekend transforming my bathroom floor, and the results exceeded my expectations. The textured surface provides just enough grip for safety, even when wet, and cleaning is as simple as mopping with any standard floor cleaner.
Mastering the Herringbone Pattern: My Bold Statement Floor
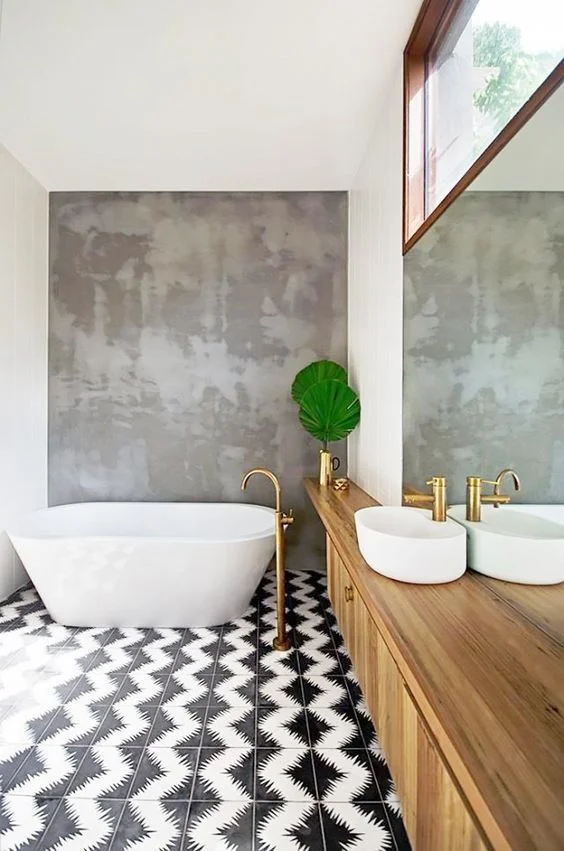
After playing it safe with straight plank layouts in other rooms, I decided to go bold in my bathroom with a herringbone pattern. This classic design creates visual interest and makes the space feel larger and more sophisticated. I chose narrow luxury vinyl planks in a weathered oak finish that complemented my farmhouse-style vanity. The key was finding planks specifically designed for herringbone installation, which come pre-cut at the right angles.
Planning the layout was crucial to getting professional-looking results. I started by finding the center point of my bathroom and created guidelines to ensure the pattern would be symmetrical. Working from the center outward prevented awkward cuts along the most visible walls. I learned that herringbone requires about 15% extra material to account for waste, so I ordered accordingly. The cutting process took patience, but the click-lock system made assembly relatively simple once I got into a rhythm.
The finished result completely transformed my bathroom’s personality. The herringbone pattern adds movement and texture that draws the eye and creates the illusion of a larger space. Friends constantly ask about my “hardwood” floors, and I love surprising them by revealing it’s luxury vinyl. The pattern hides dirt and water spots better than straight layouts, which is perfect for a busy family bathroom. Three years later, it still looks as good as the day I installed it.
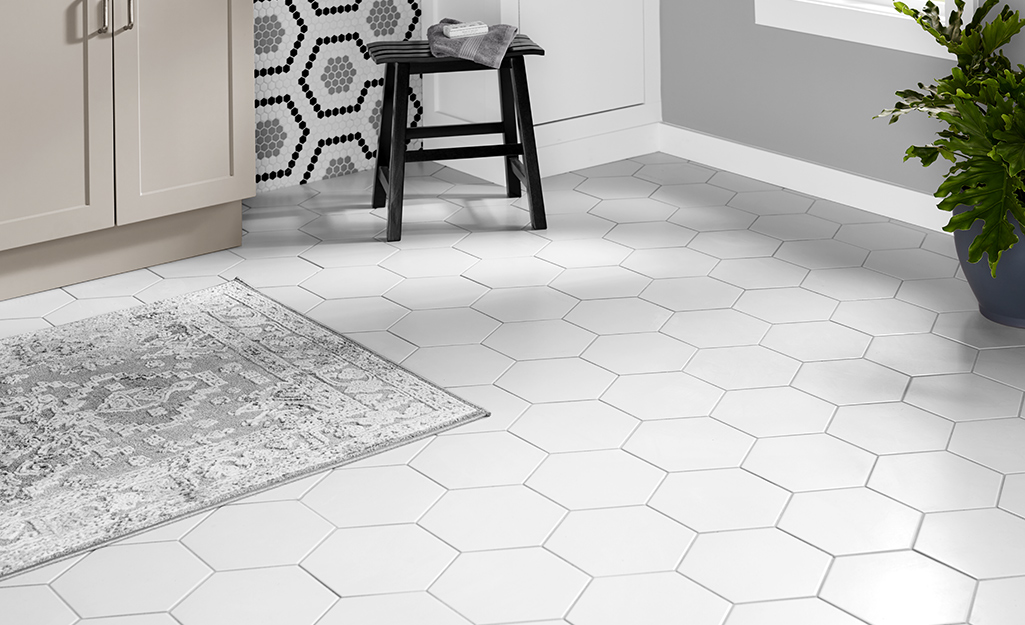
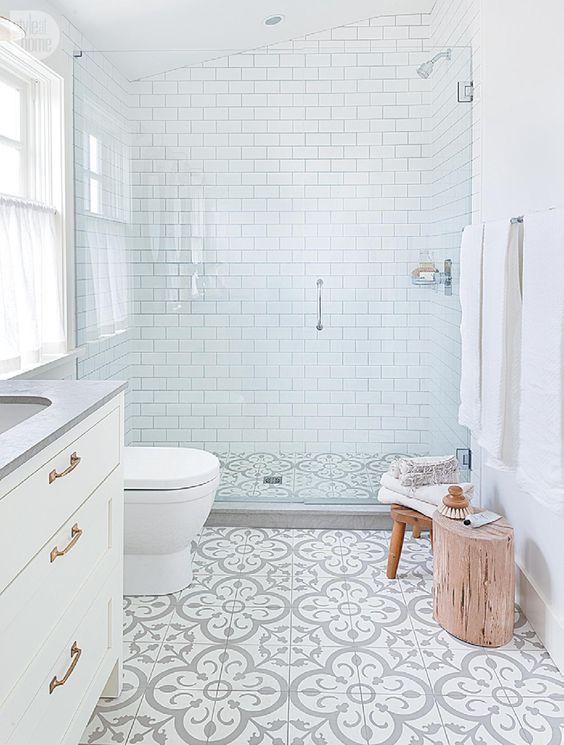
Creating Tile-Look Magic with Large Format Vinyl
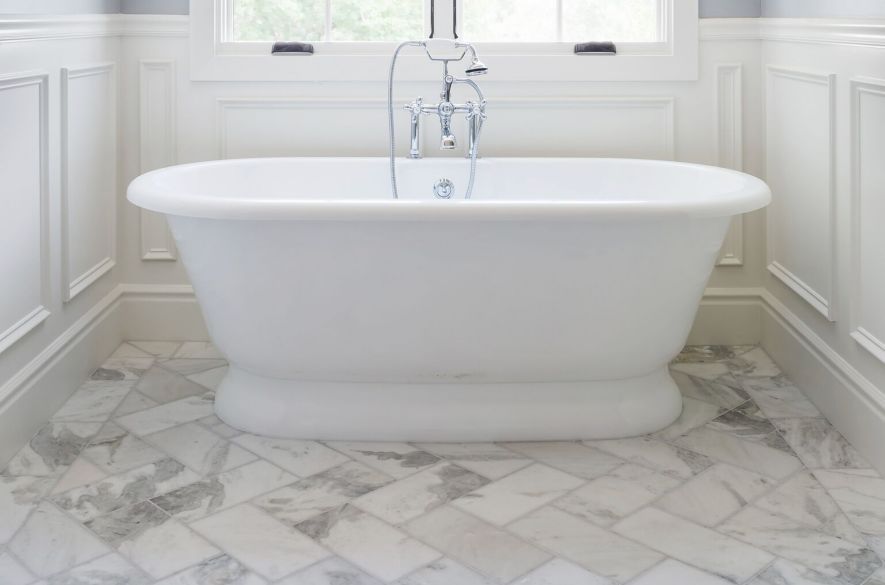
My powder room needed a different approach than my main bathroom. I wanted the clean, modern look of large-format tiles without the cold feel of ceramic. Large-format luxury vinyl tiles became my perfect solution. These oversized pieces, typically 18×36 inches or larger, mimic expensive stone or concrete tiles at a fraction of the cost. I selected a marble-look pattern with subtle veining that adds elegance without overwhelming the small space.
The installation of large-format tiles requires extra attention to subfloor preparation. Any imperfections will telegraph through these bigger pieces, so I spent time ensuring my subfloor was perfectly level and smooth. I used a self-leveling compound in a few spots where my old floor had minor dips. The effort was worth it because large-format vinyl creates fewer grout lines, resulting in a cleaner, more seamless appearance that makes small spaces feel bigger.
What I love most about this choice is the maintenance factor. With fewer seams than traditional tile, there’s less opportunity for dirt and moisture to accumulate. The vinyl surface is non-porous, so I never worry about sealing or special cleaners. A simple weekly mop keeps it looking pristine. The realistic texture even feels like real stone under bare feet, adding to the luxurious experience every time I enter the room.
Wood-Look Vinyl: Bringing Warmth to My Master Bath
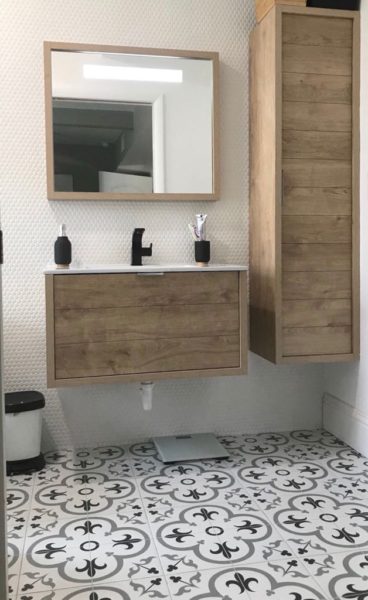
I never thought I’d put wood-look flooring in a bathroom until I discovered waterproof luxury vinyl planks. Traditional hardwood and humidity are sworn enemies, but luxury vinyl captures all the warmth and beauty of natural wood without any moisture concerns. I chose wide-plank vinyl in a rich walnut tone that coordinates beautifully with my existing cabinetry and creates a spa-like atmosphere.
The key to successful wood-look vinyl in bathrooms is selecting products with realistic grain patterns and appropriate plank widths. I opted for 7-inch wide planks that mimic the proportions of actual hardwood flooring. The longer planks, up to 48 inches, create fewer seams and a more authentic appearance. I was careful to choose a product with beveled edges that create subtle shadows between planks, just like real wood flooring.
Color coordination became an important consideration during my selection process. I brought home several samples and lived with them for a week, observing how they looked in different lighting conditions. The walnut tone I selected works beautifully with both warm and cool lighting, and the natural variation in the grain pattern helps hide everyday wear. The floating installation over my existing subfloor meant no lengthy renovation timeline, and I was using my newly transformed bathroom within 24 hours.
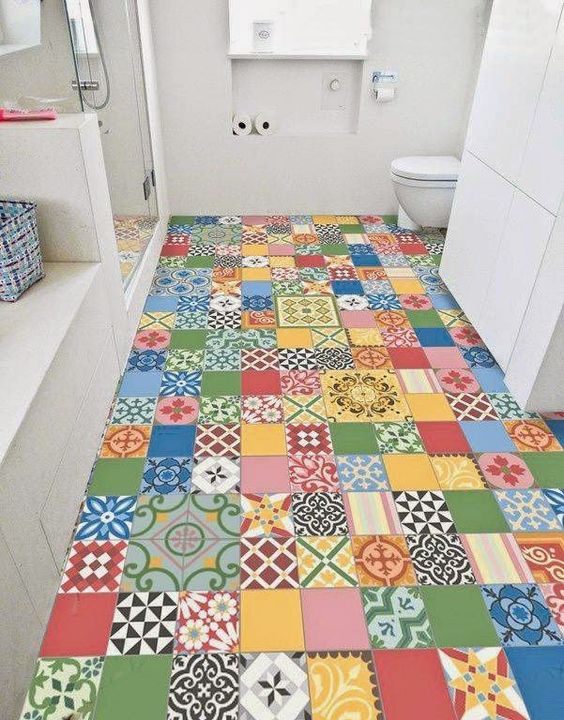
Mixed Patterns: My Creative Approach to Visual Interest
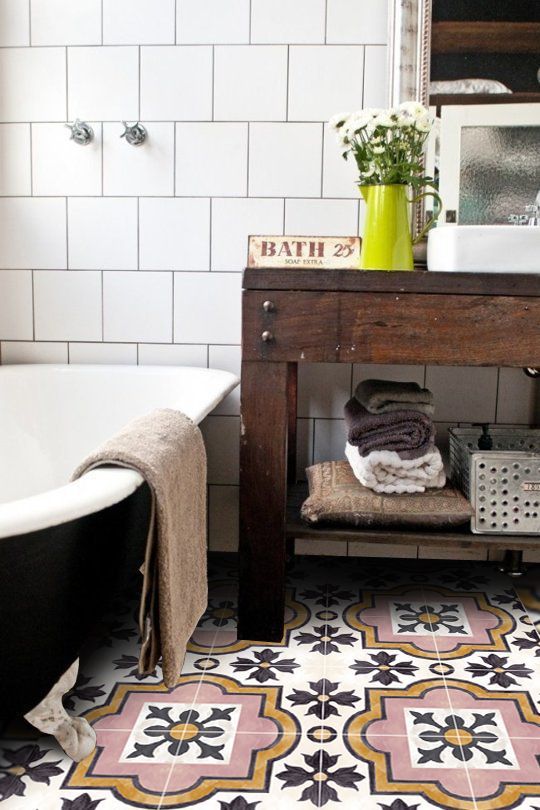
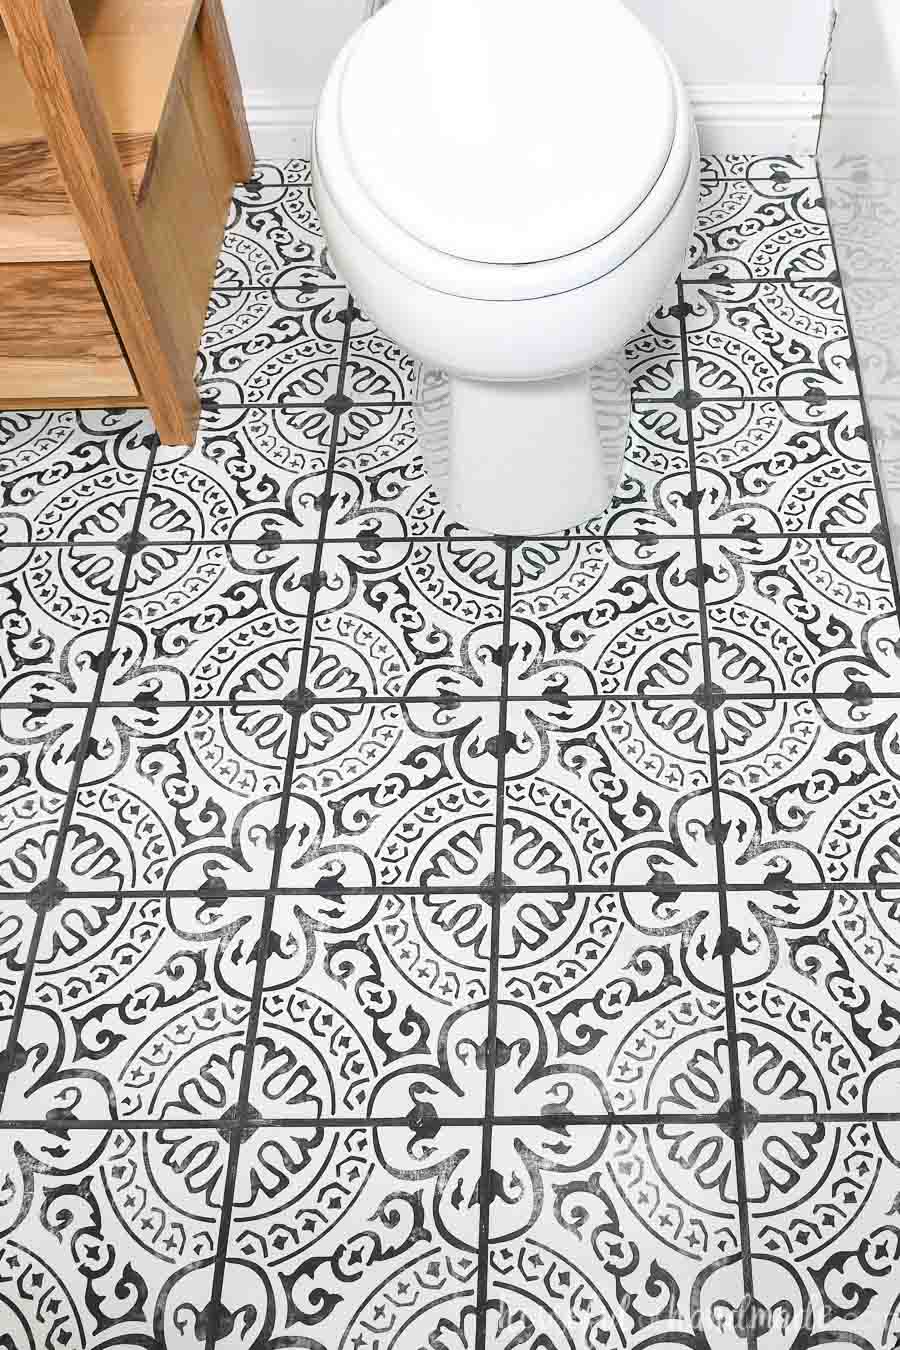
For my kids’ bathroom, I wanted something fun and unique that could handle their messy habits while still looking stylish. I decided to experiment with mixed patterns using different sizes of luxury vinyl tiles in complementary colors. I created a custom design using larger neutral tiles as the base with smaller accent tiles in a coordinating color arranged in a border pattern around the room’s perimeter.
Planning this mixed pattern required careful measurement and a detailed layout drawing. I started by mapping out the room on graph paper, then calculated exactly how many tiles of each size I’d need. The secret to success was maintaining consistent spacing between all elements. I used tile spacers during installation to ensure uniform gaps that would later be filled with coordinating caulk to create the illusion of grout lines.
The creative process was incredibly rewarding, and the results exceeded my expectations. The mixed pattern adds personality and visual interest without being overwhelming. My kids love their “special” floor, and I love that the patterned design helps camouflage their inevitable messes. The luxury vinyl’s durability means it handles dropped shampoo bottles and splashed bath water without showing wear or damage.
Maintenance and Longevity: My Real-World Experience
After living with luxury vinyl in multiple bathrooms for several years, I can speak honestly about its long-term performance. Daily maintenance is minimal, usually just a quick sweep or vacuum to remove hair and dust. Weekly mopping with a pH-neutral cleaner keeps everything looking fresh. I avoid harsh chemicals and abrasive cleaners that could damage the wear layer, though I’ve found that luxury vinyl is remarkably forgiving of most household cleaners.
The durability has impressed me most. Despite high traffic, dropped items, and occasional flooding from enthusiastic bathers, my floors show minimal wear. The wear layer on quality luxury vinyl is designed to resist scratches, stains, and fading. I did learn that furniture pads are essential to prevent scratching when moving heavy items, and I’m careful about dropping sharp objects that could potentially puncture the surface.
After five years of real-world testing, I’m confident in recommending luxury vinyl for bathroom applications. The initial investment was significantly less than ceramic tile or natural stone, yet the performance and appearance rival much more expensive options. My floors still look contemporary and fresh, proving that luxury vinyl can provide long-term value in bathroom renovations. The waterproof qualities have been tested through countless showers, baths, and the occasional plumbing mishap.

How does luxury vinyl handle constant moisture and humidity in bathrooms?
In my experience, quality luxury vinyl with waterproof cores performs excellently in humid bathroom conditions. I’ve had no issues with warping, swelling, or mold growth in five years of use. The key is proper installation with sealed edges and choosing products specifically rated for wet areas.
Can luxury vinyl flooring be installed over existing bathroom tile?
Yes, I successfully installed luxury vinyl over my old ceramic tile after ensuring the surface was level and clean. The existing tile provided a stable substrate, though I did fill any loose or missing grout lines first. This approach saved time and money compared to tile removal.
How long does luxury vinyl flooring typically last in high-traffic bathrooms?
Based on my experience and research, quality luxury vinyl should last 15-20 years in bathroom applications. The wear layer thickness is crucial, I recommend at least 12-mil for bathrooms. My floors still look great after five years of family use, showing minimal wear even in high-traffic areas.
Is luxury vinyl flooring safe for children and pets in bathrooms?
Absolutely! I chose luxury vinyl partly because it’s safer for my kids than slippery ceramic tile. The textured surface provides good traction when wet, and the cushioned feel is more comfortable for little ones. It’s also easier to clean up pet accidents compared to porous materials like natural stone.
What’s the cost difference between luxury vinyl and ceramic tile for bathroom floors?
In my renovation, luxury vinyl costs about 30-40% less than comparable ceramic tile when factoring in materials and installation. I saved additional money by installing it myself, which isn’t realistic with ceramic tile. The total project cost was roughly half what professional tile installation would have been.
Can heated floors be installed under luxury vinyl in bathrooms?
Yes, but with limitations. I researched radiant heating extensively and learned that luxury vinyl can work with low-temperature radiant systems, typically keeping surface temperatures below 80°F. However, the insulating properties of vinyl reduce heating efficiency compared to ceramic tile, so it may not be the most cost-effective combination.
Pattern Larkspur

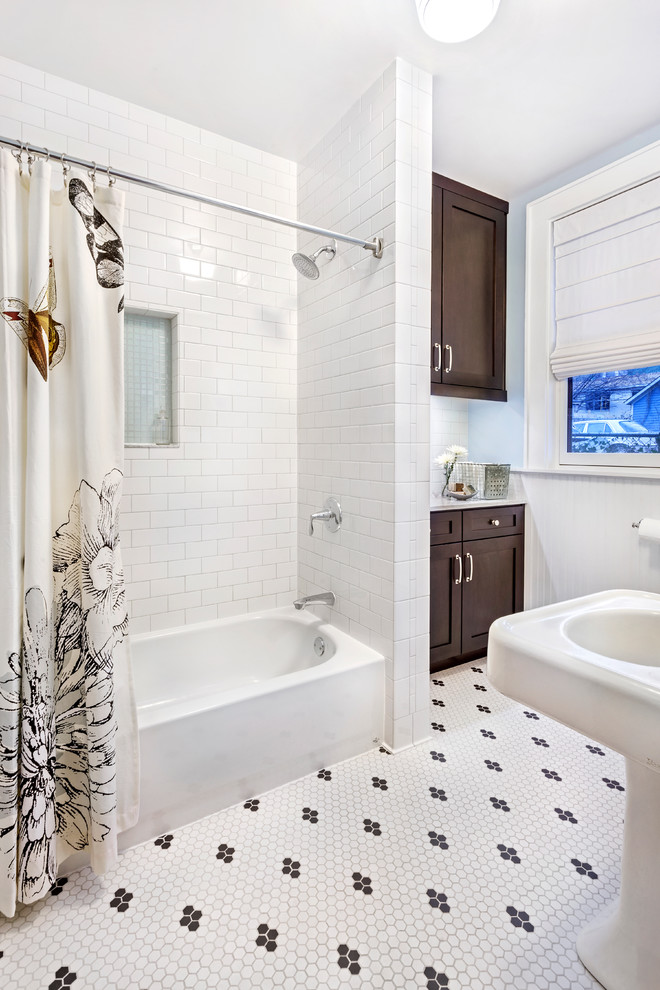
Tile Patterns & Layout Designs
Fantastic Bathroom Floor Ideas and Design
Cool Bathroom Floor Tiles Ideas You Should Try
Related Posts: