Ceramic tiles are among the most building resources out there today. Careful designing should be used to be certain of these kinds of floors are fairly level and do not have abrupt sides individuals can certainly trip over. Installation of garage tiles yet very simple is a very time-consuming task. Additionally, they are able to perfectly complement the majority of the building.
Images about Laying Heated Tile Floor
Laying Heated Tile Floor
The furniture legs of yours must have seen pads on them to avoid scratching the tiles. While many consumers have shifted towards carpeting as well as wood flooring, style flooring continue to eclipses the rest in recognition. If the floor is put in by an experienced installer, they will warrant the tile and work that they’ve done. Which you utilize is dependent on the thickness of the ceramic tile flooring of yours.
How to Install In-Floor Radiant Heat
You can opt for one variety of tile when you are interested in flooring that is beautiful and durable. Glass tiles are broadly available in the market with numerous colors as well as designs in addition to textures. Work with a scraper at a 45 % angle to drive the grout down. One reason for this versatility is the fact that flooring are available in many styles and sizes.
How to Install In-Floor Radiant Heat

Heated Tile Floor on Slab » Rogue Engineer

Heated Floors schluter.com

Heated Floors u2013 A Way To Make Your Kitchen or Bathroom More
Heated Bathroom Floors : 4 Important Pros and Cons
How to Install In-Floor Radiant Heat
The Best Heated Flooring Materials for a Cozy Home

Heated Floors schluter.com

How to Install In-Floor Heating for your Bathroom? (Step-by-Step
How to Install Heated Floors? Warmup Blog
Best Flooring for Radiant Heat Systems

Radiant Floor Heating: All About Electric and Hydronic Systems
/cdn.vox-cdn.com/uploads/chorus_asset/file/20789538/K0DFK3.jpg)
Related Posts:
- Installing Slate Tile Floor
- Painting Ceramic Tile Floor In Kitchen
- Anti Slip For Tile Floors
- Laminate Tile Flooring
- Marble Tile Floors
- Travertine Tile Flooring
- Modern Kitchen Tile Floor
- Country Style Tile Floors
- White Tile Flooring Ideas
- Herringbone Brick Tile Floor
Introduction to Laying Heated Tile Floor
Installing a heated tile floor is one of the most popular upgrades for homeowners today. It can provide luxurious warmth and comfort in winter months, making your home more inviting and comfortable. It can also help reduce energy costs by keeping rooms warmer in the winter. In addition, heated tile floors are aesthetically pleasing and can add a touch of luxury to any space. This article will provide an in-depth look at heated tile floor installation, from preparation to the final touches.
Preparation Before Laying Heated Tile Floor
Before any heated tile floor installation project can begin, preparation is essential. The first step is to measure the area that will be tiled and select the appropriate size tiles. Once the tiles have been selected, they should be laid out in the desired pattern on the subfloor. Be sure to use spacers between each tile to ensure even spacing and a professional finish.
Next, the subfloor must be prepared for tile installation. Any existing flooring material must be removed, and the subfloor must be leveled and flat. If there are any cracks or gaps in the subfloor, they should be filled with a cementitious patching compound before proceeding.
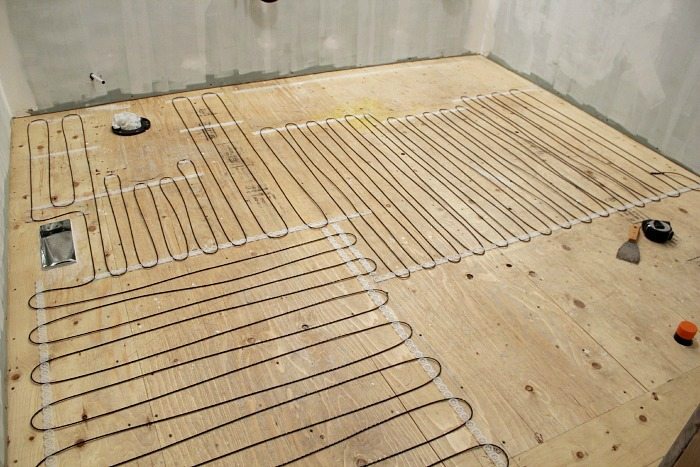
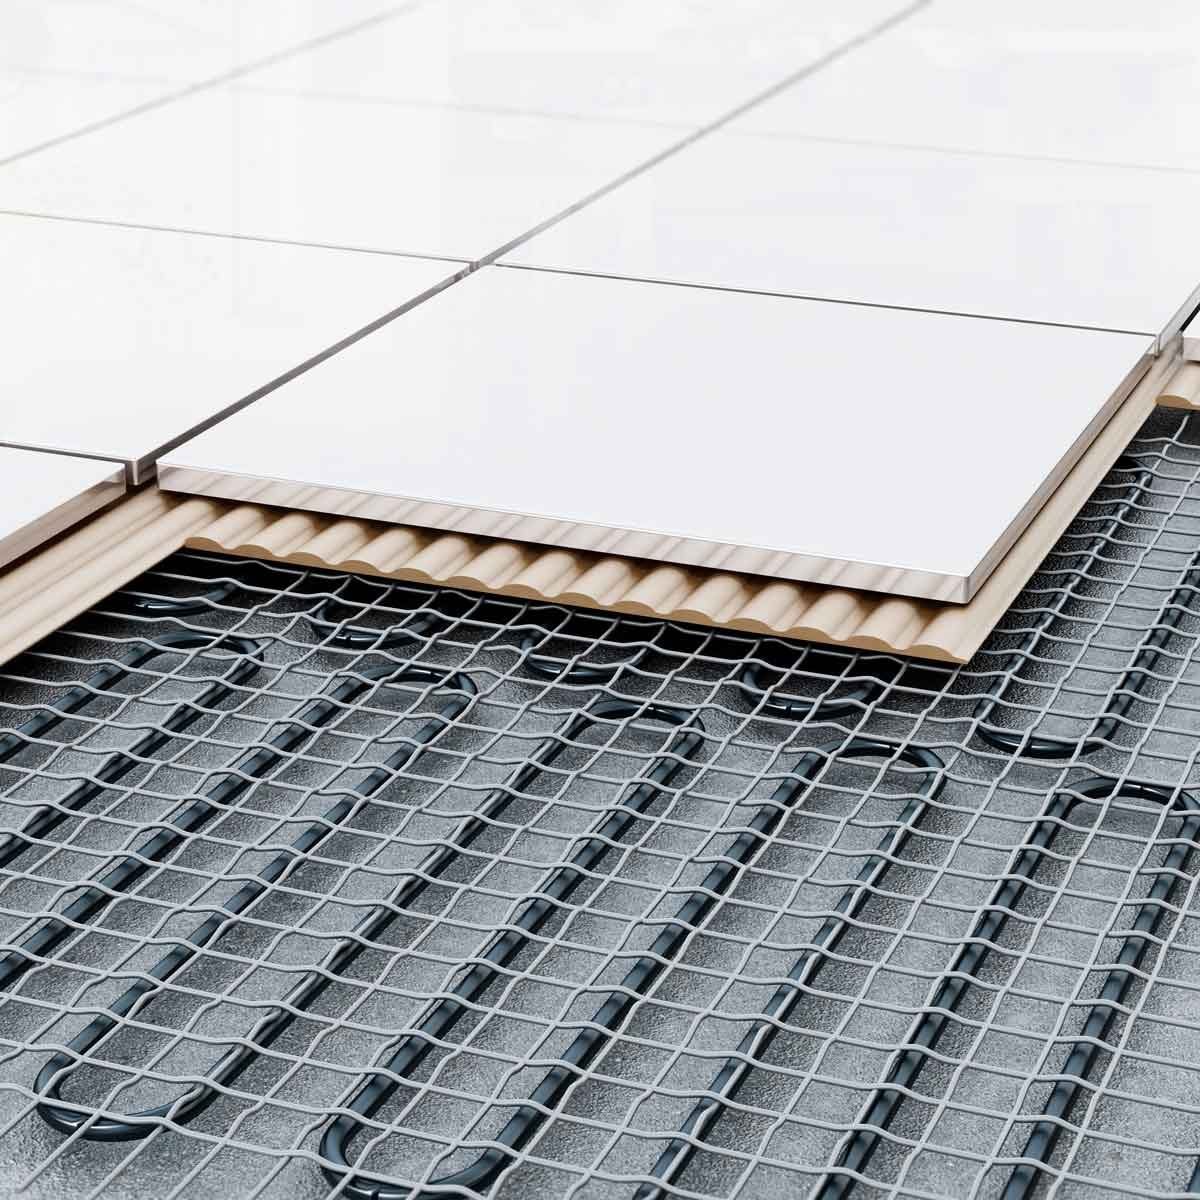
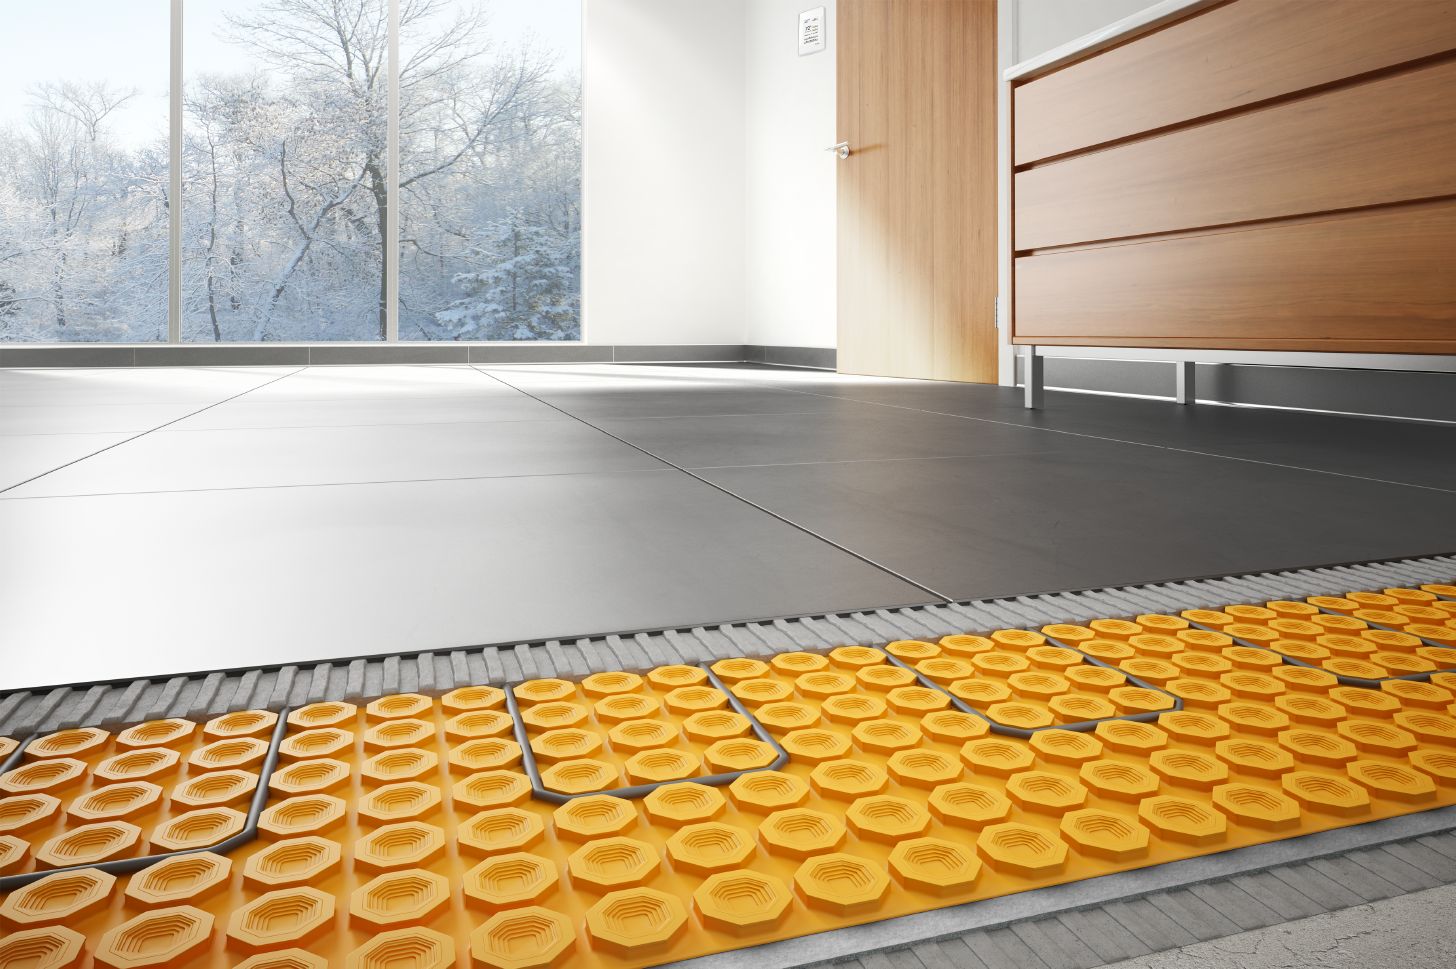
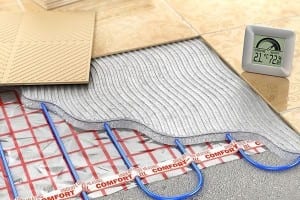
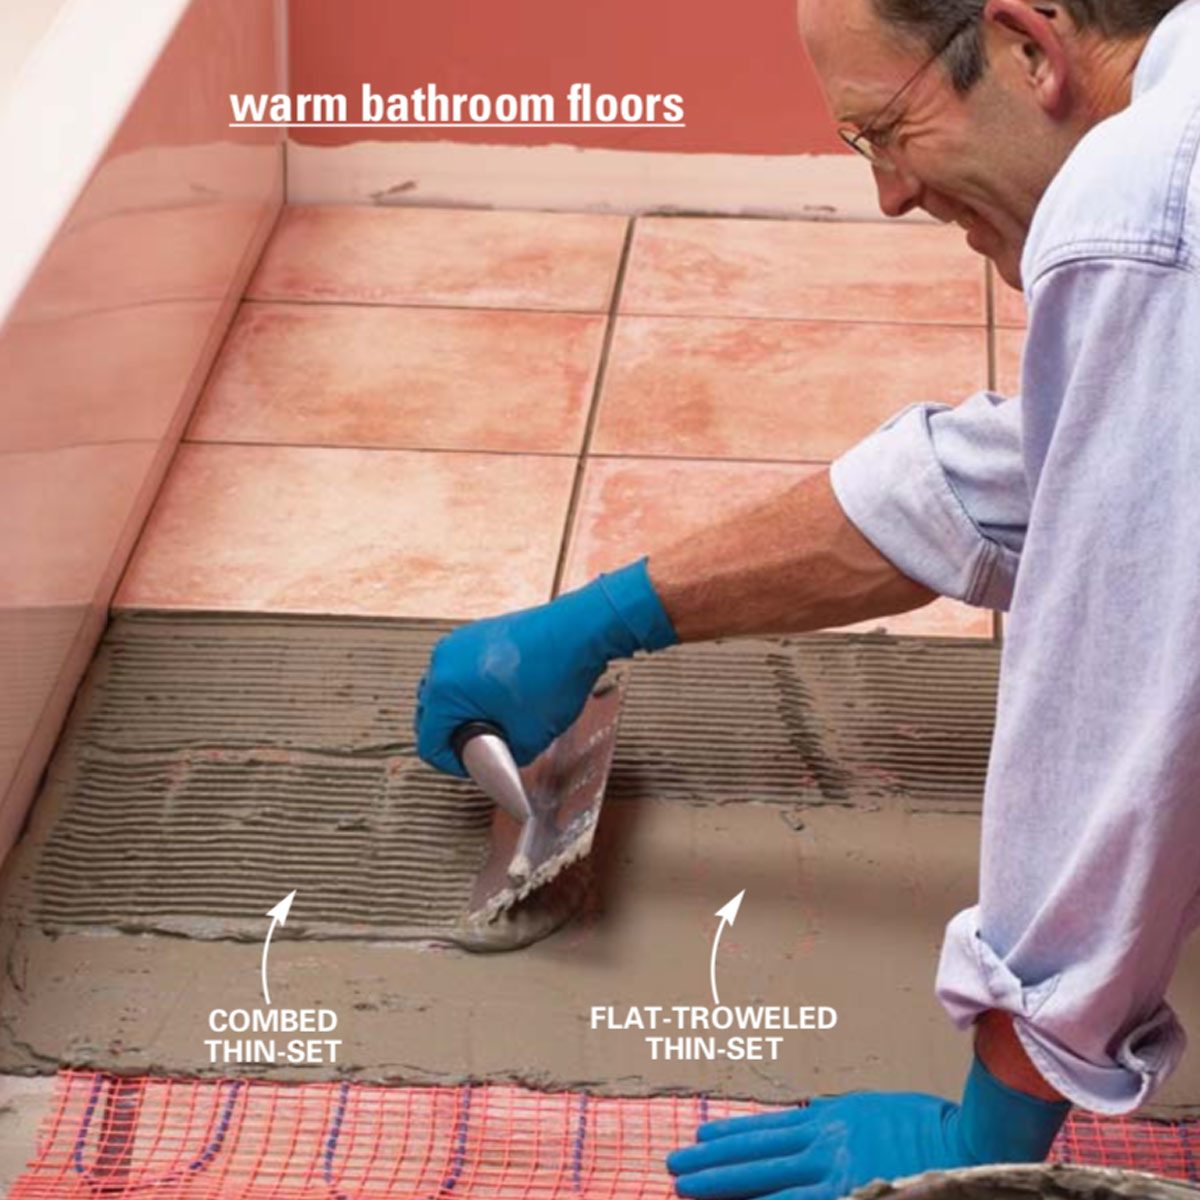
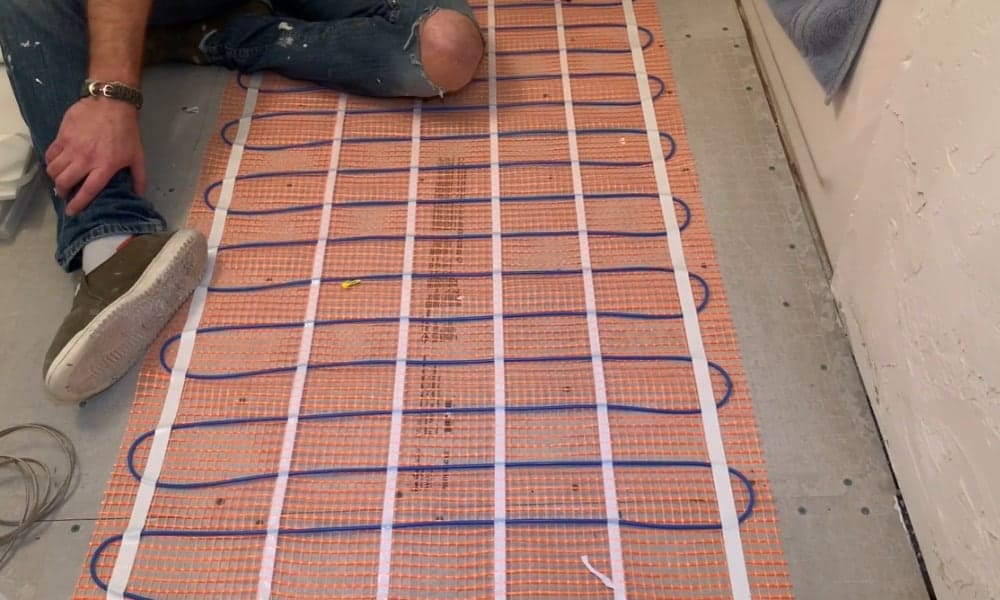
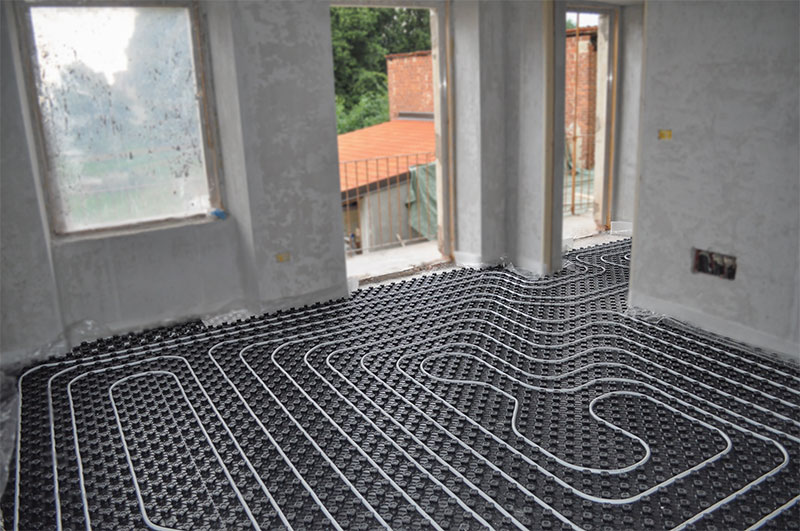
Once the subfloor is prepped, it is time to install the heating system. A thermostat should be installed according to manufacturer’s instructions and set to the desired temperature. A heating cable should then be laid over the subfloor, following manufacturer’s instructions for proper installation and spacing. Finally, self-leveling mortar should be applied over the heating cable before beginning tile installation.
Tile Installation
The final step is to install the actual tile over the self-leveling mortar. Start at one corner of the room and work your way out from there. Use a notched trowel to spread thin-set mortar over a small section of the floor at a time. Place each tile firmly onto the thin-set mortar and use spacers between each one to ensure even spacing. If necessary, cut tiles to fit around obstacles like cabinets or door frames using a wet saw or tile nippers. Once all tiles have been installed, allow them to set for 24 hours before grouting them into place.
Grouting
Once all tiles have been installed and allowed to set for 24 hours, it’s time to grout them into place. Begin by mixing grout according to manufacturer’s instructions and apply it over the entire area in sweeping arcs with a rubber grout float. Be sure to work quickly before it has a chance to dry out and remove any excess with a damp sponge or rag before it sets up too much. Allow the grout to cure for 24 hours before walking on it or applying sealer.
Applying Sealer
Once the grout has cured, sealer can be applied to protect it from stains and moisture damage. Begin by cleaning off any residue or dirt from the tiles with a damp cloth or mop before applying sealer with a foam brush or roller according to manufacturer’s instructions. Allow sealer to dry completely between coats and do not walk on sealed tiles for at least 48 hours after application.
Conclusion
Laying heated tile floor is an ideal way to make your home more inviting and comfortable while also saving energy costs in winter months. With careful preparation and properly installed heating systems, installing heated tile floors can add value and luxury to any home or space.
FAQs
Q: How much does laying heated tile floor cost?
A: The cost of laying heated tile floor varies depending on factors such as size of area being tiled, type of tile used, complexity of installation, etc., but generally you can expect costs between $7-$15 per square foot including materials and labor costs.
Q: How long does it take to lay heated tile floor?
A: The time required for laying heated tile floor varies depending on factors such as size of area being tiled, complexity of installation, etc., but generally it takes around 2-3 days for most installations when done by professionals.
Q: How often do I need to replace my heated