When I decided to renovate my kitchen last year, choosing the right floor became my biggest challenge and greatest triumph. After living with outdated linoleum for fifteen years, I knew I wanted something modern, durable, and stylish that could handle my family’s daily chaos. The tile floor I ultimately selected completely transformed not just the look of my kitchen, but how I feel when I’m cooking and entertaining. It became the foundation that tied together all my design choices, from sleek cabinets to contemporary lighting, creating a cohesive space that feels both current and timeless.
Geometric Pattern Tiles: Adding Contemporary Character
Behind my kitchen island, I installed hexagonal tiles in a subtle gray that creates visual interest without overwhelming the space. The geometric pattern adds a modern artistic element that serves as a conversation starter when guests visit. I chose 6-inch hexagons because they felt substantial enough to make an impact while remaining proportionate to my kitchen size. The honeycomb pattern creates movement and depth that prevents the floor from feeling flat or boring.
Mixing geometric tiles with my main floor tiles required careful planning to ensure the transition looked intentional rather than haphazard. I used a thin metal transition strip where the hexagons meet the large-format planks, creating a clean delineation between the two areas. This defined border helps establish the island area as a distinct zone while maintaining visual flow throughout the kitchen. The contrast in patterns actually enhances both tile choices rather than competing for attention.
The installation of geometric tiles proved more time-consuming than standard rectangular tiles due to the complex cutting required around edges and corners. I learned that starting from the center and working outward ensures the pattern stays symmetrical and balanced. The extra time invested in proper layout and installation has resulted in a floor feature that consistently impresses visitors and makes me smile every time I walk into my kitchen.
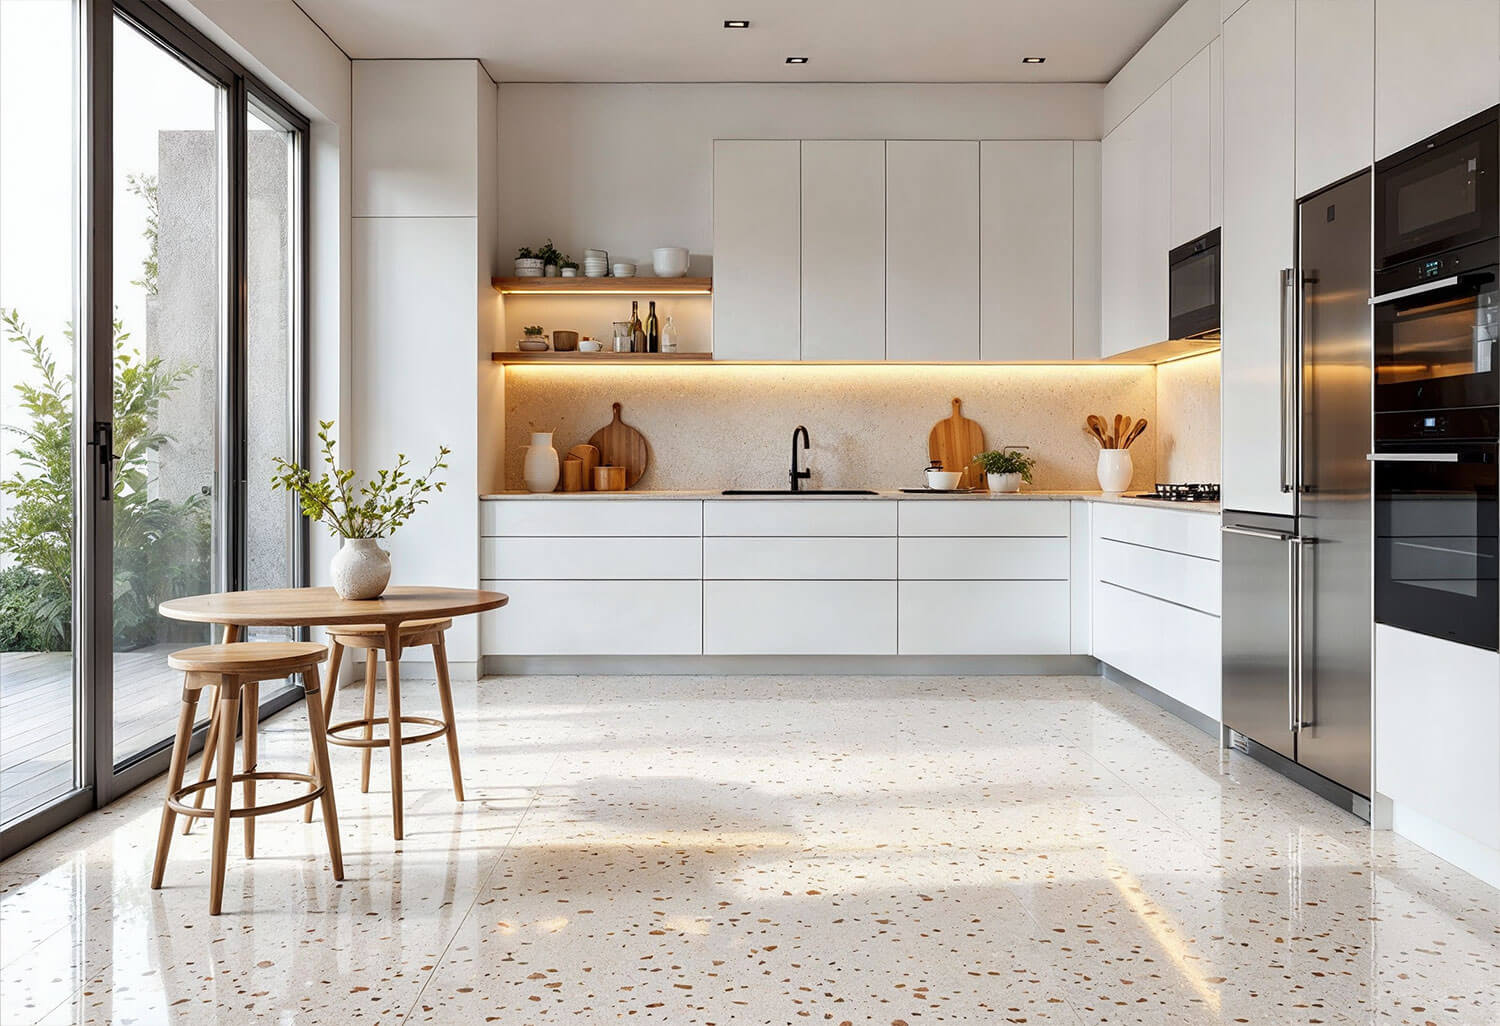
Large Format Porcelain: Creating Seamless Modern Appeal
I chose 24×48 inch porcelain planks that mimic natural wood, and the impact was immediate and dramatic. The large format tiles created fewer grout lines, which gave my kitchen a clean, uninterrupted look that made the space feel significantly larger than before. The wood-look pattern added warmth without the maintenance concerns of real hardwood in a kitchen environment. These oversized tiles became the perfect backdrop for my modern aesthetic while providing the durability I needed for a high-traffic family kitchen.
Installing large format tiles required more precision than I anticipated, but the results were worth every careful measurement. I hired professionals for this project because the size and weight of these tiles demanded experience and specialized tools. The installers used a leveling system to ensure each tile sat perfectly flush with its neighbors, preventing lippage that could create trip hazards or an uneven appearance. This attention to detail during installation has paid off with a floor that still looks flawless after two years of heavy use.
The maintenance of these large porcelain tiles has been surprisingly simple, which was a major factor in my decision. Daily sweeping and weekly mopping with a neutral pH cleaner keep them looking pristine. The non-porous surface resists stains, scratches, and water damage beautifully. I love that spilled wine, dropped sauce, or muddy footprints wipe away easily without leaving permanent marks. This practical benefit has made my kitchen much more enjoyable to use and maintain.
Subway Tile Floors: Classic Style with Modern Execution
I used 3×12 inch subway tiles laid in a herringbone pattern for my kitchen entrance, creating a sophisticated transition from the main living areas. The familiar subway shape felt timeless, but the herringbone layout gave it a contemporary twist that perfectly suited my modern kitchen design. The light gray color I selected coordinates beautifully with my cabinetry while providing enough contrast to define the entry zone. This classic tile in an unexpected application became one of my favorite design decisions.
The herringbone pattern required meticulous planning and precise cutting, especially around doorways and corners. I created a detailed layout drawing before starting installation to ensure the pattern would be centered and symmetrical. Working with subway tiles in this configuration taught me the importance of checking alignment frequently and making small adjustments as needed. The final result creates a stunning visual impact that guests notice immediately upon entering my kitchen.
Maintenance of subway tiles in a herringbone pattern requires attention to the grout lines, which are more numerous than with larger format tiles. I sealed the grout after installation and resealed it annually to prevent staining and discoloration. The extra grout lines do collect more dirt and debris, so I vacuum the floor more frequently than other areas. Despite the additional maintenance, the dramatic visual effect of this pattern makes the extra effort worthwhile for this high-impact entrance area.

Natural Stone Look: Achieving Luxury on a Budget
I discovered porcelain tiles that perfectly mimic Carrara marble but cost a fraction of the price and require none of the maintenance hassles. These 12×24 inch tiles feature realistic veining and color variation that convinced even my designer friends they were looking at real stone. The sophisticated appearance instantly upgraded my kitchen’s aesthetic while staying within my budget for the renovation. The marble-look tiles created a luxurious foundation that made all my other design choices look more expensive and refined.
The beauty of choosing porcelain over real marble became apparent immediately after installation. Unlike natural stone, these tiles don’t require sealing, won’t etch from acidic spills, and maintain their appearance with simple cleaning. I can use any standard floor cleaner without worrying about damaging the surface or dulling the finish. This practical advantage enables me to enjoy the luxury of a marble look without the stress of maintaining real stone in a busy kitchen environment.
The installation process for marble-look porcelain was straightforward, but selecting the right layout was crucial for achieving the realistic stone appearance. I arranged the tiles to create a random pattern that avoided repetitive veining alignment, making the installation look more like natural stone slabs. The subtle color variations between tiles enhanced the realistic effect and prevented the floor from looking too uniform or artificial. This attention to natural stone characteristics made all the difference in the final result.

Bold Color Choices: Making a Contemporary Statement
I chose deep charcoal gray tiles for my kitchen floor, a decision that initially worried my family but has proven to be brilliant. The dark color creates a sophisticated backdrop that makes my white cabinets and stainless steel appliances pop dramatically. The bold floor choice gives my kitchen a modern, gallery-like quality that feels current and unexpected. This dramatic color decision has aged beautifully and continues to impress visitors who appreciate the confident design choice.
Maintaining dark tiles requires different strategies than lighter colors, and I’ve learned techniques that keep them looking their best. Light-colored debris and dust show more readily on dark surfaces, so I sweep daily and use a microfiber mop that captures particles effectively. Surprisingly, many stains and spills are less visible on the dark surface than they would be on light tiles. I use a pH-neutral cleaner that doesn’t leave streaks or residue that would be visible on the dark surface.
The psychological impact of the bold floor color has been unexpectedly positive, creating a sense of drama and sophistication that makes cooking and entertaining more enjoyable. The dark tiles ground the space and provide a strong foundation for my lighter design elements. Friends often comment that the bold floor choice makes my kitchen feel more like a professional chef’s space than a typical family kitchen. This confident design decision has influenced other bold choices throughout my home renovation.

Textured and Slip-Resistant Options: Safety Meets Style
I selected tiles with a subtle textured surface that provides slip resistance without compromising the sleek modern aesthetic I wanted. The micro-texture is almost imperceptible to the eye but provides crucial grip underfoot, especially when the floor is wet from cooking activities. This safety feature has proven invaluable in my busy kitchen, where spills and splashes are inevitable. The textured surface doesn’t collect dirt or grime any more than smooth tiles, making maintenance just as simple.
Testing different texture levels before making my final selection was essential to finding the right balance between safety and appearance. I brought home samples and tested them with wet feet to evaluate their slip resistance. Too much texture would have looked industrial and felt uncomfortable underfoot, while too little wouldn’t provide adequate safety. The subtle texture I chose provides confidence when walking across wet areas without being noticeable in daily use.
The textured surface has additional benefits I didn’t anticipate when making my selection. Minor scratches and scuff marks that might be visible on smooth tiles blend into the texture and become virtually invisible. This forgiving surface maintains its pristine appearance despite heavy foot traffic and occasional dropped utensils. The texture also adds subtle visual interest and depth to the floor without competing with other design elements in the kitchen.

How do I choose between large format and standard-sized tiles for my modern kitchen floor?
Large format tiles create a more seamless, contemporary look with fewer grout lines, making spaces feel larger and easier to clean. I chose 24×48 inch planks for my main floor area because they provided that sleek modern aesthetic. However, standard tiles work better for smaller kitchens or areas with many angles and corners. Consider your space size, layout complexity, and cleaning preferences when deciding.
Are dark-colored tiles practical for a kitchen floor, or do they show too much dirt?
I chose charcoal gray tiles and have been thrilled with the results. Dark tiles actually hide many stains better than light colors, though they do show dust and light debris more readily. Daily sweeping is essential, but the sophisticated look is worth the extra maintenance. Dark floors create a dramatic contrast with light cabinets and make the entire kitchen feel more upscale and contemporary.

What’s the most important factor when selecting kitchen floor tiles?
Durability and water resistance should be your top priorities, followed by slip resistance for safety. I learned that porcelain tiles rated for heavy commercial use perform beautifully in residential kitchens. Consider your lifestyle, maintenance preferences, and design goals equally. The best kitchen floor tile balances all these factors while fitting your budget and complementing your overall design aesthetic.
How much should I expect to spend on modern kitchen floor tiles?
My porcelain wood-look planks cost about $8 per square foot, plus installation fees of $6 per square foot. Geometric and specialty tiles can range from $5-15 per square foot, depending on size and design complexity. Natural stone-look porcelain offers a luxury appearance at mid-range prices. Budget for 10% extra tiles for future repairs and consider professional installation for best results.

Can I install modern kitchen tiles myself, or should I hire professionals?
I hired professionals for my large format tiles because their size and weight require specialized tools and experience. Smaller standard tiles are more DIY-friendly if you have patience and basic skills. Geometric patterns and complex layouts benefit from professional installation to ensure proper alignment. Consider your skill level, available time, and the cost of potential mistakes when making this decision.
How do I maintain different types of modern kitchen floor tiles?
Daily sweeping and weekly mopping with pH-neutral cleaner works for most porcelain tiles. Textured surfaces may need slightly more frequent cleaning to prevent dirt buildup in the texture. I seal grout lines annually and address spills immediately to prevent staining. Avoid harsh chemicals, abrasive cleaners, and steam mops that might damage grout or tile surfaces over time.

Cream Kitchen Floor Tiles
Kitchen Floor Tiles Pattern
Different Types of Kitchen Floor Tiles – Extensive Buying Guide

Kitchen floor tile ideas

Related Posts: