When I started my whole-house flooring renovation two years ago, I never imagined vinyl would become my hero material. After researching countless options and living with the chaos of torn-up floors for weeks, neutral vinyl flooring emerged as the perfect solution for my busy family lifestyle. The warm gray-beige luxury vinyl planks I ultimately chose transformed every room while standing up to kids, pets, and daily life better than I ever expected. What started as a budget-conscious decision became my favorite home improvement choice, proving that practical doesn’t mean sacrificing style.
Neutral Luxury Vinyl Tiles: Versatile Style for Every Space
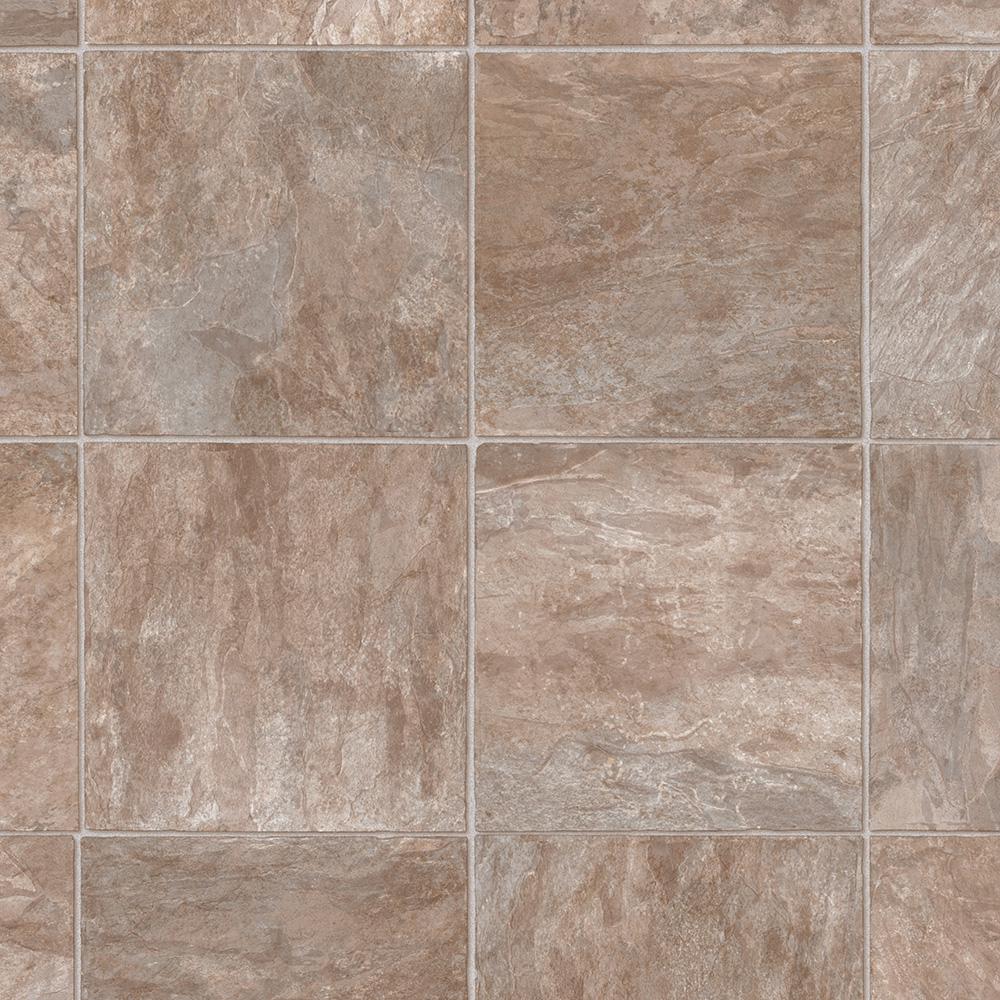
In my bathrooms and laundry room, I installed 12×24-inch luxury vinyl tiles in a soft stone gray that resembles natural travertine. These larger-format tiles create a seamless, sophisticated look that makes smaller spaces feel more expansive and luxurious. The neutral stone appearance coordinates perfectly with my plank flooring while providing the water resistance these wet areas demand. The subtle variation between tiles prevents the floor from looking monotonous or artificial.
The installation process for luxury vinyl tiles required more precision than planks, especially in achieving straight lines and consistent spacing. I invested in a quality tile spacer system and took extra time measuring and marking my starting lines to ensure everything stayed square. Cutting tiles around toilets and vanities challenged my patience, but the forgiving nature of vinyl made mistakes manageable. The adhesive backing made positioning easy, though repositioning required gentle warming with a hair dryer.
These neutral vinyl tiles have proven incredibly practical for high-moisture areas while maintaining their attractive appearance. The textured surface provides excellent slip resistance when wet, giving me confidence in the bathroom safety for my family. Cleaning requires nothing more than regular mopping with any standard floor cleaner, and the non-porous surface never absorbs stains or odors. The tiles look as fresh and clean as on installation day, despite constant exposure to humidity and water.
Luxury Vinyl Planks: The Wood Look Without the Worry
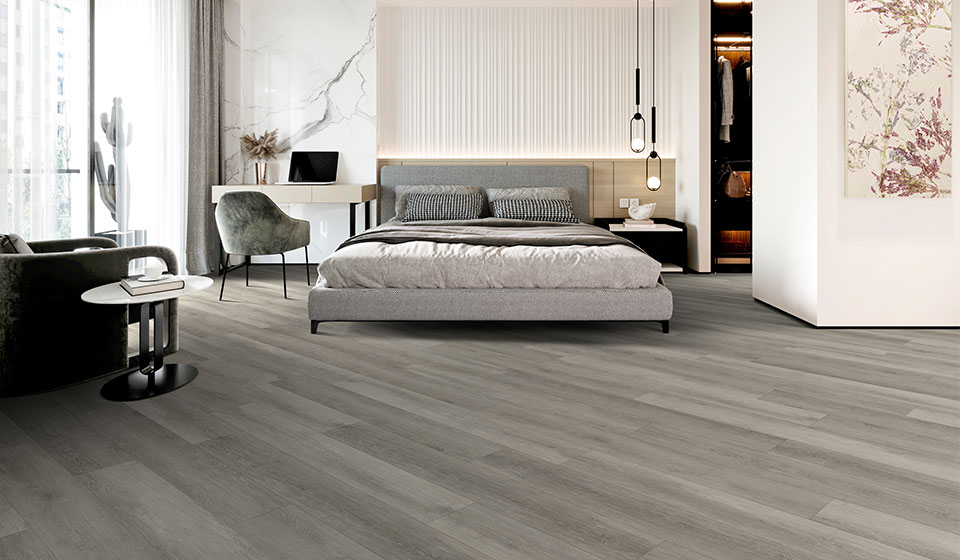
I chose luxury vinyl planks that perfectly mimic weathered oak, complete with realistic grain patterns and subtle color variations that fooled even my contractor friends. The 7-inch wide planks in a soft greige tone created the warm, natural look I wanted without the maintenance headaches of real hardwood. These planks feature beveled edges and surface textures that make them virtually indistinguishable from authentic wood flooring. The neutral coloring works beautifully with both my existing furniture and future decorating changes.
Installing these luxury vinyl planks was surprisingly straightforward, even for a novice like me. The click-lock system meant no messy adhesives or complex tools, just careful measuring and a steady hand with the saw for cuts around doorways. I completed my living room in a weekend, working at my own pace and feeling accomplished with each row I finished. The planks are thick enough to feel substantial underfoot while remaining thin enough to install over my existing subfloor without height issues at transitions.
The durability of these luxury vinyl planks has exceeded every expectation I had when making my initial selection. After two years of heavy foot traffic, dropped toys, and the occasional water spill from my kids, the floor still looks pristine. The wear layer protects against scratches from furniture moving, and pet claws, while the waterproof core means I never panic about spills or wet shoes. Daily maintenance involves simple sweeping, and weekly damp mopping keeps everything looking brand new.
Waterproof Vinyl: Peace of Mind in Every Room
Choosing waterproof vinyl throughout my home was the smartest decision I made during renovation, especially with kids who seem to find creative ways to spill everything. The waterproof core construction means liquid never penetrates the flooring, protecting my subfloors from damage that could require expensive repairs later. I’ve tested this feature accidentally numerous times with everything from juice boxes to overflowing washing machines, and cleanup is always quick and stress-free.
The technical construction of waterproof vinyl involves multiple layers that work together to prevent moisture infiltration while maintaining comfort underfoot. The rigid core provides stability and prevents the telegraphing of subfloor imperfections, while the waterproof barrier stops moisture at the surface level. This engineering means I never worry about expansion, contraction, or warping that traditional materials might experience in changing humidity conditions throughout the seasons.
Living with truly waterproof flooring has changed how I approach household activities and relaxation. I no longer stress about kids eating snacks in the living room or worry when the dog comes in with wet paws from rain. The peace of mind extends to entertaining, where wine spills or food accidents become minor inconveniences rather than potential disasters. This psychological benefit of waterproof vinyl has made our home feel more comfortable and livable for the entire family.

Neutral Color Palettes: Timeless Appeal That Never Goes Out of Style
My neutral vinyl flooring features soft gray undertones that create a calming foundation for any decorating style I choose to embrace. The balanced beige-gray color works equally well with warm and cool color schemes, allowing me flexibility as my tastes evolve. This neutral backdrop makes furniture and artwork pop while never competing for attention or limiting my decorating choices. The subtle color variations within each plank add depth and interest without being distracting or overwhelming.
Selecting the perfect neutral shade required comparing samples in different lighting conditions throughout my home. I learned that colors can look dramatically different under natural light versus artificial lighting, and morning light versus evening light. I lived with several sample planks for a week, observing how they looked at different times and under various conditions. This careful evaluation process ensured my final choice would look beautiful in all situations.
The timeless appeal of neutral vinyl has proven its value as decorating trends have shifted over the past two years. While bold colors and patterns come and go, my neutral floors remain current and stylish. Friends often comment on how sophisticated and expensive the flooring looks, never guessing it’s vinyl. The neutral palette serves as a perfect canvas for seasonal decorating changes, holiday decorations, and furniture rearrangements without ever clashing or looking dated.

DIY Installation: Conquering Floors with Confidence and Patience
Taking on vinyl flooring installation myself saved thousands of dollars while giving me tremendous satisfaction and confidence in home improvement projects. The learning curve was manageable with careful research and patience, though I made some mistakes in the first room that taught valuable lessons for subsequent installations. Starting in a less visible room allowed me to practice techniques and build skills before tackling the main living areas where perfection mattered more.
Preparation proved more important than the actual installation, requiring careful attention to subfloor condition, moisture levels, and room measurements. I spent considerable time ensuring the subfloor was level, clean, and dry before beginning installation. Acclimating the vinyl to room temperature for 48 hours prevented expansion issues later. These preparatory steps, while time-consuming, made the actual installation smoother and ensured professional-looking results that have lasted beautifully.
The tools required for DIY vinyl installation were surprisingly basic and affordable, making this an accessible project for most homeowners. A circular saw, utility knife, measuring tape, and spacers covered most needs, with a few specialized items like a pull bar for tight spaces. I rented a floor roller for large areas to ensure proper adhesion. Taking time to learn proper cutting techniques and installation sequences prevented costly mistakes and wasted materials throughout the project.

Maintenance and Longevity: Keeping Neutral Vinyl Looking Perfect
Daily maintenance of my neutral vinyl floors consists of simple sweeping or vacuuming to remove dirt and debris that could cause surface scratches over time. Weekly damp mopping with a neutral pH cleaner keeps the floors looking fresh and clean without damaging the surface finish. I avoid harsh chemicals, abrasive cleaners, and excessive water that might seep into seams. This minimal maintenance routine takes less time than caring for traditional hardwood or natural stone flooring.
Protecting my vinyl floors from damage involves simple precautions that have become second nature after two years of living with them. I use furniture pads under heavy items and area rugs in high-traffic zones to minimize wear patterns. Prompt cleanup of spills prevents staining, though the waterproof surface means I don’t need to panic about immediate attention. These small preventive measures have kept my floors looking showroom-fresh despite constant family use.
The longevity of quality neutral vinyl flooring has impressed me as I watch my floors age gracefully without showing significant wear or fading. The manufacturer’s warranty covers twenty years, but I expect even longer performance based on the current condition. The neutral coloring helps hide minor scuffs and surface marks that might be more visible on darker or lighter floors. This durability means my flooring investment will continue looking beautiful for many years while requiring minimal ongoing maintenance or replacement concerns.

How does neutral vinyl flooring hold up to pets and children in busy households?
My neutral vinyl has been amazing with two dogs and three kids constantly running around. The waterproof surface handles accidents instantly, scratches from pet nails barely show on the textured surface, and dropped toys don’t cause dents or damage. The neutral color hides pet hair and everyday dirt better than darker or lighter options. Cleanup is so easy that I actually worry less about messes now than I did with my previous carpet.
What’s the real difference in cost between vinyl flooring and hardwood or tile?
I paid about $4 per square foot for quality luxury vinyl, including installation materials, compared to $12-15 for equivalent hardwood or ceramic tile. The DIY installation saved me another $3-5 per square foot in labor costs. Even adding tools and supplies, my total project cost was less than half what a professional hardwood installation would have been. The long-term savings continue with minimal maintenance costs compared to refinishing hardwood.

Can I install neutral vinyl flooring over my existing floors, or do I need to remove them first?
I successfully installed my vinyl over existing laminate and linoleum after ensuring the surfaces were level and secure. Most stable existing floors work as a base, though carpet and loose materials need removal. The key is having a smooth, level surface underneath. I used floor leveling compound in a few spots but avoided the expense and mess of complete floor removal in most rooms.
How do I choose the right neutral shade that won’t look dated in a few years?
I chose a balanced gray-beige that works with both warm and cool color schemes rather than following trending colors. Classic neutral tones like soft grays, warm beiges, and greige combinations have staying power beyond current fads. Test samples in your actual lighting conditions at different times of day. Avoid pure whites or very dark colors that show every speck of dirt and limit decorating flexibility.

Is luxury vinyl flooring actually waterproof, or just water-resistant?
My luxury vinyl planks are genuinely waterproof with sealed edges and waterproof cores that prevent any moisture penetration. I’ve tested this accidentally with everything from overflowing bathtubs to leaking appliances, and cleanup is always just surface mopping. Water-resistant products allow some moisture penetration over time, while truly waterproof vinyl creates a complete barrier. Check product specifications carefully as marketing terms can be misleading.
What’s the biggest mistake people make when installing vinyl flooring themselves?
The biggest mistake I see friends make is rushing the preparation phase and not letting materials acclimate properly. Skipping subfloor preparation or ignoring manufacturer guidelines for temperature and humidity leads to problems later. Taking time for proper planning, measuring twice before cutting, and following installation sequences prevents most issues. Starting in a closet or less visible room lets you practice before tackling main living areas.

TrafficMaster Pro Basic Refined Slate Neutral Residential Vinyl
Related Posts: