When I renovated my small toilet room a couple of years ago, I knew the flooring decision mattered more than most people might think for such a compact space. Everything in that room gets seen up close, touched constantly, and subjected to more moisture and cleaning product exposure than almost anywhere else in the house.
I looked at tile, I considered painted concrete, and I even briefly entertained the idea of a small mosaic installation before a friend talked me into seriously considering vinyl. I’m so glad she did. Vinyl flooring transformed that little room in ways that felt disproportionate to the size of the project, and the practical performance has been flawless since day one. Here’s everything I wish I’d known going in.
Why a Toilet Room Has Unique Flooring Demands
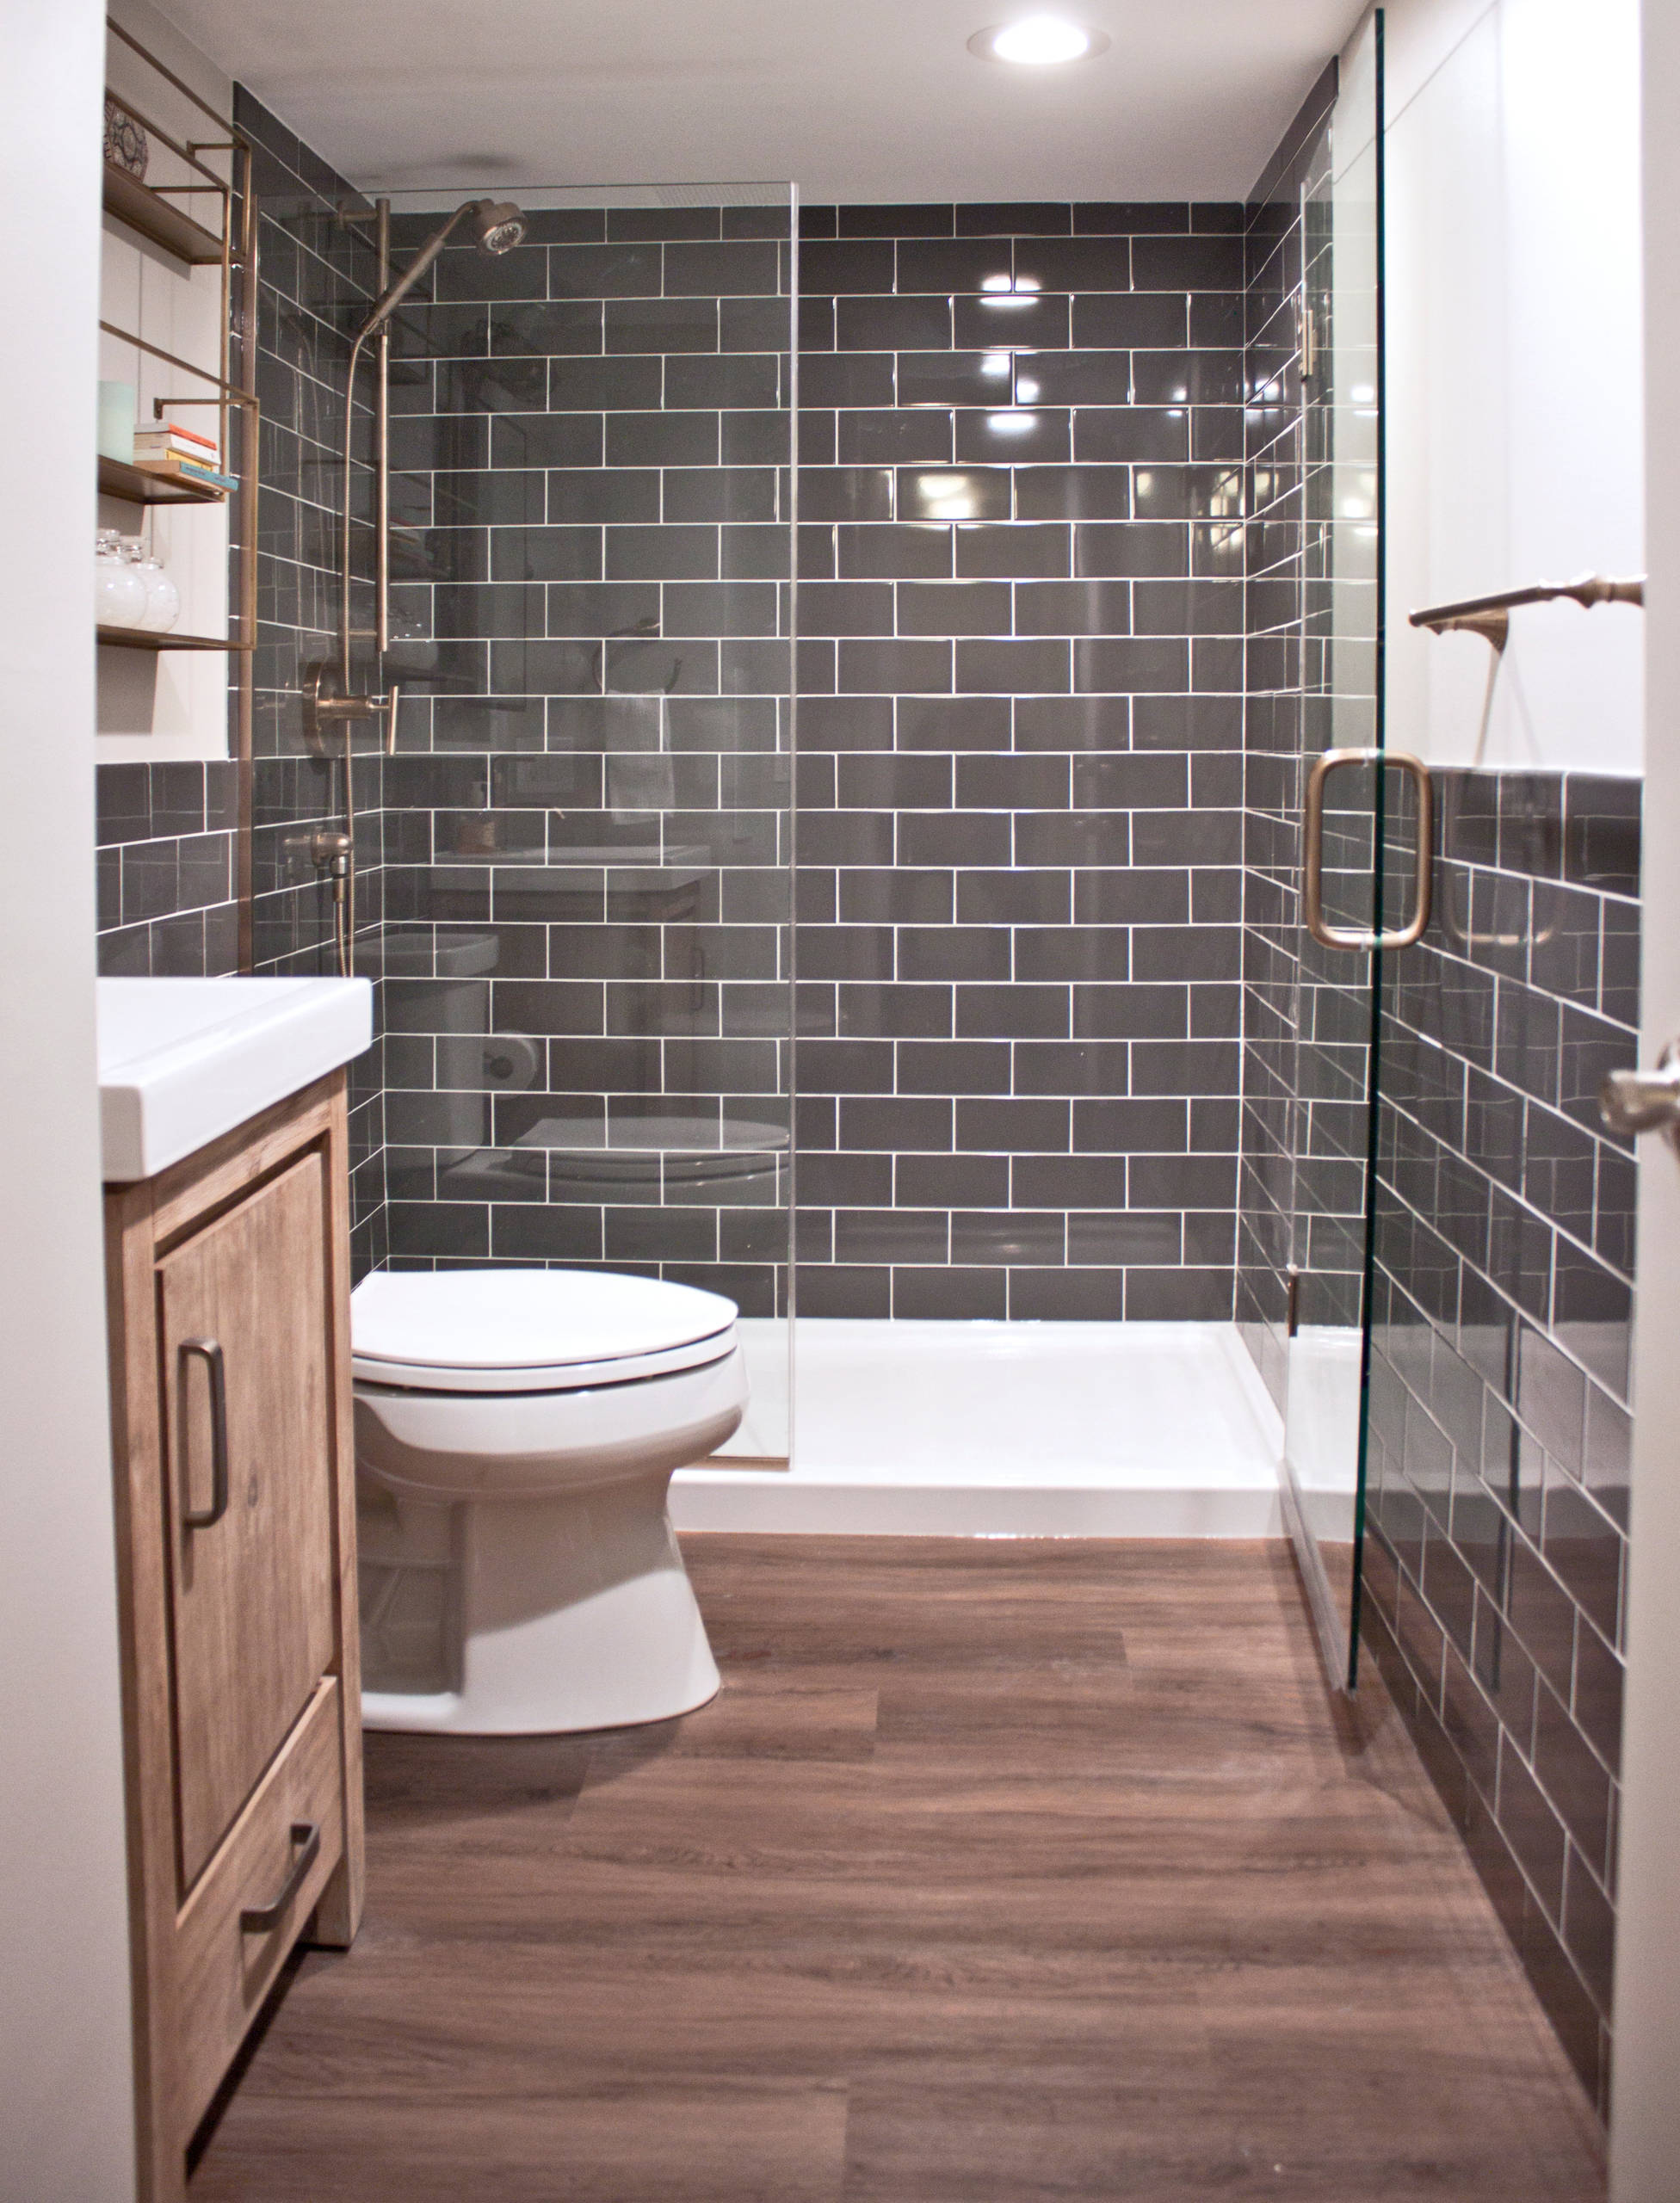
A dedicated toilet room is a different environment from a full bathroom in ways that genuinely affect which flooring materials make sense. It’s typically a very small space, which means the floor is one of the dominant visual elements in the room rather than a background detail.
Every material choice reads large in a small room, so the appearance of the flooring matters in a way it sometimes doesn’t in bigger spaces where rugs, furniture, and other elements compete for attention.
The moisture situation in a toilet room is specific as well. There’s no shower steam or bath splashing, but there is consistent humidity from toilet flushing, potential drips and splashes around the base of the toilet, and frequent cleaning with products that can be harsh on certain floor finishes over time. The floor needs to handle all of that without warping, staining, or degrading at the surface in ways that would make the room look tired and unhygienic quickly.
Cleanability is something I weighed heavily in my decision, and it should be near the top of anyone’s criteria list for a toilet room floor. A surface that traps dirt in grout lines, shows every water mark, or requires special cleaning products to stay presentable is a real ongoing maintenance burden in a room you’re cleaning frequently.
Vinyl’s combination of a smooth or lightly textured sealed surface and full waterproofing makes it one of the most genuinely easy floors to keep spotlessly clean, which in a toilet room is not a small thing.
The Vinyl Options That Work Best in a Toilet Room
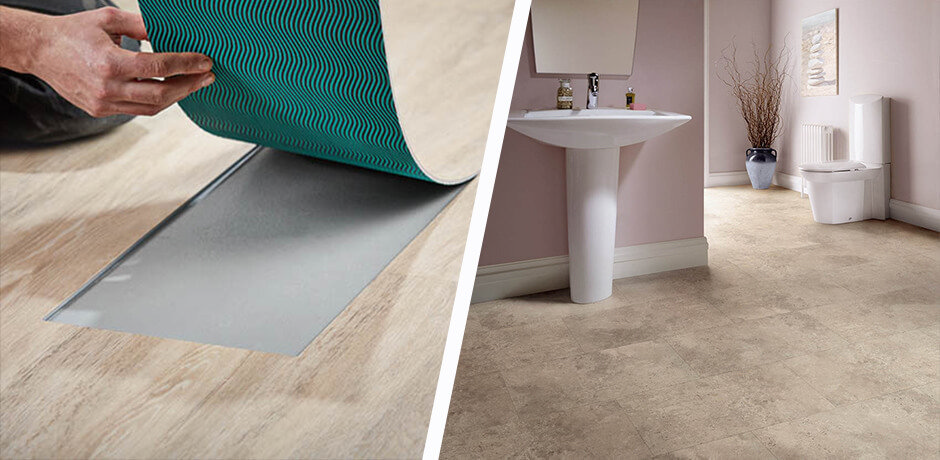
Not all vinyl flooring is the same, and understanding the main product categories helped me make a much more confident decision than I would have made just picking something off a shelf based on how it looked in a sample. The three main formats worth considering for a toilet room are sheet vinyl, luxury vinyl tile, and luxury vinyl plank, each with different installation characteristics and aesthetic results.
Sheet vinyl comes in a single continuous piece with no seams, which is a genuine advantage in a toilet room where moisture can find its way into joints over time if they’re not perfectly sealed. The seamless surface means there’s simply nowhere for water to penetrate, which gives it a practical edge in a room where the toilet base is always a potential drip source. The trade-off is that sheet vinyl can be harder to cut accurately around a toilet base, and any mistakes in cutting are more expensive to correct than with tile or plank formats.
Luxury vinyl tile and luxury vinyl plank have seams between pieces, but modern click-lock systems create very tight joints that perform well in typical bathroom moisture conditions when installed correctly. The design options in LVT and LVP are significantly broader than what’s available in sheet vinyl, which matters in a small room where the floor design contributes substantially to the overall character of the space. I went with luxury vinyl tile in a hexagonal format for my toilet room, which gave me a geometric look that felt both contemporary and timeless in a space too small for anything overly busy.
Choosing a Design That Makes a Small Space Shine
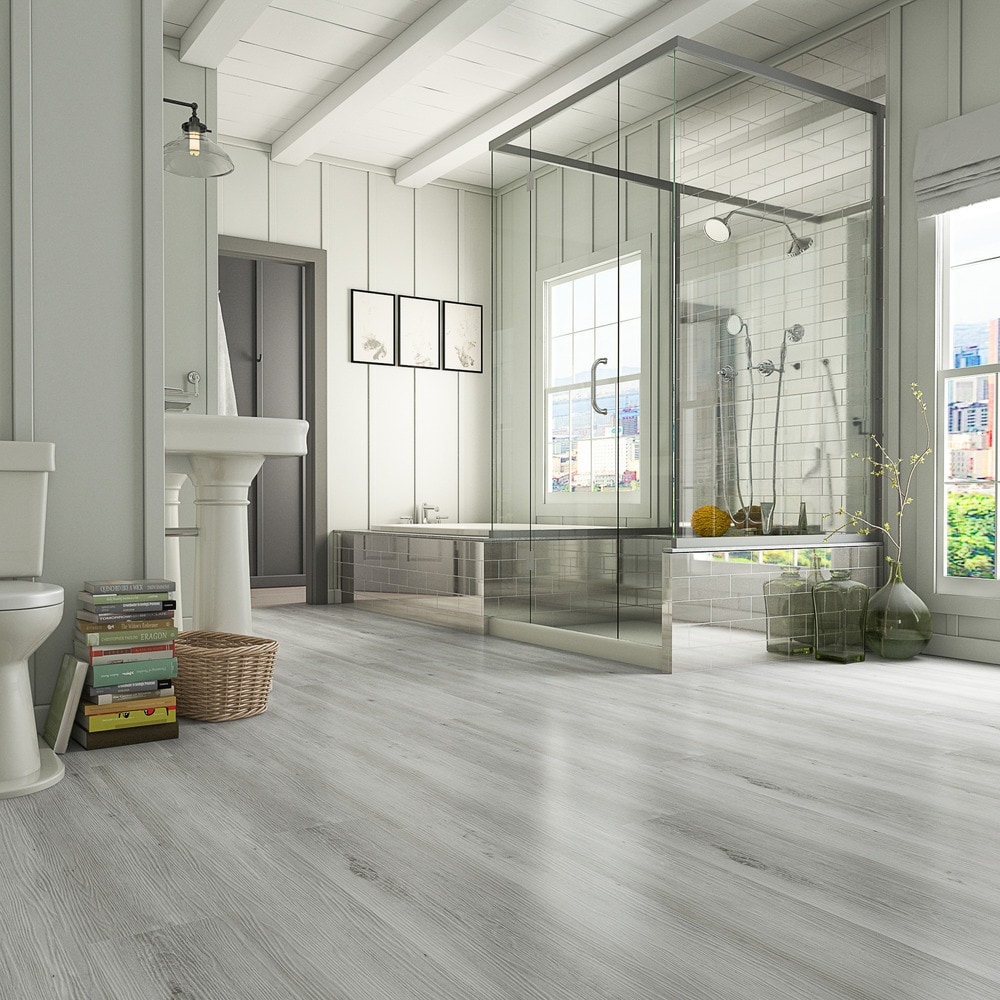
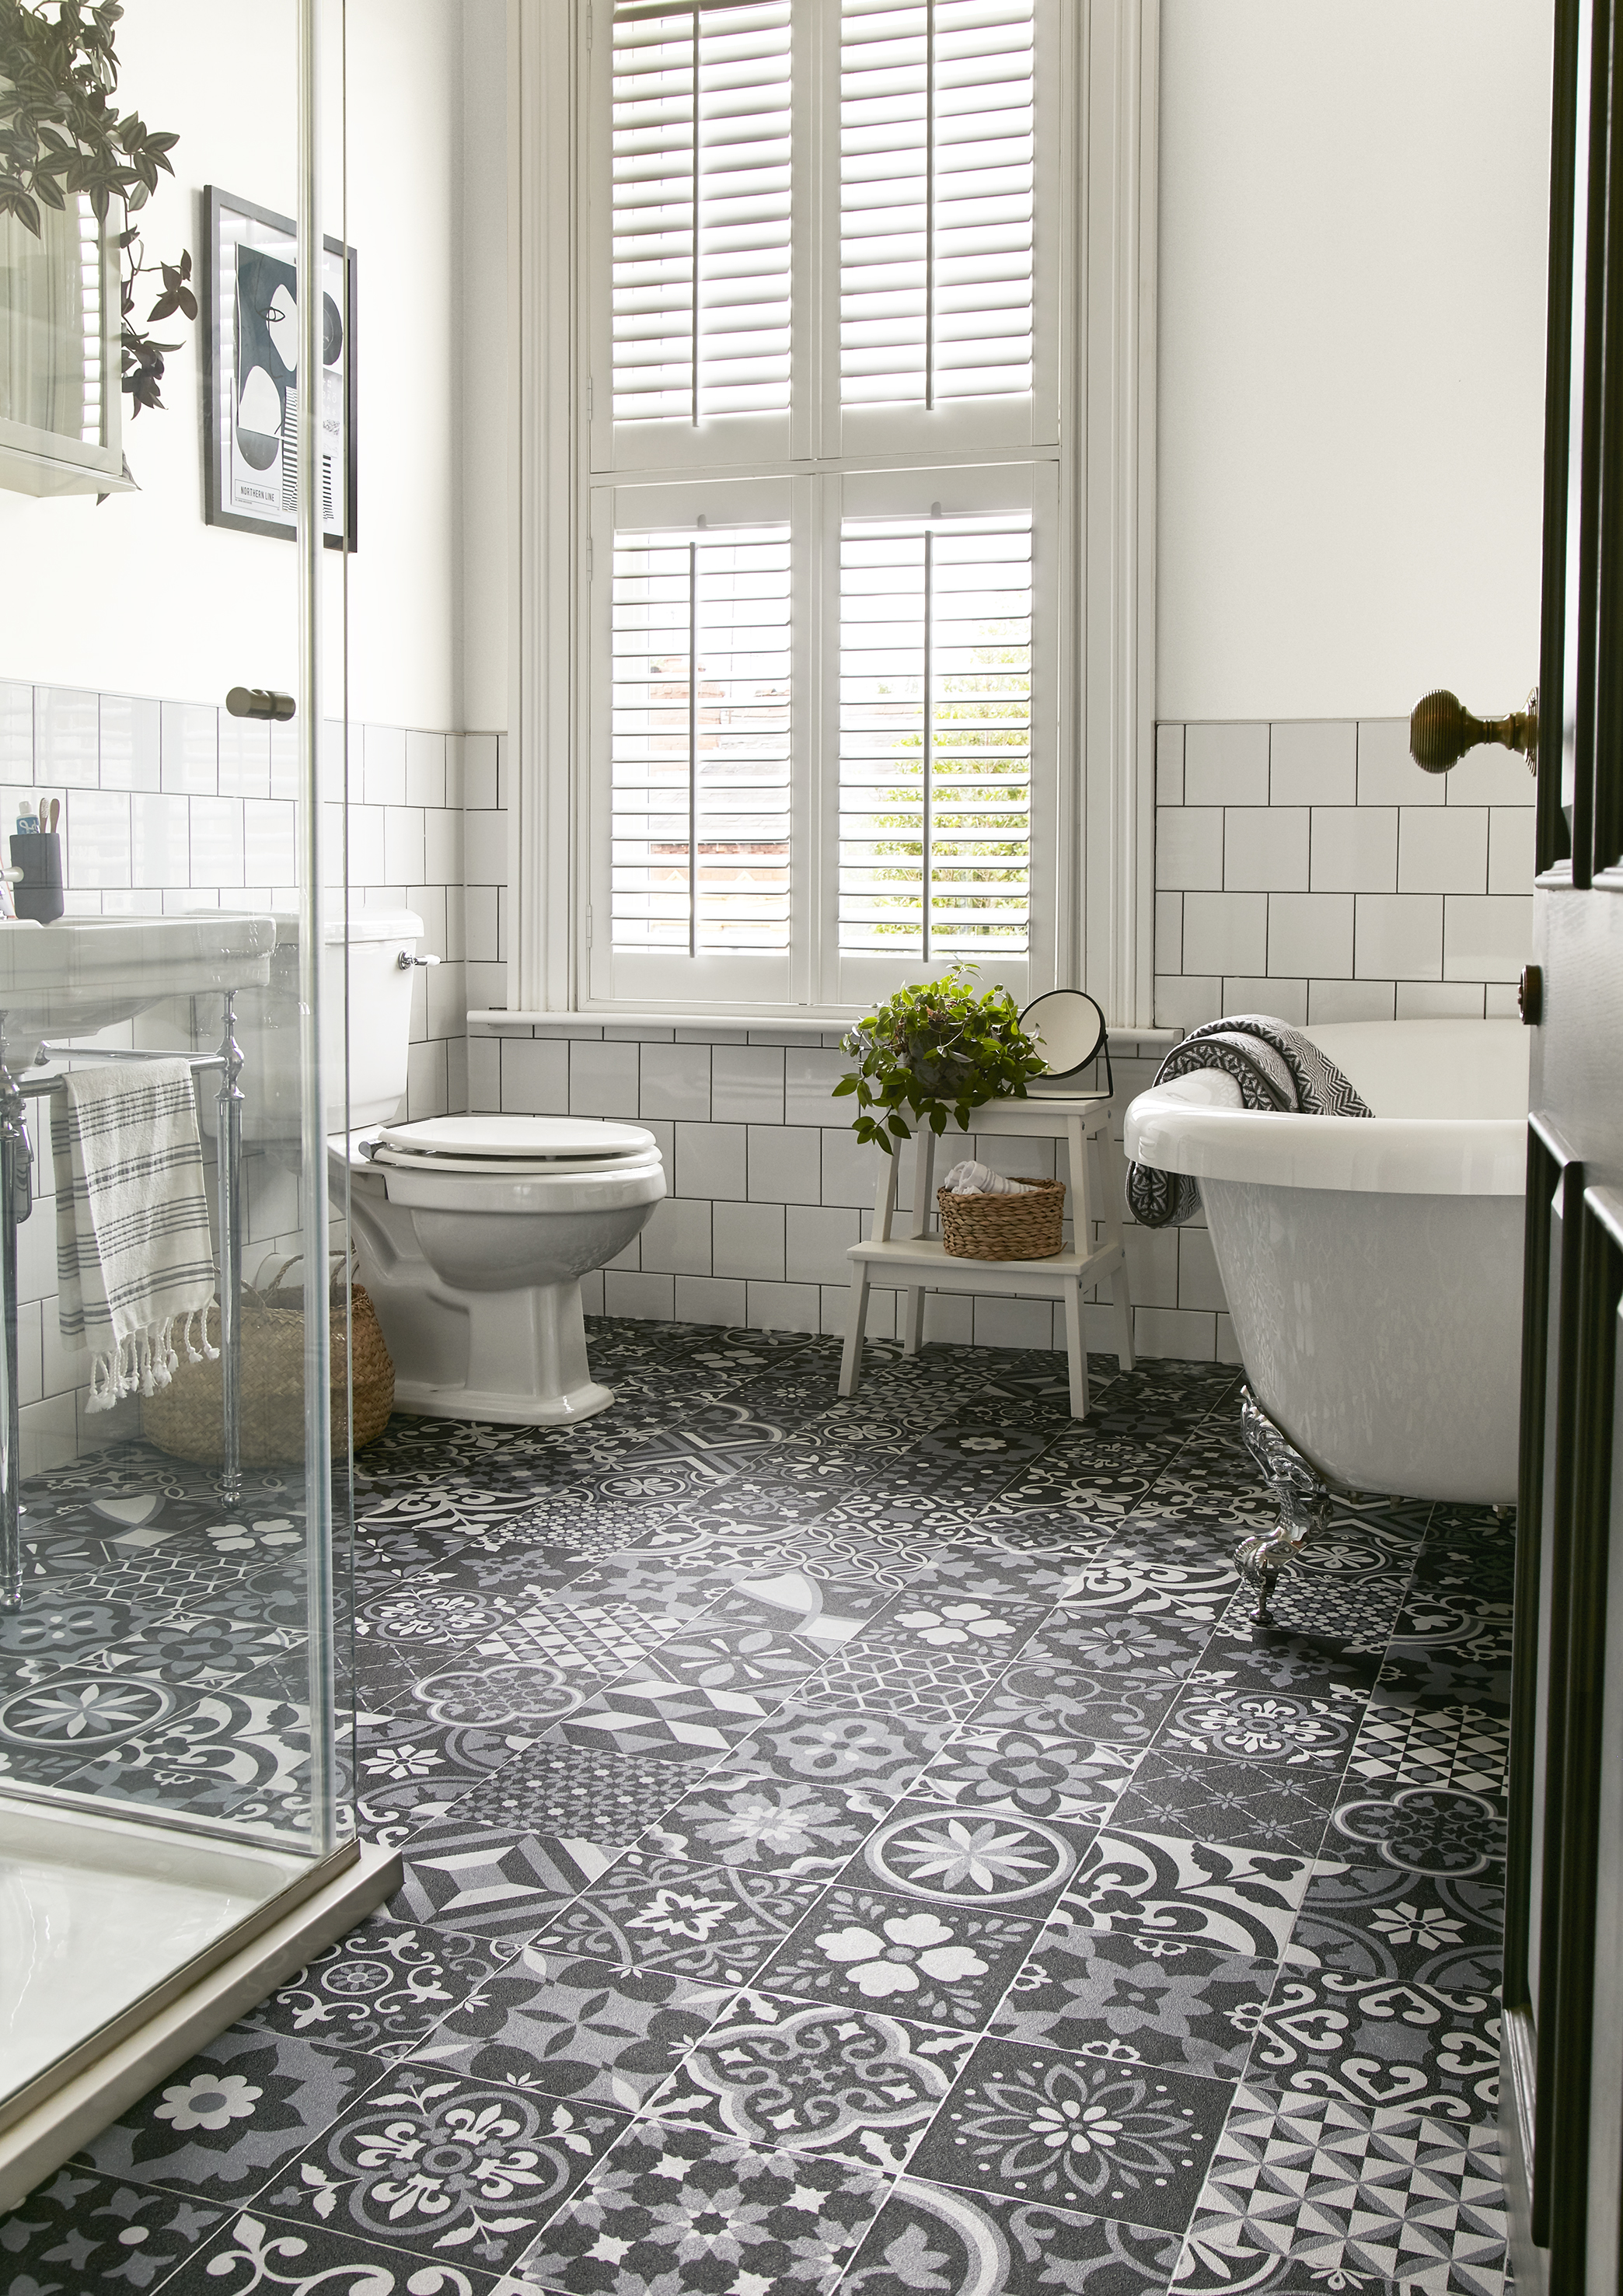
One of the most enjoyable parts of this project was realizing how much design freedom vinyl gives you in a small toilet room precisely because the floor area is compact. A pattern or format that might feel overwhelming in a large bathroom becomes perfectly proportioned in a small toilet room, and you can afford to be bold with your choice in a way that a larger space wouldn’t allow.
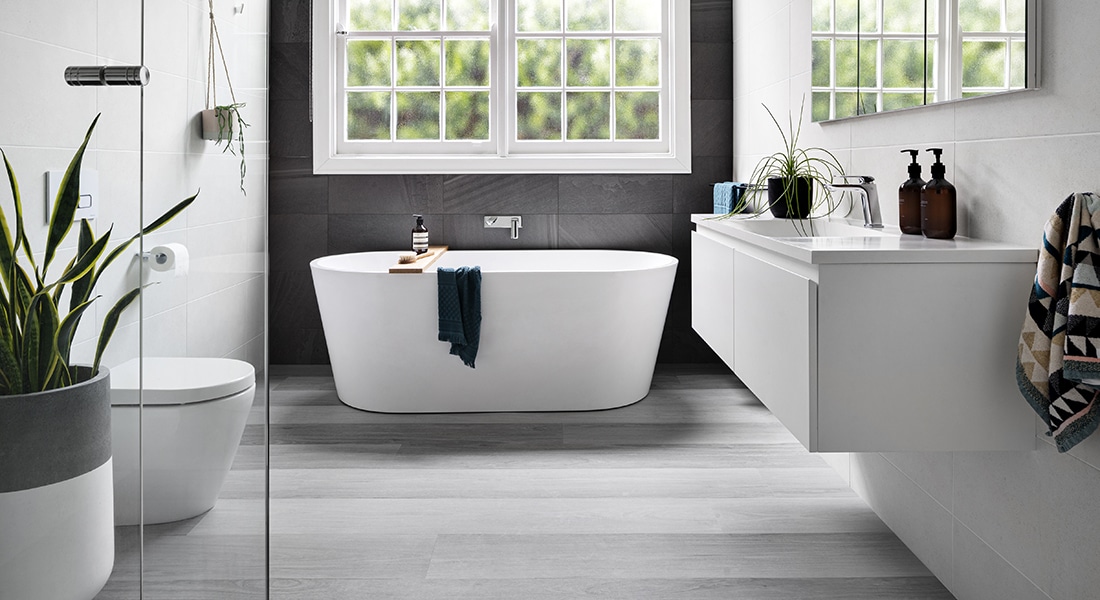
Small-format tiles, whether hexagonal, square, or encaustic-inspired patterned options, work beautifully in toilet rooms because multiple tiles fit within the floor area and create a proper pattern repeat that reads as intentional and designed. I chose a classic black and white hexagonal vinyl tile that references Victorian and Art Deco bathroom floors, and in my small toilet room it looks genuinely striking in the way that a feature floor is supposed to. It was the detail that made the whole renovation feel considered rather than functional.
For those who prefer a simpler, more contemporary look, large-format vinyl tiles in a stone or concrete effect create a clean, expansive feeling in a small room that works particularly well when the wall tiles or paint carry most of the decorative weight. Plank formats in a narrow width can also look excellent laid diagonally in a toilet room, which elongates the space visually and adds a dynamic quality without introducing a complicated pattern. The key is matching the floor’s visual weight to the overall tone of the room rather than letting it compete with everything else.
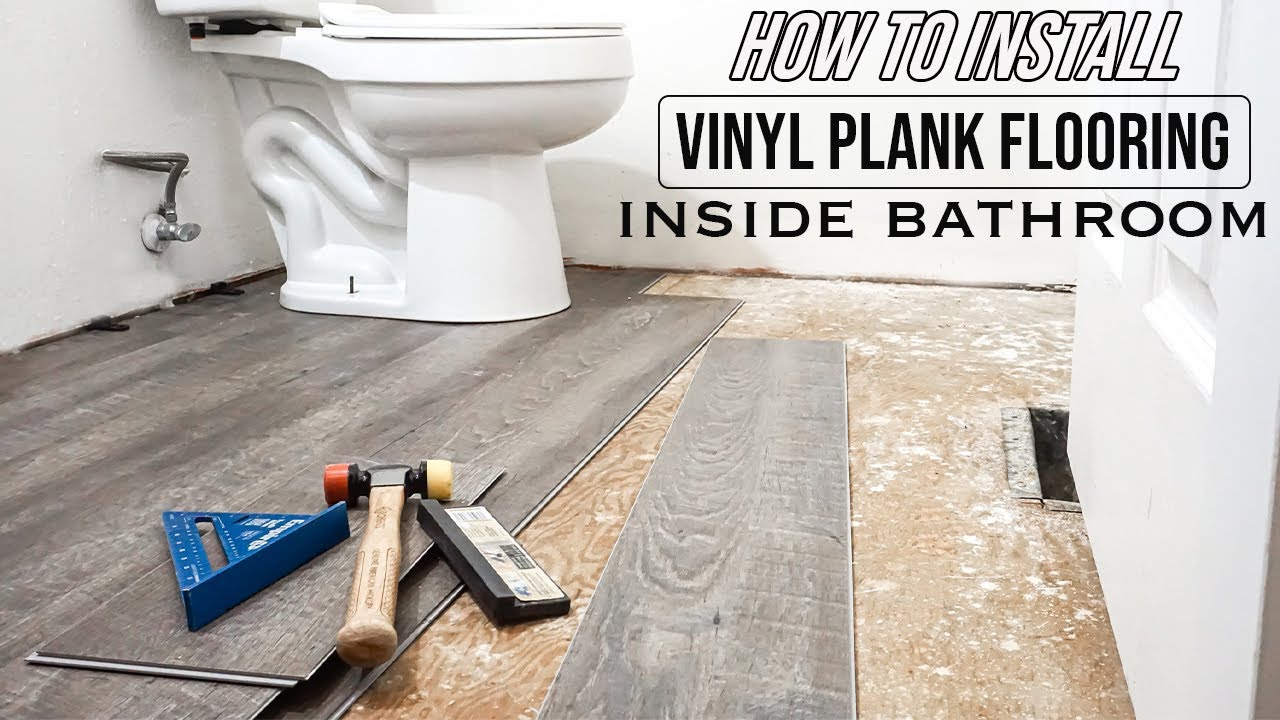
Getting the Installation Right Around a Toilet Base
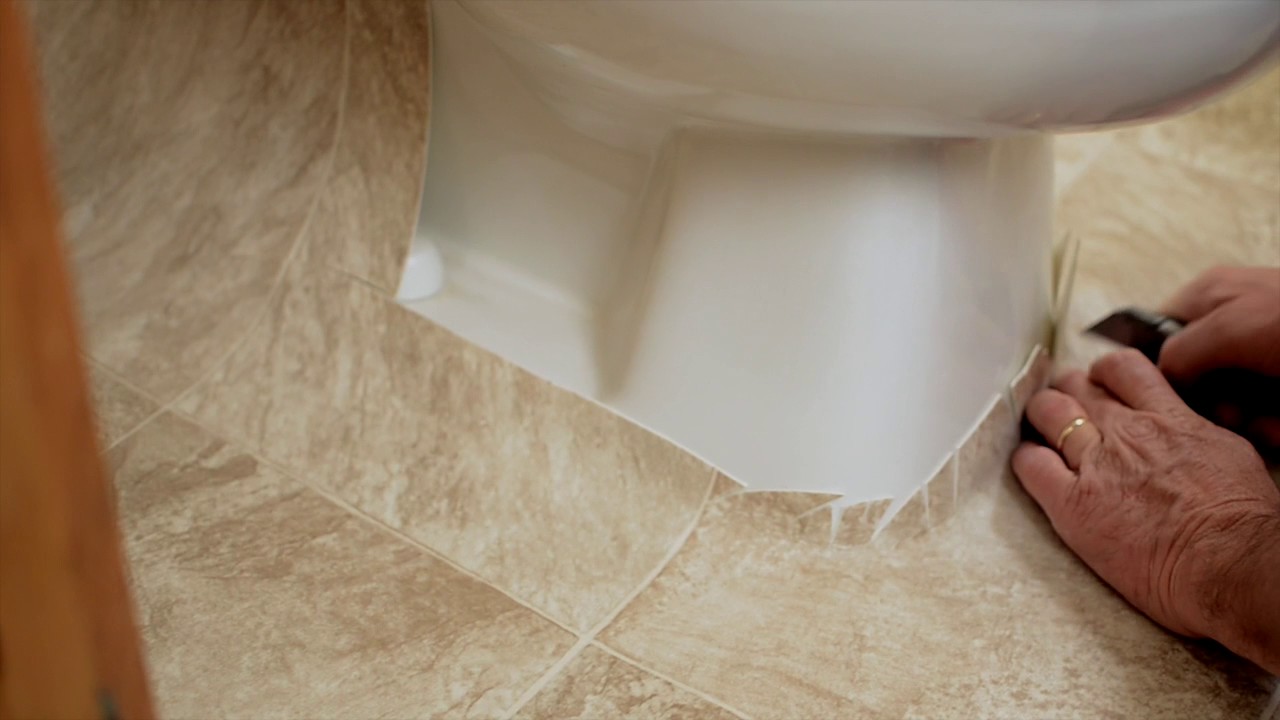
Installing vinyl flooring in a toilet room requires one specific skill that doesn’t come up in most other flooring projects, and that’s cutting accurately around the toilet base. The toilet sits directly on the floor and its base has an irregular curved shape that needs to be followed closely for the floor to look finished and professional rather than improvised. Getting that cut right is achievable, but it requires patience and the right technique.
The method I used and would recommend is making a paper template of the toilet base before cutting any vinyl. I taped sheets of paper together on the floor around the toilet, traced the exact outline of the base with a pencil, cut along that line, and then transferred the template onto the vinyl before making the cut. It adds twenty minutes to the project and the difference between a clean fit and a gapped, ragged edge is completely worth that extra time. A sharp utility knife is essential for getting the curved cuts clean on vinyl material.
For sheet vinyl specifically, the template approach is even more critical because there’s no opportunity to replace just one piece if a cut goes wrong. With tile or plank formats, a badly cut piece around the toilet can be replaced individually without affecting the rest of the floor, which makes those formats a bit more forgiving for first-time installers. Either way, working slowly and checking the template fit against the toilet base before making any irreversible cuts on the actual flooring material is the single most important installation advice I can offer for this part of the project.
Waterproofing and Sealing the Perimeter Properly
Even though luxury vinyl itself is fully waterproof through its core, the perimeter where the floor meets the walls and especially where it meets the toilet base is where moisture can find its way underneath if not properly sealed. I learned this from my installer, who was emphatic about caulking every perimeter edge carefully before the job was considered complete, and I’ve seen enough cautionary stories since then to understand why that step matters so much.
A bead of flexible silicone caulk around the entire perimeter of the room, where the vinyl meets the skirting boards or wall tiles, prevents any water that gets onto the floor surface from working its way down through gaps and underneath the flooring. This is especially important in a toilet room where the floor is cleaned regularly with water and cleaning products that could gradually find their way into any unsealed edges over many cleaning cycles. I used a white silicone that matched my skirting boards and it’s completely invisible once applied neatly with a caulking tool.
Around the toilet base specifically, I applied a bead of silicone where the vinyl meets the porcelain, which seals that junction completely and also prevents any cleaning product residue from accumulating in the gap. Some people skip this step thinking the toilet’s weight holds it in place adequately, but even a perfectly seated toilet has a gap between its base and the floor at some point around its circumference, and sealing that gap is a small effort with meaningful long-term benefits for how the floor performs and how hygienic the room stays over years of use.
Maintaining Vinyl in a Toilet Room for the Long Term
Keeping vinyl flooring in a toilet room looking clean and fresh is genuinely one of the easiest maintenance routines of any flooring type I’ve dealt with in my home, and that ease of care has made me appreciate the material more as time has passed. The waterproof surface doesn’t absorb cleaning products, odors, or moisture, which means the floor stays hygienic and fresh-smelling in a way that more porous materials simply can’t match in this particular environment.
My regular routine is a quick wipe with a damp cloth or sponge mop every few days, using a diluted bathroom cleaner that’s safe for vinyl surfaces. The whole floor of a toilet room takes less than two minutes to clean thoroughly, which means I actually do it regularly rather than putting it off the way I might with a more demanding surface. That regularity is its own form of maintenance because frequent light cleaning prevents the buildup that eventually requires more aggressive treatment.
For deeper cleaning, I use a slightly stronger dilution of my bathroom cleaner and a soft scrubbing pad on the textured areas of my hex tiles where any residue accumulates in the slight surface detail. I avoid bleach-based products used full strength on the vinyl surface over time, as they can gradually affect the finish with repeated exposure, but a properly diluted bleach solution used occasionally for disinfection is fine. The floor still looks as fresh and sharp as it did on installation day, which in a high-use room like a toilet is exactly the kind of result that makes you feel confident a material choice was the right one.
Is vinyl flooring hygienic enough for a toilet room?
Yes, vinyl is one of the most hygienic flooring options available for a toilet room. The non-porous sealed surface doesn’t absorb bacteria, moisture, or odors the way more porous materials can. It cleans quickly and thoroughly with standard bathroom cleaners, and because there are no grout lines in sheet vinyl, there’s nowhere for bacteria to accumulate over time. I’ve found it far easier to keep genuinely clean than the tiled floor it replaced.
Will vinyl flooring hold up to frequent cleaning with bathroom products?
Quality luxury vinyl handles regular cleaning with standard bathroom cleaners very well. I clean mine every few days with a diluted bathroom cleaner and it shows no signs of wear or surface degradation after two years. The things to avoid are undiluted bleach used repeatedly over time and highly abrasive scrubbing pads, both of which can gradually affect the wear layer. Stick to vinyl-safe cleaners and a soft mop or cloth and the surface stays in excellent condition.

How do I choose the right vinyl thickness for a small toilet room?
For a toilet room, I’d recommend at least 4 to 6mm total thickness for a comfortable, solid feel underfoot. Sheet vinyl in the 2 to 3mm range can feel thin in a small space but works adequately over a smooth subfloor. Luxury vinyl tile or plank at 5mm or above feels more substantial and does a better job of hiding minor subfloor imperfections. A thicker product simply feels better quality when you’re standing on it, which matters even in a small room.
Can I install vinyl flooring in a toilet room myself?
Yes, and a toilet room is actually one of the more manageable DIY vinyl flooring projects because the area is small and the cuts, while requiring care around the toilet base, are limited in number. The toilet base cut is the trickiest part, and using a paper template before cutting the actual material makes it very achievable for a first-timer. Sheet vinyl requires a bit more precision overall, while click-lock LVT is more forgiving if individual pieces need adjusting or replacing.

How long will vinyl flooring last in a toilet room?
Quality luxury vinyl in a toilet room, which doesn’t face the heavy foot traffic of a hallway or the constant moisture of a wet room shower area, can easily last 15 to 20 years or more with normal use and maintenance. The wear layer rating matters most for longevity, with AC3 being appropriate for a low-traffic toilet room. Proper installation with sealed perimeter edges significantly extends the floor’s life by preventing moisture from getting underneath and causing problems from below.
What’s the best vinyl style for a very small toilet room?
Small format patterned tiles give the best visual result in a compact toilet room by creating a proper pattern repeat that reads as a deliberate design choice. Classic black and white hexagonal, geometric encaustic-inspired patterns, or small stone-effect squares all work beautifully. If you prefer something simpler, a large format stone or concrete effect tile in a light tone makes the room feel more open. The key is choosing something with enough visual interest to make the floor a feature rather than an afterthought.
Livelynine Peel and Stick Floor Tile Stickers Waterproof Vinyl Flooring White Marble Vinyl Tiles for Kitchen Bedroom White Laminate Flooring Bathroom

Related Posts: