My fascination with rustic wood floors began when I inherited my grandmother’s century-old farmhouse. The weathered pine planks creaked beneath my feet, each board telling stories of generations past. That experience opened my eyes to how raw, natural wood can transform any space into something authentic and inviting. Through years of renovation projects and countless visits to reclaimed lumber yards, I’ve discovered that rustic flooring isn’t just about aesthetics, it’s about creating spaces that feel genuinely lived-in and loved.
Reclaimed Barn Wood: Character in Every Plank
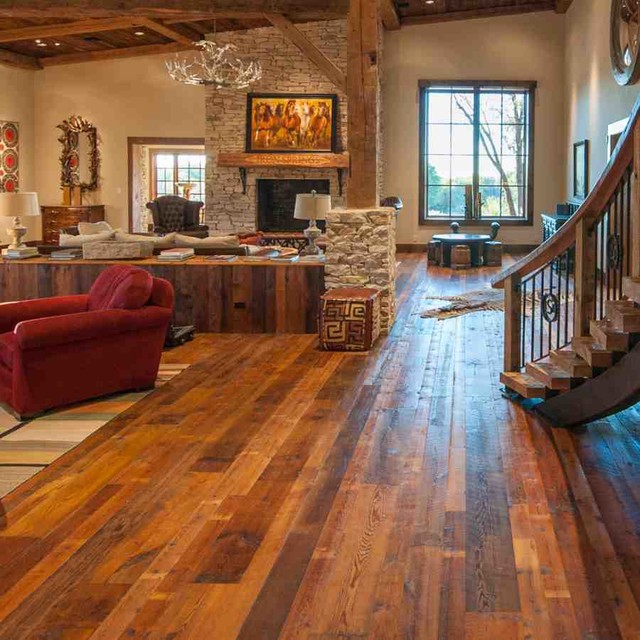
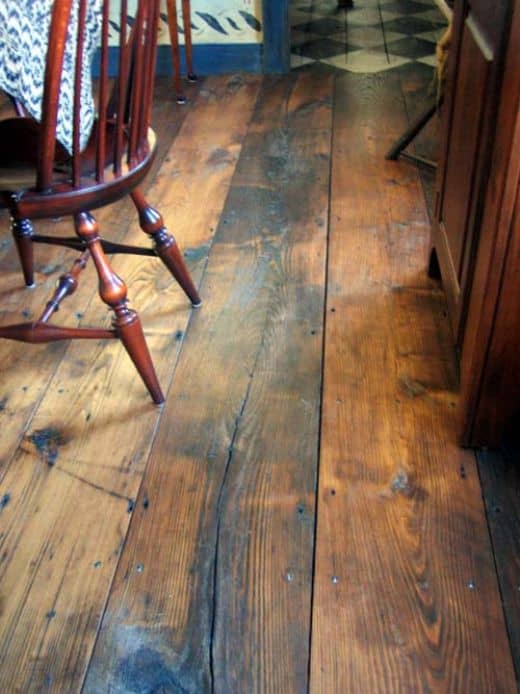
Walking through my first salvage warehouse, I was amazed by the history embedded in each piece of reclaimed barn wood. The deep grooves, nail holes, and weathered surfaces spoke of decades spent protecting livestock and storing harvests. I learned that these imperfections aren’t flaws, they’re the very essence of rustic charm. Each plank carries unique character marks that no manufactured product can replicate.
My experience installing reclaimed barn wood taught me patience and appreciation for craftsmanship. The varying widths and thicknesses require careful planning and skilled installation. I spent hours sorting through planks, selecting pieces that would complement each other while maintaining the random, organic appearance that makes barn wood so appealing. The extra effort pays off when guests run their hands across the textured surface, marveling at its authenticity.
The color variations in barn wood fascinate me most. I’ve found planks ranging from silvery gray to deep chocolate brown, sometimes within the same board. This natural patina develops over generations of exposure to weather and use. When I installed my barn wood floors, I mixed different tones deliberately, creating a patchwork effect that captures the randomness of rural life while maintaining visual cohesion throughout the space.
Hand-Scraped Textures: Creating Artisan Appeal
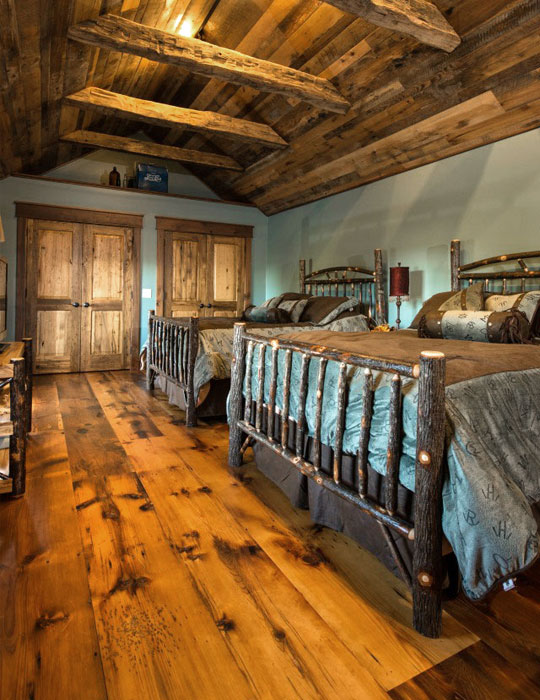
My introduction to hand-scraped wood floors happened during a visit to a colonial restoration project. The craftsman demonstrated how traditional scraping techniques create subtle undulations that catch light differently than machine-planed surfaces. I watched him work methodically, each stroke of his tool adding character and depth. This labor-intensive process results in floors that feel handmade and personal.
The tactile quality of hand-scraped floors became apparent when I installed them in my own home. Walking barefoot across the surface, I could feel the gentle rises and dips that make each step slightly different. This texture variation creates visual interest that flat surfaces simply cannot match. I’ve noticed how shadows play across the scraped patterns, changing throughout the day as light angles shift through windows.
Maintenance of hand-scraped floors surprised me with its simplicity. The intentional imperfections hide minor scratches and wear patterns that would be obvious on smooth surfaces. I’ve found that small dings and scuffs blend seamlessly into the existing texture, making these floors incredibly forgiving for busy households. This practical advantage, combined with their artistic appeal, makes hand-scraped floors ideal for families seeking both beauty and functionality.

Wide Plank Installations: Embracing Bold Proportions
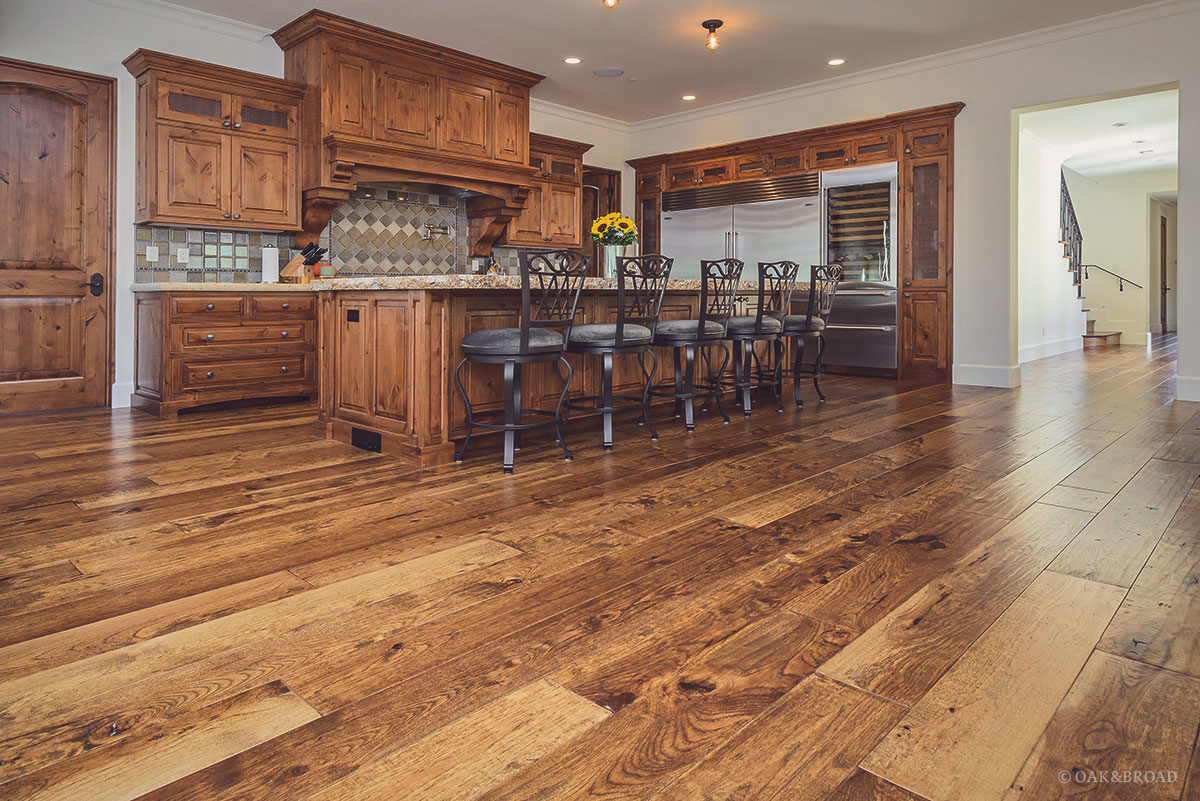
My first wide plank installation completely transformed my perspective on floor proportions. The 8-inch planks I chose made my modest living room appear significantly larger than it was. I discovered that fewer seam lines create a cleaner, more expansive visual flow. The generous width showcases the natural grain patterns more dramatically, turning each plank into a statement piece rather than just functional flooring.
The installation process for wide planks requires extra attention to subfloor preparation. I learned that any imperfections become magnified across the broader surface area. My contractor emphasized the importance of proper acclimation, allowing the wood to adjust to room conditions before installation. This patience prevents the cupping and warping issues that can plague wide plank floors when rushed through installation.
Selecting wide planks taught me about wood movement and stability. I chose quarter-sawn oak for its superior dimensional stability, reducing the expansion and contraction that can cause gaps between boards. The investment in quality materials paid off when my floors maintained their tight fit through seasonal changes. I’ve watched friends struggle with inferior wide planks that develop unsightly gaps, reinforcing the importance of selecting appropriate species and grades for this application.
Distressed and Weathered Finishes: Time-Worn Beauty
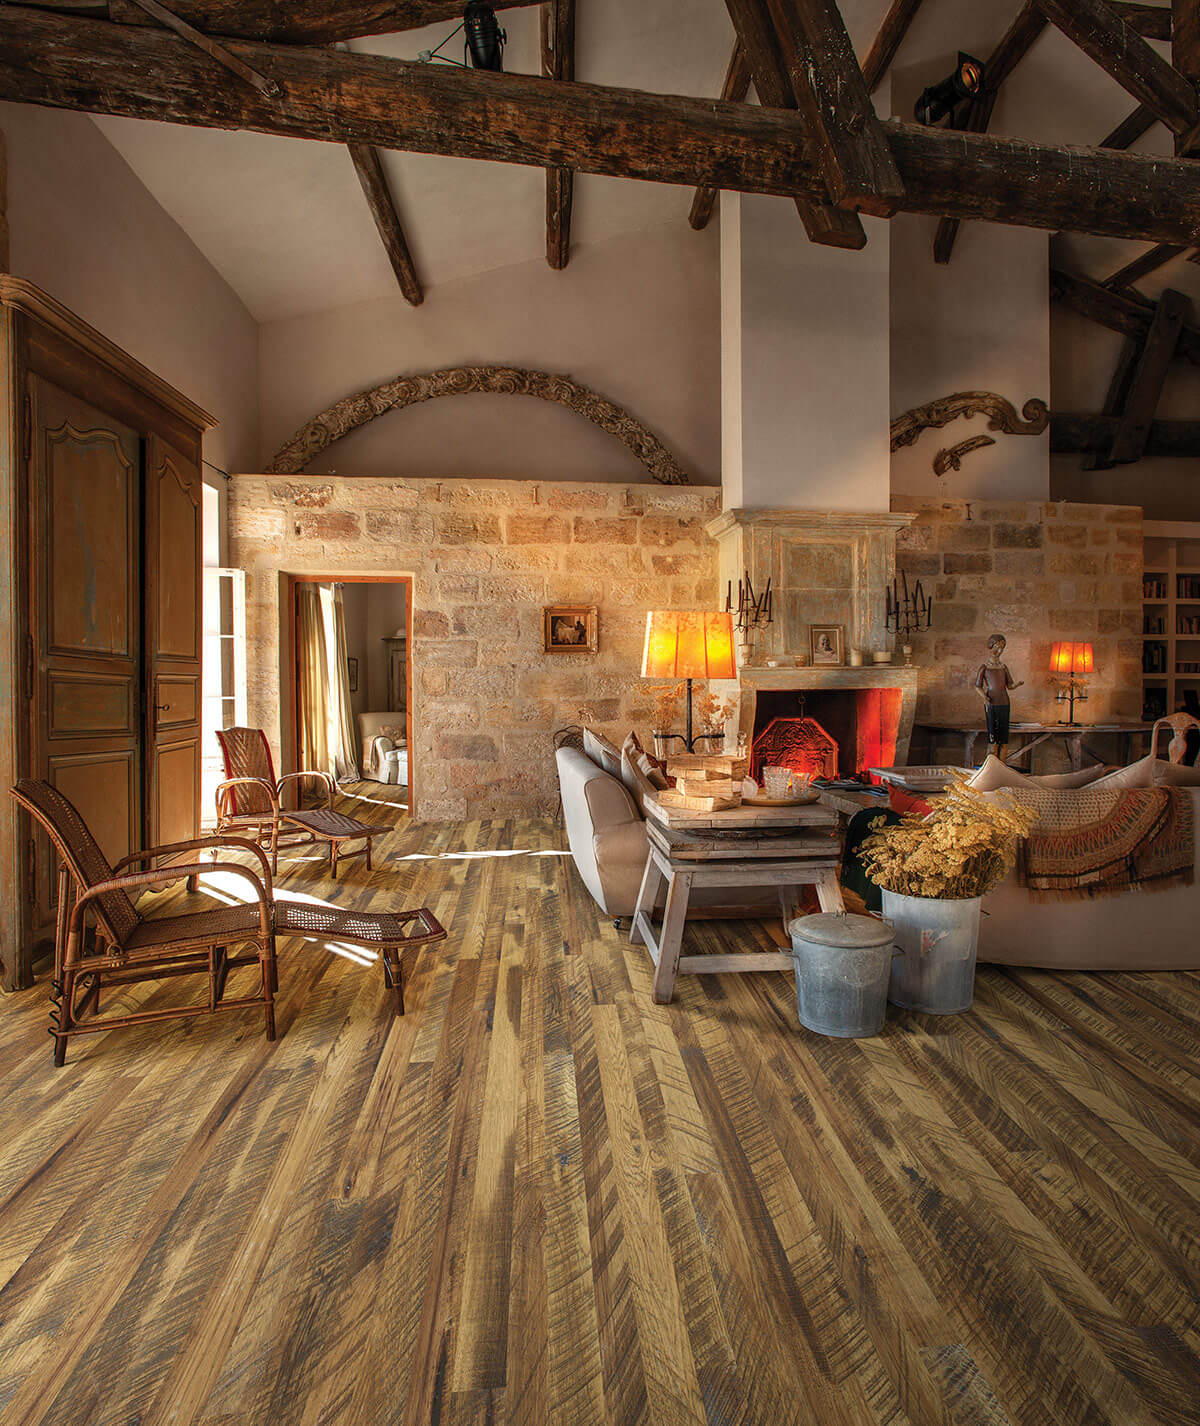
My fascination with distressed wood floors began when I visited a designer’s showcase home. The floors looked like they had been weathered by decades of use, yet I knew they were newly installed. The artificial aging process intrigued me, and I began researching techniques for creating authentic-looking wear patterns. This exploration led me to appreciate the artistry involved in replicating natural aging processes.
I experimented with various distressing techniques in my workshop, using chains, hammers, and even my old work boots to create realistic wear patterns. The key, I discovered, is restraint and randomness. Overdoing the distressing creates an artificial appearance that lacks the subtle beauty of genuinely aged wood. I learned to focus on high-traffic areas where natural wear would occur, leaving other sections relatively pristine.
The finishing process for distressed floors requires special consideration. I found that traditional polyurethane finishes can fill in the carefully created texture, negating the distressing work. Instead, I experimented with penetrating oils and waxes that preserve the tactile quality while providing protection. These finishes enhance the weathered appearance while allowing the wood to continue aging naturally over time.
Combining Species: Creating Visual Interest
My boldest flooring project involved mixing three different wood species in a single installation. I combined oak, hickory, and walnut planks in a random pattern that created incredible visual complexity. The varying grain patterns, colors, and hardness levels combined to produce a floor that looked like it had been assembled from salvaged materials over many years. This approach requires careful planning to maintain balance while avoiding repetitive patterns.
The color variations between species became both a challenge and an opportunity. I spent considerable time arranging planks to distribute the different tones evenly throughout the space. The lighter oak planks brightened the room, while the darker walnut pieces added depth and sophistication. The hickory provided a middle ground that tied the palette together, creating cohesion within the deliberate chaos.
Installation of mixed-species floors taught me about matching hardness levels and expansion rates. I learned to group similar species in sections to minimize differential movement that could cause uneven wear or separation. My flooring contractor shared techniques for transitioning between species seamlessly, using strategic placement to make the changes appear natural rather than forced. The result exceeded my expectations, creating a truly unique floor that guests consistently admire.
![]()
Natural Edge and Live Edge Applications
My encounter with live edge flooring happened at a custom millwork shop where I saw planks with their natural bark edges intact. The organic curves and irregular widths created a floor that felt more like a forest floor than a manufactured product. I was immediately drawn to this concept, recognizing its potential to bring nature directly into living spaces. The live edge approach celebrates the tree’s natural growth patterns rather than hiding them.
Working with live-edge planks requires a different mindset than traditional flooring installation. I learned to embrace the irregular edges and varying widths as design features rather than problems to solve. My installer developed creative solutions for transitioning between live-edge sections and standard walls, using custom trim pieces that followed the natural curves. This attention to detail maintained the organic aesthetic throughout the installation.
The maintenance considerations for live-edge floors surprised me initially. The bark edges require special care to prevent lifting or damage from foot traffic. I discovered that proper sealing and occasional maintenance keep these natural edges intact and beautiful. The extra effort is worthwhile when I watch guests trace the natural curves with their fingers, marveling at the connection between the living tree and the finished floor beneath their feet.

How do I properly maintain rustic wood floors without losing their authentic character?
My approach to maintaining rustic floors focuses on preserving their natural character while providing necessary protection. I use penetrating oils rather than surface finishes, which allows the wood to breathe and age naturally. Regular cleaning involves dry mopping and occasional damp cleaning with pH-neutral products. I avoid aggressive cleaning methods that might remove the patina or fill in distressed textures. For deeper cleaning, I use specialized wood cleaners that respect the finish. Minor scratches and dings enhance the rustic appearance, so I resist the urge to repair every imperfection.
What’s the best way to incorporate rustic wood floors into a modern home design?
I’ve found that rustic wood floors complement modern design beautifully by providing warmth and texture that balances clean lines and minimal furnishings. The key is choosing the right species and finish to bridge traditional and contemporary elements. I often select wide planks with subtle distressing rather than heavily weathered options. Pairing rustic floors with sleek furniture and modern fixtures creates an interesting contrast that feels both timeless and current. The natural variations in rustic wood prevent spaces from feeling too sterile or cold.
How much should I expect to spend on rustic wood flooring compared to traditional hardwood?
My experience with rustic flooring costs reveals significant variation depending on the specific type and source. Reclaimed barn wood typically costs 30-50% more than new hardwood due to sourcing and preparation requirements. Hand-scraped floors add labor costs that increase prices by 20-40%. However, wide plank installations can be more economical per square foot despite higher material costs. Distressed finishes applied to new wood fall in the middle range. I’ve found that the longevity and unique character of rustic floors justify the premium pricing for most homeowners.
Can rustic wood floors be installed over existing flooring, and what preparation is required?
I’ve successfully installed rustic floors over existing surfaces in several projects, though preparation requirements vary significantly. Over concrete, I ensure proper moisture barriers and subfloor preparation to prevent issues. Installing over existing hardwood requires careful height considerations and may require door adjustments. Carpet removal is typically necessary, though I’ve seen installations over low-profile commercial carpet. The key is ensuring a stable, level surface that won’t telegraph imperfections through the new flooring. Professional assessment helps determine feasibility and required preparation steps.
How do I select the right species and grade for my rustic flooring project?
My species selection process considers both aesthetic goals and practical requirements. For high-traffic areas, I recommend harder species like oak or hickory that withstand wear while maintaining character. Pine and fir work well for lower-traffic spaces where their softer nature adds to the rustic charm. I examine grade options carefully, choosing lower grades for more character marks and higher grades for cleaner appearances. The room’s lighting conditions influence my choices, with lighter species brightening dark spaces and darker woods adding intimacy to well-lit rooms.
What are the main challenges when installing rustic wood floors, and how can I avoid common problems?
Installation challenges I’ve encountered include dealing with irregular dimensions, varying moisture content, and complex fitting requirements. Proper acclimation prevents most movement issues, so I always allow adequate time for wood to adjust to room conditions. Working with experienced installers familiar with rustic materials saves time and prevents costly mistakes. I’ve learned to order 10-15% extra material to account for waste from irregular pieces. Planning the layout carefully helps distribute character marks evenly and avoids clustering similar pieces together, which can look artificial.

What Makes for a Rustic Wood Floor? – Wide Plank Floor Supply

35 Great Rustic Wood Floors ideas wood floors, house design

Amazing Ideas of Rustic Wood Flooring for Extravagant Look
Rustic Wood Floors ideas wood floors, rustic wood floors

Related Posts: