A new type that is gaining traction in the industry is actually epoxy flaked floor. Even if this gloss is typical to any kind of epoxy brand, a lot of companies accomplish this appearance by setting an extra topcoat over the standard epoxy blend. Applicators should stick to manufacturer’s suggestions to maintain consistency in structure and viscosity.
Images about 3d Epoxy Floors Diy
3d Epoxy Floors Diy

If you choose an epoxy floor coating for you warehouse, you won’t have to worry about floor scuffing, scraping or perhaps skidmarks showing up. Generally, these anti-slip agents are chips which are available in colors that are a variety of and are actually sprinkled along with poured epoxy (prior to it curing). Hardwood floors or perhaps carpet floors often get stained as well as the style of the room is actually marred.
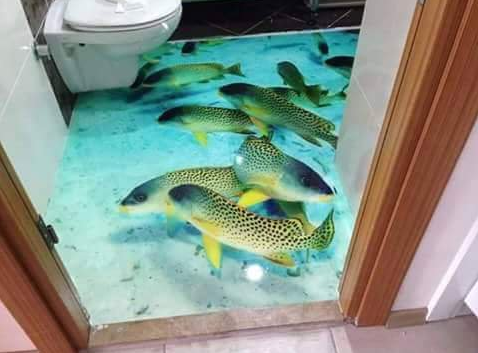
3D Epoxy Floor and walls Bathroom – how to make an 3D Floor, Step by Step Guide – Bathroom Design
The floor surface is very easy to keep and you are able to wipe it clean like sparkling countertops. You’re encouraged to examine the various shades at the disposal of theirs. Are you fed up with that boring older grey concrete in your workshop, garage or maybe rumpus room? Cover it up and make it look clear with one thing that’s sturdy adequate to withstand the continuous beating which floors take.
Epoxy 3D Floor u2013 Everything You Need to Know – Advance Industrial

3D Epoxy Flooring – How to Make 3D Floor Art With Epoxy Resin

Epoxy 3D Floor u2013 Everything You Need to Know – Advance Industrial

Epoxy 3D Floor u2013 Everything You Need to Know – Advance Industrial

3d Epoxy Flooring for Bedrooms, Kitchens, and Living Areas (Costs)
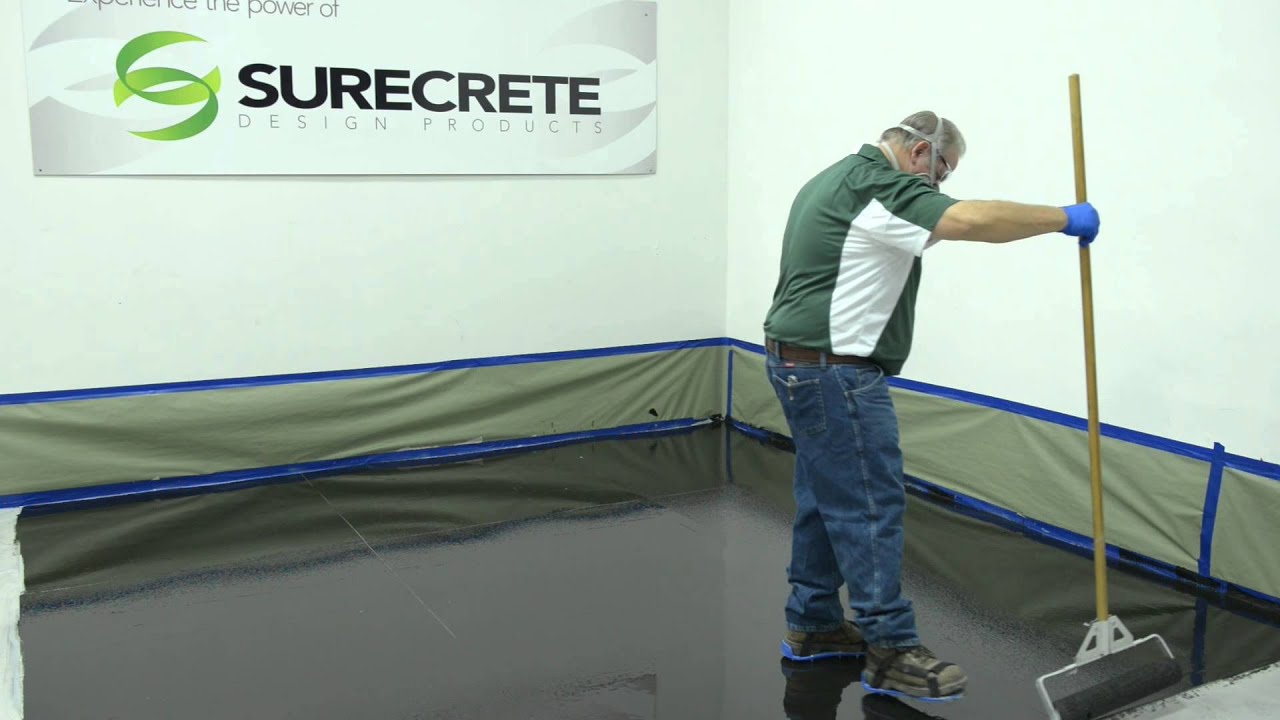
How to Make a 3D Metallic Floor – System by Surecrete
3D Epoxy Flooring – How to Make 3D Floor Art With Epoxy Resin
Step by step to install 3d epoxy flooring and how to make 3d floor

Self leveling epoxy resin floor coating and 3D flooring
Commercial and Residential Floors Trends with DIY Epoxy Floor

3D Epoxy Flooring u2013 How to Make 3D Floor Art
China 3D Epoxy Flooring Resin 3D Floor DIY Home Office Floor

Related Posts:
- Epoxy Flooring Advantages Disadvantages
- Metallic Epoxy Bathroom Floor
- Sherwin Williams Epoxy Floor
- High Gloss Epoxy Flooring
- Epoxy Flooring Interior Design
- Metallic Epoxy Floor Coating
- Epoxy Floor Coating
- Epoxy Kitchen Floor
- Epoxy Basement Floor
- Epoxy Resin Garage Floor
Introduction
Do you want to transform your home’s flooring with a unique, eye-catching surface? If so, 3D epoxy floors are the perfect solution. With this DIY project, you can create a stunning, multi-dimensional finish that will turn your dull, boring floor into an art piece. Read on to learn more about 3D epoxy floors and how you can create them in the comfort of your own home.
What are 3D Epoxy Floors?
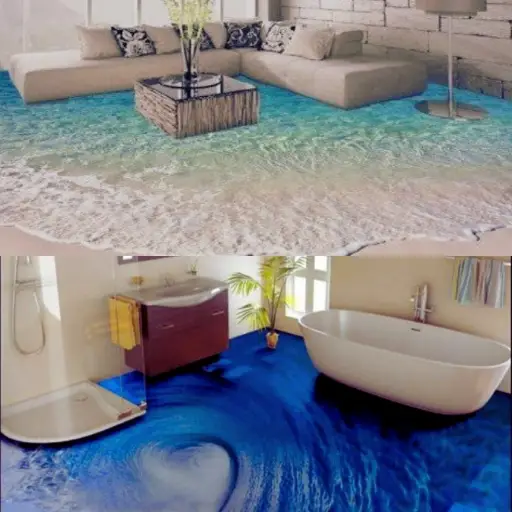
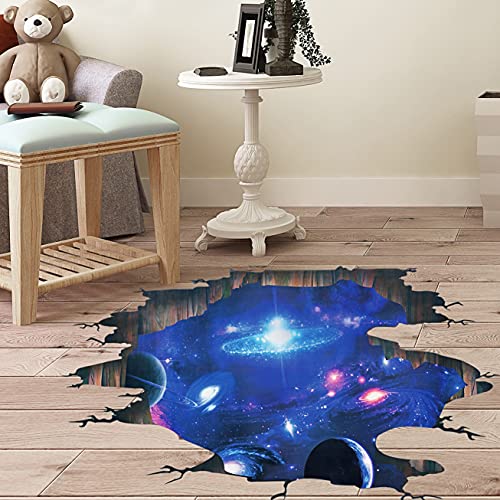
3D epoxy floors are a type of flooring that uses a combination of colored epoxy and a three-dimensional design to create a unique, eye-catching finish. The result is a visually stunning floor that will make any room stand out.
Advantages of 3D Epoxy Floors
3D epoxy floors have many advantages over traditional types of flooring. They are extremely durable and resistant to wear and tear. They are also waterproof and easy to clean, which makes them ideal for areas that may be exposed to moisture or spills. Additionally, 3D epoxy floors are relatively inexpensive compared to other types of flooring.
DIY Installation
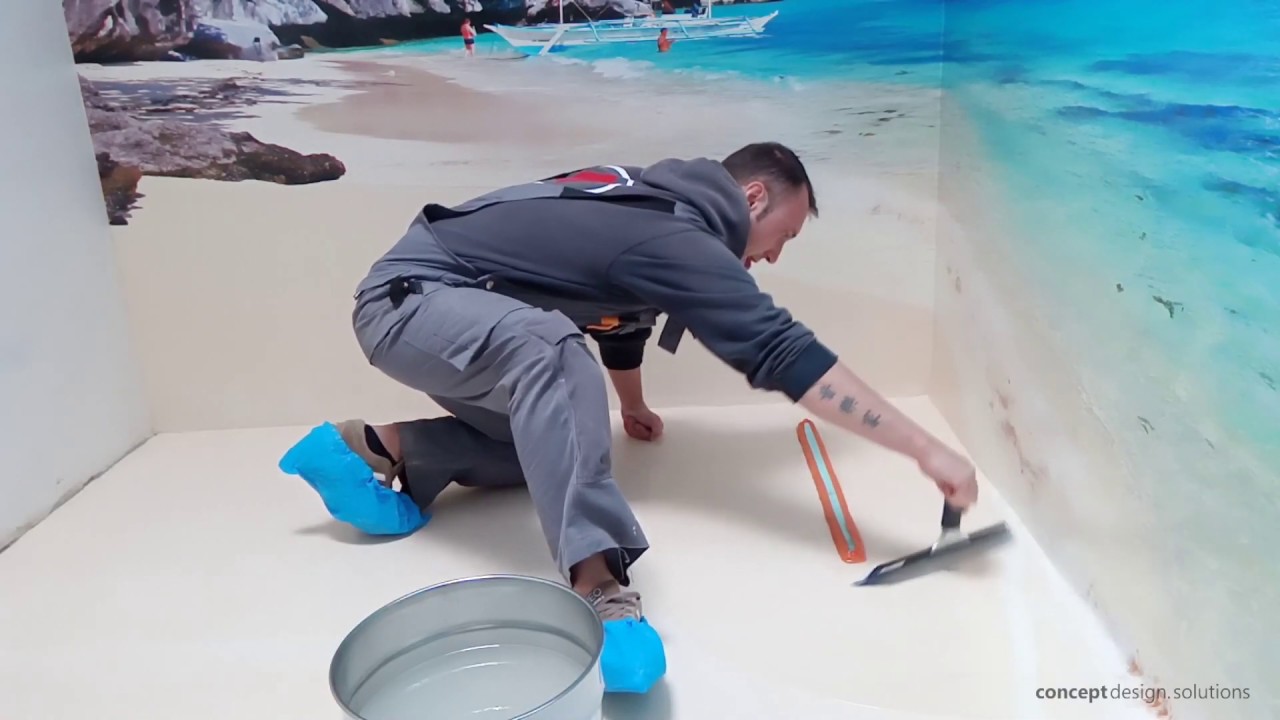
Installing 3D epoxy floors is a project that most homeowners can do on their own with just a few basic tools and supplies. The process is relatively easy and straightforward, but it does require some time and patience. Here is a brief overview of the steps involved in installing 3D epoxy floors:
1. Prep Work: Before beginning the installation process, you will need to make sure the surface is properly prepared. This includes cleaning the floor to remove any dirt or debris and filling any cracks or holes with appropriate materials.
2. Base Coat: After the surface is prepared, the next step is to apply a base coat of colored epoxy. This coat should be thick enough to cover any flaws in the surface but thin enough to allow for some flexibility when adding the three-dimensional designs later on.
3. Design: Once the base coat has been applied, you can start adding the three-dimensional designs. This can be done with special tools such as trowels or sponges, or by freehand with a brush or roller. Be sure to take your time and ensure that all designs are even and consistent throughout.
4. Top Coat: After all of the designs have been added, it’s time to apply a top coat of clear epoxy. This coat will provide additional protection against wear and tear as well as give the floor a glossy finish.
5. Finishing Touches: Finally, you can add any additional finishing touches such as border tiles or grout lines for a truly unique look.
Frequently Asked Questions
Q: What supplies do I need for installing 3D epoxy floors?
A: You will need a variety of supplies for this project including epoxy resin, primer, trowels, sponges, brushes, rollers, protective gear (gloves and goggles), mixing containers, stirring sticks, squeegees, drop cloths/paper towels, and tape measure/level.
Q: How long does it take to install 3D epoxy floors?
A: The amount of time required to complete this project will depend on the size of your area as well as your skill level. However, most DIYers can complete the entire installation process in two or three days.
Q: Are 3D epoxy floors difficult to maintain?
A: Not at all! In fact, these floors are incredibly easy to maintain since they are waterproof and resistant to wear and tear. You can simply use an all-purpose cleaner or mild soap/water solution to keep them looking shiny and new!
Q: Can I use 3D epoxy floors in my bathroom?
A: Absolutely! As mentioned earlier, these floors are waterproof so they are perfect for bathrooms (or any other area that may be exposed to moisture). Just make sure you use an appropriate sealant so water doesn’t seep through any grout lines or seams between tiles!
Conclusion
Installing 3D epoxy floors is an