When my contractor first suggested epoxy flooring for my kitchen renovation eighteen months ago, I’ll admit I was hesitant. The idea conjured images of sterile laboratory floors or industrial warehouses, nothing like the warm, inviting kitchen I envisioned for my family. However, after researching the benefits and seeing some stunning residential installations, I decided to leap.
Now, after living with my epoxy kitchen floor for over a year, I can honestly say it’s been one of the best decisions I made during our renovation. The durability, easy maintenance, and surprisingly beautiful appearance have transformed not just how my kitchen looks, but how our entire family uses and enjoys this central space in our home.
Understanding Different Epoxy Systems and Applications
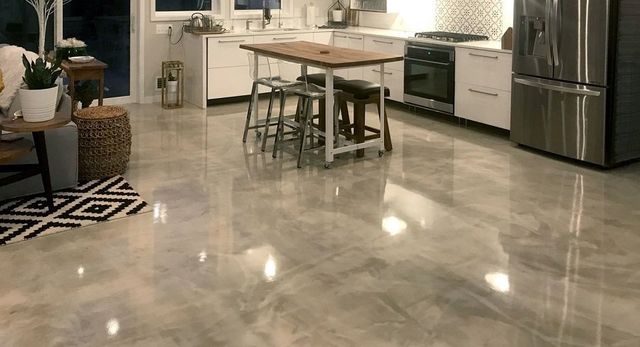
Learning about the various epoxy flooring systems available was crucial before making my final decision. I discovered that not all epoxy floors are created equal, and the type of system significantly impacts both appearance and performance. Standard epoxy coatings are thinner applications that work well over existing floors in good condition, while self-leveling epoxy systems create completely smooth, seamless surfaces perfect for kitchens with uneven or damaged concrete substrates. I chose a self-leveling system because my original concrete floor had several cracks and imperfections that needed addressing.
The application process varies dramatically between different epoxy systems, affecting both cost and timeline for installation. Water-based epoxy systems cure faster and have lower odor levels, making them more suitable for occupied homes during installation. However, I opted for a 100% solids epoxy system despite the longer cure time because it provides superior durability and chemical resistance, crucial factors for a busy family kitchen. The installation required us to stay elsewhere for three days, but the long-term performance benefits justified the temporary inconvenience.
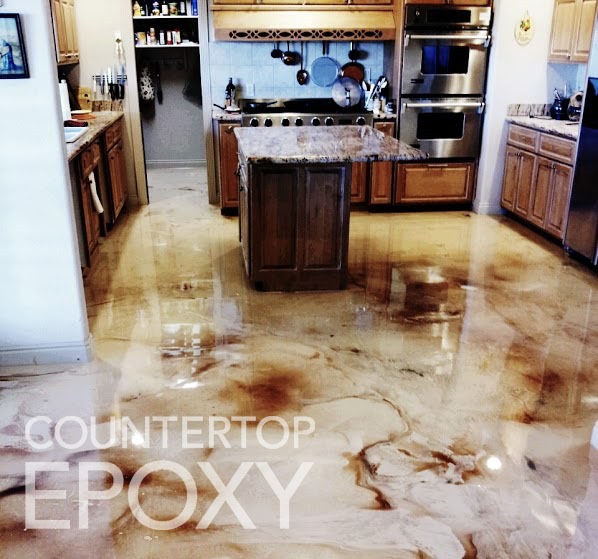
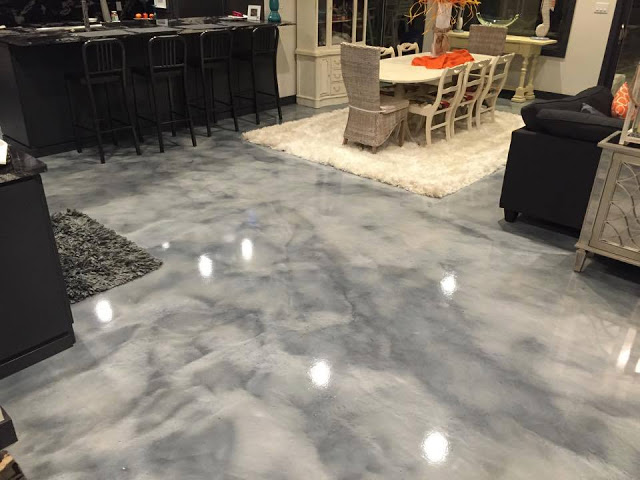
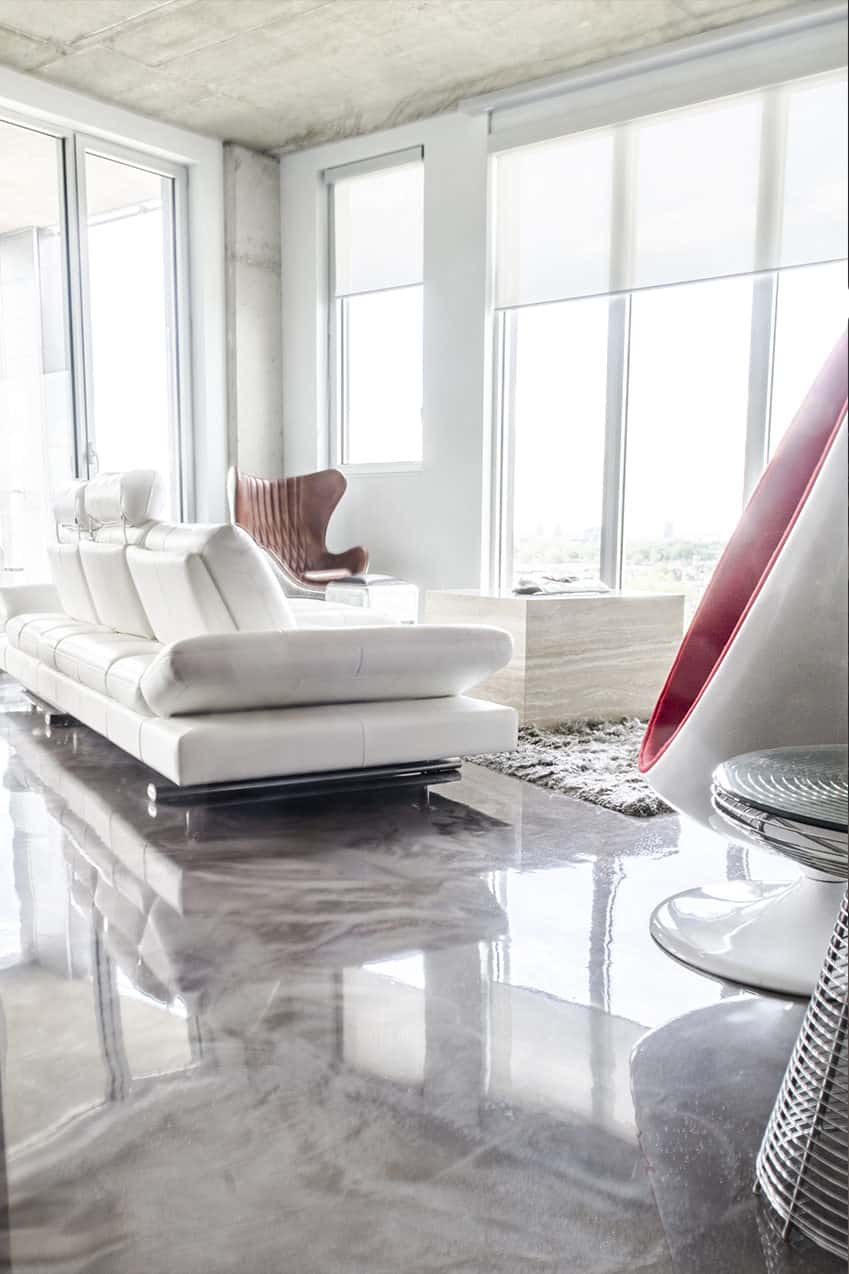
Decorative options within epoxy systems opened up design possibilities I hadn’t considered initially. Beyond solid colors, I learned about metallic epoxy systems that create stunning, swirled patterns resembling natural stone or abstract art.
Flake systems incorporate colored vinyl chips for texture and visual interest, while quartz broadcast systems provide enhanced slip resistance and durability. After seeing samples and installations, I chose a subtle metallic system in warm bronze tones that complement my oak cabinets beautifully while providing the seamless, modern look I desired.

Surface Preparation: The Foundation of Success
The surface preparation phase proved to be the most critical aspect of my epoxy kitchen floor installation, a lesson I learned through extensive research and my contractor’s emphasis on proper preparation work. My existing concrete floor required diamond grinding to remove old sealers, adhesive residue, and create the proper profile for epoxy adhesion. This mechanical preparation also revealed and addressed several hairline cracks that could have telegraphed through the new epoxy surface if left untreated. The grinding process was messy and time-consuming, but essential for long-term success.
Moisture testing became another crucial step I hadn’t anticipated in the preparation process. My contractor performed calcium chloride tests to measure moisture vapor transmission from the concrete slab, as excessive moisture can cause epoxy floors to fail by creating bubbles or delamination. We discovered slightly elevated moisture levels in one corner near the sink area, requiring additional moisture mitigation primer before the main epoxy application. This extra step added cost and time, but prevented potential failure that would have been much more expensive to remedy later.
The final preparation steps included thorough cleaning with industrial vacuums and tack cloths to remove all dust and debris from the grinding process. Even tiny particles can create imperfections in the final epoxy surface, so meticulous cleaning was essential. My contractor also masked all adjacent surfaces, cabinets, and appliances with plastic and tape to protect them during the epoxy application process. The attention to detail during preparation directly contributed to the flawless final result that continues to impress visitors to our kitchen.
Color Selection and Design Customization
Choosing the perfect color and finish for my epoxy kitchen floor opened up creative possibilities I never imagined when I first considered this flooring option. Unlike traditional flooring materials with limited color choices, epoxy systems can be customized to virtually any color imaginable. I worked with color samples and even had custom test patches created to ensure the final result would complement my existing kitchen design. The ability to match or coordinate perfectly with my backsplash and cabinet colors was a huge advantage over standard flooring options.
The metallic epoxy system I ultimately selected created depth and movement that changes throughout the day as lighting conditions shift. Morning sunlight brings out warm copper tones, while evening artificial lighting emphasizes deeper bronze and gold highlights. This dynamic quality makes the floor a living element of the kitchen design rather than just a static surface. The swirled patterns are unique, meaning no other kitchen will have the same floor design, which adds to the custom, high-end feel of the space.
I also considered decorative elements like embedded objects, logos, or borders during the design phase. Some homeowners incorporate family crests, favorite quotes, or artistic elements directly into their epoxy floors. While I chose to keep my design relatively simple, the option for unlimited customization was appealing and could be perfect for homeowners wanting to create truly unique kitchen spaces. The design flexibility of epoxy systems far exceeds traditional flooring materials and allows for personal expression that reflects individual style and preferences.
Installation Process and Timeline
The installation of my epoxy kitchen floor proved to be a multi-day process that required careful planning and temporary relocation of our family. Day one involved the surface preparation I mentioned earlier, including grinding, crack repair, and thorough cleaning. Day two began with primer application followed by the base coat of epoxy, which needed to cure for several hours before the decorative metallic layer could be applied. The timing was critical because each layer had specific windows for optimal adhesion to the previous coat.
The most fascinating part of the installation was watching the metallic epoxy application process. My installer used special tools and techniques to manipulate the metallic pigments, creating the swirled patterns and depth effects that make the floor so striking. This artistic aspect of the installation requires genuine skill and experience, reinforcing my decision to hire a specialized epoxy contractor rather than attempting a DIY installation. The installer worked sections at a time, blending edges seamlessly to create the unified appearance across the entire kitchen floor area.
The final day involved applying protective topcoats that provide durability, stain resistance, and the desired sheen level. I chose a satin finish that provides some sheen without being overly glossy or slippery. The topcoats required 24 hours to cure sufficiently for light foot traffic, with full cure taking up to a week. During this curing period, I had to be careful about what I placed on the floor and avoid heavy furniture or appliance movement. The patience required during curing was challenging but essential for achieving the full performance potential of the epoxy system.
Daily Living with an Epoxy Kitchen Floor
Living with an epoxy kitchen floor for over a year has completely changed my perspective on kitchen maintenance and functionality. The seamless surface means there are no grout lines, seams, or joints where food particles, grease, and spills can hide and accumulate. Daily cleaning consists of sweeping or vacuuming, followed by damp mopping with any standard floor cleaner. Spills wipe up immediately without staining or penetrating the surface, which has been particularly helpful with my teenage kids who aren’t always careful about cleaning up after themselves.
The durability has exceeded every expectation I had when considering different flooring options. Despite dropping pots, pans, and even a ceramic mixing bowl, the epoxy surface shows no chips, cracks, or damage. Heavy appliances like our refrigerator and dishwasher sit directly on the epoxy without causing indentations or marks. The chemical resistance means I don’t worry about acidic spills from tomatoes, citrus, or wine causing permanent damage. This peace of mind has made cooking and entertaining much more relaxed and enjoyable for our entire family.
Comfort underfoot was a concern I had before installation, but the reality has been quite positive. The slight cushioning effect of the epoxy system reduces fatigue during long cooking sessions compared to hard tile or stone surfaces. The smooth surface makes standing comfortable even when barefoot, and the temperature remains moderate year-round without the shocking coldness of tile floors. Adding area rugs in key prep areas provides additional comfort while showcasing the beautiful epoxy surface underneath during entertaining and special occasions.
Maintenance, Repairs, and Long-Term Performance
The maintenance requirements for my epoxy kitchen floor have been refreshingly simple compared to other flooring materials I’ve owned. Weekly deep cleaning involves mopping with warm water and a mild detergent, which removes all traces of cooking oils, food residue, and everyday soil. The non-porous surface means bacteria and odors can’t penetrate or accumulate, making the kitchen more hygienic than porous materials like natural stone or unfinished wood. I no longer need specialized cleaners, sealers, or professional maintenance services that were necessary with my previous flooring.
Long-term performance has remained consistently excellent with minimal signs of wear despite heavy daily use from our family of four. High-traffic areas near the sink, stove, and refrigerator look identical to less-used areas, with no visible wear patterns, scratching, or dulling of the surface. The topcoat protection has maintained its integrity and appearance. However, my contractor mentioned that refresher topcoats can be applied every 5-7 years if desired to maintain a like-new appearance. However, this may not be necessary depending on use patterns and aesthetic preferences.
The few minor maintenance issues I’ve encountered have been easily addressed without professional intervention. A small scratch from accidentally dropping a sharp knife was barely visible and didn’t penetrate through the topcoat layer. Occasional scuff marks from rubber-soled shoes disappear with regular cleaning or gentle buffing with a soft cloth. The forgiving nature of epoxy floors means minor imperfections blend naturally with the overall surface appearance rather than standing out as obvious damage requiring immediate repair or replacement, like other flooring materials might.
Is an epoxy kitchen floor slippery, especially when wet?
I was initially concerned about slip resistance, but the textured finish we chose provides excellent traction even when slightly wet. Standard epoxy can be slippery, so we added a subtle texture to the topcoat that maintains the smooth appearance while improving safety. Spills should still be cleaned promptly for safety, but normal cooking moisture doesn’t create slipping hazards. The surface feels secure underfoot during daily activities and cooking tasks.
How does the cost of epoxy flooring compare to other kitchen flooring options?
My epoxy installation cost about $12 per square foot, including preparation, materials, and professional installation. This was comparable to high-end tile and significantly less than natural stone or premium hardwood. When considering long-term cost,s including maintenance, refinishing, and potential replacement, epoxy offers excellent value. The durability and low maintenance requirements make it cost-effective over time compared to materials requiring regular upkeep.

Can epoxy floors be repaired if damaged, or do they require complete replacement?
Minor damage can often be spot-repaired by professionals, though matching the exact color and pattern can be challenging with decorative systems. Major damage might require section replacement or complete refinishing. However, in over a year of heavy use, my floor shows virtually no damage despite normal kitchen activities. The durability means repairs are rarely necessary compared to other flooring materials that might chip, crack, or wear more readily.
How long does an epoxy kitchen floor typically last before needing replacement?
Quality epoxy floors can last 15-20 years or more with proper installation and reasonable care. The longevity depends on the specific system used, installation quality, and usage patterns. Refresher topcoats every 5-10 years can extend life and maintain appearance. Given the durability I’ve observed, I expect my floor to last decades, making it an excellent long-term investment compared to flooring materials requiring more frequent replacement.

Are there any health concerns with epoxy flooring in kitchens?
Once fully cured, quality epoxy floors are food-safe and emit no harmful chemicals. During installation, proper ventilation is essential due to chemical odors, but these dissipate completely during curing. The non-porous surface is actually more hygienic than many traditional materials because bacteria cannot penetrate or accumulate. I researched extensively and found no health concerns with properly installed residential epoxy systems for kitchen use.
Can you install epoxy flooring over existing kitchen tiles or other surfaces?
Epoxy can be installed over many existing surfaces, including tile, concrete, and some types of existing flooring, but proper preparation is crucial. Tile surfaces need thorough cleaning and may require mechanical preparation for proper adhesion. Some surfaces may need removal or special primers. My contractor evaluated my existing concrete floor and determined it was suitable with proper preparation. Professional assessment is essential for determining compatibility and preparation requirements.

Residential Kitchen Floor Coating Kitchen Epoxy Floors
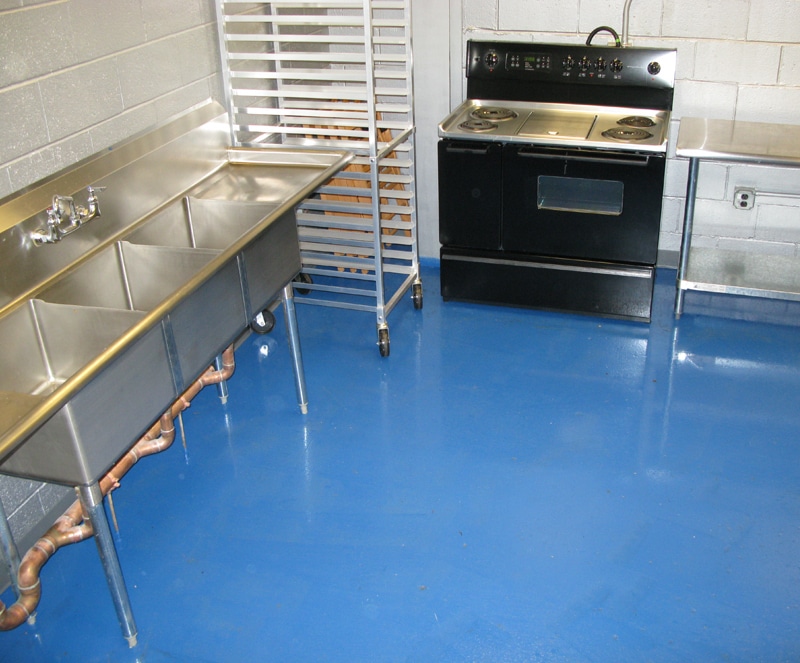
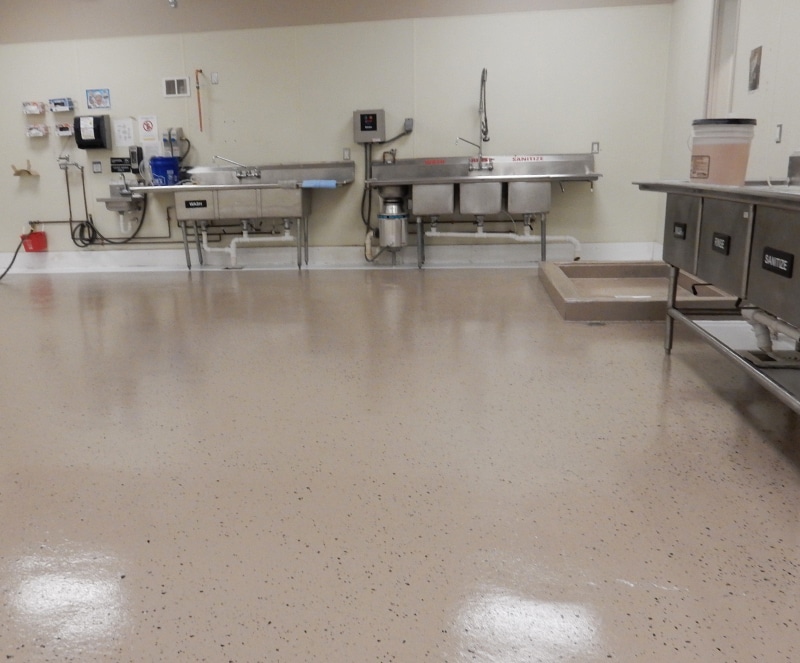
Food Industry Epoxy Floor Coatings
Related Posts: