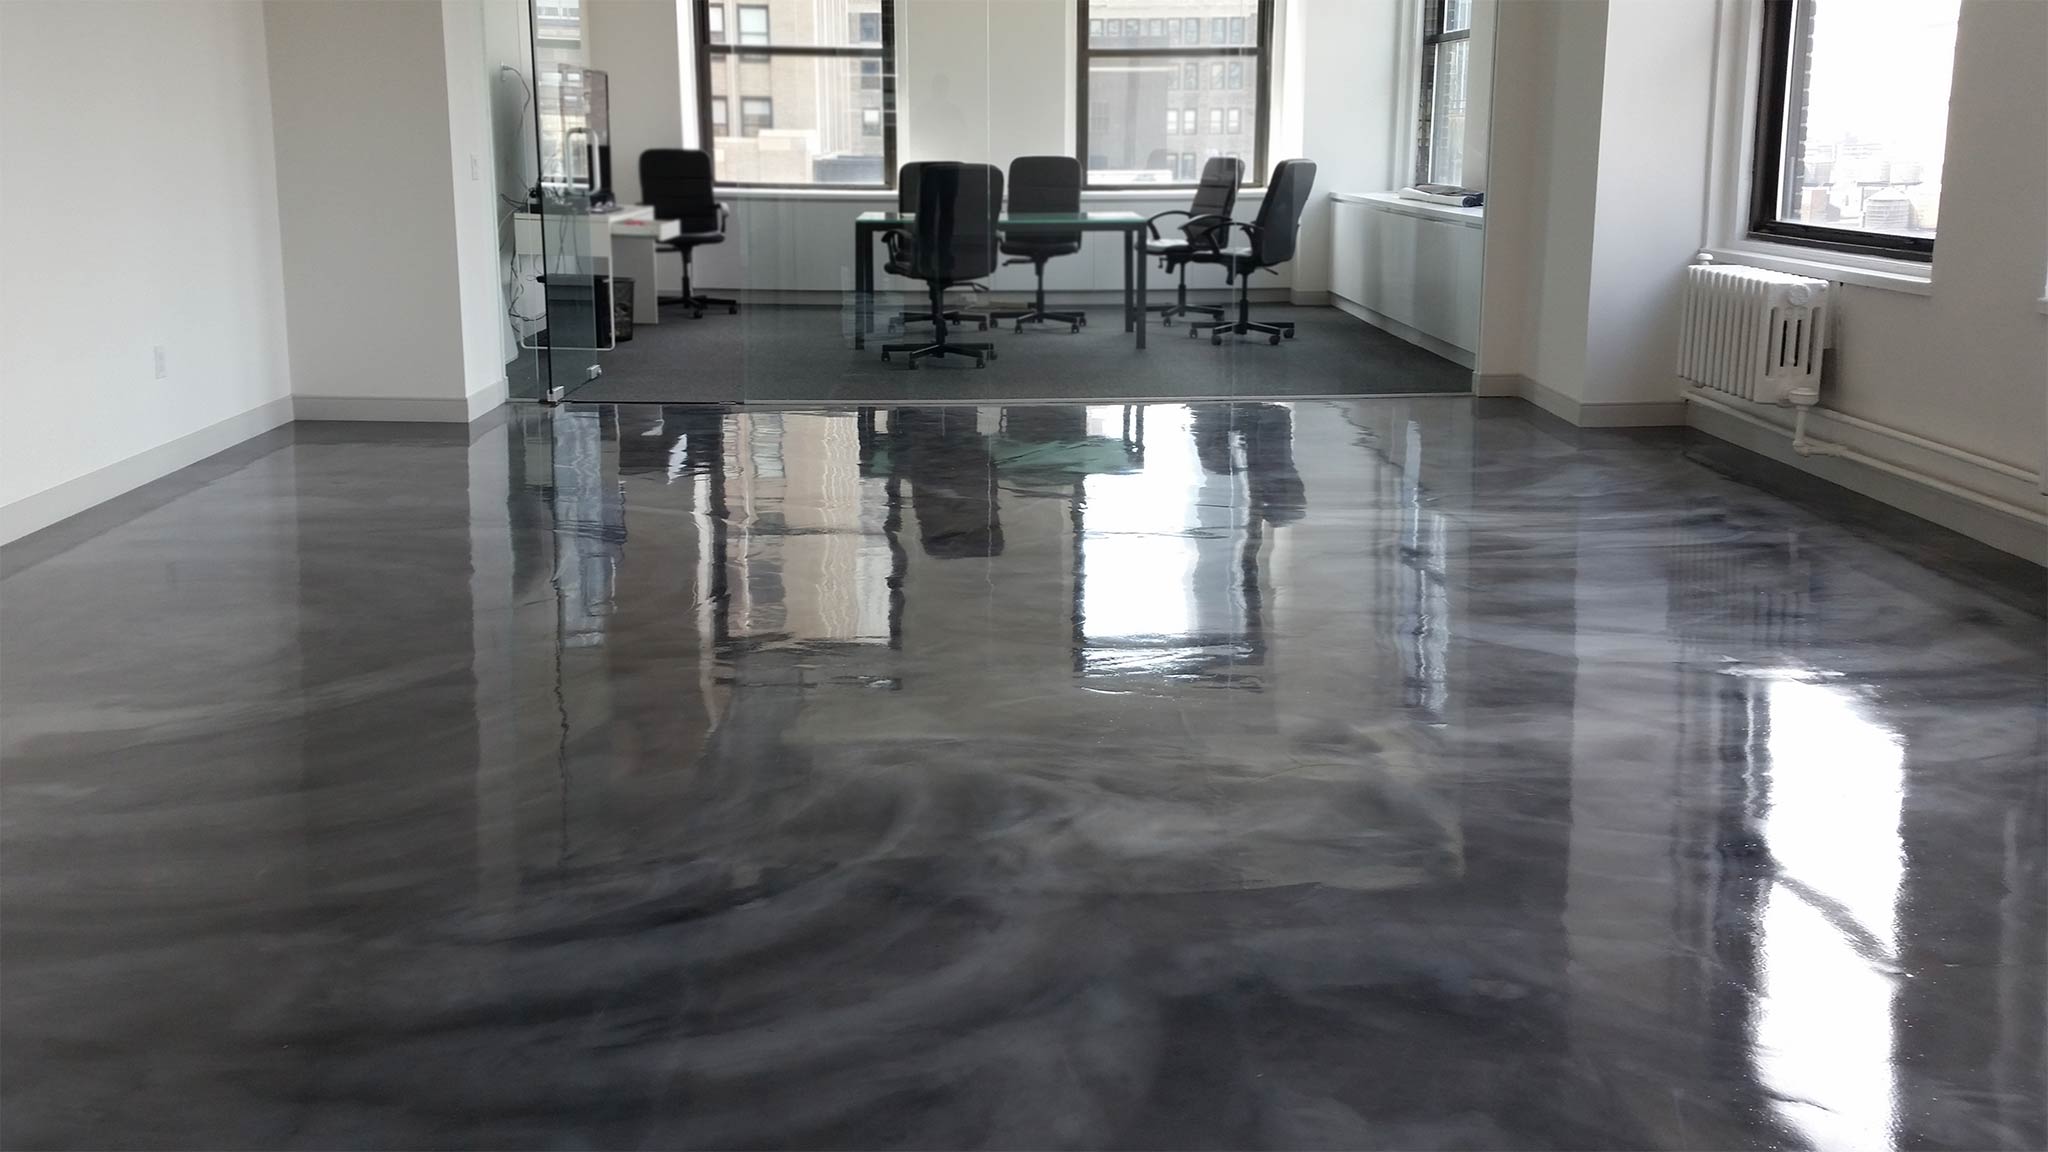
When I first heard about metallic epoxy floor coatings, I honestly thought it sounded too good to be true. The idea of transforming my boring concrete garage floor into something that looked like liquid metal seemed like expensive marketing hype. But after living with my metallic epoxy floors for over a year now, I can tell you that the transformation exceeded even my wildest expectations. The process was challenging, messy, and required more patience than I anticipated, but the result is absolutely stunning. Every visitor who walks into my garage stops in their tracks and asks what kind of flooring it is. The shimmering, three-dimensional effect changes throughout the day as light hits it from different angles, and it’s held up beautifully to everything I’ve thrown at it.
Understanding Different Metallic Pigment Systems and Effects
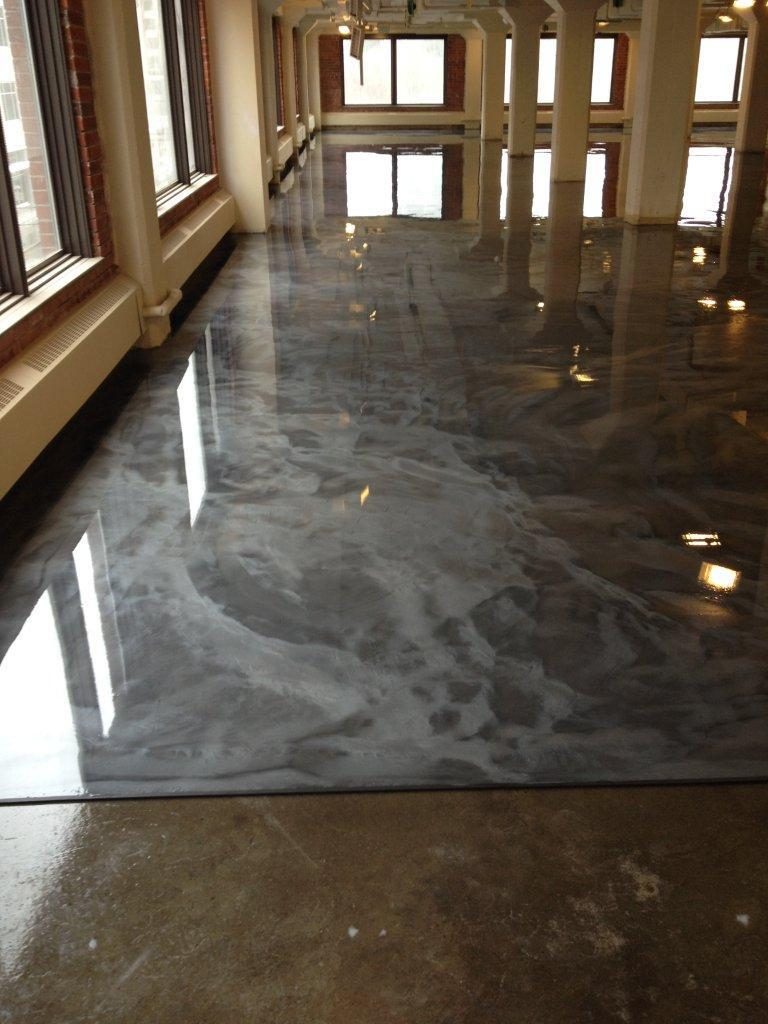
The variety of metallic pigment options available completely overwhelmed me when I started researching this project. I spent weeks examining sample boards and online galleries, attempting to comprehend the distinctions between mica-based pigments, aluminum powders, and the newer interference pigments that produce color-shifting effects. Each type produces dramatically different results, and the concentration you use can make the difference between subtle shimmer and bold, dramatic swirls that dominate the entire space.
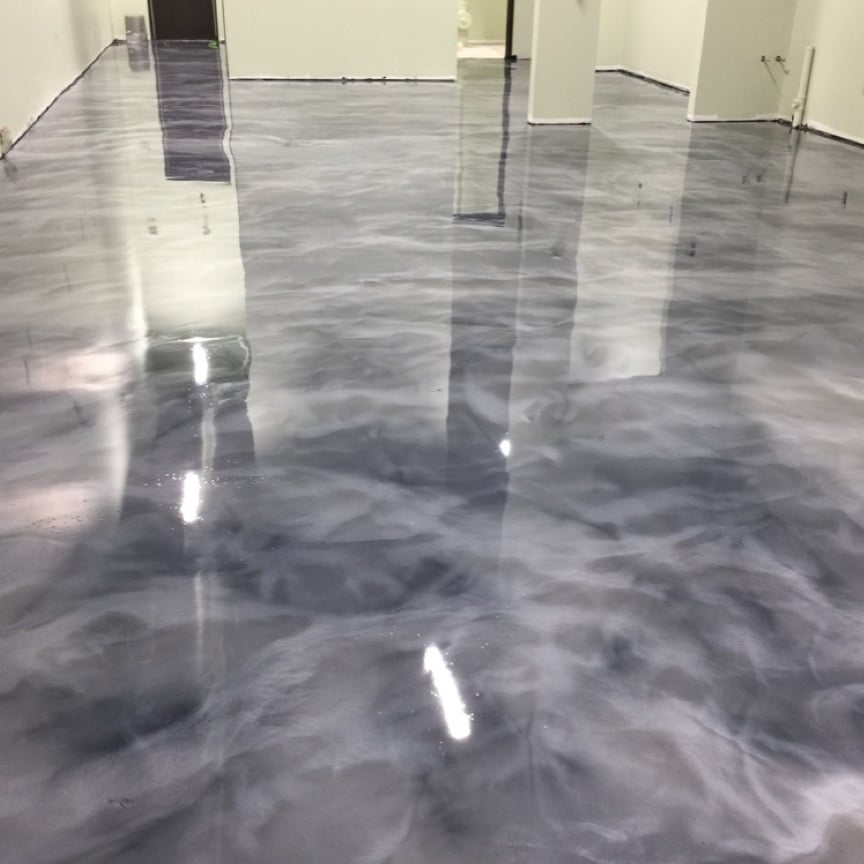
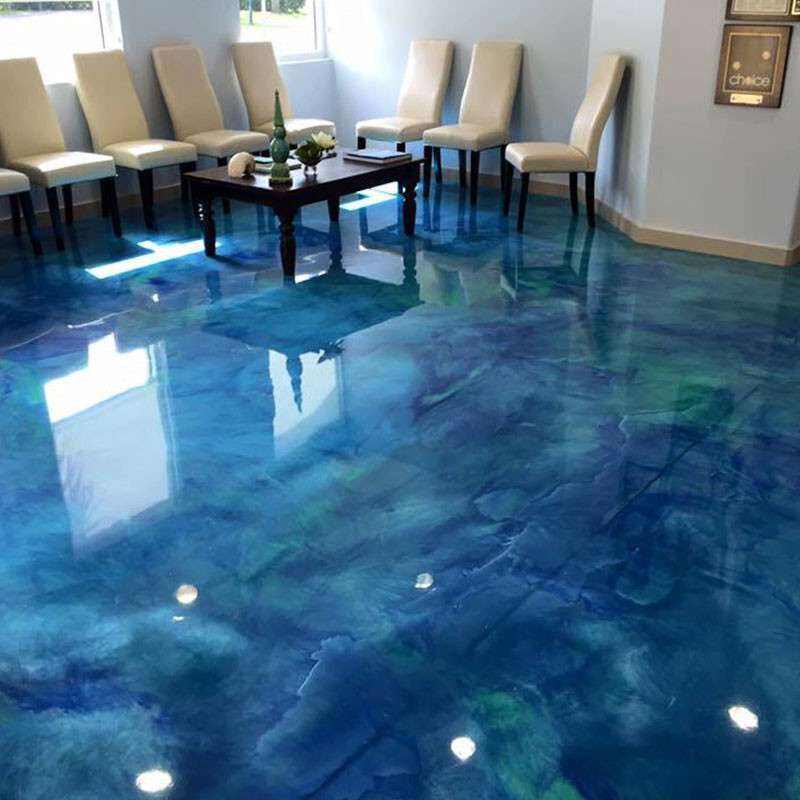
I ultimately chose a combination of silver and blue interference pigments that create an ocean-like effect with waves and depth that seem to move as you walk across the floor. The interference pigments cost more than basic metallic powders, but they produce that magical color-shifting effect that makes people think the floor is actually liquid. During installation, I discovered that these pigments react differently to temperature and humidity, making timing the application crucial for achieving consistent results across the entire surface.
Working with metallic pigments taught me that less is often more when creating the desired effect. My first test section used too much pigment, which created an overwhelming, almost gaudy appearance that lost the subtle beauty I was after. After experimenting with different ratios on sample boards, I found that using about 60% of the manufacturer’s recommended amount gave me the perfect balance of shimmer and elegance. The key is building up the metallic effect gradually rather than trying to achieve maximum impact with a single heavy application.
Surface Preparation: The Make-or-Break Foundation
Surface preparation for metallic epoxy turned out to be far more critical than I initially realized, and cutting corners here would have ruined the entire project. My concrete garage floor looked reasonably smooth to the naked eye, but once I started grinding, I discovered oil stains, surface contaminants, and variations in porosity that would have prevented proper adhesion. I spent three full days with a rented concrete grinder, working in sections to achieve the proper surface profile for optimal bonding.
The moisture testing phase revealed issues I never would have discovered without proper equipment. Even though my garage felt dry, a calcium chloride test showed moisture levels that exceeded the epoxy manufacturer’s specifications. I had to wait two weeks for conditions to improve and then apply a moisture-mitigating primer before proceeding with the metallic system. This delay was frustrating, but I’ve seen too many epoxy failures caused by moisture issues to risk skipping this crucial step.
Crack repair and surface defect correction took longer than the actual epoxy application. I used a two-part epoxy crack filler for several hairline cracks and had to grind down high spots that would have created thin areas in the coating. Every surface imperfection gets magnified under the glossy metallic finish, so attention to detail during prep work directly impacts the final appearance. The extra time spent on preparation was absolutely worth it for achieving that flawless, mirror-like surface I wanted.
Application Techniques for Professional-Looking Results
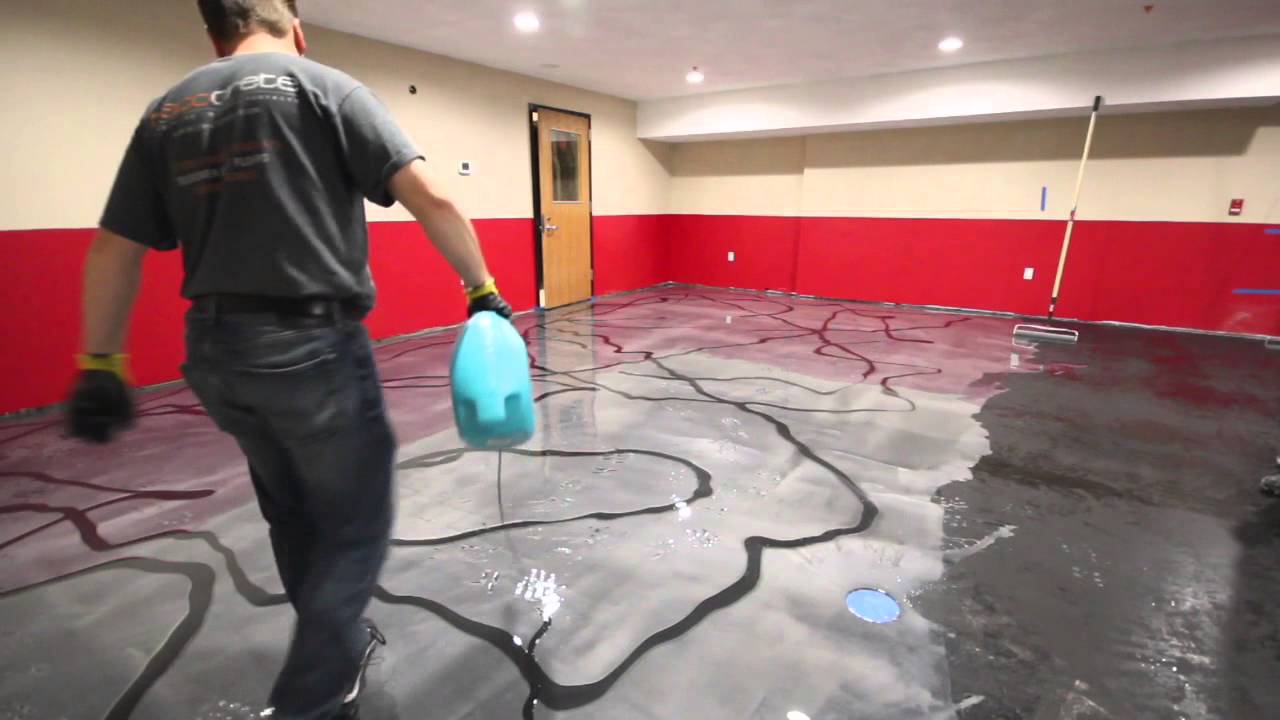
Applying metallic epoxy requires a completely different approach than standard garage floor coatings, and I learned this through some trial and error on my first section. The working time is much shorter than regular epoxy, especially in warm conditions, so having all materials pre-measured and tools ready became essential. I practiced my mixing and application technique on sample boards until I could work quickly and confidently when it came time for the real application.
The metallic effect is created through the manipulation of the wet epoxy using various tools and techniques. I used a combination of foam rollers, brushes, and even plastic bags to create swirling patterns and depth effects. The key insight I discovered was that the metallic particles continue to move and settle for about 20 minutes after application, so I could go back and refine patterns or add additional effects during this window. Timing became everything, working fast enough to maintain wet edges while slow enough to achieve the artistic effects I wanted.
Temperature and humidity control during application proved more important than I expected for consistent results. I installed temporary heaters and fans to maintain ideal conditions throughout the process, as even small variations affected how the metallic particles dispersed and settled. Working during stable weather conditions made a huge difference in achieving uniform coverage and preventing issues like blushing or inconsistent curing that can ruin the final appearance.
Color Selection and Design Planning Process
Choosing colors for my metallic epoxy floor involved much more consideration than I initially anticipated. The metallic particles interact with the base color in complex ways, and what looks good on a small sample can appear completely different when applied over a large area. I created several 2×2 foot test sections using different color combinations, viewing them under various lighting conditions throughout the day to understand how they would look in my actual space.
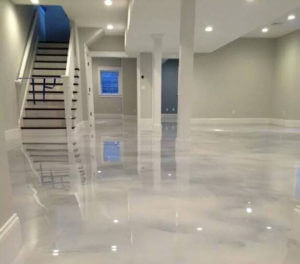
The lighting in my garage significantly influenced my final color selection. Under fluorescent shop lights, cooler metallic tones like silver and blue created a clean, modern appearance that complemented my tool storage and workbenches. Warmer tones like copper and gold looked beautiful but felt too residential for my workshop environment. I also considered how the colors would look under natural daylight streaming through the garage door, as this changes dramatically throughout the day.
Planning the design layout required thinking about traffic patterns and focal points in the space. I wanted the most dramatic metallic effects in areas where they’d be most visible and appreciated, while keeping more subtle effects in high-traffic zones where the pattern might get lost or worn over time. Creating a rough sketch helped me visualize where to concentrate the metallic pigments for maximum visual impact while maintaining a cohesive overall appearance throughout the garage.

Installation Challenges and Problem-Solving Solutions
My first major challenge came when I realized that metallic epoxy application can’t be stopped and restarted like regular painting projects. Once you begin mixing the epoxy and metallic pigments, you’re committed to completing the entire section before the material begins to set. This meant working 12-hour days to complete my 500-square-foot garage in manageable sections, which was physically exhausting but necessary for achieving seamless results between sections.
Equipment failures during application created some tense moments that required quick problem-solving. My primary mixing drill died halfway through day two, forcing me to switch to a backup while the mixed epoxy was already beginning to thicken. I learned to have redundant equipment available for every critical step, as there’s no pausing the process once the chemical reaction begins. Having extra rollers, brushes, and mixing paddles prevented minor equipment issues from becoming major disasters.
Weather conditions threw me several curveballs during the three-day application process. An unexpected temperature drop on day two slowed the curing process and extended my working time, which initially seemed like a benefit but actually made it harder to control the metallic effects. I had to adjust my technique and use heat lamps to maintain optimal curing conditions. These experiences taught me to monitor weather forecasts carefully and have contingency plans for temperature and humidity variations.
Long-Term Performance and Maintenance Reality
After 14 months of daily use in my garage workshop, the metallic epoxy floor continues to exceed my expectations for durability and appearance. The high-gloss finish shows dust and debris more readily than my old concrete floor, but cleanup is incredibly easy with just a dust mop or quick rinse with water. Oil drips from car maintenance, metal shavings from workshop projects, and even welding spatter have caused no permanent damage to the surface.
The chemical resistance has been impressive during real-world use. I’ve spilled various automotive fluids, wood stains, and cleaning chemicals without any etching or discoloration of the metallic finish. Hot tire pickup, which was a major concern during the summer months, hasn’t occurred even when parking immediately after highway driving. The thermal properties of the thick epoxy coating seem to provide good protection against heat-related damage that can affect thinner coatings.
Maintenance requirements have been minimal beyond regular cleaning to maintain the stunning appearance. I apply a thin coat of floor wax every six months to enhance shine and provide additional protection, which takes about two hours for my entire garage. Small scratches from dragging heavy equipment can be polished out with fine abrasive compound, though I’ve had very few scratches despite heavy workshop use. The biggest maintenance challenge is resisting the urge to constantly admire the floor instead of getting work done.

How long does metallic epoxy floor coating actually last in real-world conditions?
Based on my experience and research, quality metallic epoxy should last 10-15 years in residential garages with proper installation. Commercial applications might see 5-10 years, depending on traffic. The key is proper surface prep and using professional-grade materials. My floor looks nearly new after 14 months of heavy workshop use, with only minor dulling in high-traffic areas.
Is metallic epoxy installation really a DIY project, or should I hire professionals?
It’s definitely challenging for DIY, but doable with patience and preparation. I spent weeks practicing techniques and studying installation videos. The working time constraints and need for consistent results across large areas make it stressful. Professional installation costs $8-15 per square foot, while DIY materials run $3-6 per square foot. Consider your skill level and stress tolerance carefully.
How slippery are metallic epoxy floors when wet or contaminated?
The high-gloss finish can be slippery when wet, similar to polished concrete or tile. I added anti-slip aggregate to high-traffic areas near the garage door where water might track in. For workshops, the bigger concern is metal shavings or oil spills creating slip hazards. Regular cleaning and immediate spill cleanup are essential for maintaining safe conditions.
What’s the realistic cost for a quality metallic epoxy floor installation?
My 500 sq ft garage cost about $1,800 in materials, including surface prep, primers, epoxy, pigments, and topcoats. Tool rental added another $400. Professional installation would have been $5,000-7,000. The material costs are significantly higher than standard epoxy due to specialized metallic pigments and multiple coating layers required for the full effect.
How do metallic epoxy floors handle temperature extremes and seasonal changes?
They’ve handled temperature swings from below freezing to over 100°F without issues. The thick coating provides good insulation, so the floor feels warmer in winter than bare concrete. Expansion and contraction haven’t caused cracking, but proper surface prep and control joints are crucial. I haven’t noticed any seasonal color changes or finish degradation through multiple freeze-thaw cycles.
Can metallic epoxy be repaired if damaged, or does the entire floor need redoing?
Minor damage can be spot-repaired, but matching the metallic effect perfectly is nearly impossible. Small scratches polish out easily, but chips or gouges require epoxy repair that won’t match the surrounding metallic pattern. For major damage, you’d likely need to sand and recoat entire sections. This is one reason proper surface prep and quality installation are so critical upfront.

Metallic Epoxy Floor Paint
Metallic Epoxy Tips and Techniques

Metallic epoxy floor coatings by Sierra Concrete Arts Garage

Metallic Epoxy Floor Coatings Q u0026 A Dreamcoat Flooring Phoenix

Pearlescent Color Metallic Epoxy Resin 3D Floor Pigment Powder Paint Best Price Clear Peatl Epoxy Floor Coating
![]()
Related Posts: