When I first saw high gloss epoxy flooring in my neighbor’s garage two years ago, I knew I had to have it for my own space. The mirror-like finish transformed what looked like an ordinary concrete garage into something resembling a luxury showroom floor. After installing epoxy in my garage, workshop, and basement, I’ve learned the secrets to achieving that perfect high-gloss finish and avoiding the mistakes that can turn this stunning flooring option into a costly disaster. Let me share everything I’ve discovered about preparing, installing, and maintaining these beautiful floors.
Surface Preparation That Determines Success
The foundation of any successful epoxy project lies in meticulous concrete preparation, and I learned this lesson the hard way during my first attempt. I thought a simple concrete cleaner and light etching would suffice, but within six months, sections of my expensive epoxy coating were peeling away from the floor. Proper preparation means grinding or shot-blasting the concrete to create the rough profile that epoxy needs to bond permanently.
I invested in a concrete grinder rental for my second project, which completely transformed my results. The grinding process removes any existing sealers, paints, or contaminants while creating the textured surface essential for epoxy adhesion. This step is labor-intensive and dusty, requiring proper ventilation and dust collection equipment, but it’s absolutely non-negotiable for long-term success.
Repairing cracks and imperfections before epoxy application became another critical lesson I learned through trial and error. Even hairline cracks will telegraph through the epoxy coating and eventually cause failure. I now use specialized concrete crack repair compounds and allow proper curing time before proceeding with epoxy application. Taking shortcuts on preparation always leads to expensive do-overs later.
Choosing the Right Epoxy System
Not all epoxy coatings are created equal, and I discovered significant performance differences between water-based and solvent-based systems during my various projects. For high-gloss applications, I found that 100% solids epoxy provides the thickest, most durable coating with the deepest shine. These professional-grade systems cost more but deliver the mirror-like finish that makes epoxy floors so stunning.
Two-part epoxy systems require precise mixing ratios and have limited working time once combined, which initially intimidated me. However, I learned that following the manufacturer’s instructions exactly produces far superior results compared to single-component alternatives. I use a drill mixer to ensure thorough blending and always mix only what I can apply within the pot life, typically 30-45 minutes, depending on temperature.
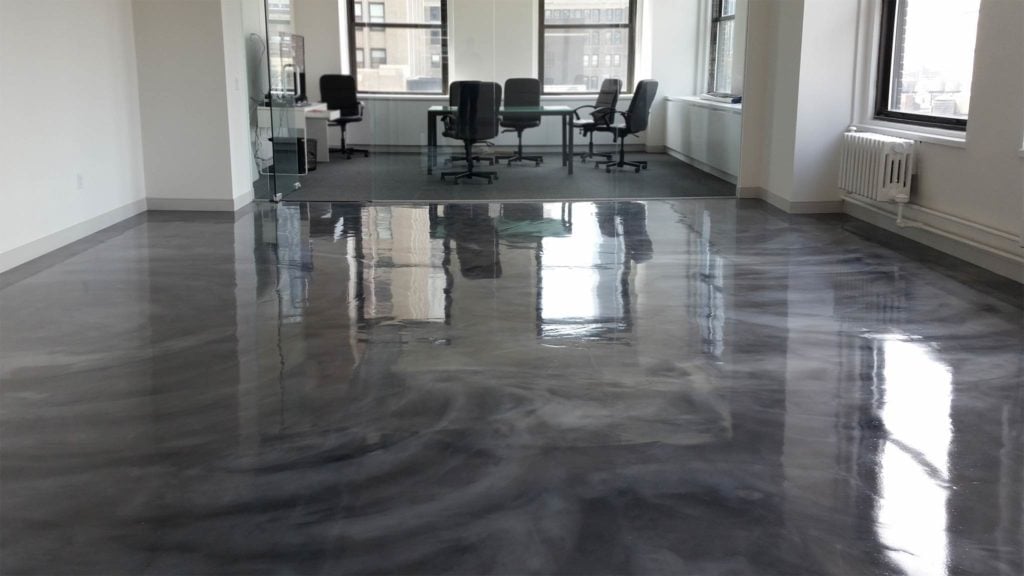
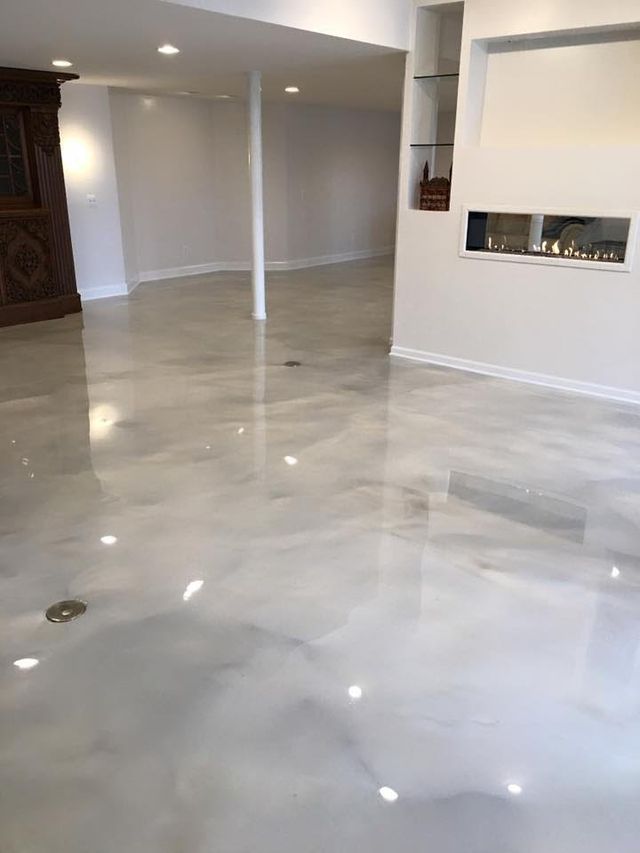
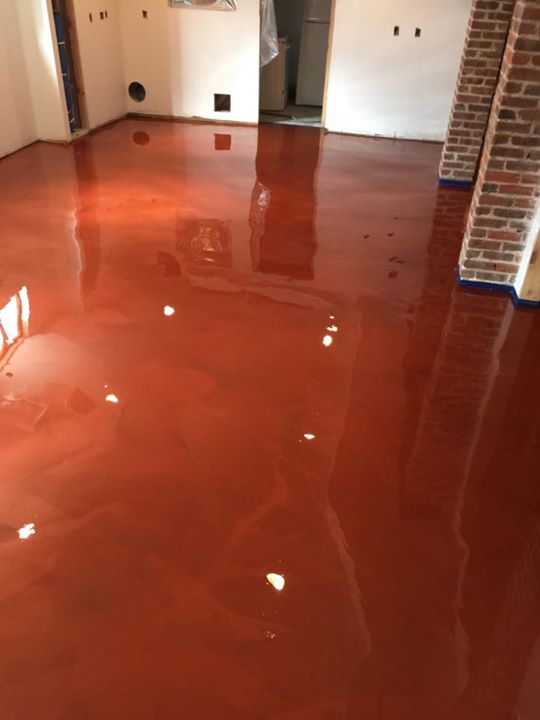
Color options and decorative effects opened up creative possibilities I hadn’t initially considered. My workshop features a solid gray base coat with metallic silver flakes for subtle texture, while my garage showcases a deep blue base with white and silver chips for a more dramatic appearance. The key is applying decorative elements while the base coat is still tacky, ensuring permanent integration into the final finish.
Application Techniques for Mirror-Like Results
Temperature and humidity control during application significantly impact final gloss levels, something I learned during a humid summer installation that resulted in a cloudy finish. Ideal conditions are 60-80°F with humidity below 50%, and I now monitor conditions carefully and adjust my timeline accordingly. Working during stable weather conditions prevents the defects that can ruin an otherwise perfect installation.
Rolling technique determines the smoothness of the final finish, and I perfected my method through practice on test areas before tackling visible surfaces. I use high-quality phenolic core rollers specifically designed for epoxy application, maintaining constant pressure and overlapping each pass by about two inches. Back-rolling perpendicular to the initial direction eliminates roller marks and ensures uniform thickness.
The final topcoat application requires the most care since any imperfections will be magnified by the high-gloss finish. I thin the final coat slightly according to manufacturer specifications to promote self-leveling, then apply it in thin, even layers. Working under bright lights helps identify any missed spots or imperfections while I can still correct them during the application process.
Decorative Options and Design Possibilities
Metallic pigments transformed my basement floor into something resembling polished marble, creating depth and visual interest that solid colors simply cannot achieve. I mixed metallic powder into the base coat and used specialized techniques to create swirling patterns that look different from every viewing angle. The three-dimensional effect adds luxury and sophistication that guests always comment on during visits.
Color flake systems became my preferred choice for areas requiring slip resistance while maintaining a high gloss appearance. I broadcast vinyl color flakes onto the wet base coat, then sealed everything with multiple clear topcoats for durability and shine. The flakes provide texture for safety while the clear topcoats maintain the mirror-like finish that makes epoxy floors so appealing.
Decorative sawcuts and borders allowed me to create defined zones and patterns that add visual interest to large spaces. I used a concrete saw to create geometric patterns before epoxy application, then filled the cuts with contrasting colors for dramatic effect. This technique works especially well in large garages or workshops where plain solid colors might look monotonous.

Curing and Initial Maintenance
The curing process requires patience that most DIYers don’t expect, and rushing this phase can ruin an otherwise perfect installation. While epoxy may feel dry to the touch within hours, full chemical cure takes 7-10 days depending on temperature and humidity. I learned to restrict foot traffic for at least 24 hours and vehicle traffic for 72 hours minimum to prevent permanent impressions in the uncured coating.
Environmental control during curing prevents defects that can mar the high-gloss finish permanently. I use fans to maintain air circulation while avoiding direct airflow over the wet coating that might cause surface ripples. Temperature fluctuations during curing can cause the coating to contract and develop stress cracks, so I maintain consistent conditions throughout the cure period.
Initial cleaning requires gentle products while the epoxy fully hardens and reaches maximum chemical resistance. I use only water and mild soap for the first month, avoiding harsh chemicals or abrasive cleaners that might damage the still-curing surface. This gentle approach protects the investment while the coating develops its full strength and chemical resistance properties.

Long-Term Care and Gloss Maintenance
Daily maintenance of high-gloss epoxy floors is surprisingly simple once you establish the right routine. I sweep or dust mop regularly to remove abrasive particles that could scratch the surface, then damp mop weekly with a microfiber mop and pH-neutral cleaner. The non-porous surface makes cleaning easy, but the high gloss shows every footprint and dust particle, requiring more frequent attention than matte finishes.
Protecting the gloss from scratches and wear requires strategic use of mats and protective measures in high-traffic areas. I use walk-off mats at all entrances to trap dirt and moisture before they reach the epoxy surface. For areas under workbenches or where tools are frequently dropped, I use protective mats that can be easily cleaned or replaced rather than risking damage to the expensive epoxy coating.
Periodic recoating maintains the mirror-like appearance and extends the floor’s lifespan significantly. Every 3-5 years, depending on use, I lightly abrade the surface and apply a fresh topcoat to restore the original gloss and repair any minor scratches or wear patterns. This maintenance is much less expensive than complete replacement and keeps the floors looking showroom-new indefinitely.
How long does high-gloss epoxy flooring typically last in a residential garage?
With proper preparation and maintenance, my garage floor still looks perfect after two years of regular vehicle use. Quality epoxy systems should last 10-15 years in residential applications. The key is proper surface prep initially and regular cleaning to prevent abrasive damage that dulls the gloss over time.
Is high-gloss epoxy flooring slippery when wet?
Yes, it can be quite slippery without texture additives. I learned to add slip-resistant aggregate or color flakes to areas that might get wet. The basement stairs get a special non-slip additive mixed into the topcoat. Pure high-gloss epoxy should be avoided in wet areas without texture enhancements.

Can I install high-gloss epoxy myself, or do I need professionals?
I successfully DIY’d my projects, but it requires careful attention to detail and proper equipment. Surface preparation is the most critical and labor-intensive part. If your concrete needs extensive repair or you want complex decorative effects, professional installation ensures better results and often includes warranties.
What’s the total cost for high-gloss epoxy flooring materials and installation?
DIY costs run $3-8 per square foot for quality materials, while professional installation ranges $8-15 per square foot. My 600-square-foot garage cost about $2,800 in materials, doing it myself. Factor in equipment rental for surface prep and plan for 20% extra materials for waste and touch-ups.

How do I repair scratches or damage to high-gloss epoxy floors?
Minor scratches can be polished out with automotive compounds, but deeper damage requires spot repairs with matching epoxy. I keep leftover material for touch-ups, though color matching can be challenging. Prevention through protective mats and careful use is much easier than repairs after damage occurs.
Does high-gloss epoxy work in cold climates with freeze-thaw cycles?
Quality epoxy handles temperature changes well once fully cured. My garage experiences temperatures from -10°F to 100°F without problems. The key is proper concrete preparation initially and ensuring the concrete slab itself is stable. Freeze-thaw damage to the underlying concrete will cause epoxy failure regardless of coating quality.

White Epoxy Resin Coating Made

Solid White Epoxy Basement DIY
Bright White epoxy and urethane floors are being installed in

high #gloss #white #concrete #floors Painted concrete floors

Related Posts: