When I finally decided to tackle my garage floor project, I was tired of looking at the cracked, oil-stained concrete that had become an embarrassment. After months of research and planning, I chose epoxy resin coating, and it completely transformed not just the appearance but the entire functionality of my garage space. Four years later, I still smile every time I pull into my garage and see that glossy, professional-looking surface. The transformation was so dramatic that neighbors regularly stop to ask about my “new” garage floor. Let me share my experience with epoxy resin garage flooring and the lessons I learned along the way.
Preparation Phase: The Foundation of Success
The preparation phase turned out to be the most critical part of my entire epoxy project. I initially underestimated how much work would be involved in getting the concrete ready. My garage floor had twenty years of oil stains, tire marks, and small cracks that all needed addressing before I could even think about applying epoxy. This groundwork phase took me an entire weekend, but it was essential.
Cleaning was more intensive than I expected. I started with a basic degreasing solution, but the stubborn oil stains required multiple treatments with specialized concrete cleaners. I ended up renting a pressure washer and using muriatic acid to etch the surface properly. The acid etching creates tiny pores in the concrete that help the epoxy bond securely. Without this step, the coating would eventually peel and fail.
Crack repair became my biggest challenge. I had several hairline cracks and one larger crack running about three feet across the center of my garage. I used concrete crack filler for the smaller ones and a more robust patching compound for the major crack. Each repair needed to cure completely before I could proceed. This patience paid off, as none of my repairs have failed or become visible through the epoxy coating.
Application Process: My DIY Installation Experience
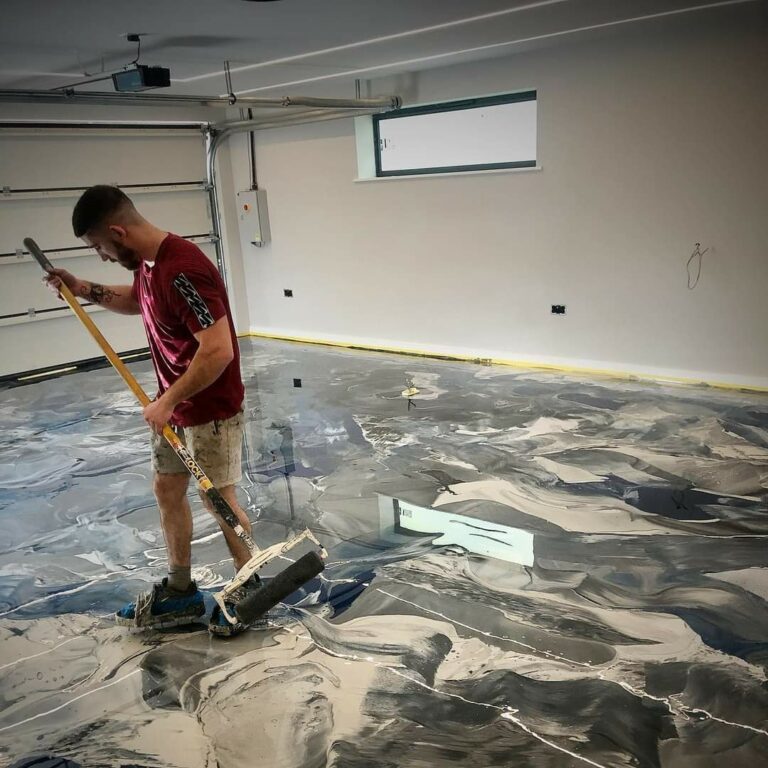
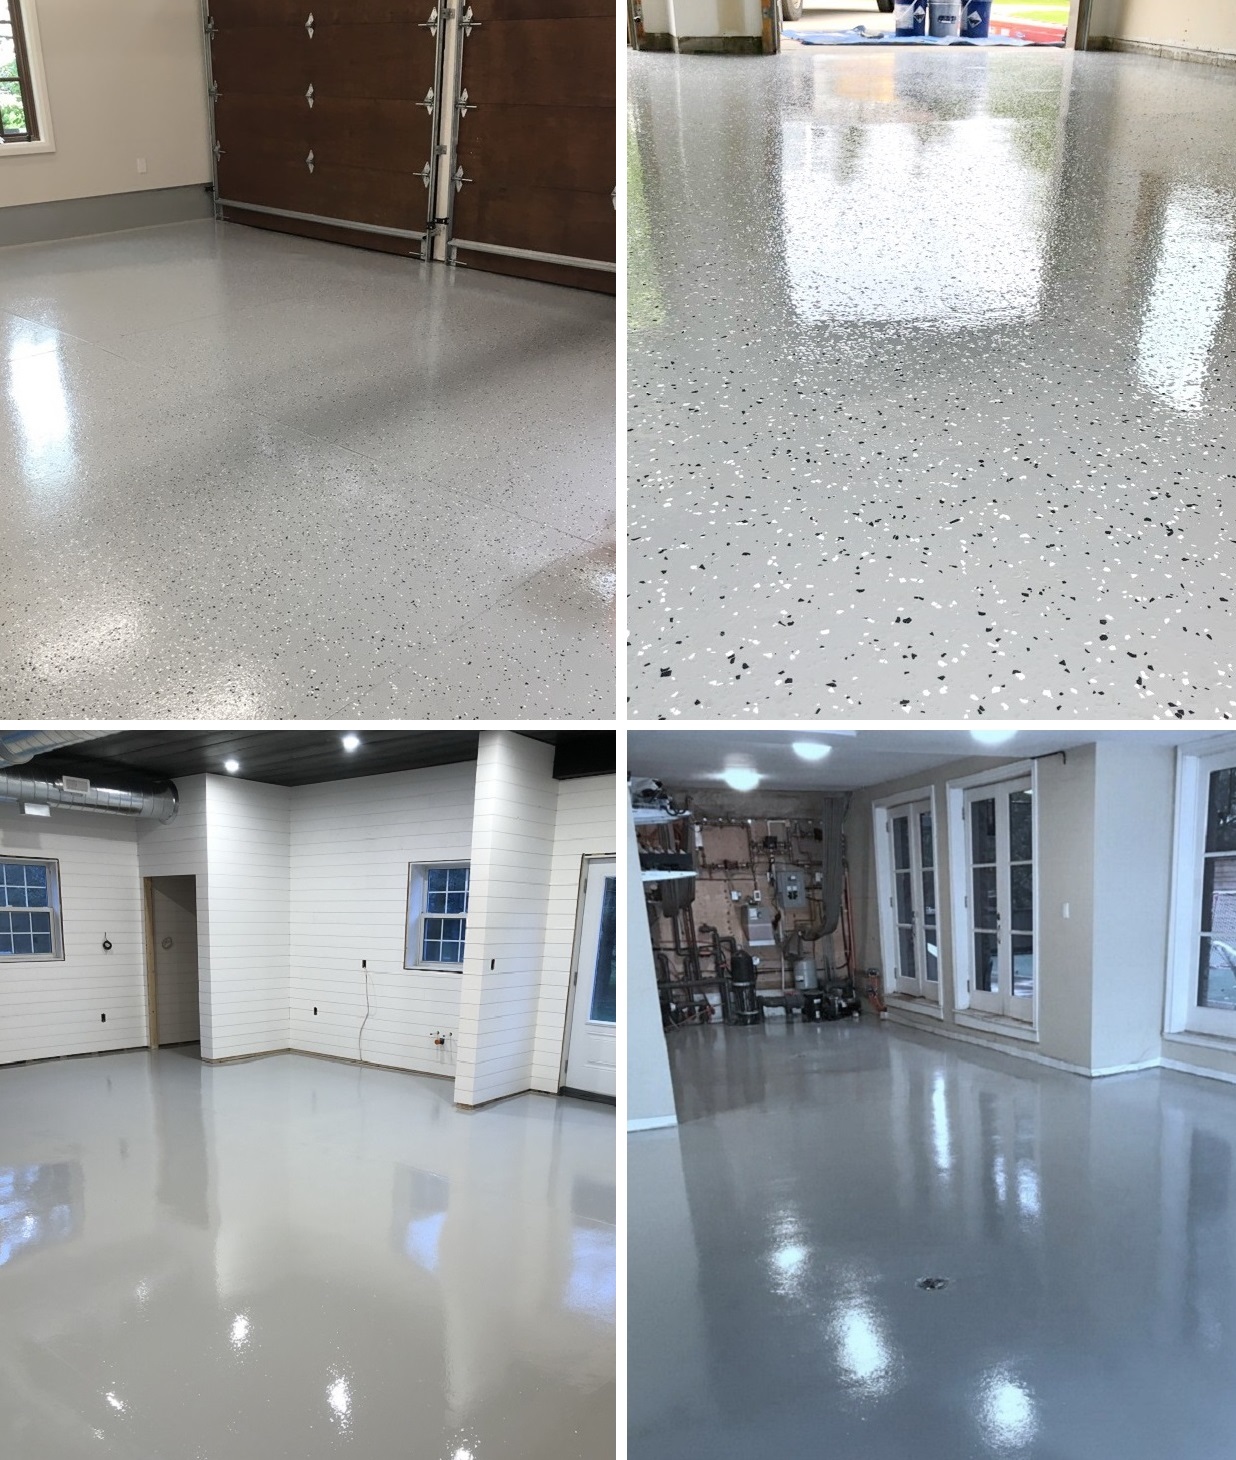
I decided to tackle the epoxy application myself rather than hiring professionals. This decision saved money but required careful planning and execution. I chose a two-part epoxy system with decorative flakes, which would give me both durability and an attractive finish. The weather conditions had to be perfect, with temperatures between 60-80 degrees and low humidity for proper curing.
Mixing the epoxy components was more critical than I realized. The working time is limited once you mix the resin and hardener, so I had to work quickly and efficiently. I started early in the morning to avoid temperature fluctuations and give myself plenty of working time. Using a drill with a mixing paddle ensured thorough blending, which is crucial for proper curing and durability.
The actual application went smoother than expected. I used a paint roller with an extension handle for the main areas and a brush for edges and corners. Working in sections helped me maintain a wet edge and avoid lap marks. I broadcast the decorative flakes while the epoxy was still wet, then applied the clear topcoat the next day. The whole process took three days from start to finish, including cure time between coats.
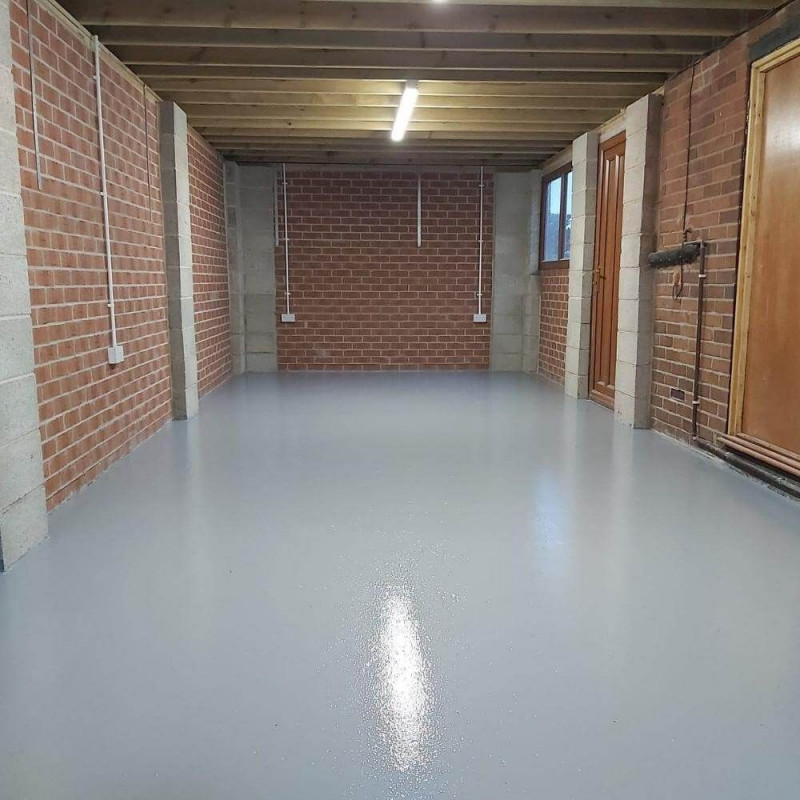
Performance and Durability: Four Years of Real-World Use
After four years of daily use, I can honestly assess how my epoxy garage floor has performed under real conditions. My garage serves multiple purposes: car storage, workshop space, and general storage area. The floor has handled everything I’ve thrown at it, from dropped tools to oil changes, chemical spills, and heavy equipment storage. The durability has exceeded my expectations in most areas.
Hot tire pickup was a concern I’d read about online. During the first summer, I noticed some slight marking where my car’s hot tires sat on the epoxy for extended periods. However, these marks were temporary and disappeared as the epoxy cooled. I learned to move my car occasionally during extreme heat, but this hasn’t been a significant ongoing issue. The chemical resistance has been excellent, with brake fluid, motor oil, and cleaning products wiping up without staining.
The glossy finish still looks impressive, though it has dulled slightly in the main traffic areas. This is normal wear and doesn’t affect the protective qualities of the coating. Small scratches from dragging tools or equipment are barely noticeable against the flake pattern I chose. The floor still cleans easily with just soap and water, maintaining that professional appearance that initially attracted me to epoxy coating.
Maintenance Routine: Keeping It Looking Professional
Maintaining my epoxy garage floor has been surprisingly simple compared to the bare concrete I lived with for years. Daily maintenance involves nothing more than sweeping away dirt and debris. The smooth surface means dust and particles don’t embed like they did in the porous concrete. This ease of cleaning was one of the biggest quality-of-life improvements from my epoxy installation.
Weekly cleaning consists of mopping with warm, soapy water. I use a standard floor cleaner, nothing special or expensive. Spills clean up immediately without staining, which is a huge improvement from my old concrete floor. Oil, coolant, and other automotive fluids that would permanently stain concrete can simply be wiped away from the epoxy surface. This easy cleanup has kept my garage much cleaner than it ever was before.
I perform a deeper cleaning every few months, using a more thorough scrubbing to remove any buildup in corners or textured areas. The decorative flakes can trap some dirt, but it comes out easily with a stiff brush. I avoid harsh chemicals or abrasive cleaners that could damage the surface. After four years, this simple maintenance routine has kept my floor looking great with minimal time investment.
Cost Analysis: Investment vs. Professional Installation
When I first researched epoxy garage floors, the cost difference between DIY and professional installation was significant. Professional quotes ranged from $3-8 per square foot, while I completed my 400 square foot garage for about $1.50 per square foot in materials. The savings were substantial, but I had to invest considerable time and effort to achieve professional-looking results.
My material costs included the epoxy kit, primer, decorative flakes, topcoat, and various tools and supplies. I already owned some basic tools, but I needed to purchase brushes, rollers, mixing paddles, and protective equipment. The total material investment was about $600, compared to professional quotes ranging from $1,200 to $3,200 for the same area. The savings funded other garage improvements.
The time investment was significant, requiring about 40 hours spread over two weeks, including preparation, application, and cure time. If I calculate my time at a reasonable hourly rate, the savings diminish but remain worthwhile. More importantly, I gained valuable experience and the satisfaction of completing a challenging project myself. The knowledge I gained has helped me maintain the floor properly and troubleshoot minor issues.

Design Choices: Creating the Look I Wanted
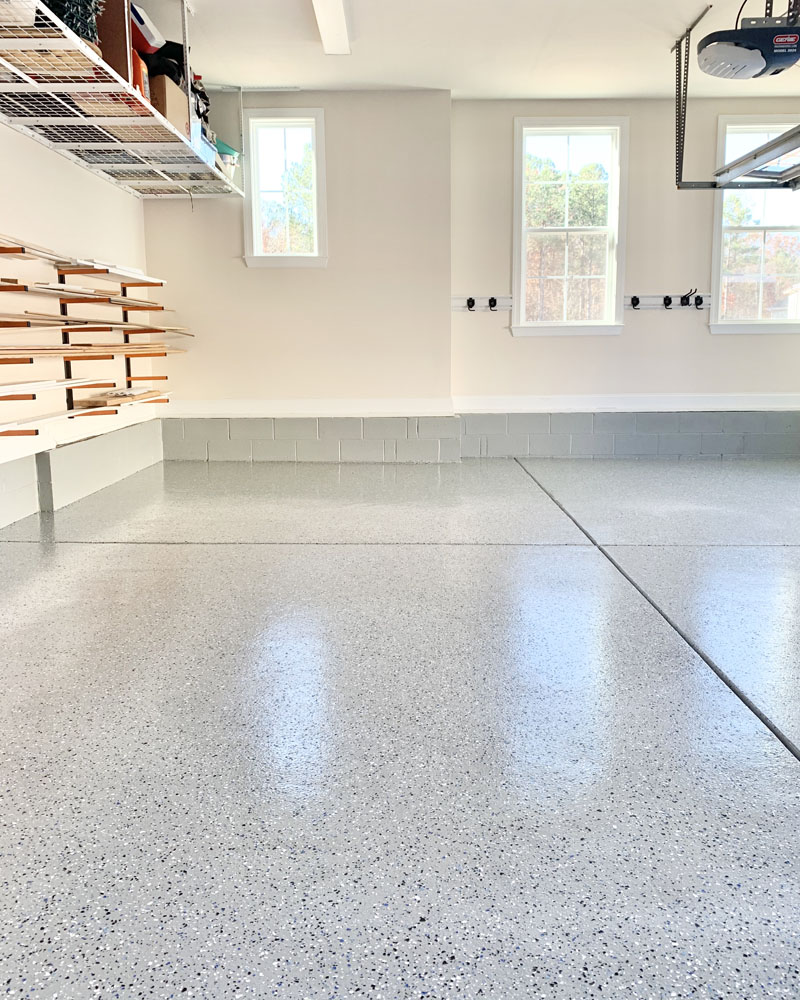
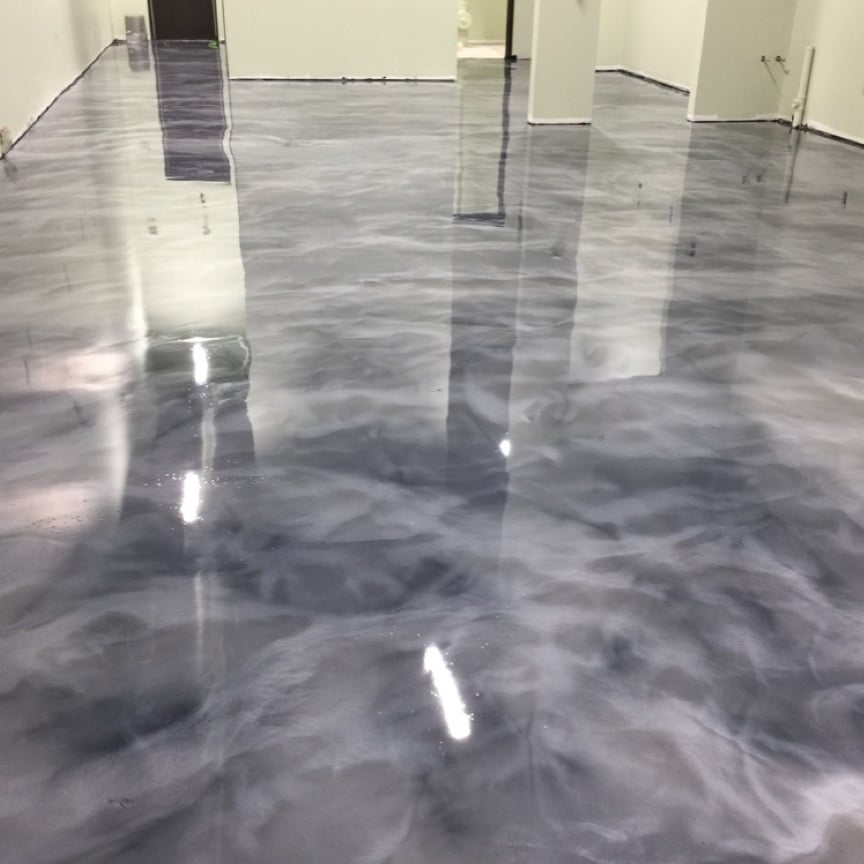
Choosing the right epoxy system and color scheme took considerable research. I wanted something that would look professional but also hide dirt and imperfections. The decorative flake system appealed to me because it adds texture and visual interest while camouflaging minor scratches and dust. I spent weeks looking at samples and visiting showrooms to understand my options.
Color selection proved more important than I initially realized. I chose a medium gray base with black, white, and silver flakes. This combination looks clean and professional while hiding everyday garage dirt better than lighter colors would. The flake pattern also helps minimize the appearance of any small imperfections or scratches that develop over time. Some of my neighbors chose solid colors that show every mark and require more frequent cleaning.
The finish level was another key decision. I opted for a semi-gloss topcoat rather than high-gloss. While high-gloss looks more dramatic initially, it shows scratches and imperfections more readily. The semi-gloss finish provides excellent chemical resistance and easy cleaning while being more forgiving of wear patterns. This choice has proven wise, as my floor still looks great after four years of use without requiring touch-ups.
How long does the epoxy application process take from start to finish?
From my experience, plan on about two weeks total. Preparation took me three days, including cleaning, etching, and crack repairs. The actual epoxy application was two days, with a cure time between coats. Then I waited a full week before parking my car on it. Weather delays can extend this timeline, so don’t plan the project right before you need your garage back.
Can I apply epoxy over existing stains and minor damage?
Surface stains usually aren’t a problem if you clean and etch properly, but deep stains may telegraph through thin coatings. I had success with most oil stains disappearing under the epoxy. However, any structural damage, like significant cracks or spalling concrete, needs repair first. Skipping proper preparation will cause premature failure, so invest the time up front.
How does epoxy flooring hold up to hot summer temperatures?
My garage gets quite hot in summer, and the epoxy has held up well. I occasionally see slight tire impressions during extreme heat, but they disappear when temperatures cool. Quality epoxy systems are designed for temperature variations. The key is choosing a product rated for your climate and following application temperature guidelines strictly.
Is DIY epoxy installation realistic for someone with basic skills?
Absolutely, but you need patience and attention to detail. The most critical aspects are surface preparation and following mixing ratios exactly. I watched numerous videos and read extensively before starting. If you’re comfortable with basic home improvement tasks and can dedicate the necessary time, DIY installation is achievable and rewarding.

What’s the biggest mistake people make with garage floor epoxy?
Rushing the preparation phase. I see neighbors who skip proper cleaning, etching, or crack repair, then wonder why their coating fails within a year. Also, many people try to apply epoxy in poor weather conditions. Temperature and humidity matter enormously for proper curing. Take your time with prep work; it determines long-term success.
How much maintenance does an epoxy garage floor require?
Very little ongoing maintenance, which is one of the best benefits. I sweep weekly and mop monthly with a regular floor cleaner. Spills wipe up immediately without staining. After four years, I haven’t needed any repairs or recoating. The initial investment in quality materials and proper installation pays dividends in reduced maintenance compared to bare concrete.

Professional Contractors of Residential
Transparent Epoxy Resin Garage Floor Coating – China Epoxy Resin
![]()
Garage Floor Paint ideas garage floor paint, garage floor

The Benefits of an Epoxy Floor in Your Garage

Related Posts: