Last year, I embarked on a complete bathroom renovation that centered around installing blue penny tile flooring, and the results exceeded every expectation I had. After living with bland beige ceramic for fifteen years, I craved something bold and beautiful that would transform my master bathroom into a spa-like retreat. My journey with blue penny tiles taught me about color psychology, installation challenges, and maintenance realities that I never anticipated. From selecting the perfect shade of cobalt to navigating complex installation patterns, this project became a labor of love that completely changed how I feel about my most personal space in the house.
Choosing the Perfect Shade of Blue
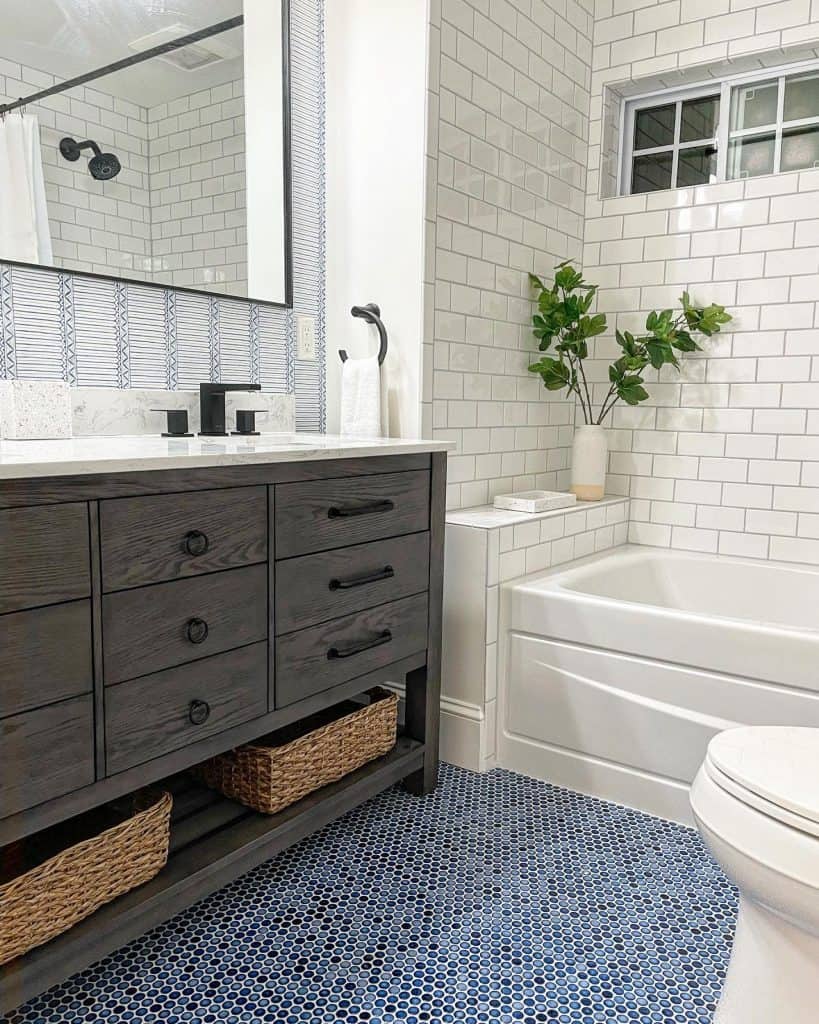
Navy blue penny tiles became my final choice after testing dozens of samples in different lighting conditions throughout my bathroom. The deep, rich color provides dramatic sophistication while remaining timeless enough to avoid looking dated in future years. I held samples against my white subway wall tiles and brass fixtures, discovering that navy creates a stunning contrast without overwhelming the space. The color depth changes beautifully throughout the day as natural light shifts, sometimes appearing almost black in shadows and revealing gorgeous blue undertones in direct sunlight.
Cobalt blue offered a more vibrant alternative that I seriously considered for its energetic, Mediterranean-inspired appearance. The bright, saturated color would have created a bold statement perfect for powder rooms or guest bathrooms where dramatic impact is desired. However, I worried that such intensity might become overwhelming in my master bathroom, where I spend considerable time getting ready each morning. After living with samples for two weeks, I decided cobalt was too stimulating for my personal relaxation space.
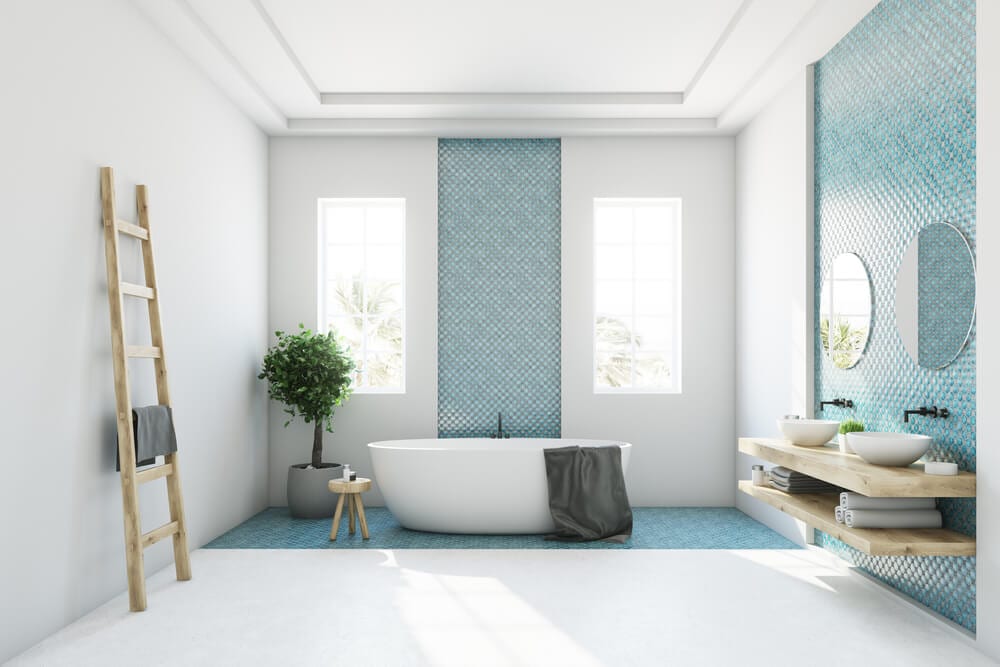
Powder blue penny tiles provided a softer, more subtle option that many designers recommended for creating calming, spa-like atmospheres. The gentle color works beautifully with white fixtures and natural materials, creating serene environments perfect for unwinding after stressful days. I ultimately rejected this option because my bathroom lacks natural light, and I feared the pale color would appear washed out or dingy in artificial lighting. The decision came down to wanting color that would energize my mornings while maintaining sophisticated elegance.
Installation Challenges and Solutions
Professional installation became essential after attempting to install a small sample section myself and realizing the precision required for perfect penny tile alignment. The tiny tiles demand meticulous attention to spacing, and even minor variations become glaringly obvious across large surfaces. I hired a tile specialist who had extensive experience with mosaic installations, and his expertise showed immediately in the perfectly uniform spacing and straight lines. The investment in professional installation prevented costly mistakes and ensured results that look flawless years later.
Mesh backing on penny tile sheets simplified installation compared to individual tile placement, but still required careful handling to prevent tiles from shifting during installation. My installer cut custom pieces around fixtures and edges using specialized tools that maintained perfect circular shapes. We encountered challenges around the toilet base and shower threshold, where complex cuts were necessary. His experience showed in creative solutions that maintained pattern integrity while accommodating real-world obstacles that amateur installers often struggle to handle properly.
Subfloor preparation required extra attention because penny tiles reveal every imperfection in the underlying surface through their small size and numerous grout lines. We spent additional time leveling and smoothing the subfloor to create the perfect foundation. Any high or low spots would have created lippage between individual tiles that would catch dirt and look unprofessional. The extra preparation time added cost but created the smooth, even surface necessary for penny tiles to showcase their intended beauty and perform properly long-term.

Grout Selection and Color Coordination
White grout created the classic contrast I wanted against my navy penny tiles, making each tile pop while maintaining clean, crisp lines throughout the installation. The bright white provides visual separation that prevents the floor from appearing as a solid blue mass, instead celebrating the individual penny shapes that give this flooring its distinctive character. I chose sanded grout for durability in the wider spaces between tiles. Regular sealing keeps the white grout looking fresh and prevents staining from daily use and cleaning products.
Grey grout offered a more subtle alternative that would have created a softer contrast while hiding dirt and stains more effectively than bright white. I tested samples with grey grout and found it created a more monochromatic appearance that emphasized the blue color over the individual tile shapes. This approach works beautifully for those who prefer understated elegance over high contrast drama. However, I wanted maximum visual impact from my penny tiles, so white grout better achieved my desired aesthetic goals.
Matching blue grout would have created seamless color flow, but eliminated the definition between individual tiles that makes penny tile flooring so distinctive and appealing. Some installations use this approach to create solid color fields with subtle texture variations rather than obvious pattern repetition. I considered this option briefly but realized it would sacrifice the geometric interest that initially attracted me to penny tiles. The individual tile definition created by contrasting grout is essential to the penny tile aesthetic I wanted to achieve.

Maintenance and Cleaning Routines
Daily maintenance of blue penny tile floors requires more attention than large format tiles due to the numerous grout lines that collect dirt and soap residue. I developed a routine of quick daily sweeping or vacuuming to remove hair and debris that settles in the grout lines. Spills get wiped immediately to prevent staining, especially important with white grout that shows every mark. A squeegee after showers prevents water spots and soap scum buildup that would otherwise require aggressive cleaning to remove completely.
Weekly deep cleaning involves scrubbing grout lines with appropriate cleaners to maintain their original white appearance and prevent mildew growth in the humid bathroom environment. I use an old toothbrush for detailed grout cleaning and find this tedious but necessary for keeping the floor looking fresh and new. The investment in quality grout sealer has reduced staining and made cleaning more effective. Steam cleaning monthly helps sanitize and brighten both tiles and grout without harsh chemicals.
Professional deep cleaning annually keeps my penny tile floor looking like a new installation despite daily use and humid conditions. The specialist uses equipment and products not available to homeowners, restoring original colors and removing embedded soil that regular cleaning cannot address. This service costs approximately $200 but preserves my significant flooring investment and maintains the stunning appearance that makes daily maintenance efforts worthwhile. Prevention through regular care reduces the need for expensive restoration services.
Design Impact and Visual Effects
Scale relationships between penny tiles and bathroom fixtures required careful consideration during my design planning process. The small tile size works beautifully in my medium-sized master bathroom, creating visual interest without overwhelming the space or competing with other design elements. I learned that penny tiles can make very small bathrooms feel cluttered, while large bathrooms might make them appear insignificant. My 8×10-foot bathroom provides the perfect canvas for penny tiles to create impact while maintaining appropriate proportions.
Pattern variations using different blue shades could have created custom designs, but I chose solid navy for timeless simplicity and maximum impact from the beautiful color. Some installations incorporate multiple blue tones or accent colors to create ombre effects or geometric patterns within the penny tile field. These approaches require careful planning and skilled installation but create unique results. My solid color choice provides sophisticated elegance that won’t look dated as design trends change over time.
Visual texture created by hundreds of individual tiles adds dimensional interest that flat surfaces cannot achieve, making my bathroom feel more luxurious and custom-designed. The slight variations in each handmade tile create subtle light reflections that change throughout the day as lighting conditions shift. This organic variation prevents the mechanical uniformity that can make manufactured materials appear cold and institutional. The handcrafted quality adds warmth and personality to my bathroom that perfectly balances the bold color choice.

Cost Analysis and Budget Considerations
Material costs for quality blue penny tiles ranged from $8-15 per square foot, depending on manufacturer, glaze quality, and color consistency. I invested in premium tiles at $12 per square foot because the color saturation and finish quality were noticeably superior to cheaper alternatives. The small tile size means significant coverage from each box, but waste factors increase due to cutting requirements around fixtures and edges. I ordered 15% extra material to account for installation waste and future repairs, which proved necessary for the complex cuts required.
Installation labor costs exceeded material expenses due to the precision and time required for proper penny tile installation. My professional installer charged $18 per square foot for the meticulous work required to achieve perfect results. The labor-intensive nature of small tile installation means costs can double or triple compared to large-format tiles. However, the stunning results justify the expense, and attempting DIY installation would likely have resulted in poor outcomes requiring expensive professional correction later.
Long-term value considerations include durability, maintenance costs, and aesthetic longevity compared to standard bathroom flooring options. Quality penny tiles properly installed and maintained can last decades while maintaining their beauty and functionality. My annual maintenance costs are minimal beyond regular cleaning supplies and occasional professional deep cleaning. The unique character and timeless appeal of penny tiles provide lasting satisfaction that justifies the initial investment in materials and professional installation for this special application.

How do I choose between different blue shades for penny tile floors?
Blue shade selection depends on your desired mood, lighting conditions, and overall design aesthetic for the space. Navy blue provides sophisticated elegance and works well with brass or gold fixtures, while cobalt creates energetic Mediterranean vibes perfect for powder rooms. Lighter blues like powder or sky blue create calming, spa-like atmospheres but may appear washed out in bathrooms with limited natural light. I recommend testing large samples in your actual space for at least a week, observing how colors appear in different lighting throughout the day before making final decisions.
What’s the realistic maintenance schedule for blue penny tile floors?
Daily maintenance involves sweeping or vacuuming to remove debris from grout lines, plus immediate spill cleanup to prevent staining. Weekly deep cleaning requires scrubbing grout lines with appropriate cleaners and monthly steam cleaning for sanitization without harsh chemicals. Annual professional deep cleaning preserves appearance and removes embedded soil that regular cleaning cannot address. This maintenance schedule has kept my penny tile floor looking like new after one year of daily use. The numerous grout lines require more attention than large format tiles but the stunning results justify the extra effort required.

Should I choose white or colored grout with blue penny tiles?
White grout creates a dramatic contrast that emphasizes individual tile shapes and provides a classic, timeless appearance that works with any blue shade. Grey grout offers subtler contrast while hiding dirt better than white, creating more monochromatic looks that emphasize color over pattern. Matching blue grout creates seamless color flow but eliminates the geometric definition that makes penny tiles distinctive. I chose white grout for maximum visual impact and don’t regret the decision despite requiring more maintenance. Consider your cleaning preferences and desired aesthetic when making this important choice.
Can I install blue penny tiles myself or should I hire professionals?
Professional installation is strongly recommended for penny tiles due to the precision required for proper alignment and spacing across hundreds of small tiles. The mesh backing simplifies handling, but complex cuts around fixtures require specialized tools and experience. I attempted a small sample section myself and quickly realized the difficulty of achieving professional results. My installer’s expertise showed in perfectly uniform spacing and creative solutions around obstacles. DIY installation often results in uneven spacing, poor cuts, and alignment issues that become increasingly obvious over time in small tile installations.

What subfloor preparation is required for penny tile installation?
Subfloor preparation requires exceptional attention to levelness because penny tiles reveal every imperfection through their small size and numerous grout lines. Any high or low spots create lippage between tiles that catches dirt and looks unprofessional. We spent extra time leveling and smoothing my subfloor with self-leveling compound and careful sanding. Moisture protection is essential in bathroom applications through proper underlayment and vapor barriers. The additional preparation time adds cost but creates the perfect foundation necessary for penny tiles to showcase their beauty and perform properly long-term.
How do blue penny tiles affect small bathroom spaces visually?
Blue penny tiles can make small bathrooms feel either more spacious or more cramped, depending on the shade chosen and overall design approach. Lighter blue shades reflect more light and can make compact spaces appear larger, while dark navy might make very small bathrooms feel enclosed. The small tile size adds visual texture and interest, but can appear busy in tiny powder rooms. My 8×10 foot bathroom provides ideal proportions for penny tiles to create impact without overwhelming. Consider your specific space dimensions and lighting when evaluating whether penny tiles will enhance or diminish your bathroom’s perceived size.

Cobalt Blue Shiny Penny Round Porcelain Mosaic Tile Pool Rated Kitchen Backsplash Bathroom Floor

Rooms That Will Make You Fall in Love With Penny Tile
Maplewood Eclectic

Penny Tiles: 12 Stunning Home Project Ideas – The Zhush

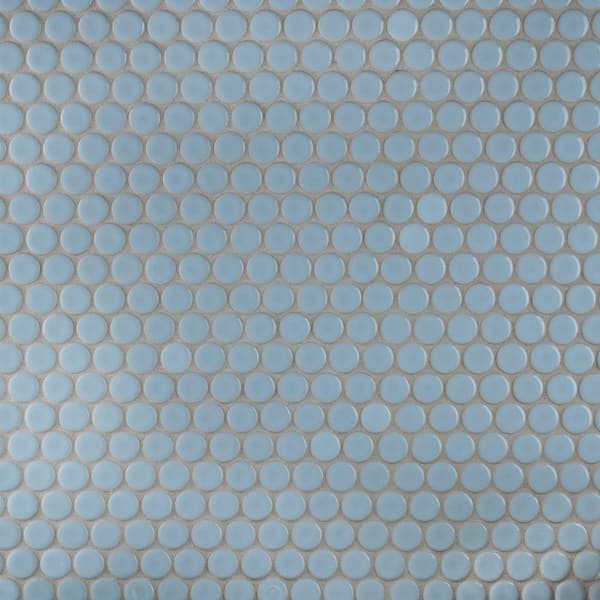
Merola Tile Hudson Penny Round Cashmere Blue 12 in. x 12 in
Related Posts: