When it comes to ensuring the longevity and durability of your concrete floors, one crucial aspect that should not be overlooked is the installation of a high-quality vapor barrier. A concrete floor vapor barrier acts as a protective layer, preventing moisture and water vapor from seeping through the concrete surface and causing potential damage. This comprehensive guide will take you through the essential steps of installing a concrete floor vapor barrier, allowing you to safeguard your investment and enhance the performance of your flooring.
Selecting the Right Vapor Barrier Material
The first step in the installation process is choosing the appropriate vapor barrier material. There are various options available, including polyethylene sheets, epoxy coatings, and specialized vapor barrier paints. Each material offers unique advantages, such as enhanced moisture resistance, flexibility, and ease of installation. Consider the specific requirements of your project and consult with experts if needed to determine the best-suited material for your concrete floor.
Preparing the Concrete Surface
Proper preparation of the concrete surface is vital for a successful vapor barrier installation. Thoroughly clean the floor, removing any dust, debris, or contaminants that could hinder the adhesion of the vapor barrier material. Repair any cracks or imperfections in the concrete to ensure a smooth and even surface, as this will contribute to the effectiveness of the vapor barrier.
Installing the Vapor Barrier
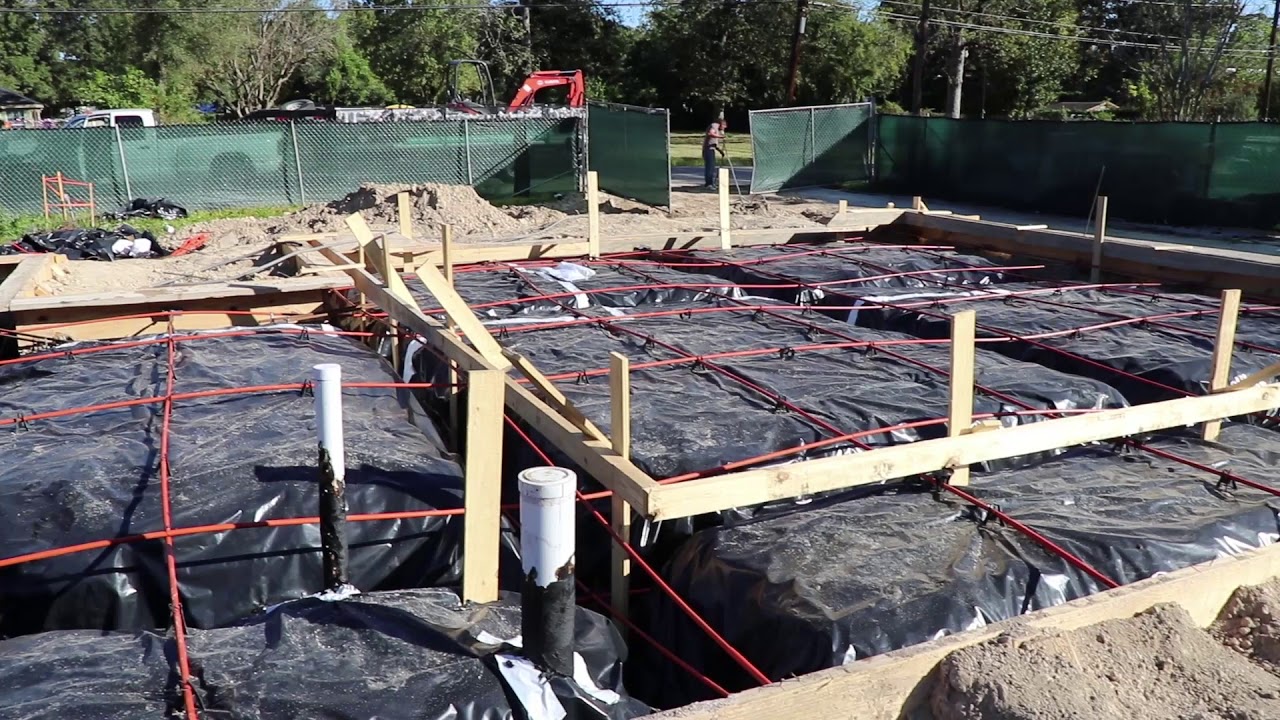
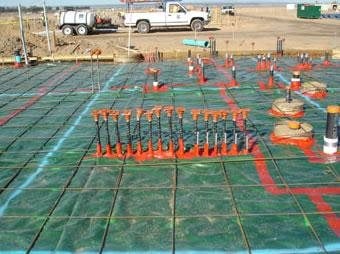
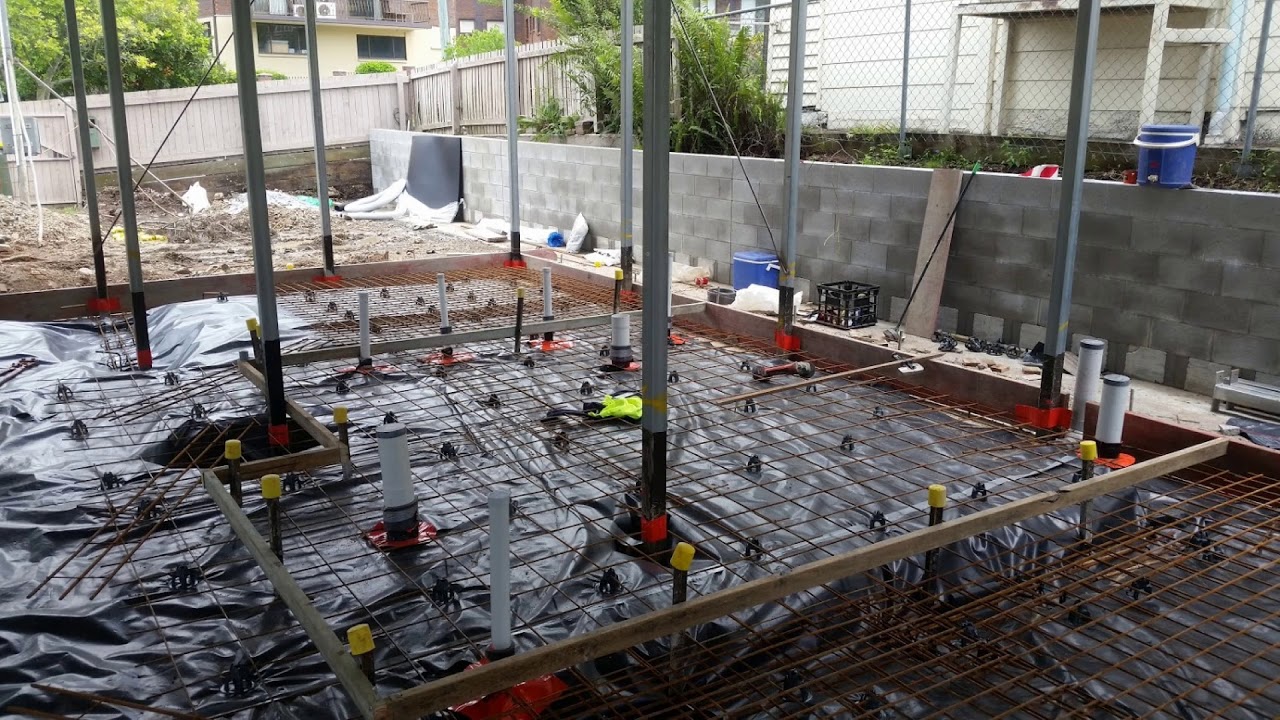
Now that your concrete floor is prepped and ready, it’s time to start the installation process. Roll out the selected vapor barrier material across the entire surface, ensuring it overlaps at the seams to create a continuous, watertight barrier. If you opt for an adhesive-backed vapor barrier, carefully apply it to the concrete, smoothing out any wrinkles or bubbles to achieve a tight bond.
Sealing the Joints and Edges
To further enhance the protective capabilities of the vapor barrier, it’s essential to seal all joints and edges thoroughly. Utilize a high-quality sealing tape or adhesive to seal the overlapping seams securely. Pay close attention to corners and edges, as these areas are particularly susceptible to moisture infiltration. A well-sealed vapor barrier will act as a reliable barrier against water vapor, ensuring the long-term integrity of your concrete flooring.
Conducting a Quality Check
Once the vapor barrier installation is complete, take the time to conduct a comprehensive quality check. Inspect the entire surface for any signs of damage, improper sealing, or irregularities. Address any issues promptly, as a properly installed and sealed vapor barrier is critical to maintaining the structural integrity of your concrete floor.
Adding a Protective Flooring Layer
After successfully installing the vapor barrier, consider adding an additional protective layer on top of the concrete floor. This layer can be in the form of epoxy coatings, sealants, or other specialized floor coverings. Not only will this enhance the aesthetic appeal of your flooring, but it will also offer an extra layer of protection against potential wear and tear.
Long-Term Maintenance and Care
Congratulations on successfully installing a concrete floor vapor barrier! To ensure its effectiveness and extend the lifespan of your flooring, it’s essential to implement a regular maintenance and care routine. Routinely inspect the vapor barrier for signs of damage or degradation, and promptly address any issues that may arise. Additionally, follow the manufacturer’s recommendations for cleaning and maintenance to preserve the barrier’s integrity.
A well-installed concrete floor vapor barrier is a fundamental element in safeguarding your flooring from moisture-related damage. By selecting the right materials, properly preparing the concrete surface, and meticulously installing and sealing the vapor barrier, you can create a robust defense against water vapor infiltration. Remember to complement the vapor barrier with a protective flooring layer and implement a routine maintenance plan to ensure your concrete floors remain in top-notch condition for years to come. Protect your investment and enjoy the long-lasting benefits of a professionally installed concrete floor vapor barrier.

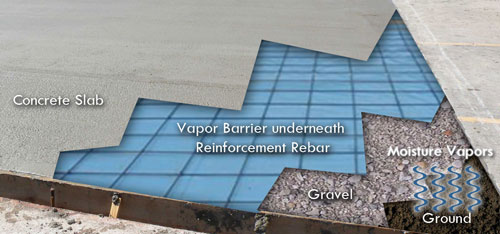
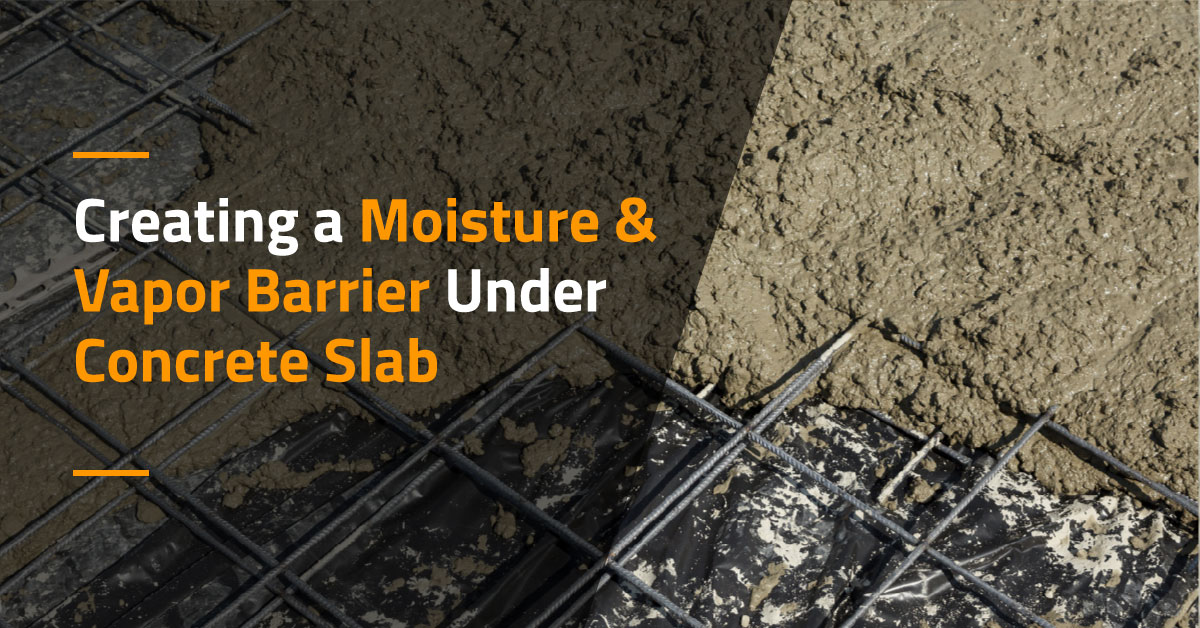
Creating a Moisture u0026 Vapor Barrier Under Concrete Slab Americover
Polyethylene Under Concrete Slabs – GreenBuildingAdvisor

How to Install an Under-Slab Vapor Barrier Pro Builder

Why a Plastic Vapor Barrier Under Concrete Slab – Mondays with Mike
Concrete Vapor Barriers for Under Slabs – Concrete Network
Why do you need a Vapour Barrier Under Concrete Slabs – The Structural Why Files aswers the question
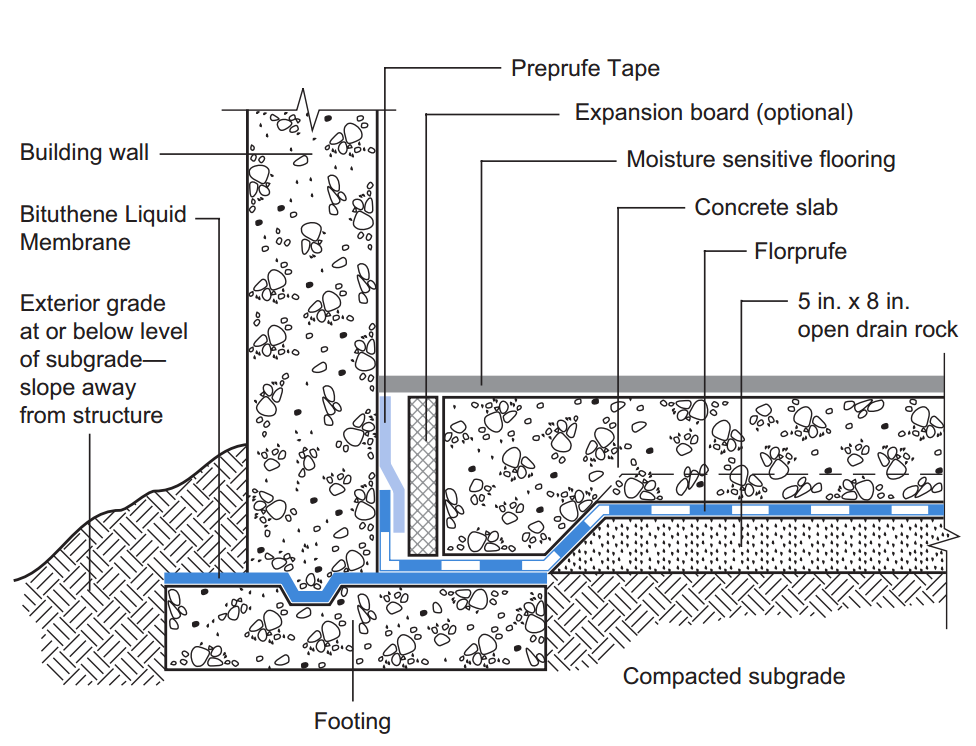
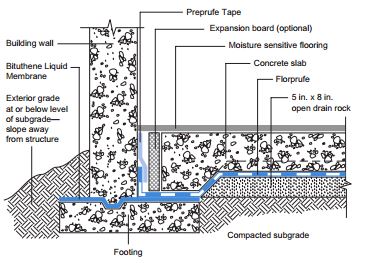
FLORPRUFE® 120 Resource GCP Applied Technologies
The Best Moisture Barrier for Protecting Concrete Slabs and Floors
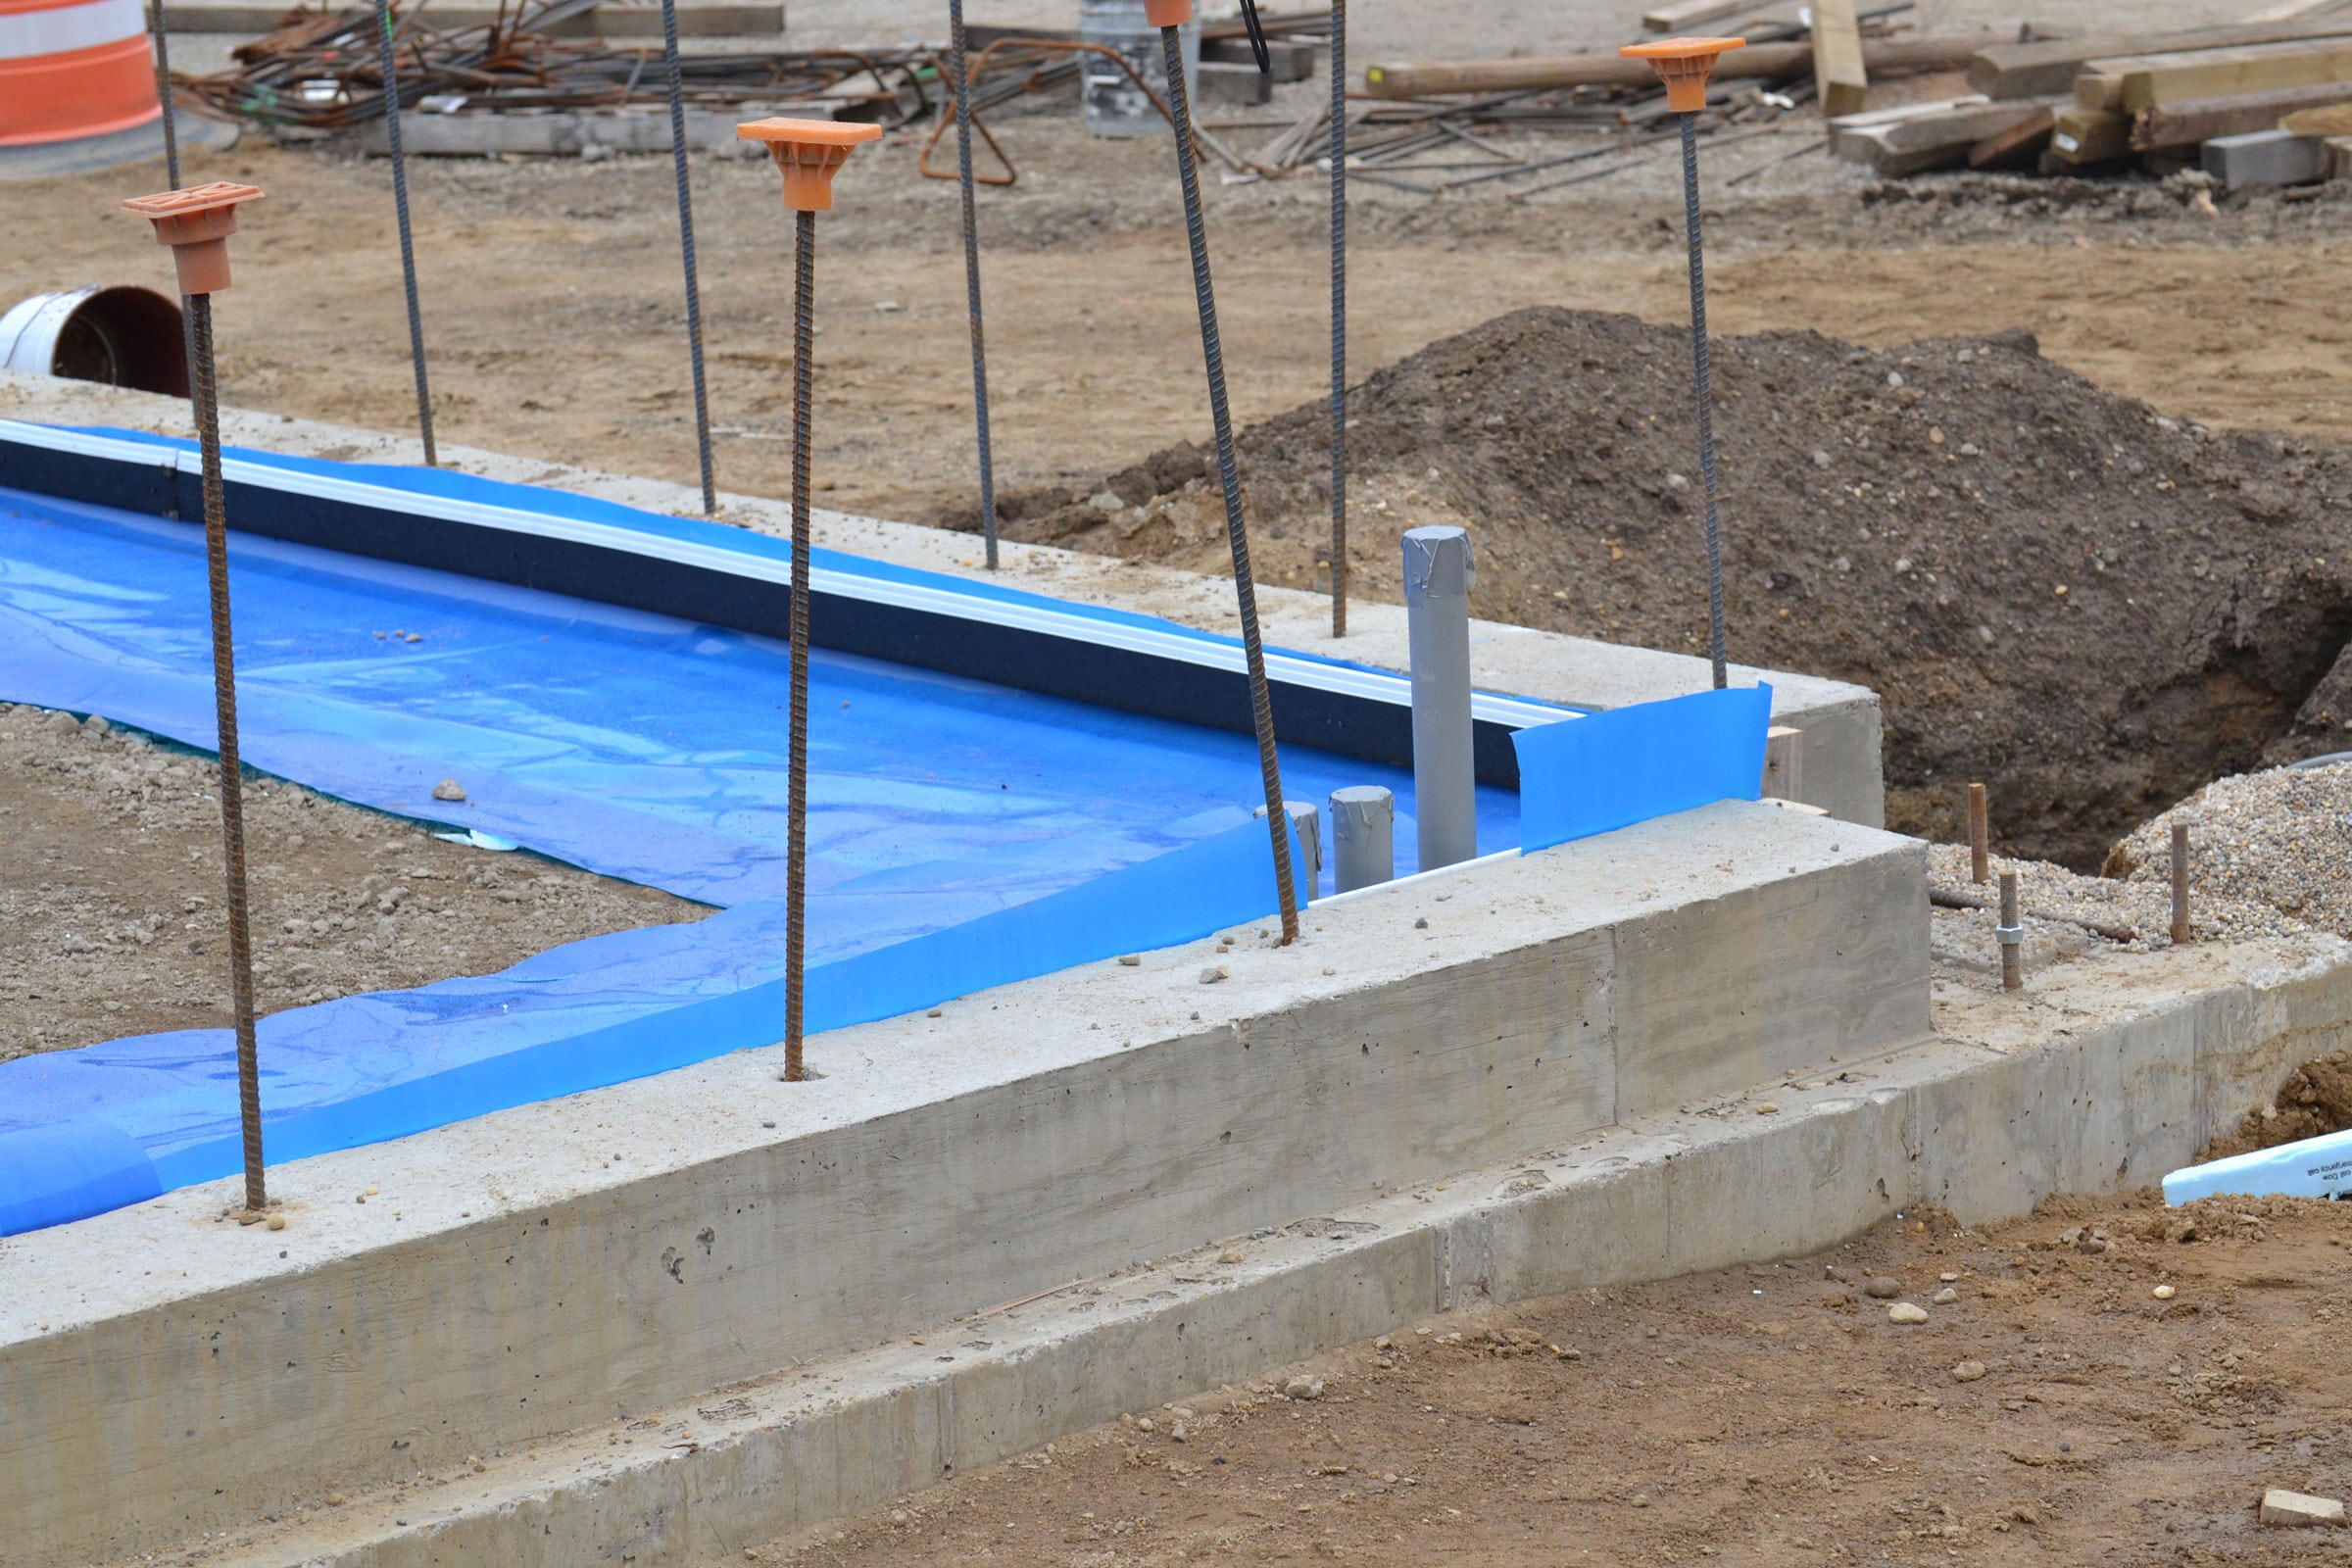
FLORPRUFE® 120 Resource GCP Applied Technologies
Whatu0027s the Best Vapor Barrier for a Concrete Slab? – Fine Homebuilding

Related Posts:
- Acid Stain Concrete Floors Yourself
- Resurfacing A Concrete Floor
- Interior Concrete Floor Stain
- Acid Stained Concrete Floors
- Concrete Floor Paint Flakes
- Epoxy Concrete Floor DIY
- Fixing Concrete Floors
- Rustic Stained Concrete Floors
- Painting Concrete Floors Basement
- Concrete Floor Tiles Interior
Installing a Concrete Floor Vapor Barrier for Optimal Protection
Having a vapor barrier installed in your concrete floor is one of the most effective ways to protect your home from moisture-related damage. A vapor barrier can help prevent mold, mildew, and even wood rot from forming beneath your concrete floor. In this article, we will discuss the benefits of installing a concrete floor vapor barrier, the tools and materials needed to get the job done, and answer some frequently asked questions about this important installation project.
Why Install a Concrete Floor Vapor Barrier?
A concrete floor vapor barrier is designed to prevent moisture from seeping through the concrete and into the areas below. The barrier will act as a sealant between the concrete and any wood or other materials that may be beneath it. This will help protect your home from potential moisture damage and even help reduce the chance of mold or mildew forming in your basement or other areas below your concrete flooring.
The Benefits of Vapor Barrier Installation
Installing a vapor barrier for your concrete floors has several benefits. First, it can help reduce the amount of moisture in your home and make it more comfortable for you and your family. Second, it can prevent mold, mildew, and other issues caused by excess moisture from taking root in areas below your concrete floors. Finally, it provides an extra layer of protection against water damage that could cause costly repairs in the future. All in all, installing a vapor barrier for your concrete floors can be an effective way to safeguard your home’s foundation from potential water damage.
Tools and Materials Needed for Installation
There are several tools and materials that you will need to have on hand when installing a vapor barrier in your concrete floors. These include:
• Vapor barrier membrane
• Caulk gun
• Utility knife
• Tape measure
• Level
• Hammer drill or impact driver
• Screws or anchors
• Sealant or adhesive
• Protective eyewear
Step-by-Step Guide to Installing a Vapor Barrier
Installing a vapor barrier for your concrete floors is relatively straightforward if you have the right tools and materials on hand. Here is a step-by-step guide to help you get started:
1. Measure the area you want to cover with the vapor barrier and cut the membrane to size using a utility knife.
2. Secure the membrane to the subfloor using screws or anchors. Make sure you use enough screws or anchors so that the membrane won’t come loose over time.
3. Use a caulking gun to apply sealant or adhesive around the edges of the membrane to ensure that it is securely sealed against the subfloor. Allow the sealant or adhesive to dry completely before proceeding with the next step.
4. Drill holes through the membrane into the subfloor using a hammer drill or impact driver. These holes should be spaced evenly at least 8 inches apart around the perimeter of the membrane.
5. Insert screws or anchors into each hole and tighten them securely to ensure that they are firmly secured into place. Allow them to dry completely before continuing with the next step.
6. Apply sealant or adhesive around each screw or anchor head to make sure they are properly secured in place. Allow this sealant or adhesive to dry completely before proceeding with any further installation steps.
7. Inspect your work carefully once all of these steps have been completed to make sure everything is properly installed and there are no gaps or leaks in the membrane. If everything looks good, you can then move on to finishing off any other necessary tasks such as taping off any exposed edges of the membrane with duct tape or additional sealant or adhesive to make sure they are completely sealed off against moisture intrusion.
FAQs About Concrete Floor Vapor Barrier Installation
Q: How often should I replace my vapor barrier?
A: It’s recommended that you replace your vapor barrier every 7-10 years depending on how much wear and tear it has seen over time due to foot traffic,