When I bought my house three years ago, the garage floor was a disaster. Oil stains, cracks, and bare concrete that looked like it hadn’t been touched since the 1970s. I’d always admired those glossy, speckled garage floors I saw on home improvement shows, but I assumed they were way out of my budget. Then I discovered concrete floor paint with decorative flakes, and everything changed. What started as a weekend project to make my garage look presentable evolved into an obsession with creating the perfect, durable, and beautiful floor that could handle everything from car repairs to holiday storage.
Understanding Paint Flake Systems: My Learning Curve
I initially thought paint flakes were just for decoration, but I quickly learned they serve multiple practical purposes. The flakes, also known as chips or broadcasts, actually help conceal imperfections in the concrete and add texture that improves traction on what could otherwise be a slippery surface. When I started researching, I discovered that flakes come in various sizes, from fine dust-like particles to chunky quarter-sized pieces, each creating different visual effects and performance characteristics.
My first mistake was thinking all flake systems were the same. I visited several home improvement stores and found basic paint-and-flake kits that seemed affordable, but talking to contractors taught me about professional-grade epoxy systems with vinyl flakes that offer superior durability. The difference lies in the base coating, with true epoxy systems providing chemical resistance and longevity that regular concrete paint simply can’t match. I learned that the flakes bond permanently with properly applied epoxy, creating a unified surface rather than just decorative elements sitting on top.
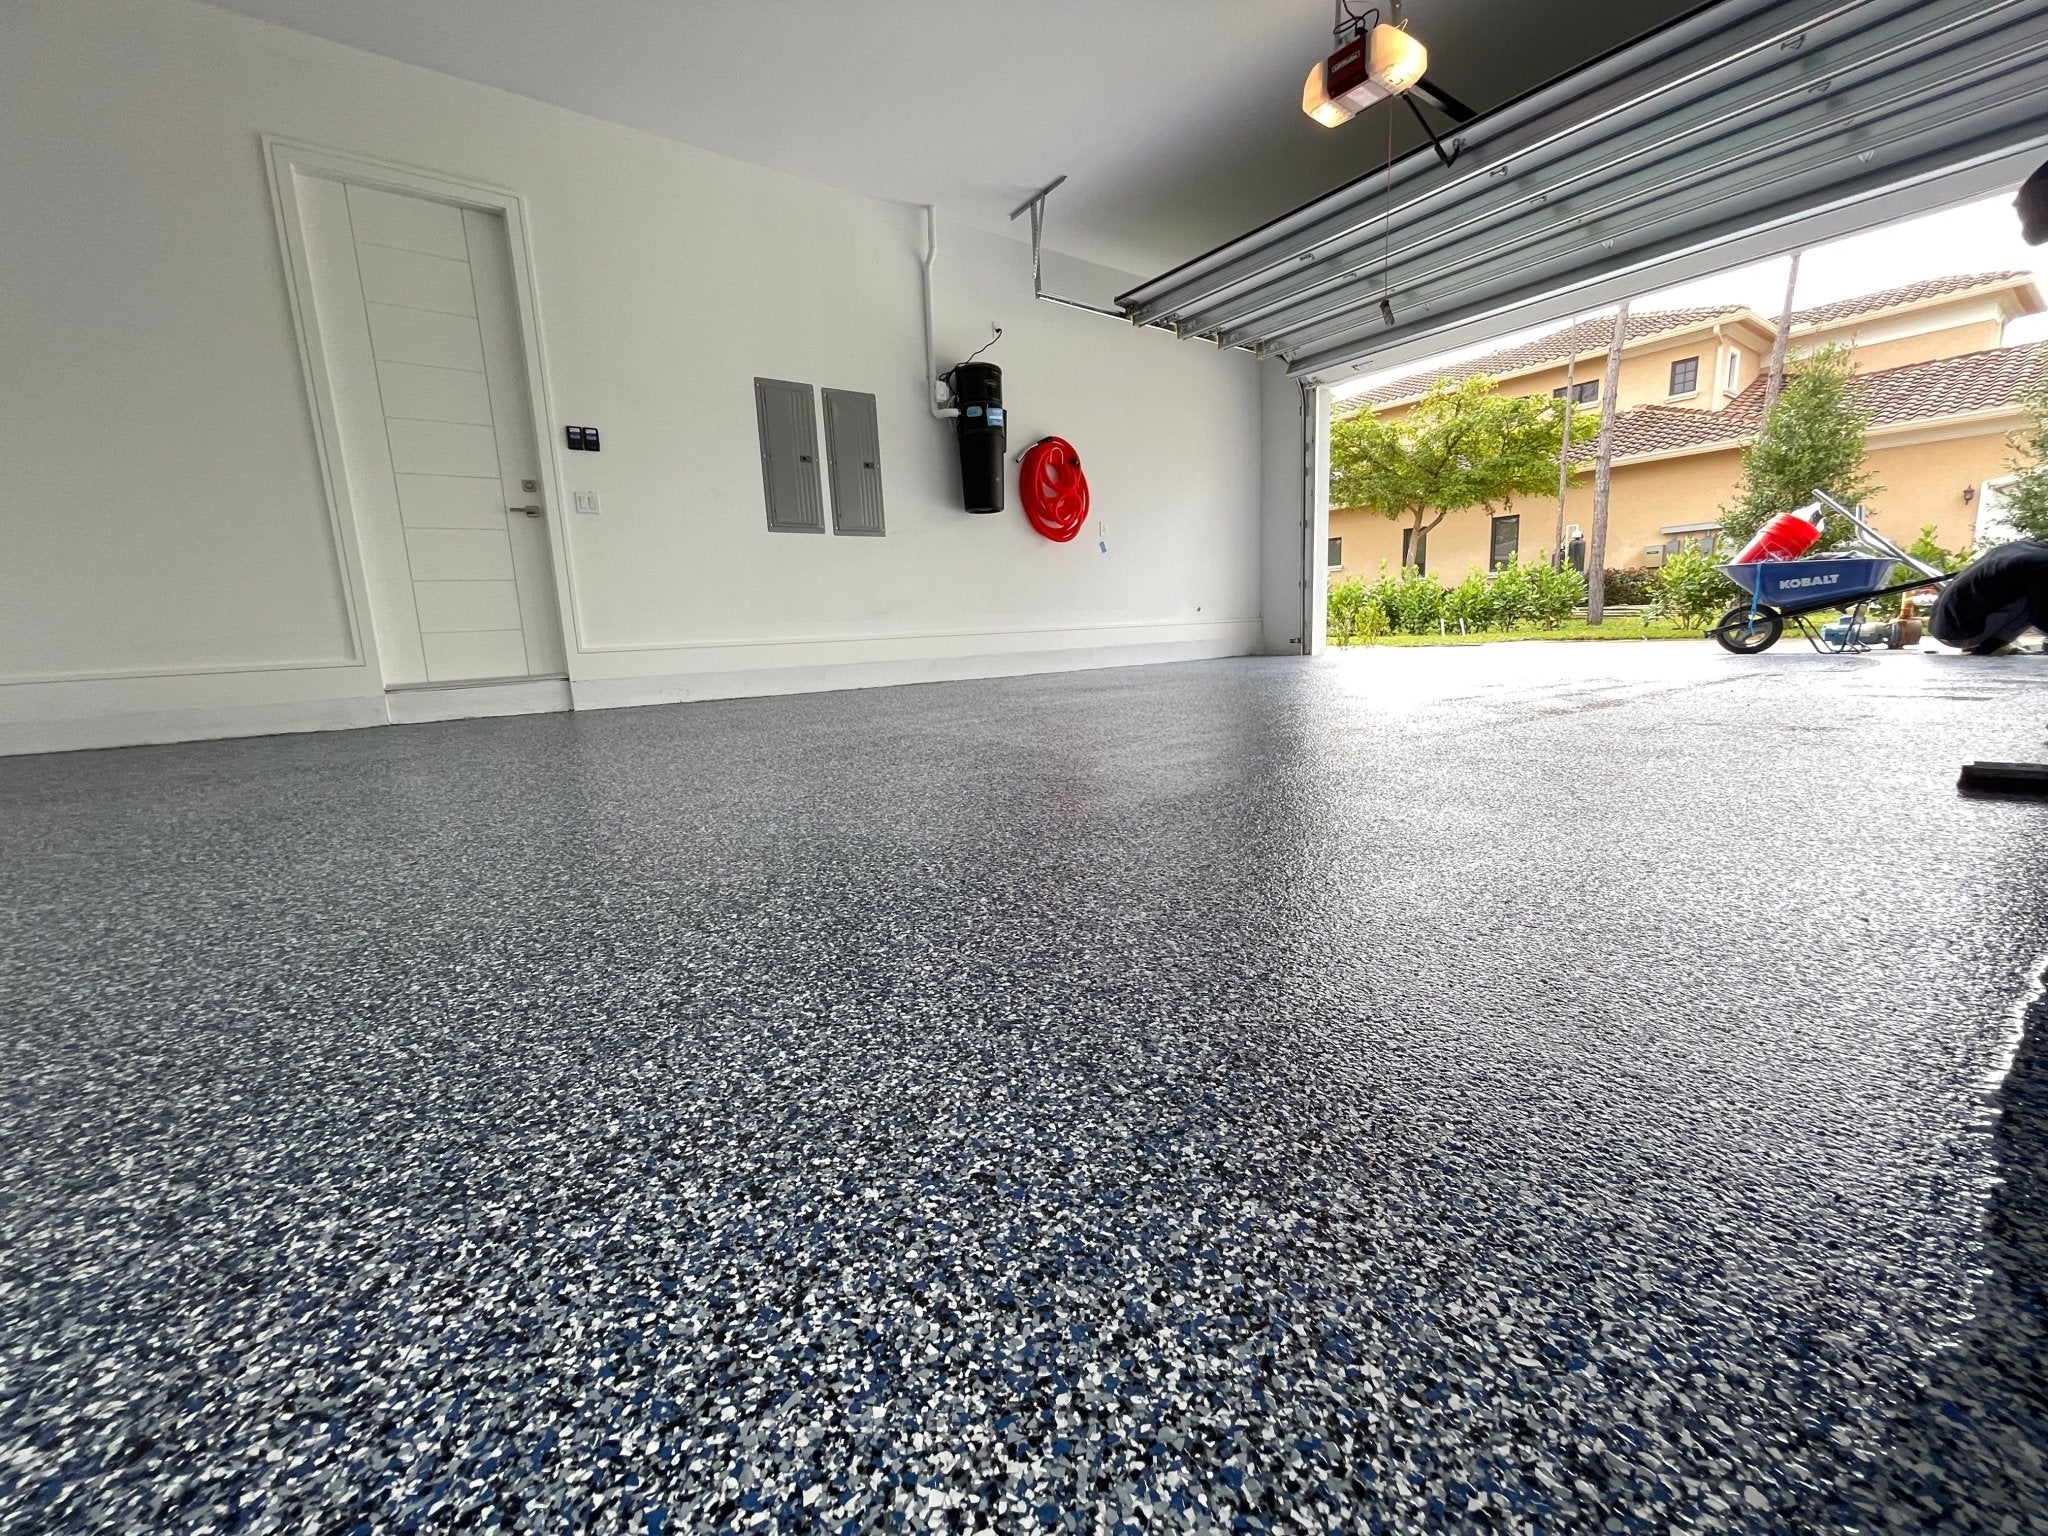
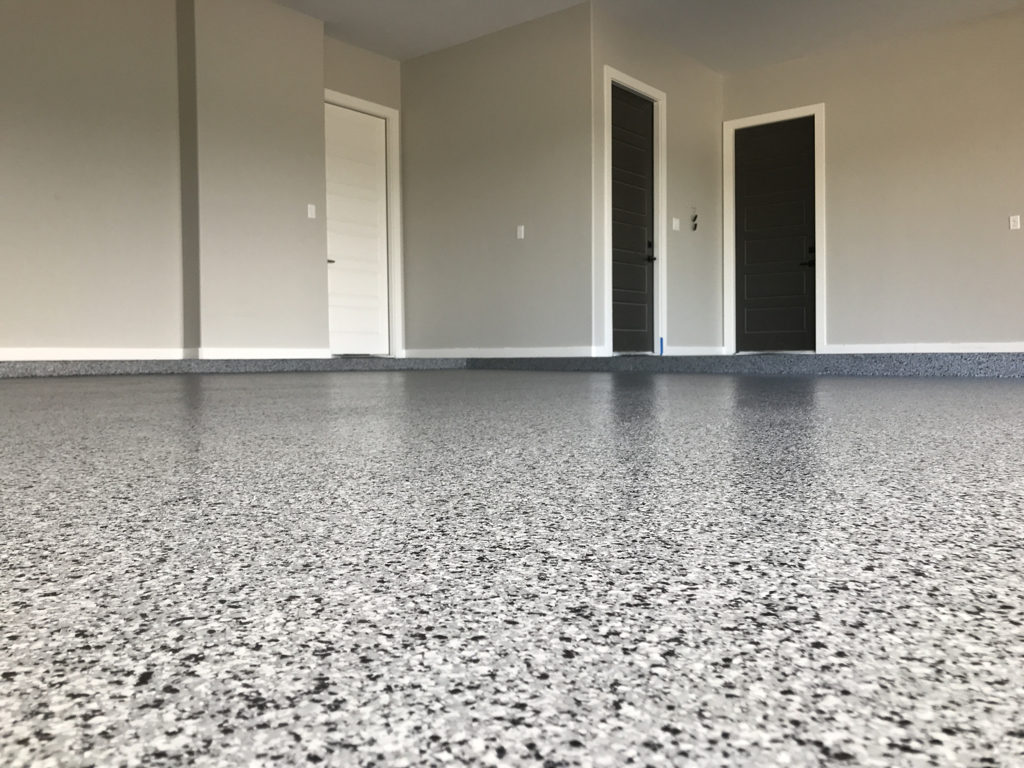
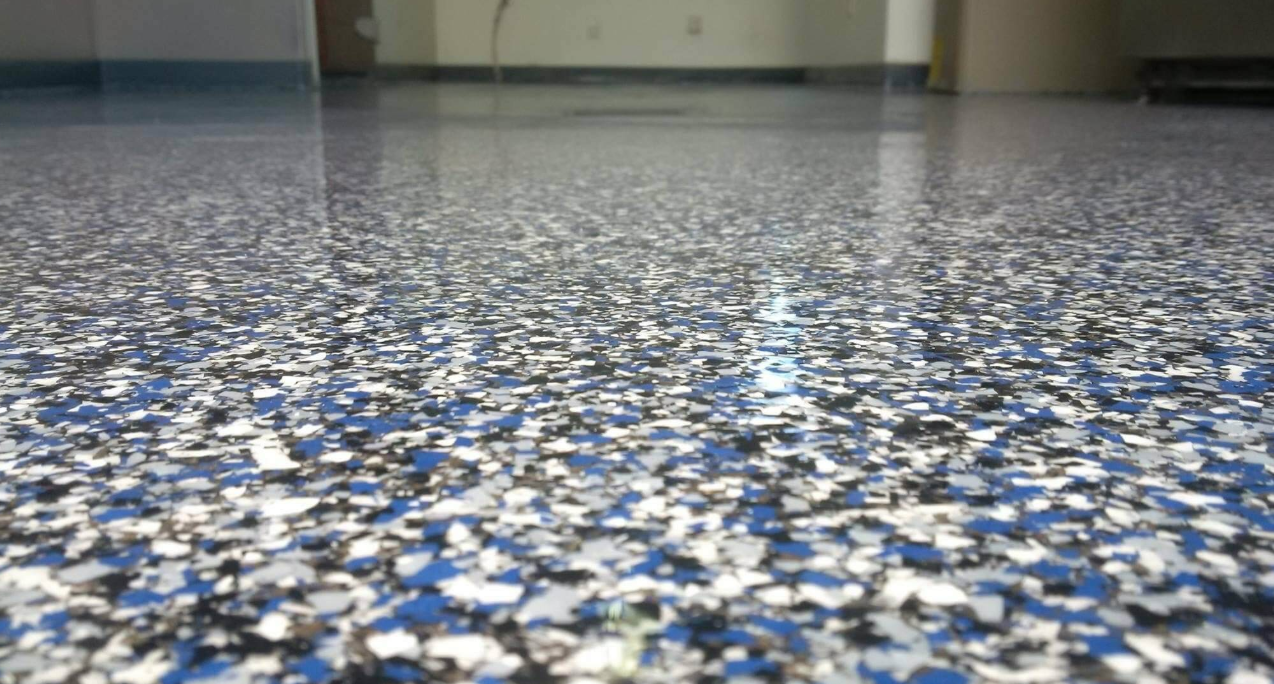
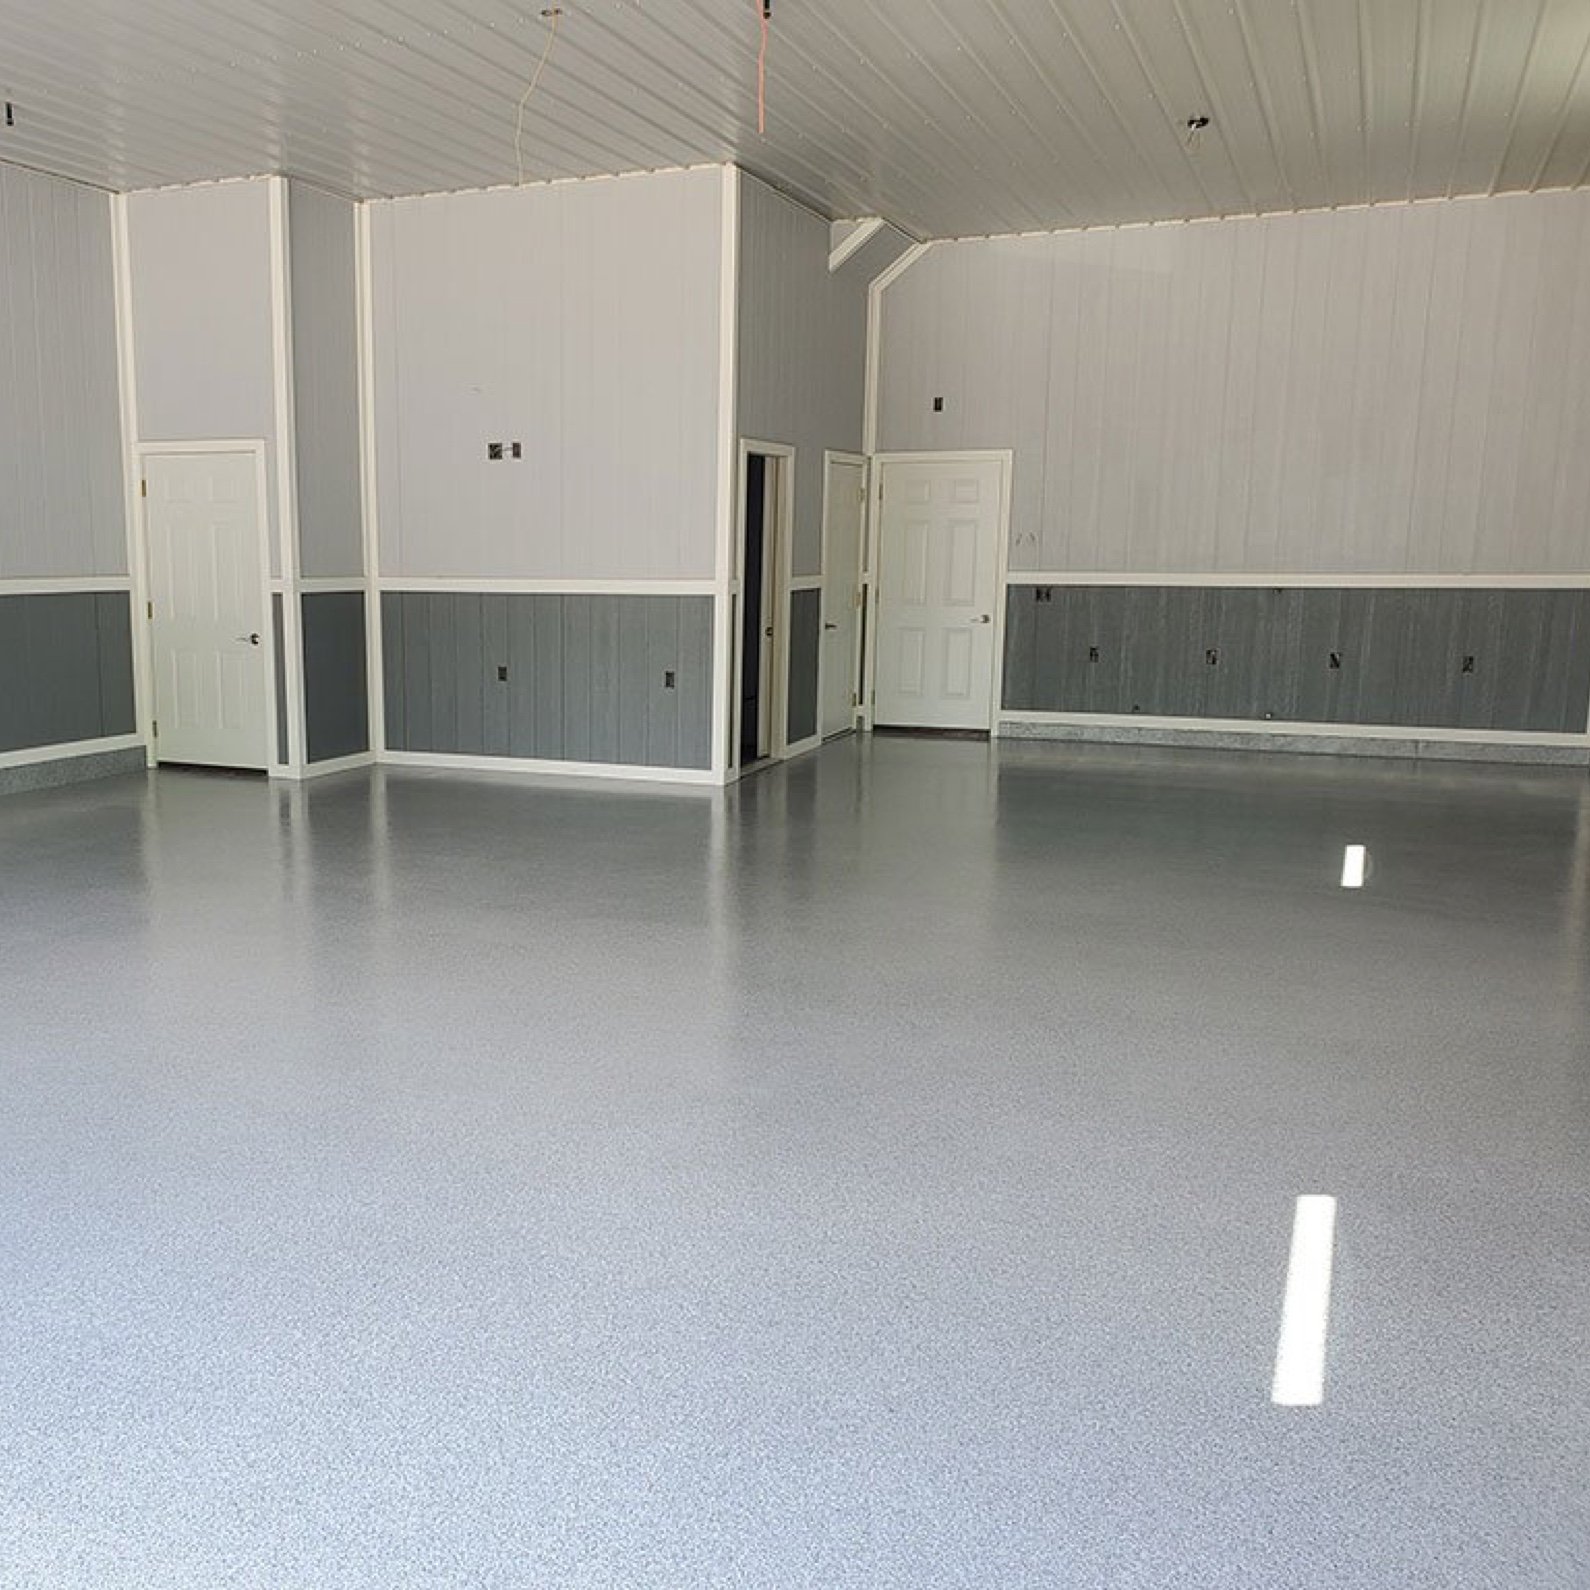
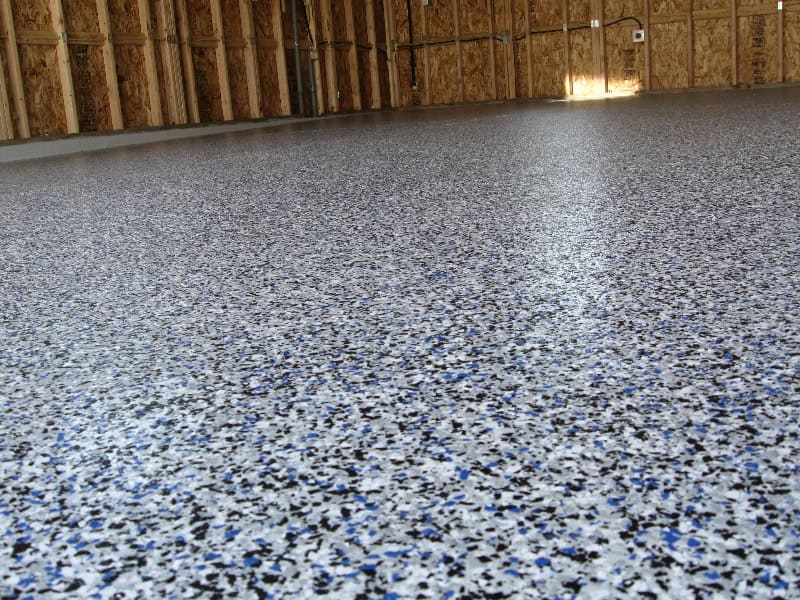
The color combinations available amazed me. I spent hours mixing different flake colors in small containers, trying to visualize how they’d look across my entire garage floor. The salesperson explained that flakes can be blended to create custom looks, from subtle earth tones that complement natural concrete to bold, high-contrast combinations that make a real statement. I settled on a blend of gray, white, and black flakes over a medium gray base, creating a sophisticated look that would complement my tools and equipment.
Surface Preparation: The Foundation of My Success
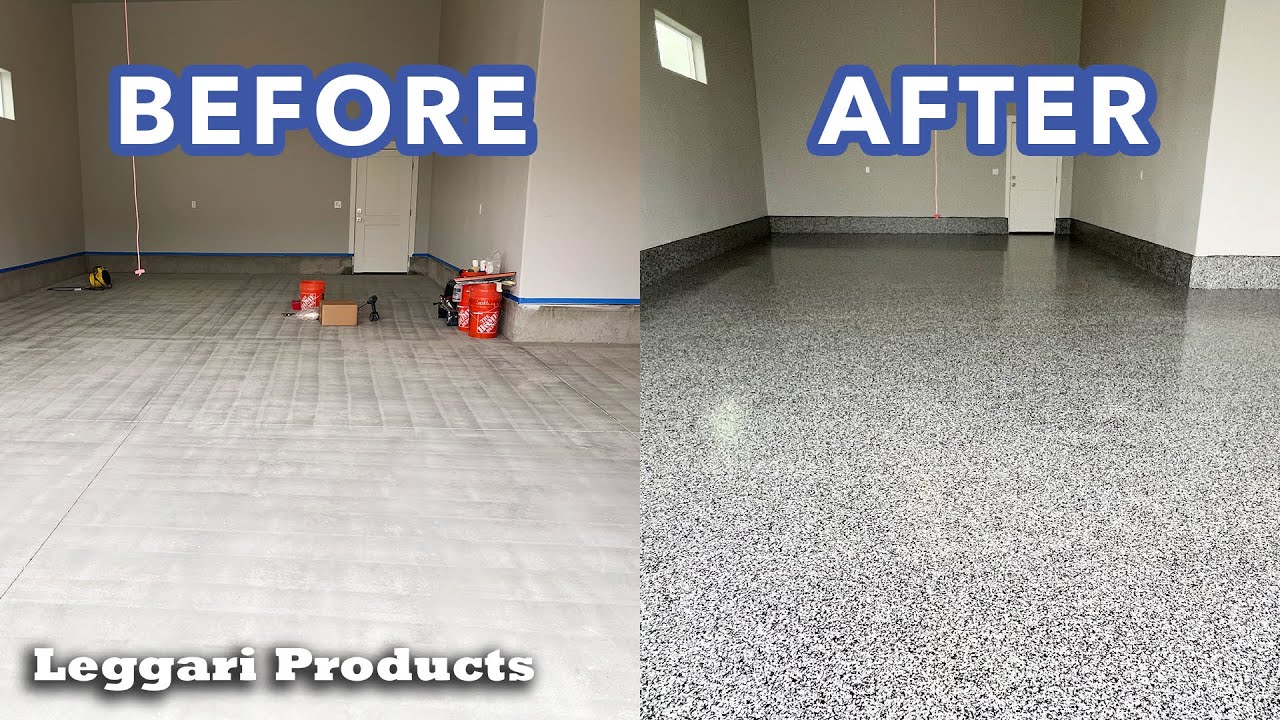
Nothing prepared me for how crucial surface preparation would be to my project’s success. I thought I could skip some steps and save time, but my research and conversations with experienced DIYers convinced me otherwise. Proper preparation accounts for about 80% of the final result’s quality and longevity. I started by thoroughly cleaning the concrete with a degreaser to remove years of accumulated oil stains, then used a pressure washer to blast away loose debris and surface contaminants.
The next step, concrete etching, initially intimidated me. I used muriatic acid diluted according to the manufacturer’s instructions, working in small sections while wearing full protective gear. The acid creates microscopic pits in the concrete surface that help the paint and flakes bond properly. I could actually see the difference as the concrete changed from smooth to slightly textured. After neutralizing and thoroughly rinsing the acid, I let everything dry completely for 24 hours before proceeding.
Crack repair became more involved than I expected. Several hairline cracks required filling with concrete crack filler, which I applied with a putty knife and sanded smooth once cured. I also discovered that my garage floor wasn’t perfectly level, with a few low spots that collected water. Using a self-leveling concrete compound in these areas ensured my final surface would be uniform. This preparation phase took two full days, but seeing the clean, uniform concrete surface ready for coating made every hour worthwhile.
Choosing the Right Flake Size and Color: My Design Process
Selecting flake size became a balancing act between aesthetics and practicality. Fine flakes create a subtle, almost granite-like appearance that looks sophisticated but doesn’t add much texture for traction. Large flakes make a bold visual statement and provide excellent slip resistance, but they can be harder to clean and may interfere with rolling equipment. I chose medium-sized flakes as my primary broadcast with a small amount of larger accent flakes for visual interest and improved safety.
Color selection consumed more time than I expected. I brought home sample boards showing different flake combinations and observed them under various lighting conditions throughout the day. My garage has both fluorescent work lights and natural light from windows, and I was surprised how different the same flake blend looked under each condition. I ultimately chose a multi-colored blend that looked consistent and attractive under all lighting scenarios, avoiding single-color systems that could appear flat or monotonous.
The coverage rate became an important consideration in my planning. Most manufacturers recommend specific broadcast rates measured in pounds per square foot, but I learned that personal preference plays a role, too. Light broadcast creates a speckled appearance where individual flakes are visible, while heavy broadcast can completely cover the base color for a solid, textured look. I opted for medium-heavy coverage that would hide minor imperfections while still showing some base color through the flakes.
Application Technique: My Trial and Error Experience
My first attempt at applying the base coat taught me the importance of working systematically and maintaining a wet edge. I started in the back corner of my garage and worked toward the entrance, using a high-quality roller with a 3/8-inch nap cover recommended for epoxy applications. The key was maintaining consistent coverage while working quickly enough that adjacent sections blended seamlessly. I learned to plan my work area in manageable sections that I could complete before the epoxy began to set.
Broadcasting the flakes required more finesse than I anticipated. I practiced my throwing technique on cardboard, learning to cast flakes in a wide, even arc while walking backward across the wet coating. The timing was critical, broadcasting while the epoxy was still tacky enough to grab the flakes but not so wet that they sank completely into the coating. I found that working with a partner made the process much smoother, with one person applying the coating and the other broadcasting flakes immediately behind.
The second coat application over the embedded flakes presented its own challenges. I had to sand down any sharp flake edges that stood proud of the surface, then thoroughly vacuum all dust before applying the clear topcoat. This topcoat not only sealed the flakes permanently in place but also provided the final gloss level and chemical resistance. I applied it with a foam roller to avoid creating texture in the smooth finish, working carefully to avoid bubbles or roller marks that would be permanent once cured.

Maintenance and Durability: My Long-Term Results
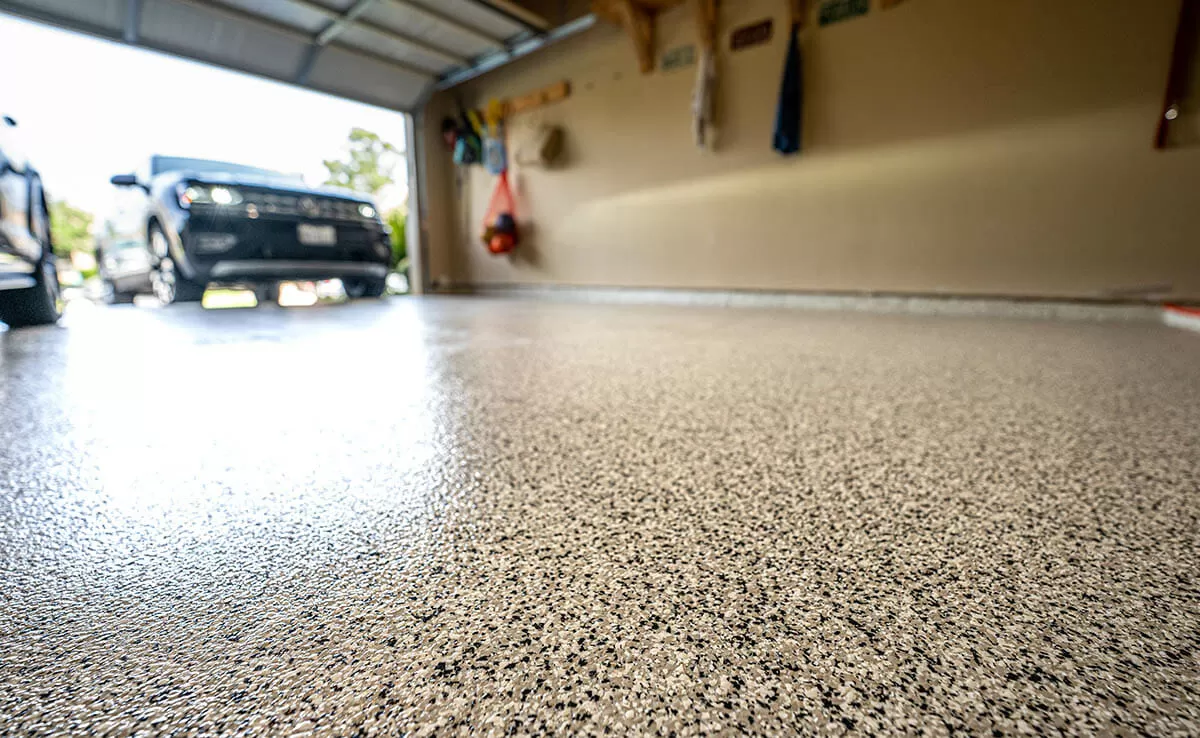
Three years into living with my flaked concrete floor, I can speak confidently about its real-performance characteristics. Daily maintenance involves nothing more than sweeping or dust mopping to remove debris tracked in from outside. The textured surface created by the flakes actually helps hide dust and small particles between cleanings, unlike smooth floors that show every speck of dirt. Monthly deep cleaning with a standard mop and mild detergent keeps the floor looking fresh and maintains its gloss.
The durability has exceeded my expectations, especially considering the abuse my garage floor endures. I regularly park two cars on it, drag heavy equipment across it, and work on various projects that involve dropping tools and spilling fluids. The flaked surface shows remarkably little wear, and the few minor scratches that have appeared blend into the textured pattern and aren’t noticeable unless I look closely. Chemical spills from car maintenance wipe up easily without staining or etching the surface.
I’ve noticed that high-traffic areas, particularly where I walk most frequently, have developed a subtle polish from foot traffic, but this actually enhances the floor’s appearance rather than detracting from it. The areas under my car tires show no indentation or permanent marking, proving the coating’s resistance to point loads. The biggest maintenance surprise was how easy snow and ice removal became, with the smooth surface allowing me to clear winter weather effects with a simple push broom rather than scraping and chipping.

Cost Analysis and Value: My Investment Perspective
When I calculated the total cost of my flaked concrete floor project, including all materials, tools, and my time, it came to roughly $3.50 per square foot for my 400-square-foot garage. This compared favorably to professional installation quotes that ranged from $6 to $12 per square foot for similar systems. The DIY approach required significant time investment, about 20 hours spread over four days, but the satisfaction of completing the project myself added value beyond the monetary savings.
Comparing my flaked floor to other garage flooring options helped justify the investment. Interlocking tiles would have cost similar amounts but wouldn’t have provided the seamless, professional appearance I wanted. Polished concrete was more expensive and wouldn’t have hidden my floor’s existing imperfections. Traditional concrete paint was cheaper initially but would require reapplication every few years, making the flaked system more economical long-term.
The added value to my home became apparent when I had it appraised for refinancing. The appraiser specifically noted the upgraded garage floor as a positive feature, though he couldn’t assign a specific dollar value to the improvement. More importantly, I use my garage differently now that it looks professional and clean. It’s become a more functional workspace and storage area, effectively adding usable square footage to my home. Friends and neighbors constantly compliment the floor, and several have asked for advice on their own projects.
How long does it take for concrete floor paint with flakes to fully cure before I can park cars on it?
In my experience, most systems allow light foot traffic after 24 hours, but I waited a full week before parking cars on mine. The manufacturer recommended 72 hours for vehicle traffic, but I wanted to be completely safe. Full chemical cure takes about 30 days, during which the coating continues hardening and reaching maximum durability.
Can I apply flaked concrete paint over an existing painted garage floor?
This depends on the existing paint’s condition and type. I tested adhesion by trying to scratch off the old coating. If it peels easily, it must be completely removed first. In my case, I had bare concrete, but friends who painted over well-bonded existing coatings achieved good results after proper cleaning and light sanding for adhesion.
What happens if some areas have lighter flake coverage after application?
I experienced this in a few spots where I was too conservative with flake broadcasting. You can’t easily add more flakes once the base coat starts curing, so I accepted the variation. In future projects, I’d broadcast more heavily since excess flakes can be swept up and reused, but thin areas are permanent unless you start over.
How do flaked floors perform in cold climates with freeze-thaw cycles?
My garage experiences significant temperature swings, and the floor has performed flawlessly through three winters. The key is proper surface preparation and using products rated for exterior use. The flexible nature of quality epoxy coatings allows them to expand and contract with the concrete substrate without cracking or delaminating.

Can I repair damaged areas of flaked concrete flooring without redoing the entire floor?
Small repairs are possible, but challenging to blend seamlessly. I had to fix one area damaged by a battery acid spill, which required sanding, repainting, broadcasting matching flakes, and topcoating. The repair is functional but slightly visible if you know where to look. Major damage would likely require full refinishing of that section.
What’s the biggest mistake people make with DIY flaked concrete floors?
Based on my research and mistakes, inadequate surface preparation causes most failures. Many people skip the etching step or don’t clean thoroughly enough. I also learned that working in hot weather or high humidity can cause application problems. Following manufacturer instructions exactly, especially regarding temperature and timing, is crucial for success.

Garage floor coating, epoxy flake coating, patios, concrete

Epoxy Flakes On A Garage Floor

Chip Flooring Systems
Garage Makeover Using Epoxy
Epoxy Flake Floor – Decorative, Uniform, Durable and Efficient
Related Posts: