Epoxy is going to protect and expand the life of concrete when applied over the prior concrete flooring. They're for sale in different styles and combos as well as their software hinges just on the budget as well as the place to be covered.
Images about Epoxy Flooring Installation Process
Epoxy Flooring Installation Process
Whatever style of shade you've in mind, you are able to get the color of paint you are searching for. The floors are very simple to clean and maintain, and they last for many months even in high traffic areas. You are able to likewise repair your epoxy flooring if you have a chip or maybe damage the floor in some way. The paint is thinner than the solids, nonetheless, and will not last as long.
Lifetime Epoxy Floors Unique 5-Step Installation process

Even though epoxy flooring is more often than not a concrete floor it is able to in addition be used on floors made of wood. Further, they also give business owners an additional advantage of customization in qualities which isn't available with other flooring choices. Tile repels most stains and dirt, but is quite brittle and certainly will chip quickly.
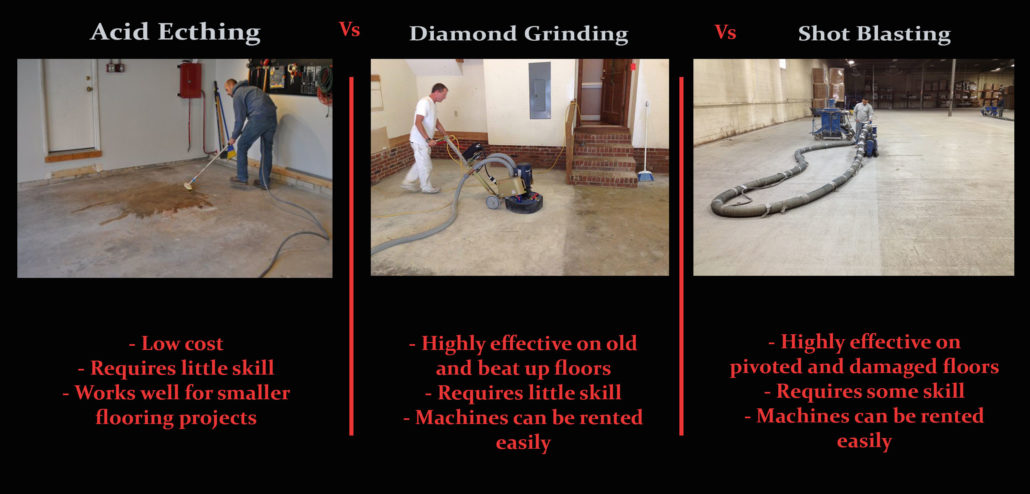
How to Apply Epoxy Coating to a Garage Floor – This Old House
:no_upscale()/cdn.vox-cdn.com/uploads/chorus_asset/file/19495950/epoxy_floor_overview.jpg)
How to Apply Epoxy Floor Paint – A 7 step guide
How to do Epoxy Floors – STEP BY STEP GUIDE – S3E3
The Cons of DIY Epoxy Garage Coatings Dreamcoat Flooring

Chicagoland Solid Color Epoxy Flooring Professionals – Epoxy Experts

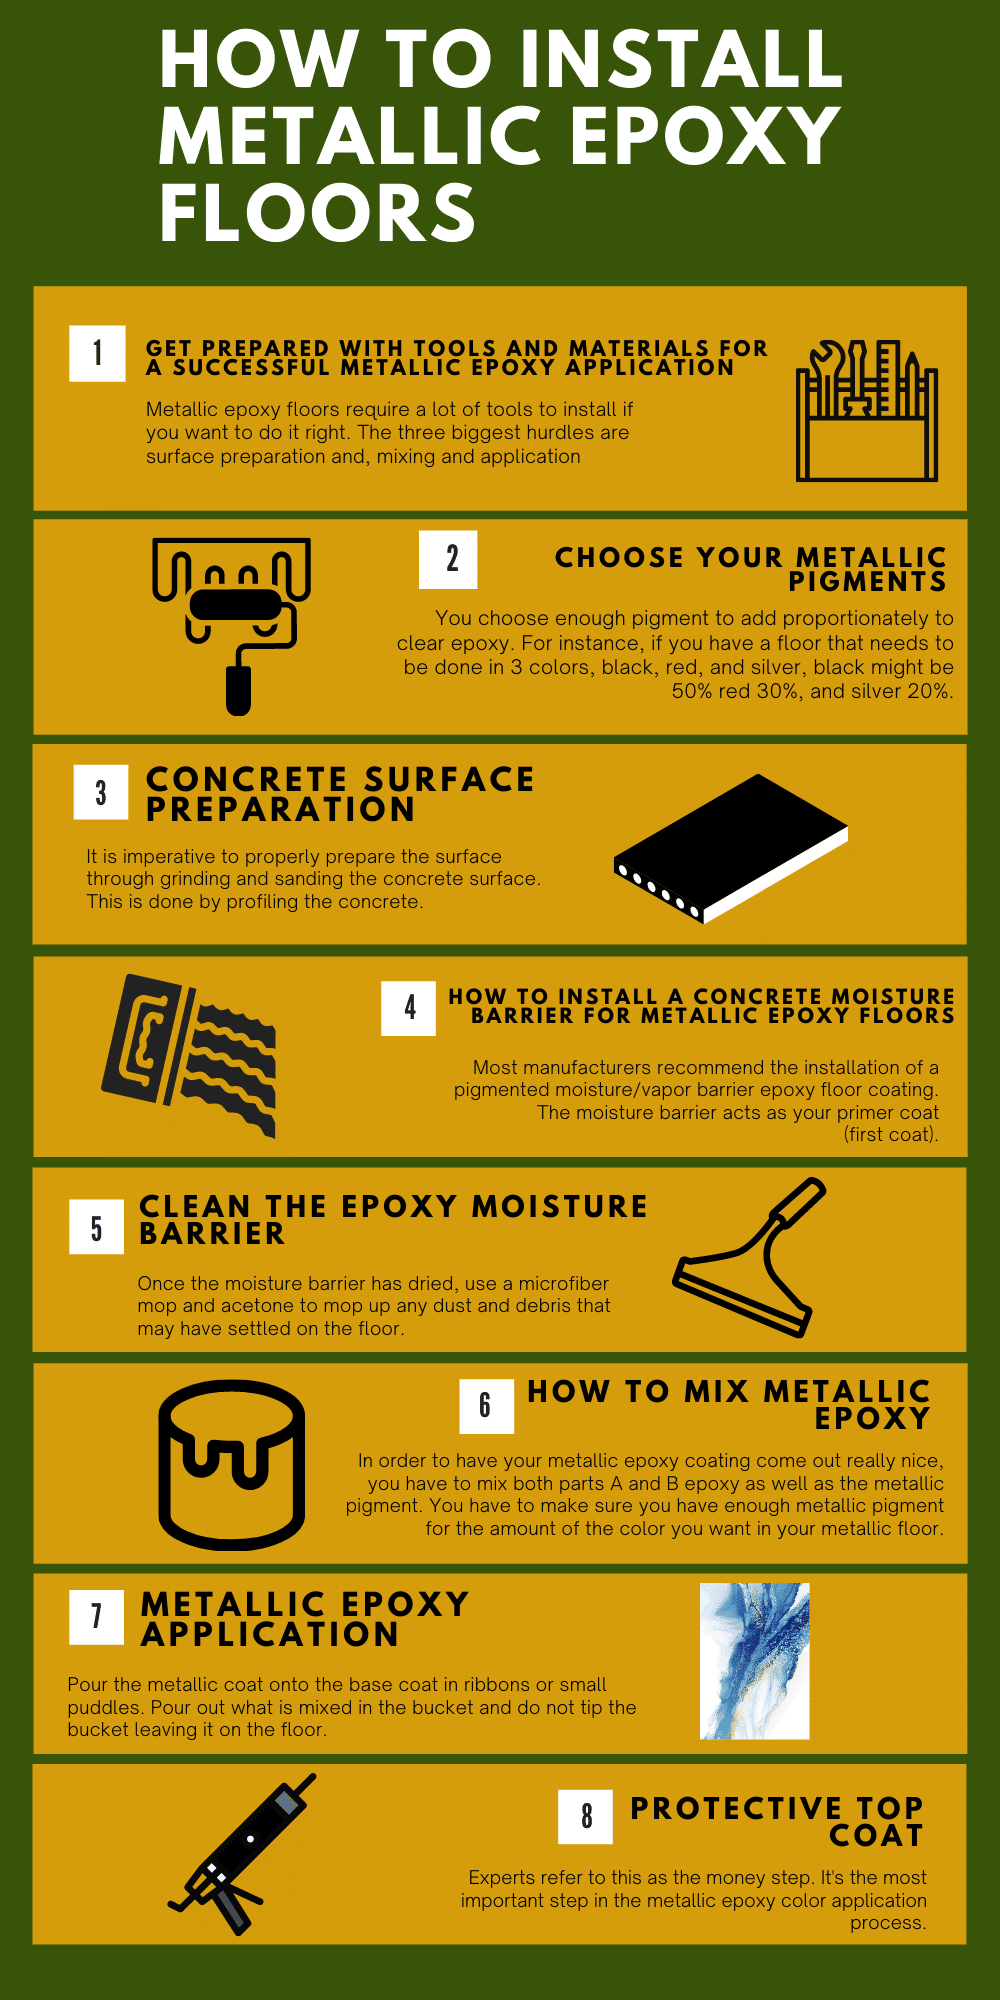
Learn How To Install Metallic Epoxy Floors: A How-To Guide For
How to Do Epoxy Flooring (with Pictures) – wikiHow

Epoxy Coating Process – The 4 key steps involved (2018)

How to Do Epoxy Flooring (with Pictures) – wikiHow

How to Apply Garage Floor Epoxy Coatings The DIY Guide All
Industrial Floorings FAQs PSC Flooring Ltd. Epoxy Flooring

What is Epoxy Flooring? A Better Flooring Solution Epoxy Colorado
Related Posts:
- Epoxy Flooring Advantages Disadvantages
- Metallic Epoxy Bathroom Floor
- Sherwin Williams Epoxy Floor
- High Gloss Epoxy Flooring
- Epoxy Flooring Interior Design
- Metallic Epoxy Floor Coating
- Epoxy Floor Coating
- Epoxy Kitchen Floor
- Epoxy Basement Floor
- Epoxy Resin Garage Floor
Epoxy Flooring Installation Process: A Step-by-Step Guide
Epoxy flooring is a popular choice for residential and commercial spaces due to its durability, low maintenance, and easy installation. It is also an excellent choice for areas that experience heavy foot traffic or frequent spills. Installing epoxy flooring requires a few simple steps, and the end result is an attractive, long-lasting flooring solution. Read on for a step-by-step guide to installing epoxy flooring.
Preparation
Before beginning the installation process, it is important to prepare the space. This should include removing any existing flooring, cleaning the surface thoroughly, and filling in any cracks or holes. It is also important to make sure the surface is completely dry before beginning the installation process. Once the surface is prepared, it is time to begin installing epoxy flooring.
Primer
The first step in installing epoxy flooring is to apply a primer. This will help ensure that the epoxy adheres properly to the floor. The primer should be applied according to the manufacturer’s instructions and allowed to dry completely before proceeding.
Mixing Epoxy
Once the primer has dried, it is time to mix up the epoxy. This should be done according to the manufacturer’s instructions and using the appropriate materials. It is important to mix the epoxy thoroughly until it reaches a uniform consistency before applying it to the floor.
Applying Epoxy
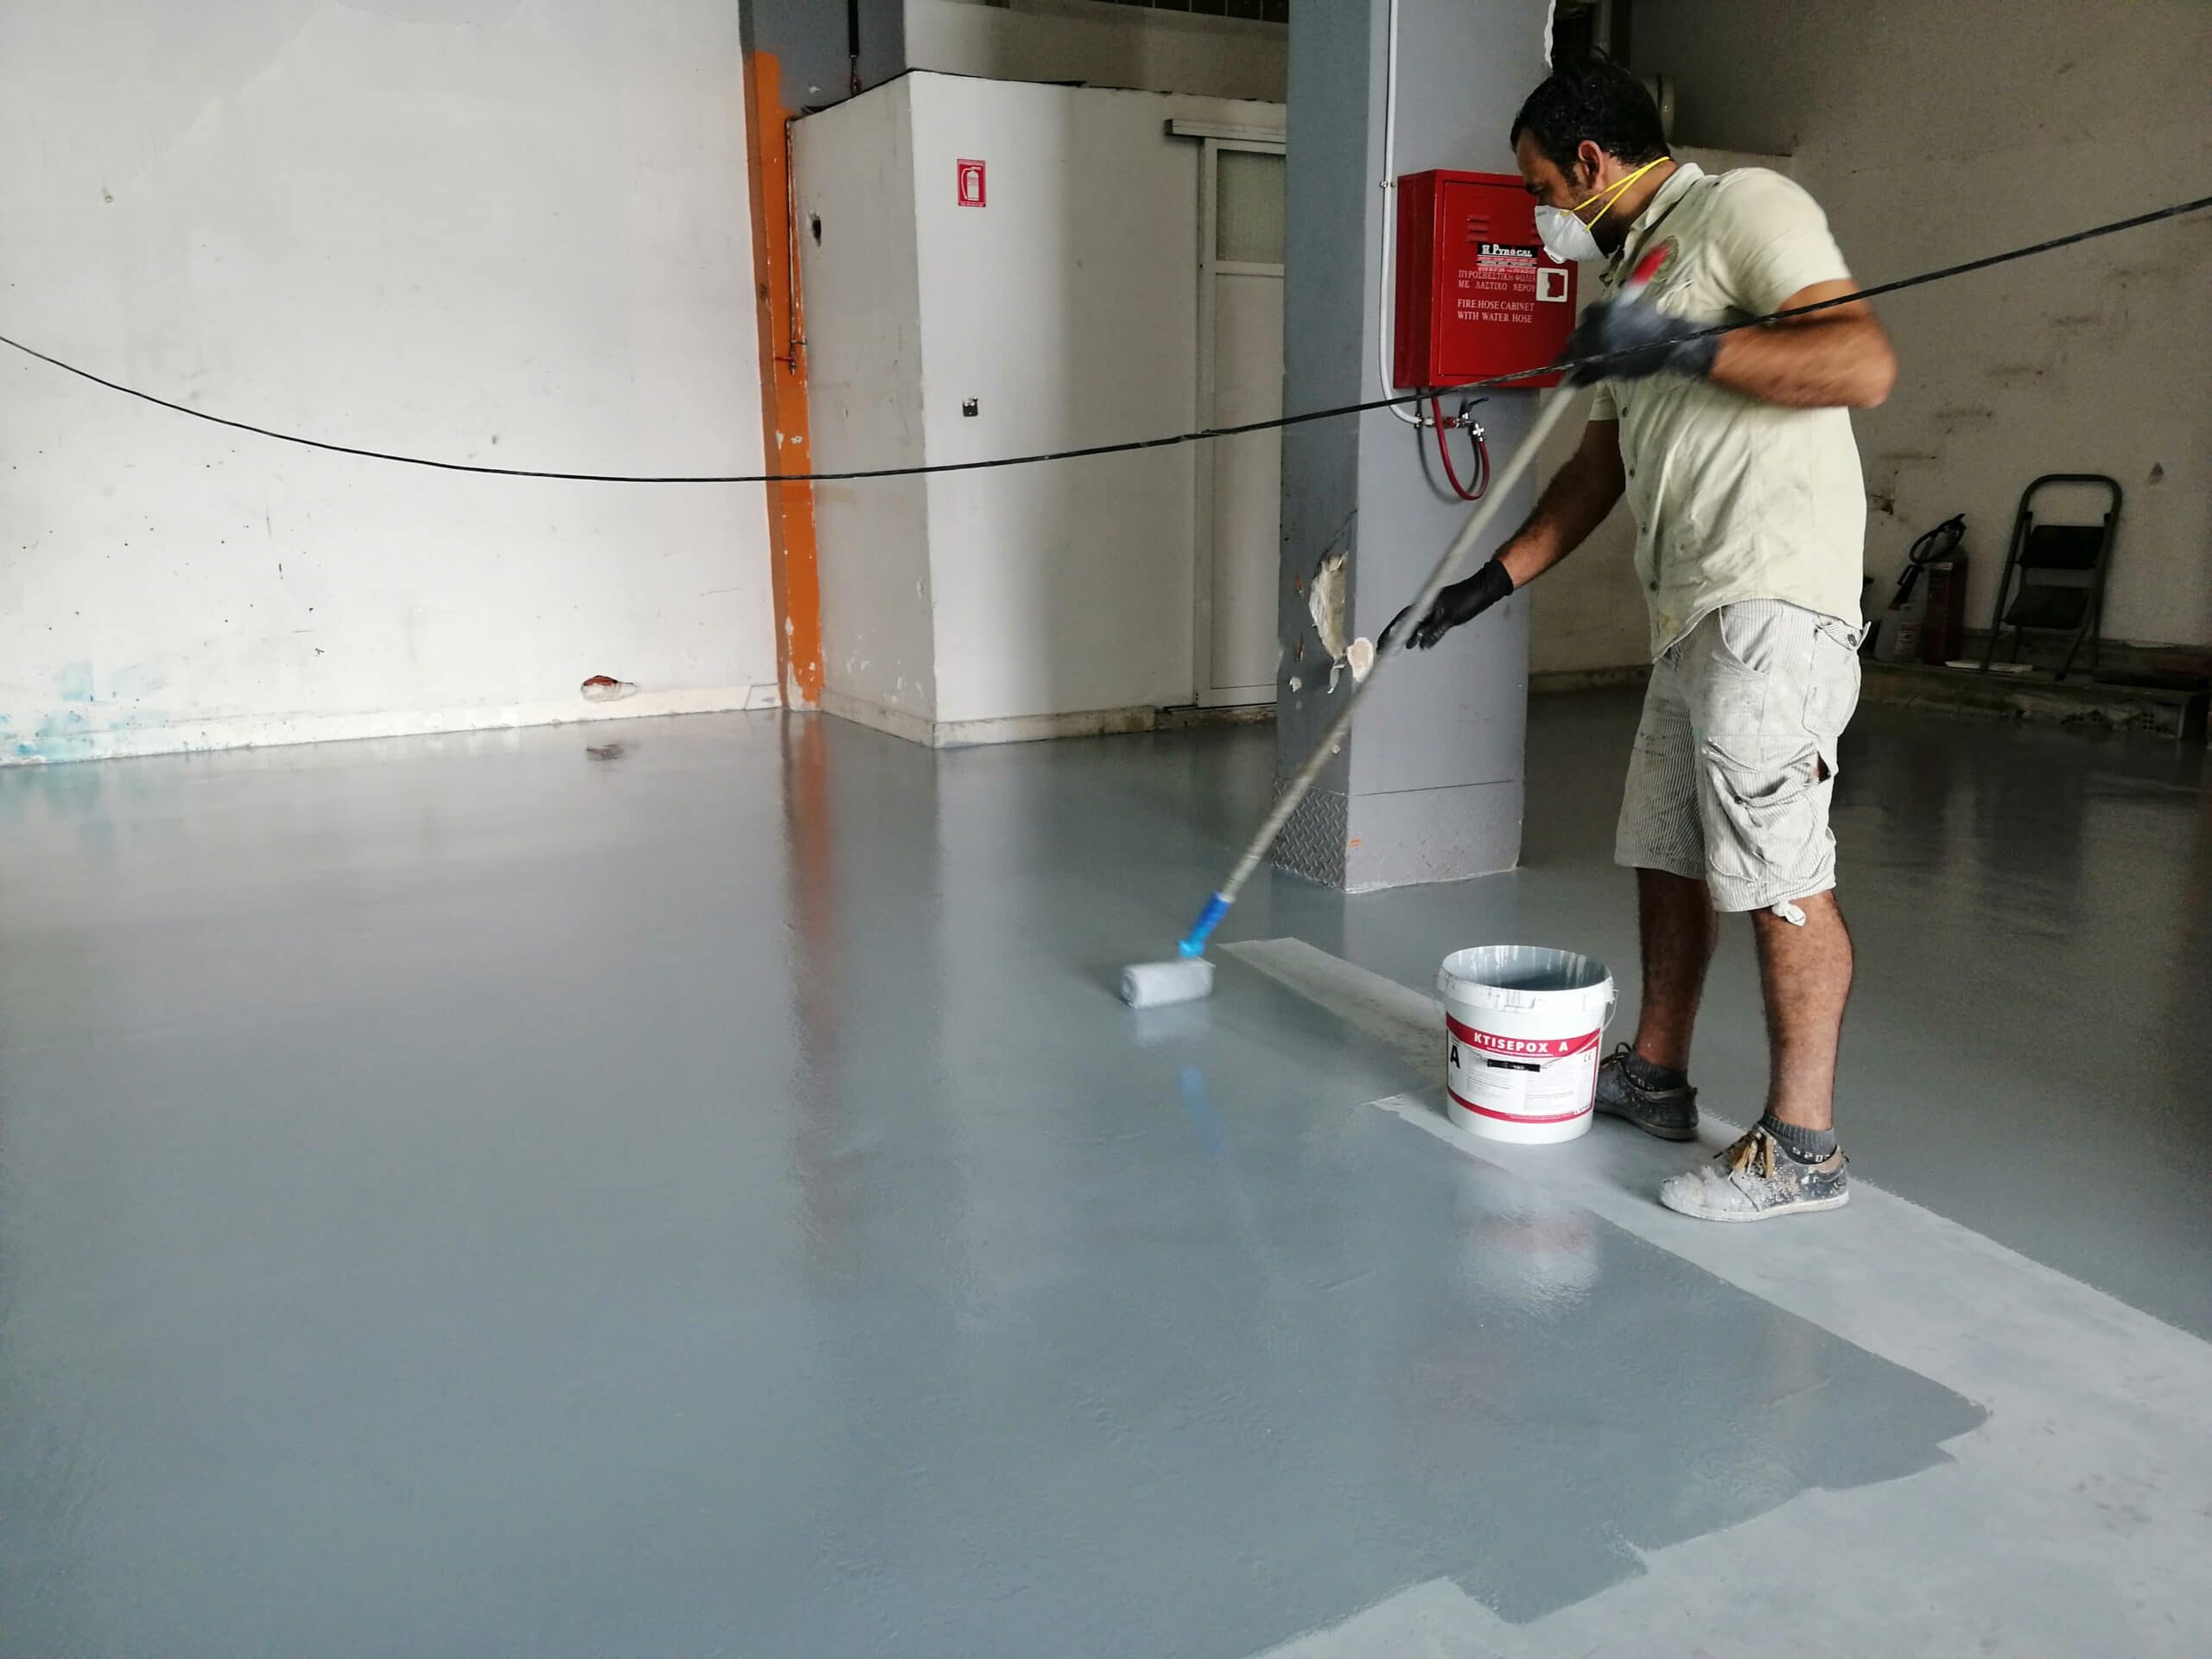
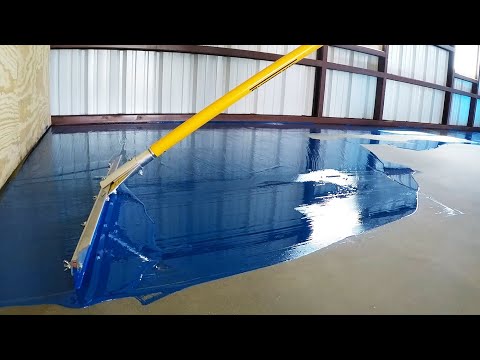
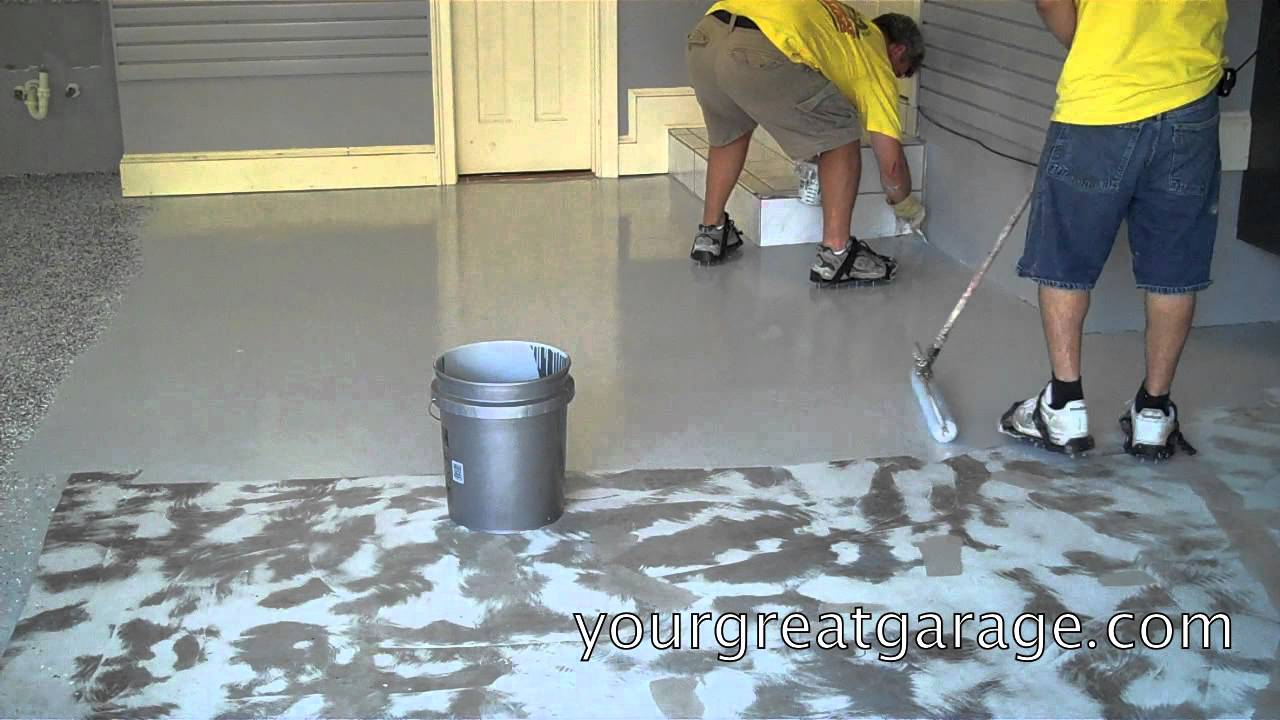
Once the epoxy has been mixed, it is time to apply it to the floor. It should be spread evenly across the surface using a roller or brush. Depending on the size of the space, it may be necessary to divide the space into sections and complete one section at a time. Once all of the sections have been completed, it is important to allow the epoxy to cure according to the manufacturer’s instructions before proceeding.
Finishing Touches
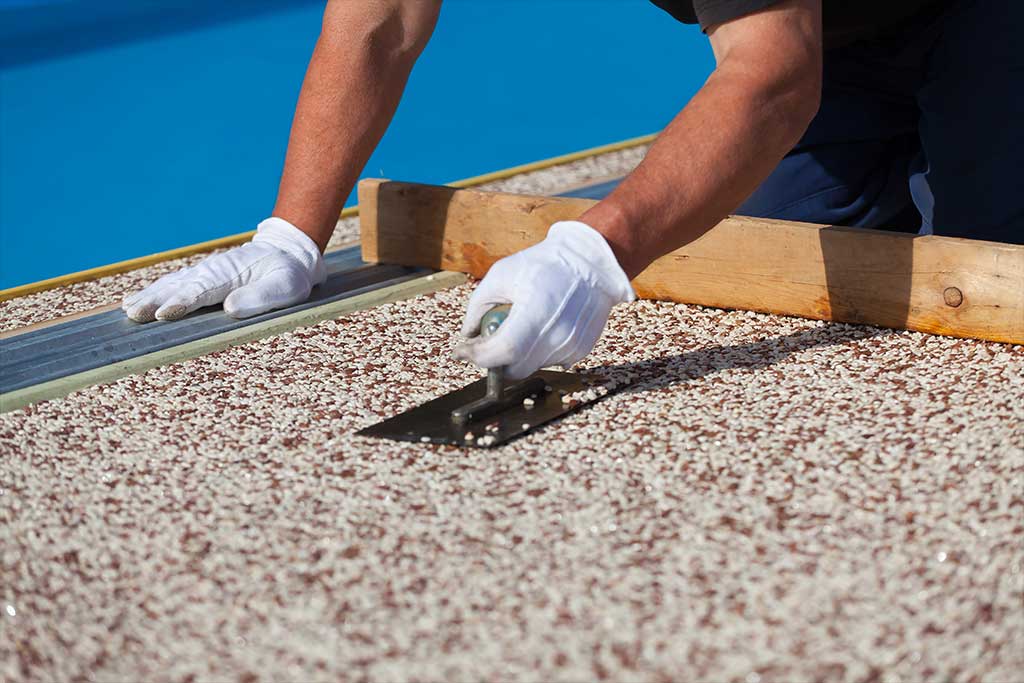
Once the epoxy has cured completely, it is time to add any finishing touches such as decorative flakes or paint chips. These should be applied according to the manufacturer’s instructions and allowed to dry completely before proceeding. Once all of these steps have been completed, it is time to enjoy your new epoxy floor!
FAQs
Q1: What tools are needed for installing epoxy flooring?
A1: The tools needed for installing epoxy flooring include a roller or brush for applying the epoxy, an applicator gun for mixing and applying any decorative flakes or paint chips, and a vacuum or broom for cleaning up any excess material.
Q2: How long does it take for epoxy flooring to cure?
A2: The amount of time it takes for epoxy flooring to cure depends on several factors including temperature, humidity, and type of epoxy used. Generally speaking, most types of epoxy require 24 hours of curing time for every 1/8th inch of thickness applied.
Q3: Is epoxy flooring easy to maintain?
A3: Yes, epoxy flooring is very easy to maintain and only requires occasional sweeping or mopping with a damp mop. It is also resistant to wear and tear, making it an ideal choice for areas that experience heavy foot traffic or frequent spills.