When I first considered vinyl flooring for my master bathroom renovation three years ago, I’ll admit I was skeptical. Like many homeowners, I associated vinyl with cheap, outdated options that looked fake. But after researching modern vinyl products and seeing installations in friends’ homes, I discovered that today’s vinyl flooring has completely transformed. From luxury vinyl planks that perfectly mimic hardwood to sophisticated tile patterns that rival expensive ceramics, vinyl has become my go-to recommendation for bathroom flooring. It’s completely waterproof, comfortable underfoot, surprisingly durable, and offers design possibilities I never imagined possible at such an affordable price point.
Luxury Vinyl Plank Options That Look Like Real Wood
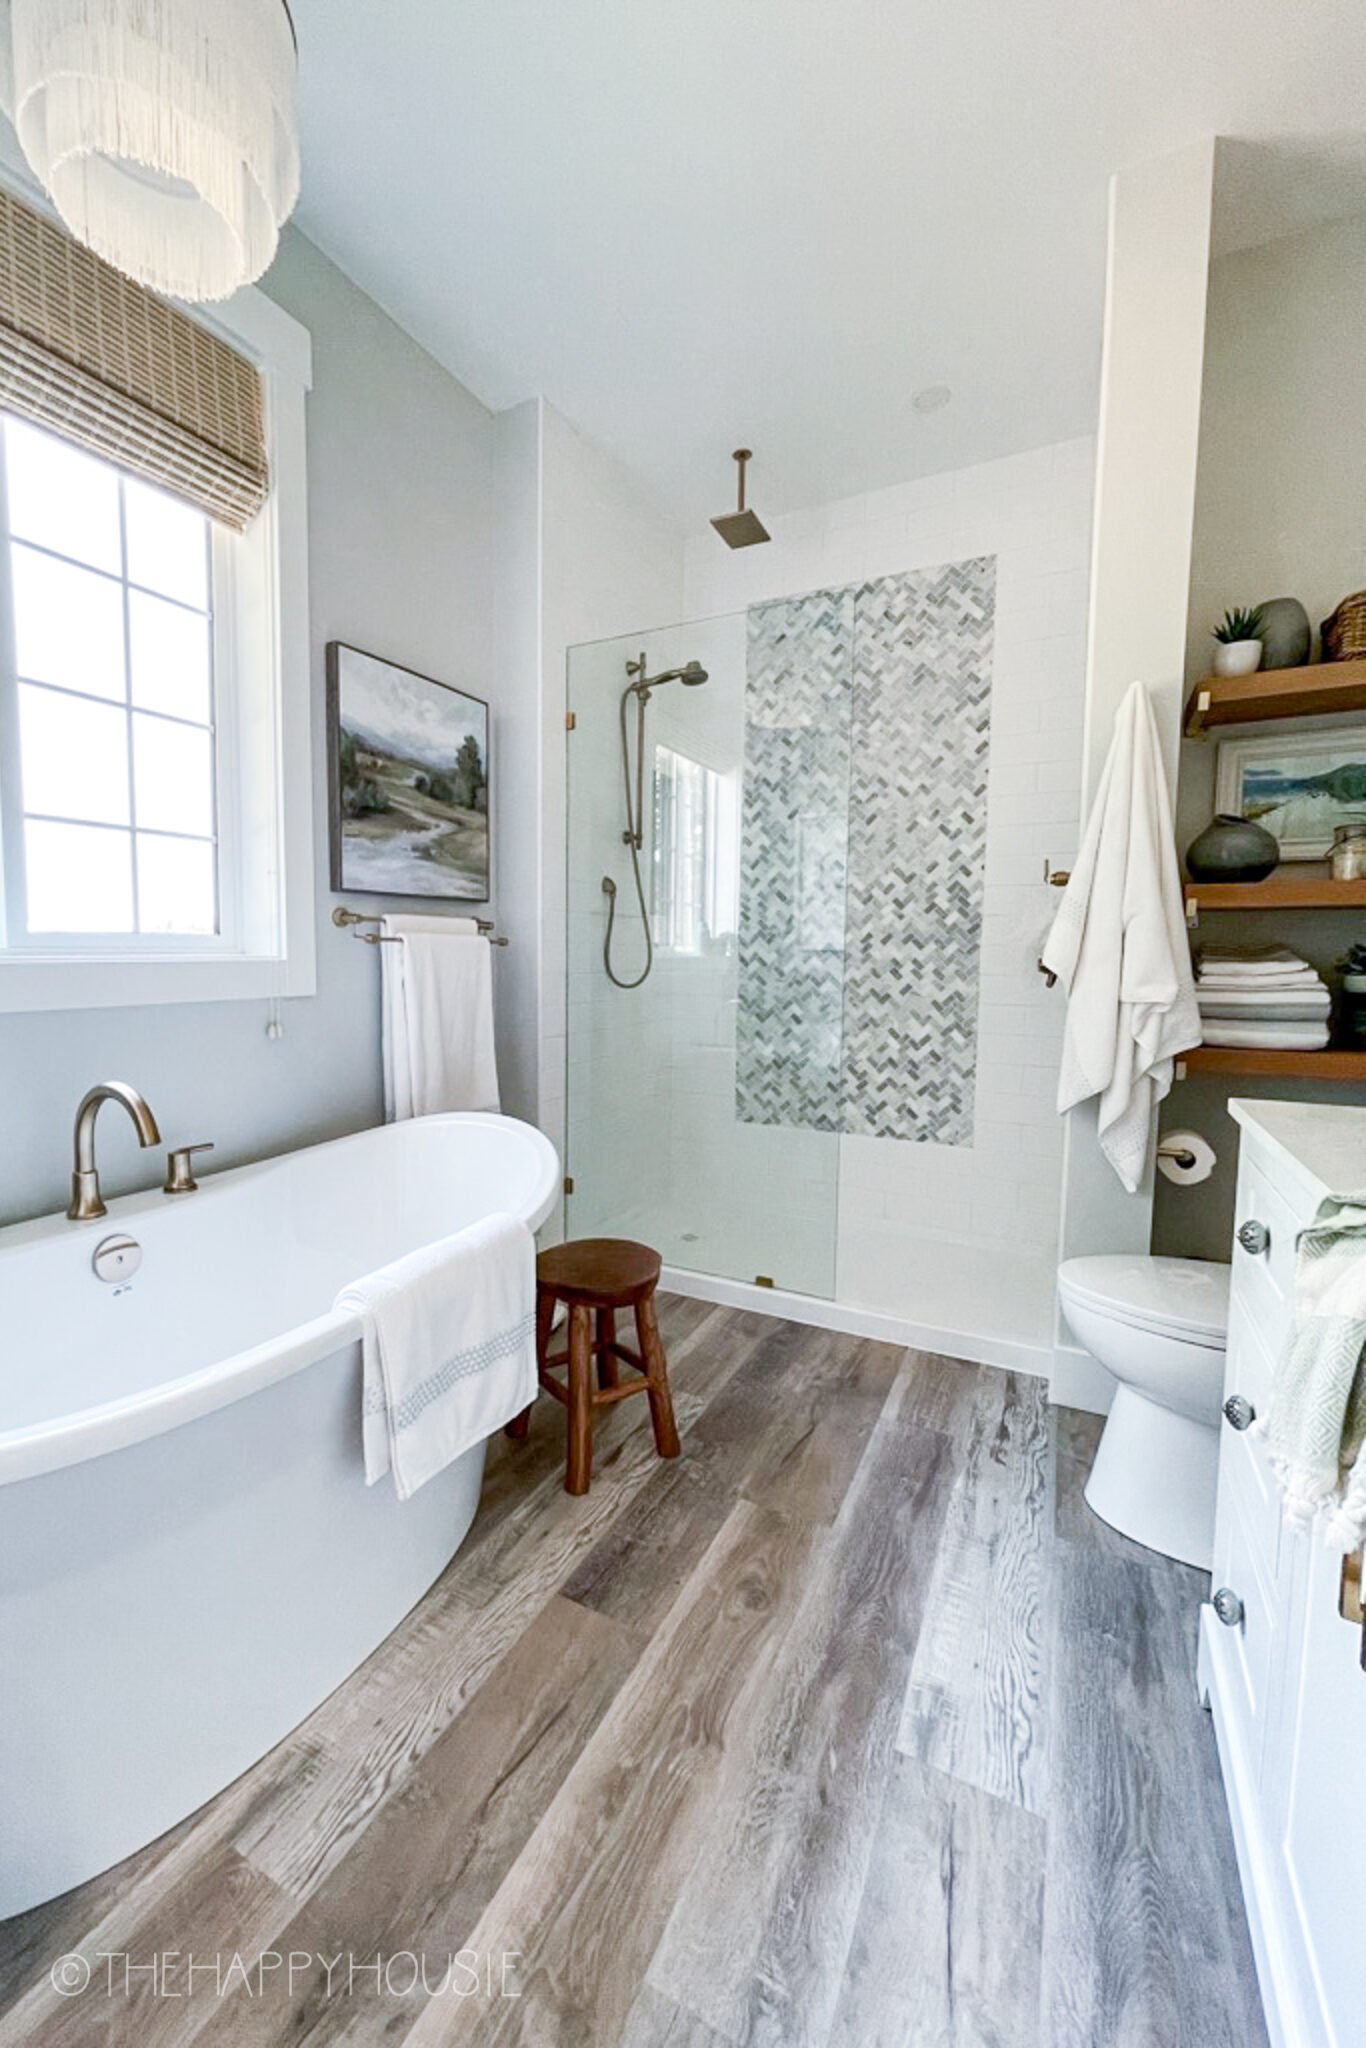
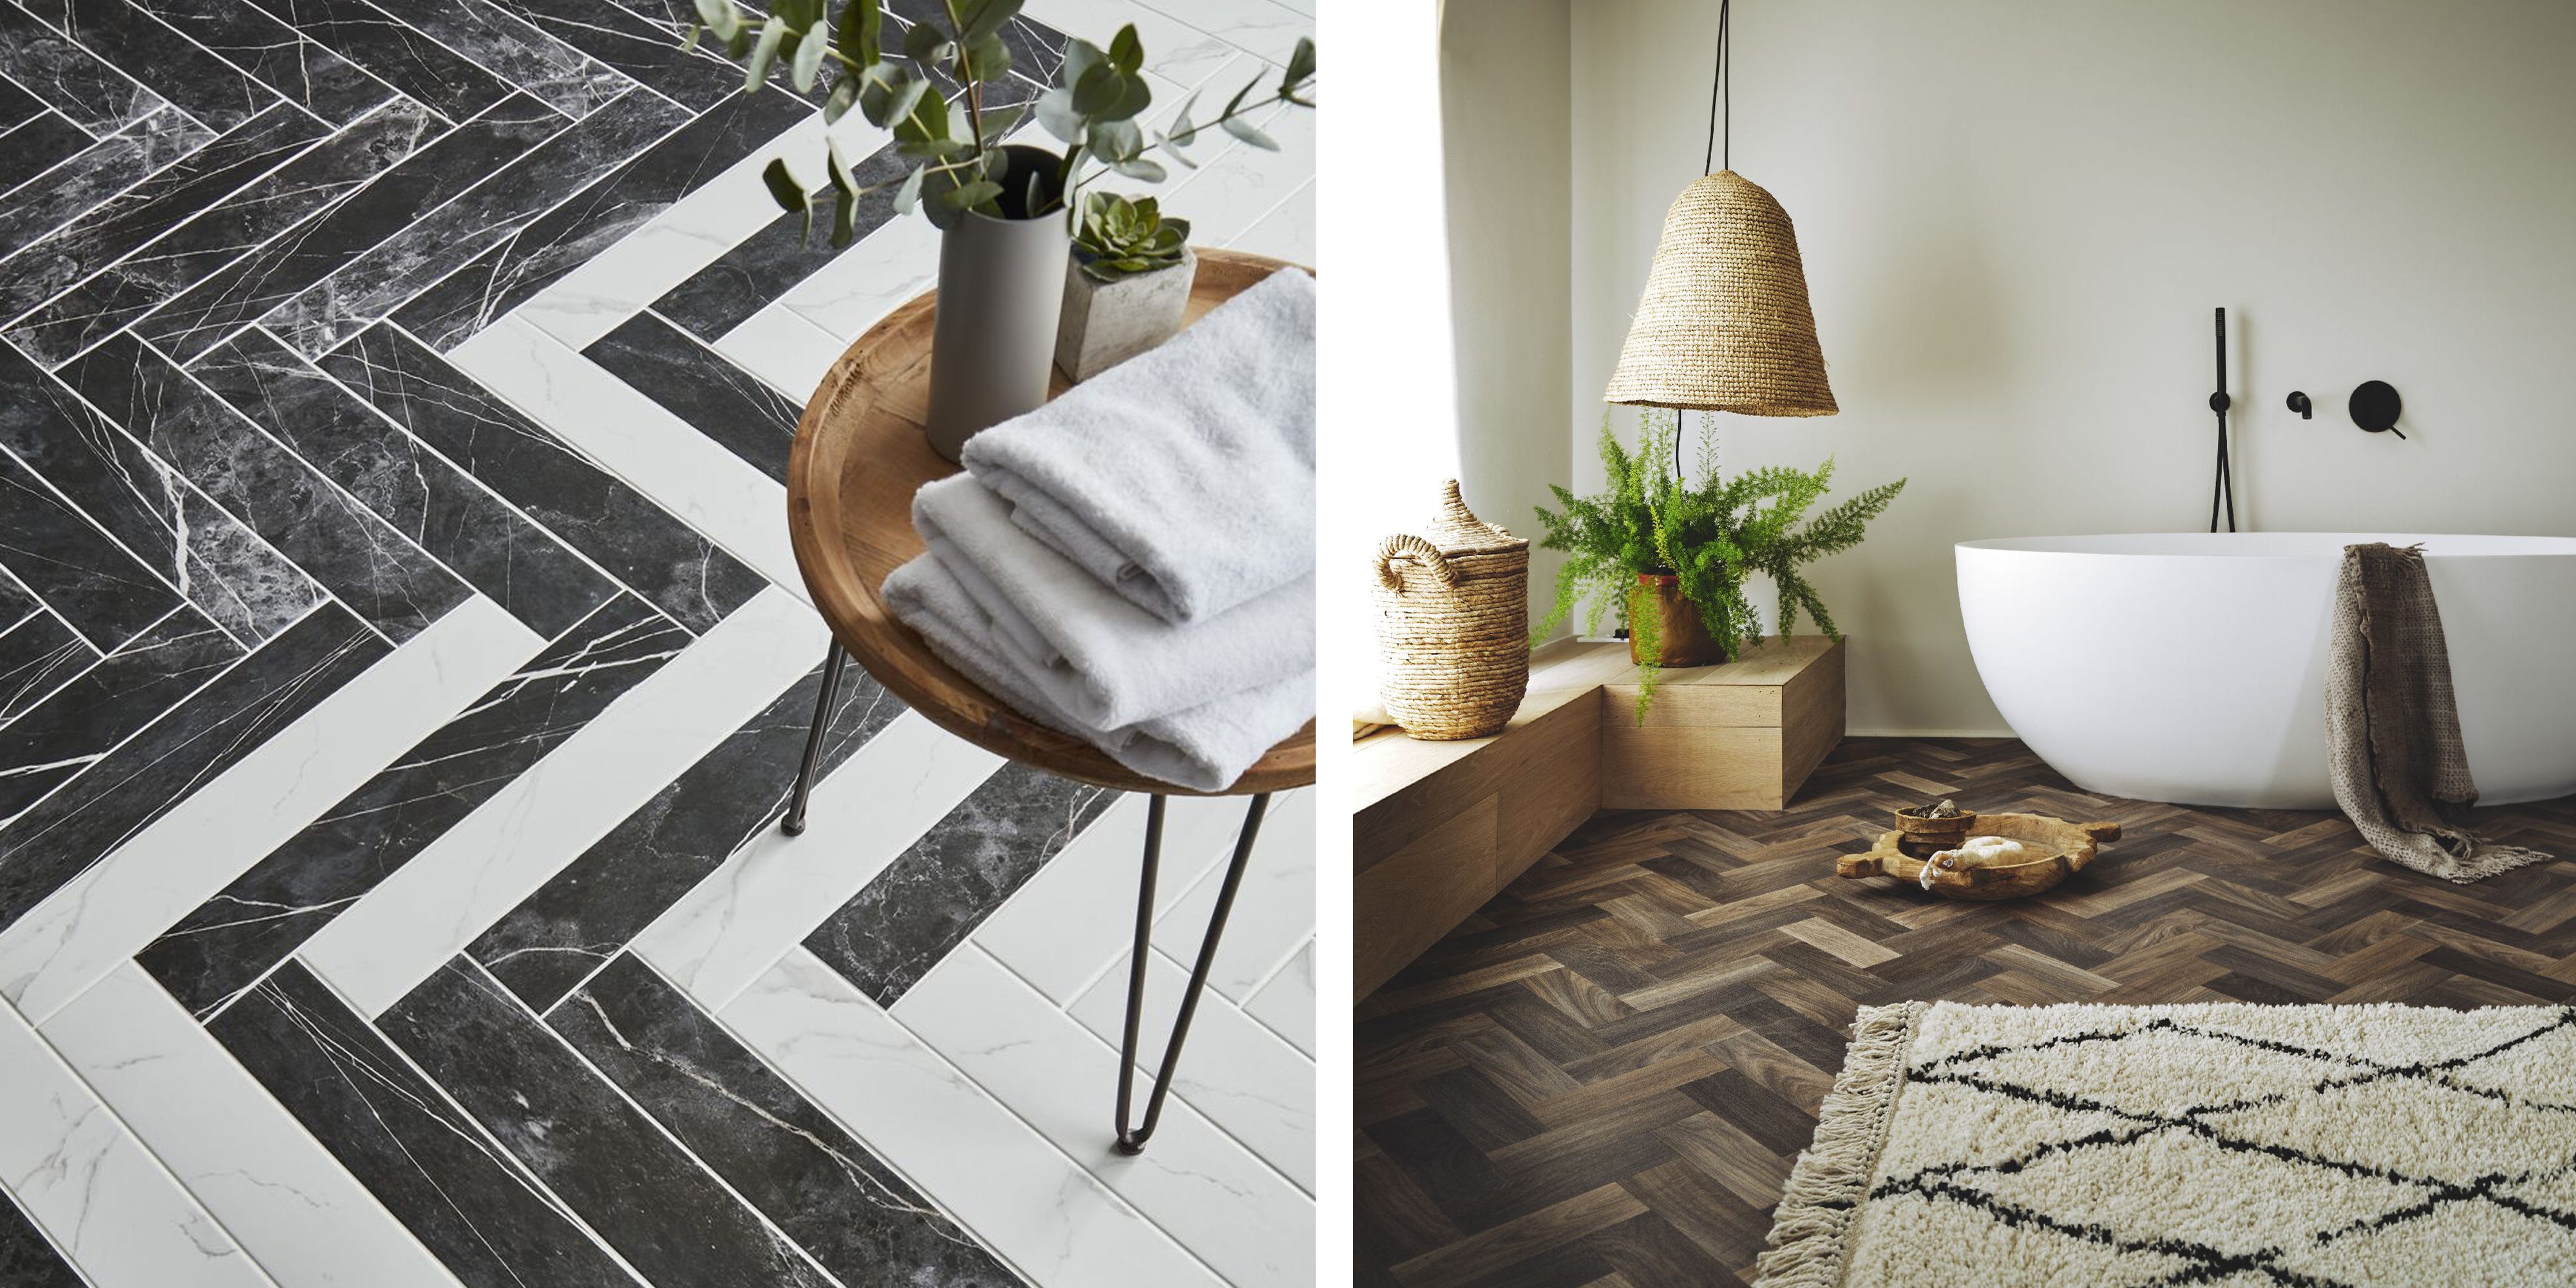
The most surprising discovery in my bathroom renovation journey was how realistic modern luxury vinyl planks (LVP) have become. When I installed 7-inch wide oak-look planks in my guest bathroom, even my contractor friend couldn’t tell they weren’t real hardwood until he got down and examined them closely. The embossed texture, varied grain patterns, and subtle color variations create an authentic wood appearance that adds warmth and sophistication to any bathroom space. I chose a weathered gray finish that complements both traditional and contemporary design styles, and the 20-mil wear layer ensures it still looks perfect after three years of daily use.
What makes LVP particularly brilliant for bathrooms is how it handles the moisture challenges that would destroy real hardwood. I’ve had multiple shower overflows, and the floor simply dried without any warping, cupping, or damage that wood would suffer. The planks install with a click-lock system that creates watertight seams, and unlike laminate, there’s no fiberboard core to swell if water somehow penetrates. I’ve learned that wider planks (7-9 inches) create a more luxurious appearance and require fewer seams, which both look better and provide better water protection.
Installing LVP in bathrooms does require some special considerations I discovered through trial and error. You need to acclimate the planks in the bathroom for at least 24 hours before installation, and I learned to use 100% silicone caulk around the perimeter instead of quarter-round molding. This creates a waterproof seal that’s essential in wet areas. The flexibility of vinyl also means you need a perfectly flat subfloor. I spent extra time leveling my bathroom floor because even small imperfections would telegraph through the planks and create an uneven appearance.
Stone and Tile-Look Vinyl Patterns for Classic Bathroom Aesthetics
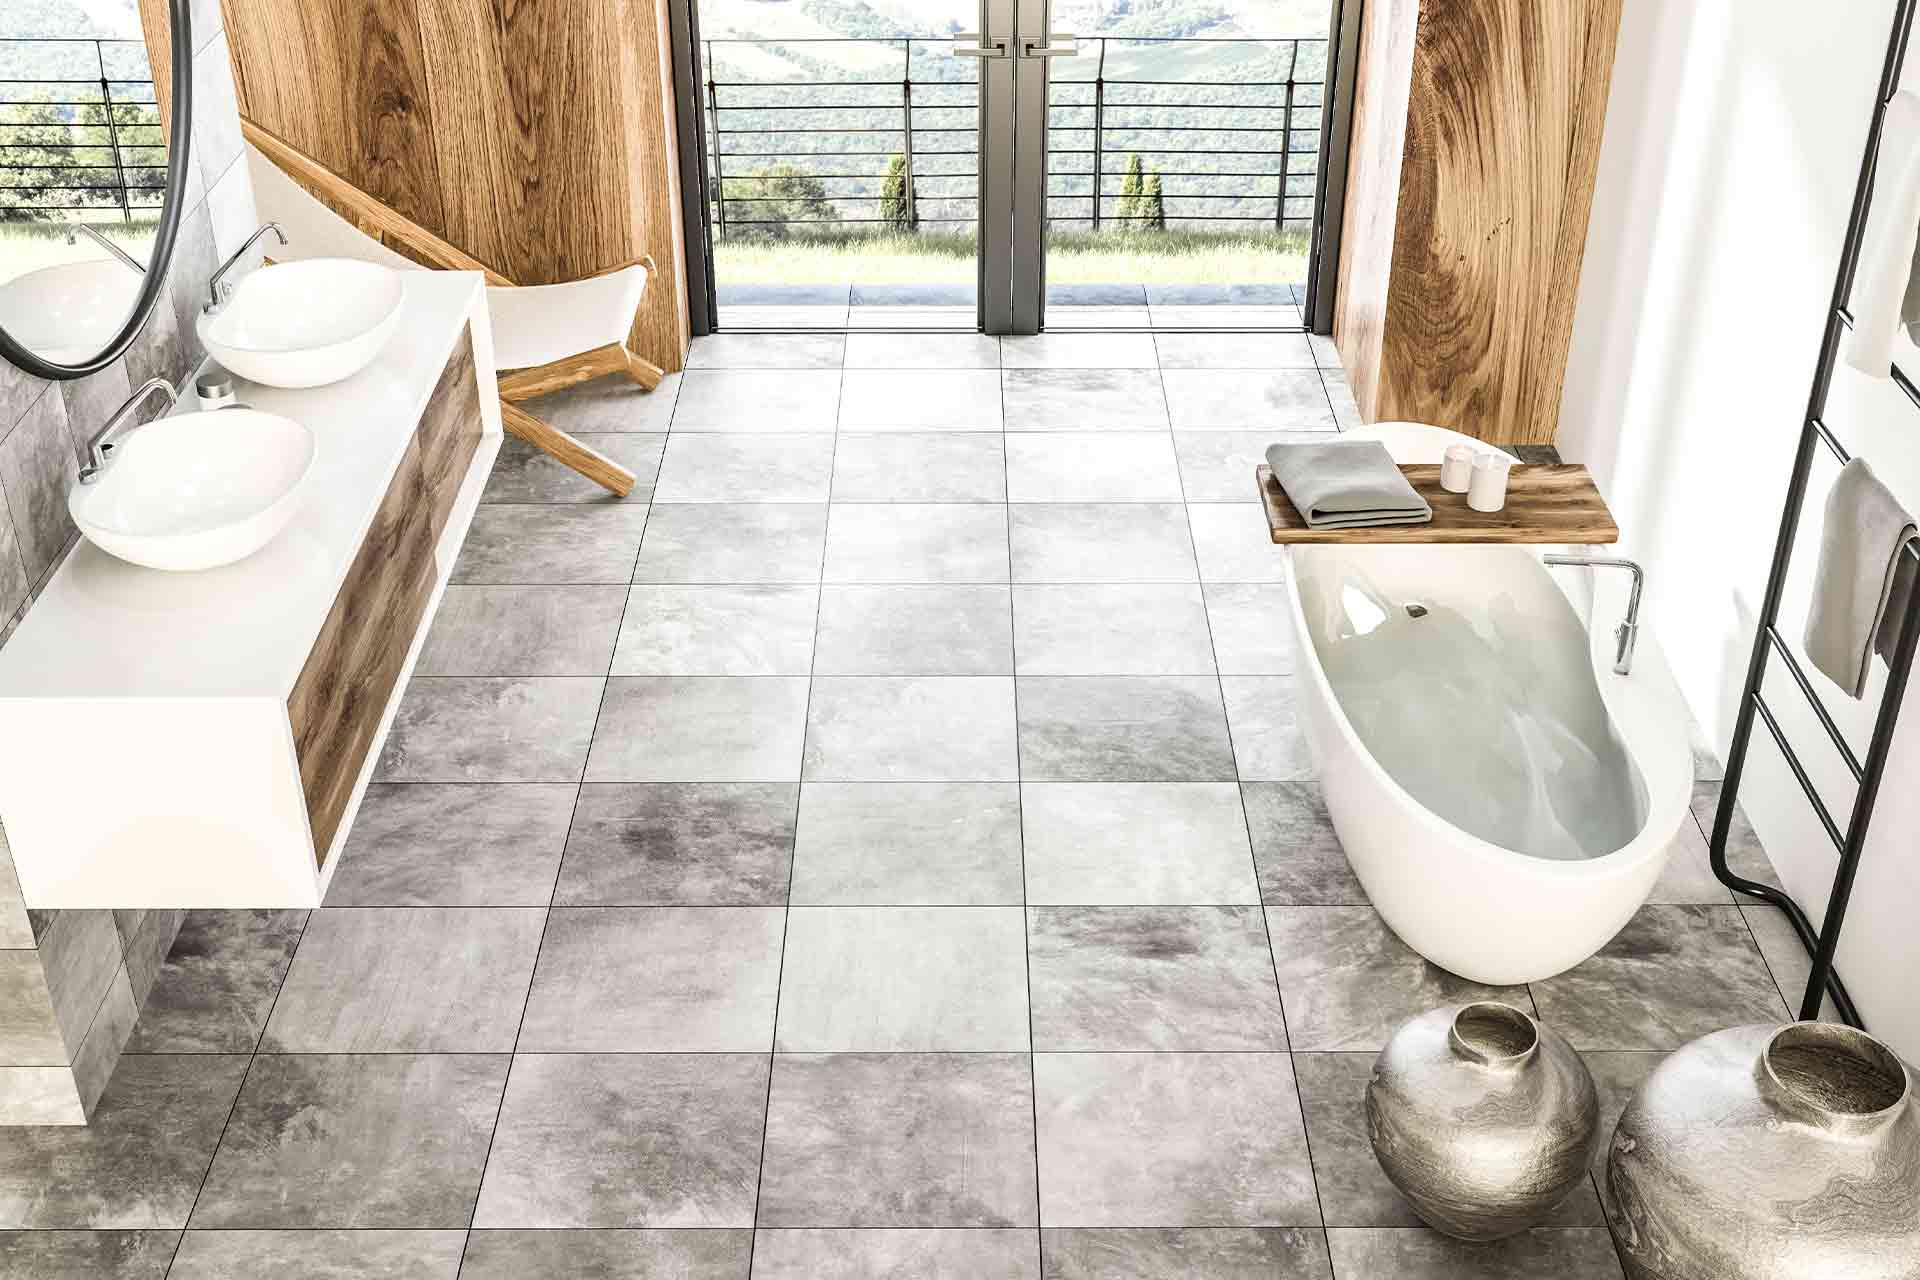
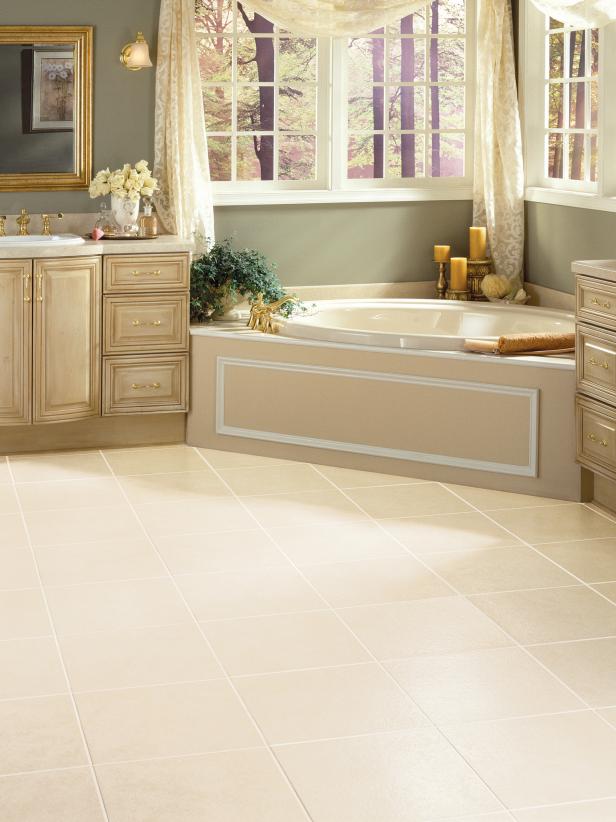
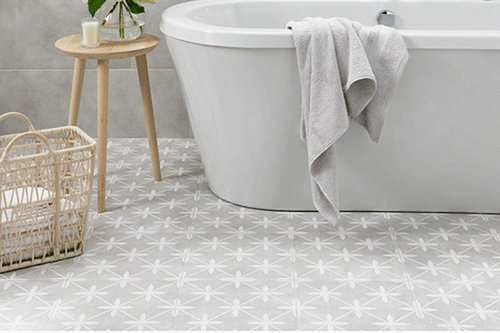
After falling in love with LVP, I explored luxury vinyl tile (LVT) options for my powder room renovation, and I was amazed by the realistic stone and ceramic patterns available. I chose a Carrara marble-look vinyl that captures every vein and subtle color variation of real marble, but without the maintenance headaches or susceptibility to etching from bathroom cleaning products. The 18×18-inch tiles create the same elegant appearance as genuine marble, and guests consistently assume it’s the real thing until I tell them otherwise.
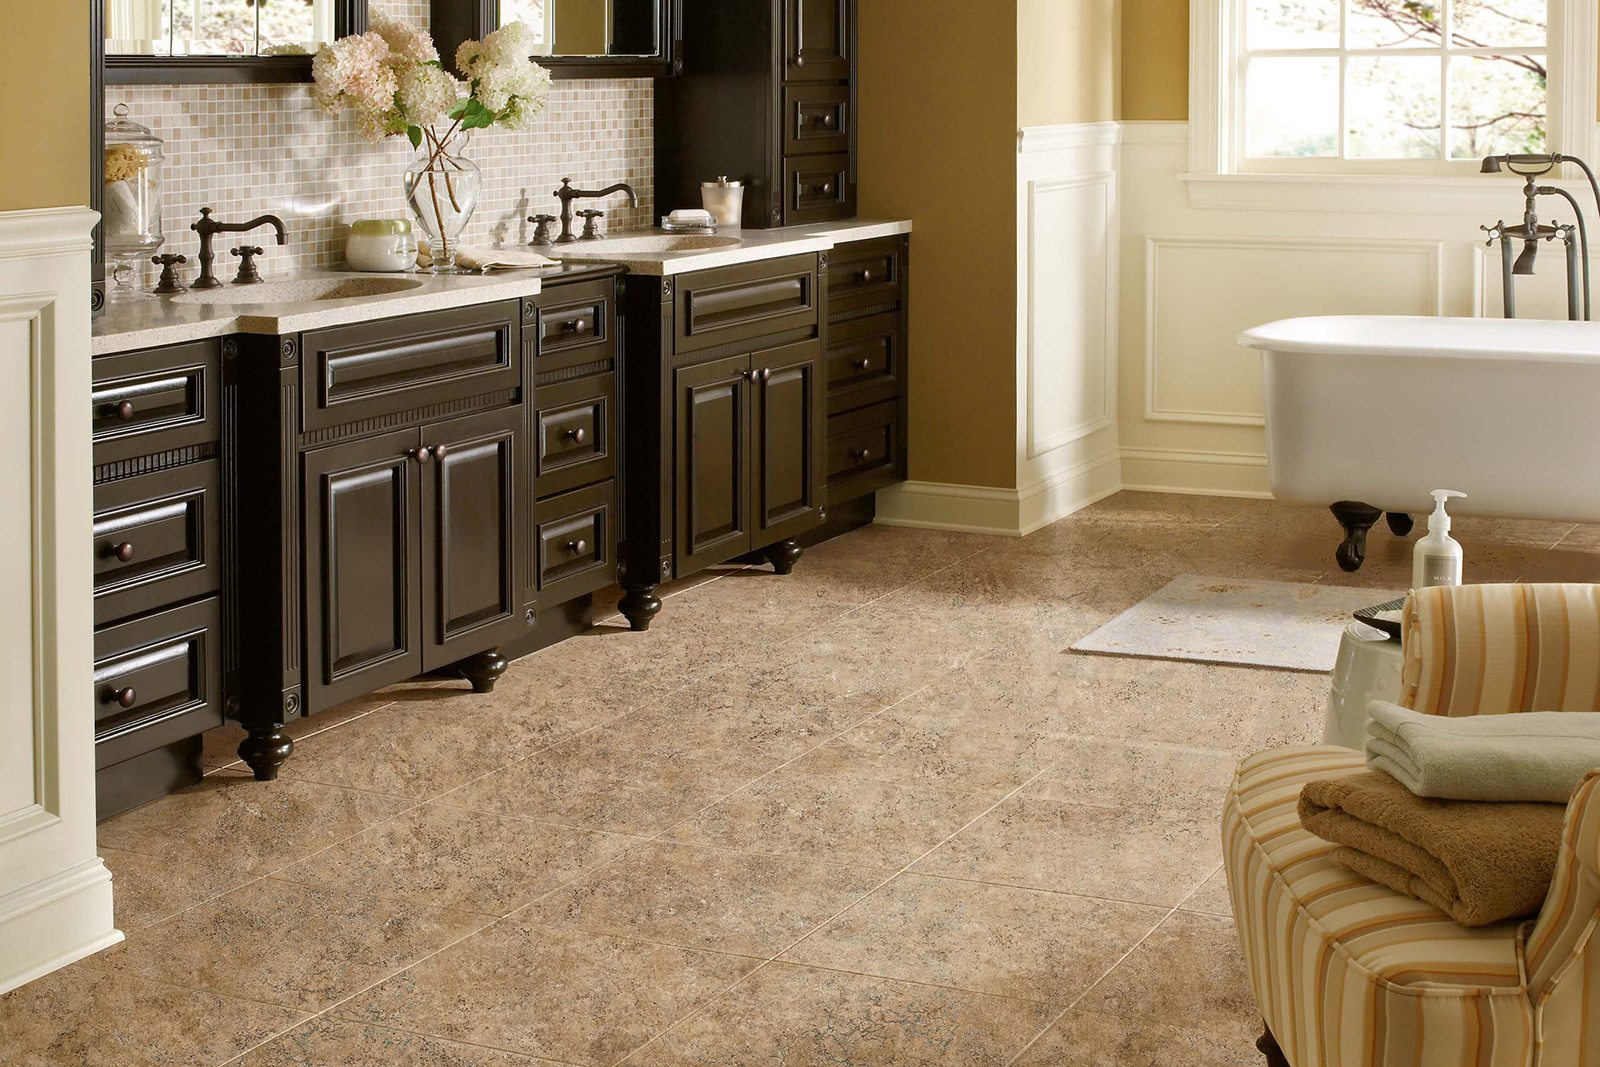
The variety of stone looks available in modern vinyl is incredible, from classic subway tiles to dramatic slate patterns. I’ve installed travertine-look vinyl that perfectly replicates the natural pitting and color variation of real stone, complete with realistic grout lines molded into the vinyl surface. For clients who love the look of expensive natural stone but worry about maintenance and cost, these vinyl options provide the perfect solution. They’re completely stain-resistant, never need sealing, and won’t crack or chip like real stone can when something heavy is dropped.
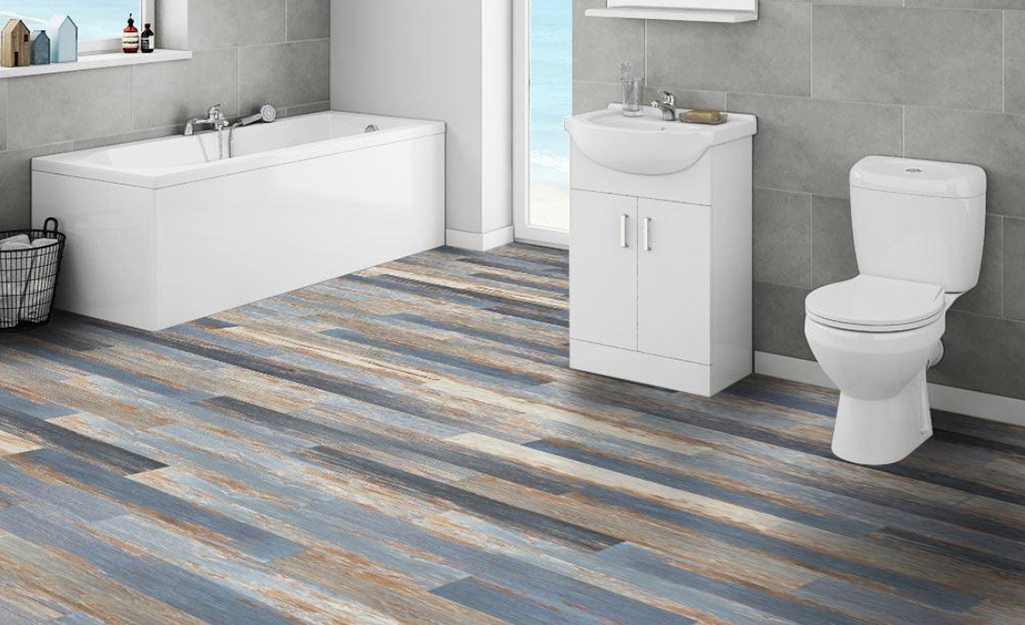
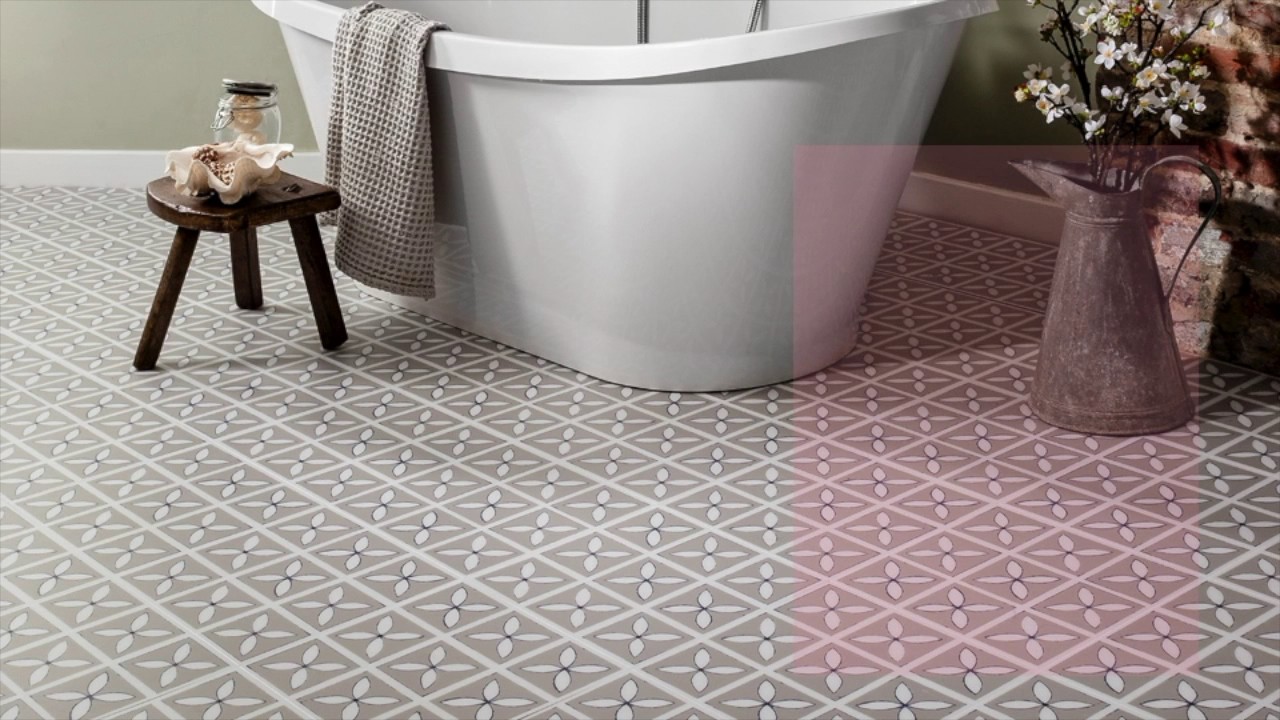
One of my favorite recent discoveries is vinyl that mimics cement tiles and encaustic patterns. I used a gorgeous Moroccan-inspired pattern in a client’s bathroom that would have cost thousands in real cement tiles, but we achieved the same stunning look for a fraction of the price. These patterned vinyls are particularly effective in powder rooms or smaller bathrooms where you want maximum visual impact. The key is choosing high-quality products with realistic textures and colors. Cheaper vinyl tiles can look fake, but premium options are virtually indistinguishable from the real materials they’re designed to replicate.
Waterproof Installation Techniques and Moisture Barriers
Learning proper waterproof installation techniques was crucial to my vinyl flooring success, and I’ve refined my approach through several bathroom projects. The most important lesson I learned is that “waterproof” vinyl still needs proper installation to truly protect your subfloor from moisture damage. I always start with a moisture test on concrete subfloors, even in upper-level bathrooms, because trapped moisture can cause problems even with waterproof flooring. For wood subfloors, I ensure they’re completely dry and apply a moisture barrier primer if there’s any concern about humidity levels.
The seams are where most vinyl flooring failures occur in bathrooms, so I pay special attention to creating perfect connections between planks or tiles. I use a tapping block and pull bar to ensure every click-lock connection is fully engaged, and I test each seam by trying to lift adjacent pieces. Any gaps or loose connections can allow water penetration that defeats the waterproof properties. Around fixtures like toilets and vanities, I use a utility knife to make precise cuts and seal all edges with 100% silicone caulk. This creates a waterproof barrier that prevents water from reaching the subfloor.
Temperature control during installation makes a huge difference in the final result. I learned this the hard way when I installed vinyl in a cold bathroom and later discovered small gaps when the room warmed up. Now I always ensure the room is at normal living temperature (65-75°F) for at least 24 hours before and after installation. I also leave the recommended expansion gaps around the perimeter, even though vinyl is more stable than other flooring types. These gaps get covered by baseboards and allow for any seasonal movement while maintaining the waterproof integrity of the installation.
Creative Design Ideas Using Vinyl Flooring Patterns
Once I mastered basic vinyl installation, I started experimenting with creative design patterns that transform ordinary bathrooms into stunning spaces. One of my favorite techniques is creating custom borders using contrasting vinyl planks or tiles. In my daughter’s bathroom, I installed gray LVP throughout but created a decorative border using white subway-look vinyl tiles around the bathtub area. This defines the wet zone while adding visual interest and making the small space feel larger and more intentionally designed.
Mixing different vinyl formats in the same bathroom creates sophisticated layered looks that rival expensive custom tile work. I recently combined wood-look LVP in the main bathroom area with matching stone-look LVT in the shower and around the vanity. The key is choosing products from the same manufacturer with complementary colors and finishes. This approach allows you to have slip-resistant textured vinyl where you need it most while enjoying the smooth surface of planks in dry areas, all while maintaining a cohesive design aesthetic.
Diagonal installation patterns can make small bathrooms appear larger and add dynamic visual interest. I installed 6×24-inch wood-look vinyl tiles diagonally in a narrow half-bath, and the pattern tricks the eye into seeing more space than exists. Herringbone patterns using vinyl planks create sophisticated focal points, especially effective behind floating vanities or in powder rooms where you want maximum impact. These advanced patterns require more cutting and waste, but the dramatic results justify the extra effort and cost for special spaces.
Budget-Friendly DIY Installation Tips and Tricks
Installing vinyl flooring yourself can save thousands on labor costs, and I’ve developed several techniques that make DIY installation much easier. The most important tool investment I made was a quality vinyl cutter, which creates cleaner cuts than a utility knife and reduces hand fatigue during long installation sessions. I also invested in knee pads and a comfortable kneeler, bathroom floors require lots of detail work around fixtures, and your knees will thank you for the protection during those hours spent on hard surfaces.
Planning your layout before opening any boxes prevents costly mistakes and reduces waste. I use chalk lines to mark the center of the room and dry-lay several rows to check the pattern before making any permanent cuts. For bathrooms with multiple angles and fixtures, I create cardboard templates for complex cuts around toilets and vanity bases. This extra planning time always pays off in better-fitting pieces and less wasted material. I also order 10-15% extra vinyl to account for mistakes and future repairs, the extra cost is minimal compared to running short and having to match discontinued patterns.
The biggest DIY challenge I’ve encountered is cutting vinyl around curved fixtures like toilet bases and pedestal sinks. I’ve learned to make relief cuts from the edge to the curve, which allows the vinyl to flex around the obstacle. For inside corners, I cut slightly oversized and trim to fit, while outside corners need precise measurements to avoid gaps. A heat gun helps soften vinyl for easier manipulation around tight curves, but be careful not to overheat and damage the material. Taking your time with these detail cuts makes the difference between a professional-looking installation and an obviously amateur job.

Long-Term Maintenance and Care Strategies
Maintaining vinyl flooring in bathrooms is remarkably simple compared to natural materials, but I’ve learned specific strategies that keep it looking new for years. Daily maintenance involves nothing more than sweeping or vacuuming to remove sand and debris that can scratch the surface over time. I use a microfiber mop with pH-neutral vinyl floor cleaner for weekly cleaning, avoiding harsh chemicals or abrasive cleaners that can dull the finish. The key is addressing spills immediately, even though vinyl is waterproof, some substances like nail polish or hair dye can stain if left too long.
Deep cleaning every few months helps maintain the vinyl’s appearance and slip resistance. I use a soft brush with vinyl-specific cleaner to clean textured surfaces and grout lines on tile-look products. Steam mops work well on vinyl flooring, but I avoid using them on seams where the heat and moisture might affect the adhesive over time. For stubborn stains or scuff marks, I use a tennis ball or pencil eraser; these gentle abrasives remove marks without damaging the vinyl surface or protective wear layer.
Preventing damage is easier than repairing it, so I’ve implemented several protective strategies in my bathrooms. I use furniture pads under vanity legs and storage furniture to prevent indentations, and I immediately clean up any dropped items that might scratch or dent the surface. While vinyl is very durable, sharp objects can still cut or gouge it, so I’m careful with razors and other bathroom tools. The good news is that most vinyl products allow for individual plank or tile replacement if damage does occur. I keep extra pieces stored in my basement for future repairs.

Is vinyl flooring 100% waterproof for bathroom use?
Yes, quality luxury vinyl flooring is completely waterproof, which is why I chose it for all my bathroom renovations. Unlike laminate flooring that can swell from moisture, vinyl won’t be damaged by standing water, shower splashes, or high humidity. However, proper installation with sealed seams and edges is crucial to prevent water from reaching your subfloor underneath the vinyl.
How long does bathroom vinyl flooring typically last?
I’ve had vinyl in my master bathroom for three years with zero wear, and most quality products come with 15-20 year residential warranties. With proper care, I expect my floors to look great for at least 15 years. The thick wear layer protects against scratches and stains, and unlike tile, you won’t have grout lines that discolor or need constant maintenance over time.
Can I install vinyl flooring over existing bathroom tiles?
I’ve successfully installed vinyl over existing ceramic tile in two bathrooms, as long as the tiles are well-adhered and the surface is smooth. You’ll need to fill any missing grout lines and ensure the existing floor is level. This saves the time and expense of tile removal, but adds height to your floor that might affect door clearances and transitions to adjacent rooms.
What’s the cost difference between vinyl and ceramic tile for bathrooms?
Vinyl typically costs 30-60% less than comparable ceramic or porcelain tile when you factor in materials and installation. I paid about $4 per square foot for premium vinyl, including installation, while similar-looking ceramic would have cost $8-12 per square foot. The labor savings are significant since vinyl installs much faster than tile and doesn’t require grouting or special tools.
Does vinyl flooring feel cold like ceramic tile in bathrooms?
Vinyl feels much warmer underfoot than ceramic tile because it doesn’t conduct heat away from your body as quickly. I particularly notice this during winter mornings when stepping out of the shower. The slight cushioning effect of vinyl also makes it more comfortable to stand on for extended periods, which I appreciate during my morning routine.
Will pets or kids damage vinyl bathroom flooring?
My dogs’ nails and my kids’ dropped toys haven’t damaged my vinyl floors after three years of family life. Vinyl is much more forgiving than tile or stone, which can crack or chip from impacts. The waterproof nature also means accidents from potty-training kids or pet mishaps clean up easily without permanent stains or odors that can penetrate other flooring materials.

Bathroom Flooring Ideas – Choosing Bathroom Flooring
How to Install Sheet Vinyl Flooring Over Tile – Blessu0027er House

Bathroom Vinyl Flooring Cheap Vinyl Bathroom Flooring
Bathroom Flooring Luxury Vinyl Bathroom Flooring
Vinyl bathroom flooring ideas: 10 easy to clean floors Homes
Vinyl Flooring – The Home Depot

Related Posts: