When I first moved into my apartment, the kitchen floor was a disaster. Stained linoleum that curled at the edges and a tight budget meant I had to get creative. After months of research and trial-and-error, I discovered several affordable solutions that transformed my space without breaking the bank. These budget-friendly options proved that you don’t need expensive contractors or premium materials to achieve stunning results.
Peel-and-Stick Vinyl Tiles: The Weekend Warrior’s Dream
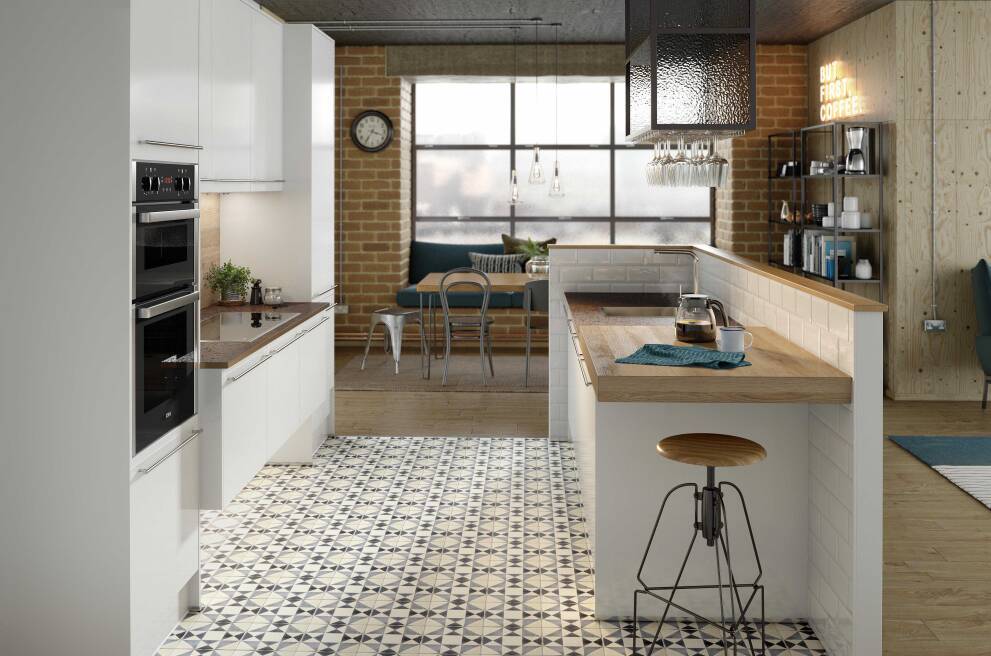
I started with peel-and-stick vinyl tiles because they seemed foolproof. The installation took just one weekend, and I didn’t need any special tools beyond a utility knife and measuring tape. The adhesive backing made positioning simple, though I learned to work slowly to avoid air bubbles. Some tiles shifted slightly over time, but pressing them down with a rolling pin solved most issues. For $80, I covered my entire 100-square-foot kitchen.
These tiles come in countless patterns, from realistic wood grain to modern geometric designs. I chose a weathered oak pattern that perfectly complemented my farmhouse aesthetic. The quality surprised me; they felt substantial underfoot and cleaned easily with standard floor cleaners. Water resistance proved excellent around my sink area, where spills happened daily. The only downside was cutting tiles around corners, which required patience and steady hands.
Maintenance has been refreshingly simple over the past two years. Regular sweeping and occasional mopping keep them looking fresh. A few tiles loosened near the refrigerator where heavy traffic occurs, but replacement was straightforward. I keep extra tiles in my closet for future repairs. The cost-effectiveness remains unmatched, especially considering professional installation would have cost triple my DIY budget.
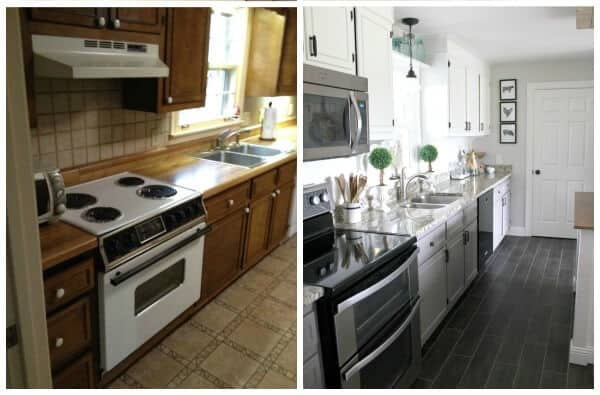
Laminate Flooring: Professional Results on a Shoestring Budget
My second kitchen renovation involved laminate flooring, which initially intimidated me. The click-lock system made installation easier than expected. I measured carefully, used spacers around the perimeter, and worked systematically from left to right. The tongue-and-groove design created seamless joints that looked professionally installed. My local home improvement store offered free tool rentals, including the essential saw for cutting planks.
The transformation was dramatic. High-quality laminate mimics hardwood so convincingly that guests often assume it’s real wood. I selected a medium-toned oak with subtle grain patterns that hide minor scratches and dust. The underlayment padding provided excellent sound absorption, crucial in my upstairs apartment. Installation took three days working evenings, but the results justified every hour spent measuring and cutting.
Durability exceeded my expectations after five years of heavy use. Spills wipe up easily without staining, and the surface resists scuffs from chair legs and dropped utensils. The initial $200 investment continues paying dividends through easy maintenance and timeless appearance. I’ve moved twice since installation, and both times, the laminate flooring significantly boosted my kitchen’s appeal to potential buyers.
Painted Concrete: Industrial Chic on a College Budget
My basement kitchen had exposed concrete floors that looked unfinished and cold. Rather than covering them, I decided to embrace the industrial aesthetic through strategic painting. Concrete paint designed for floors provided the durability I needed while costing under $50 for complete coverage. The preparation required thorough cleaning and acid etching, but the actual painting process was surprisingly straightforward and therapeutic.
I chose a warm gray shade that brightened the space while hiding inevitable scuffs and stains. The first coat absorbed quickly into the porous concrete, requiring a second application for even coverage. Rolling the paint produced the smoothest finish, though I used a brush for detail work around cabinets and corners. Adding a clear protective topcoat extended the lifespan and provided additional stain resistance.
The finished floor exceeded my expectations with its modern, polished appearance. Friends consistently compliment the unique look, assuming I hired professionals. Maintenance involves regular sweeping and occasional damp mopping. After three years, high-traffic areas show minimal wear, and touch-ups are simple. The project taught me that sometimes the most affordable solutions create the most striking results.
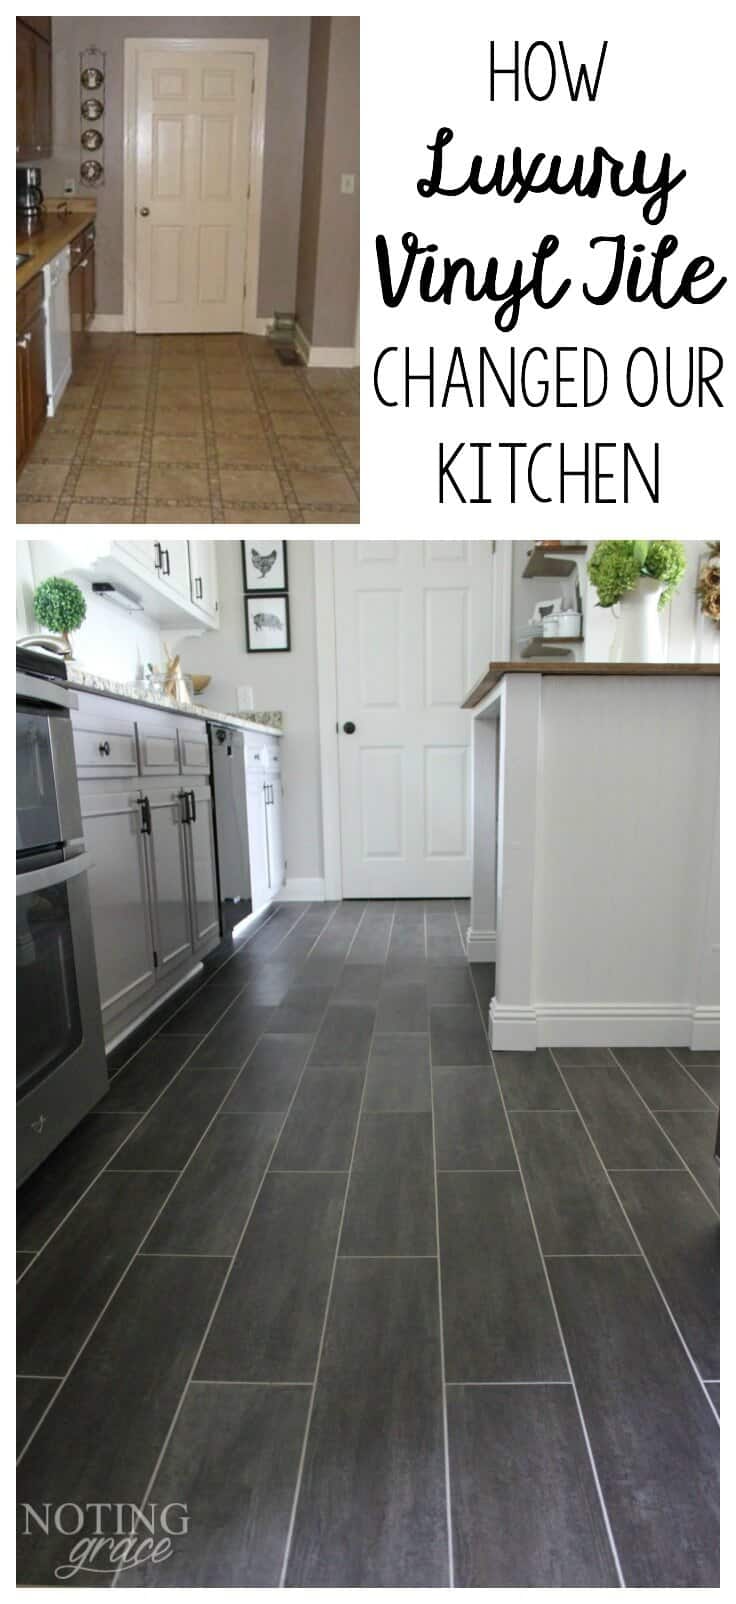
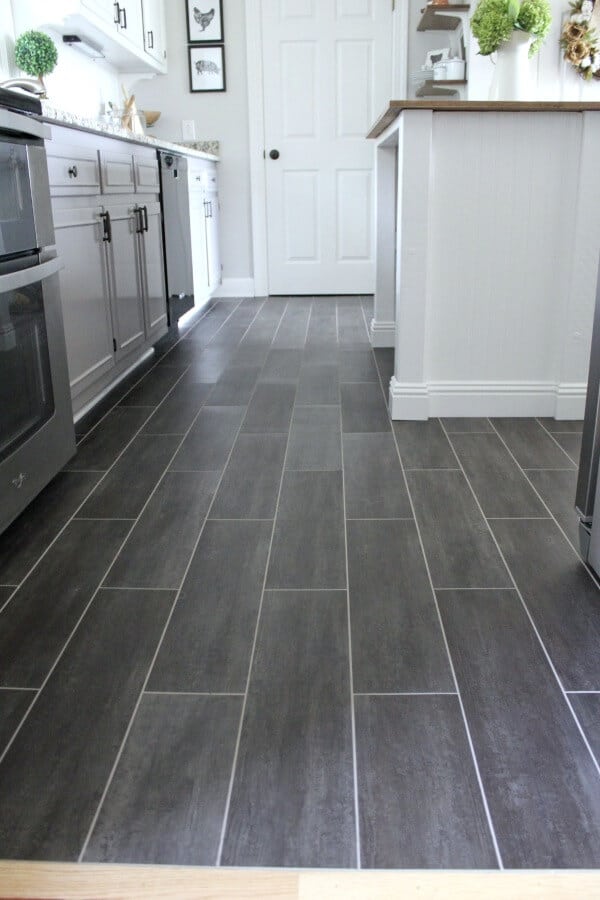
Luxury Vinyl Plank: The Goldilocks Solution
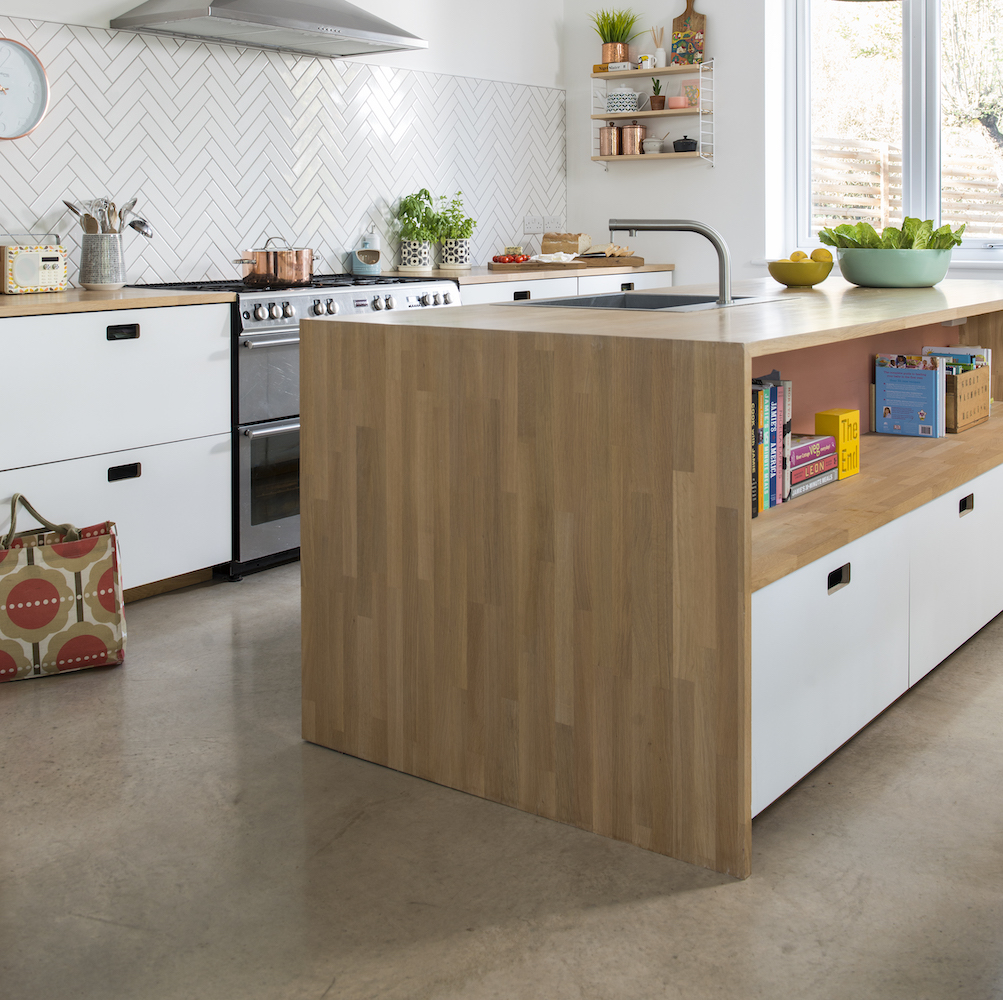
When I needed flooring that balanced affordability with upscale appearance, luxury vinyl plank (LVP) proved perfect. The material feels substantial underfoot while maintaining the flexibility that makes installation manageable for beginners. I appreciated the variety of styles available, from rustic farmhouse to sleek contemporary designs. The click-lock system eliminated the need for adhesives, making mistakes easily correctable during installation.
My chosen planks featured realistic wood texture and subtle color variations that fooled even my contractor friend. The waterproof core made them ideal for my kitchen’s high-moisture environment. Installation progressed smoothly over two days, with the most challenging aspect being precise measurements around appliances and irregular corners. The floating floor system allows for natural expansion and contraction without buckling.
Performance has been exceptional throughout the four years of daily use. The scratch-resistant surface handles dropped knives and dragged chairs without visible damage. Cleaning requires only a damp mop, and the planks maintain their original luster. At $150 for materials, this flooring delivers premium aesthetics at a fraction of traditional hardwood costs. The investment continues to pay dividends through enhanced home value and personal satisfaction.
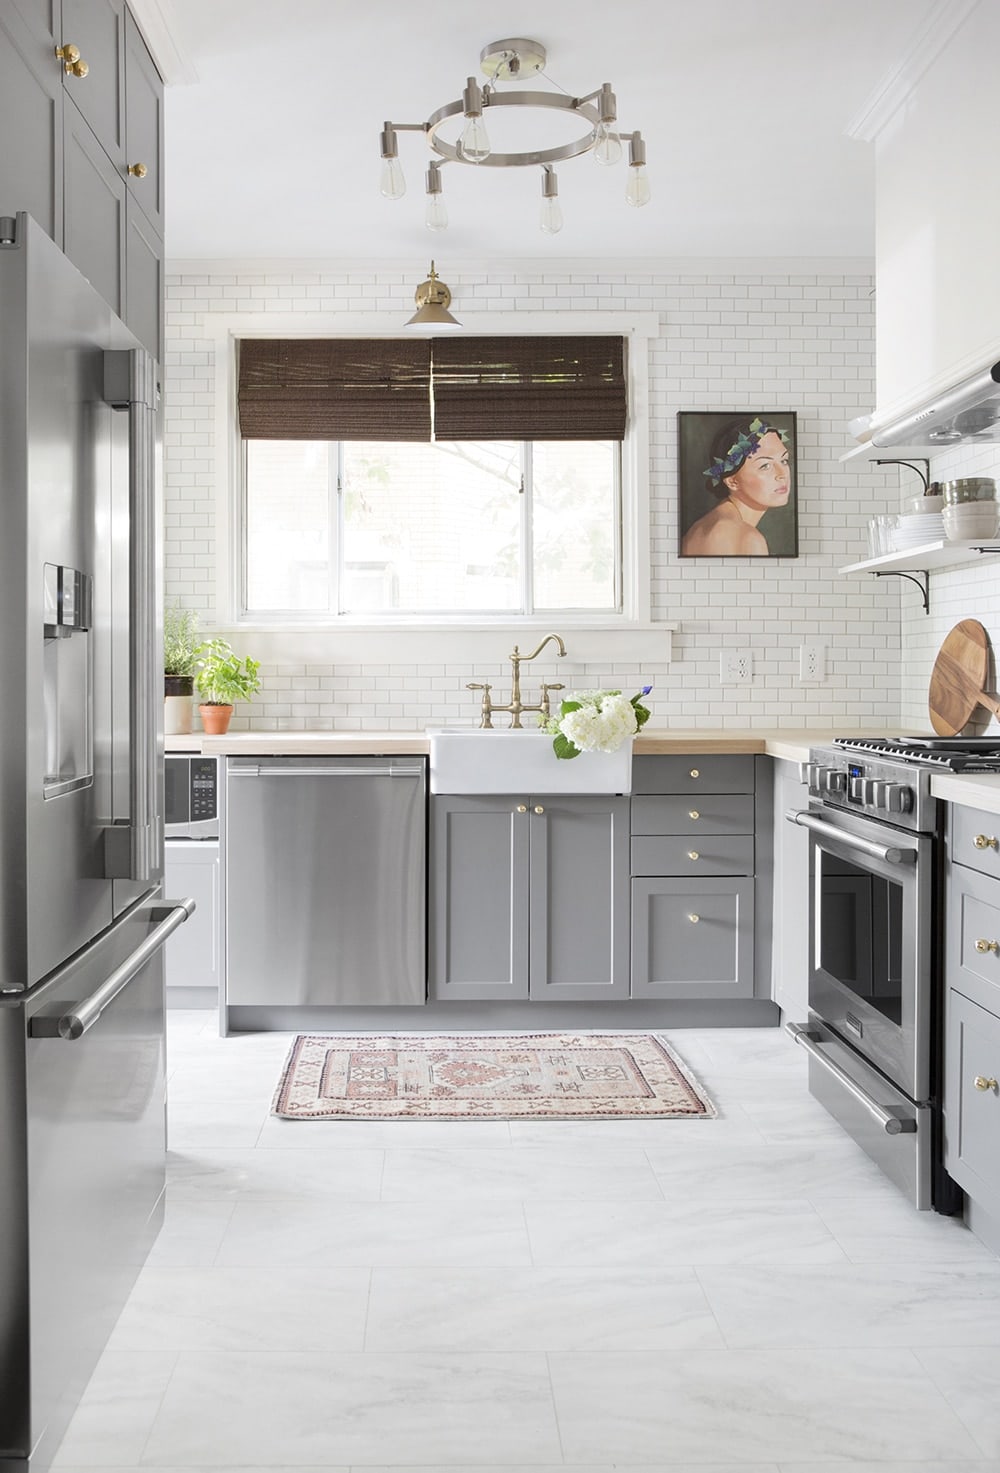
Ceramic Tiles: Timeless Elegance Within Reach
My grandmother’s kitchen featured gorgeous ceramic tiles that inspired my renovation. Modern ceramic options offer incredible variety while remaining budget-friendly. I found beautiful subway tiles on clearance for $1 per square foot, making the entire project affordable. The installation required more precision than other options, but online tutorials and borrowed tools made the process manageable for a determined DIYer.
Laying tiles demands patience and attention to detail. I started with a center reference line and worked outward, using spacers to maintain consistent gaps. The tile cutter rental proved essential for achieving clean edges around obstacles. Grouting was messy but satisfying, and I learned to work in small sections to prevent the mixture from hardening prematurely. The traditional white subway pattern creates a clean, timeless look that complements any decor style.
Six years later, these tiles still look pristine with minimal maintenance. The grout required resealing after two years, but the tiles themselves remain stain-free and vibrant. Regular cleaning with standard household products keeps them sparkling. The classic design ensures they won’t look dated, making this investment both practical and aesthetically enduring. The total cost of $120 transformed my kitchen into a space I’m proud to show guests.
Engineered Wood: Sophistication Without the Premium Price
My final kitchen renovation called for genuine wood flooring, but solid hardwood exceeded my budget. Engineered wood offered the perfect compromise, providing authentic wood veneer over a stable plywood base. The thinner profile made installation simpler than traditional hardwood, and the pre-finished surface eliminated the need for sanding and staining. I found quality engineered planks at a flooring outlet for half the retail price.
The installation process resembled laminate flooring, with tongue-and-groove edges that clicked together securely. The real wood surface required more careful handling during installation, but the results were worth the extra attention. I used a pneumatic nailer for faster progress, though hand-nailing would work for smaller spaces. The natural wood grain patterns created beautiful variation throughout the room.
Living with engineered wood has been a pleasure. The surface accepts refinishing if needed, though careful maintenance has kept it beautiful for seven years. Regular sweeping and occasional professional cleaning maintain its luster. The authentic wood appearance adds significant value to my home while providing the warmth and character only real wood can offer. At $300 for materials, this flooring proves that luxury doesn’t require luxury prices.

What tools do I need for DIY kitchen flooring installation?
The basic toolkit includes a measuring tape, utility knife, level, spacers, and safety equipment. Specific projects may require additional tools like tile cutters, saws, or nail guns. Most home improvement stores offer tool rentals, making expensive equipment accessible without purchase. I recommend borrowing or renting rather than buying tools you’ll use only once. Always prioritize safety glasses and knee pads for comfort during installation.
How do I prepare my existing floor for new flooring?
Preparation depends on your current flooring type and chosen replacement. Remove loose materials, clean thoroughly, and ensure the subfloor is level and stable. Some flooring types can be installed over existing surfaces, while others require complete removal. I always check manufacturer guidelines and local building codes. Proper preparation prevents future problems and ensures professional-looking results.

Which flooring option works best in high-moisture areas?
Luxury vinyl plank, ceramic tiles, and properly sealed concrete handle moisture excellently. Traditional hardwood and basic laminate should be avoided near sinks and dishwashers. I learned this lesson the hard way when my first laminate flooring warped from a minor leak. Waterproof cores and sealed surfaces provide peace of mind in kitchens where spills are inevitable.
How long does DIY kitchen flooring installation typically take?
Installation time varies dramatically based on room size, chosen material, and skill level. Simple peel-and-stick tiles can be completed in a weekend, while ceramic tiles might require a full week. I always plan for longer than estimated, especially for first-time installations. Working evenings and weekends, most projects take 2-4 days. Patience produces better results than rushing through installation.

What’s the most cost-effective flooring option for rental properties?
Peel-and-stick vinyl tiles offer the best combination of low cost, easy installation, and tenant appeal. They’re durable enough for moderate use and simple to replace if damaged. Laminate flooring provides a more upscale appearance for a slightly higher cost. I avoid expensive options in rentals since tenant preferences vary widely. Focus on neutral colors and patterns that appeal to broad audiences.
How do I maintain my new DIY flooring to maximize its lifespan?
Regular maintenance prevents costly repairs and extends flooring life significantly. Sweep daily to remove abrasive dirt, clean spills immediately, and use appropriate cleaning products for your specific flooring type. I place mats at entrances and use furniture pads to prevent scratches. Annual deep cleaning and periodic sealing for certain materials keep floors looking fresh. Preventive care costs far less than premature replacement.
DIY Flooring: How We Changed our Kitchen in 3 days for Less than
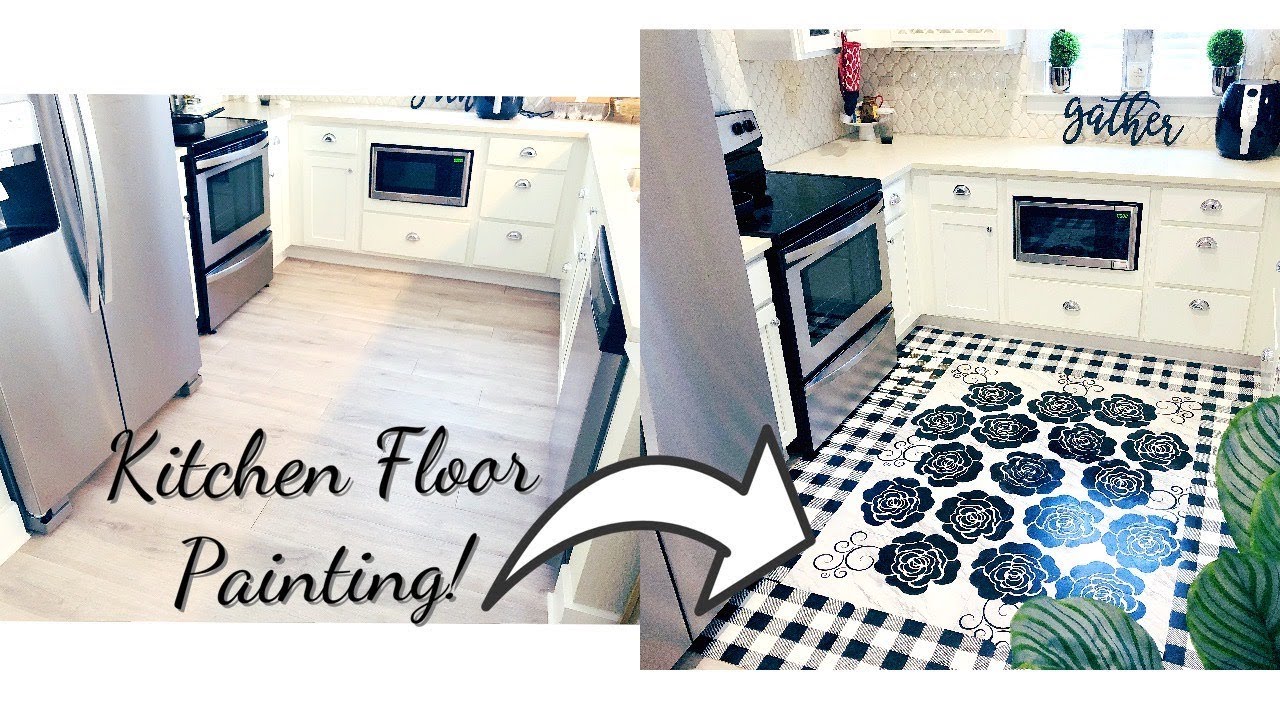
RENTER FRIENDLY KITCHEN FLOOR DIY ON A BUDGET – INEXPENSIVE HOME DECOR IDEAS!
Cheap Flooring Ideas (That Are Beautiful!)
DIY Flooring Projects That Could Transform The Home

DIY Flooring: How We Changed our Kitchen in 3 days for Less than

Related Posts: