In case you are unsure, and also you have an older home, you may wish to have much that done be a professional just in case there is asbestos of the product. Merely wipe it with a wet cloth and you are done. Apply firm and even pressure after measuring the size that has to be cut. If you understand what the existing flooring is made of, this might be a pretty great deal. Scrubbing or the use of sanitizers may not always help eliminate germs.
Images about How To Install Underlayment For Tile Floor
How To Install Underlayment For Tile Floor
When installing ceramic tile on vinyl, professionals would recommend rough sanding, or scarifying, the vinyl floors surface first so the tiling mortar of yours has very good hold to set on. Make sure you have proper instruction for safety reasons. Evidence of this may be found in the remains of Ancient Rome and Greece, in which mosaic tile flooring may be seen. And patient enough to smooth mortar evenly, but with grooves.
The Best Tile Underlayment Options and How to Use Them – Bob Vila

Polished granite is also included in floor tiles. By understanding which room it is going straight into, the visitors patterns, and what you’re really looking for, they can certainly point you to the perfect tile which will give you a lifetime of enjoyment. Put an image on your floors with mosaic tiles. In case the mortar dries just before you are able to set the tile, you will have the additional predicament of removing it.
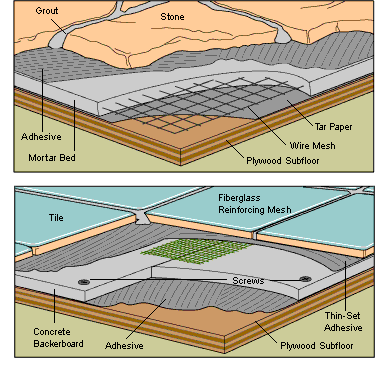
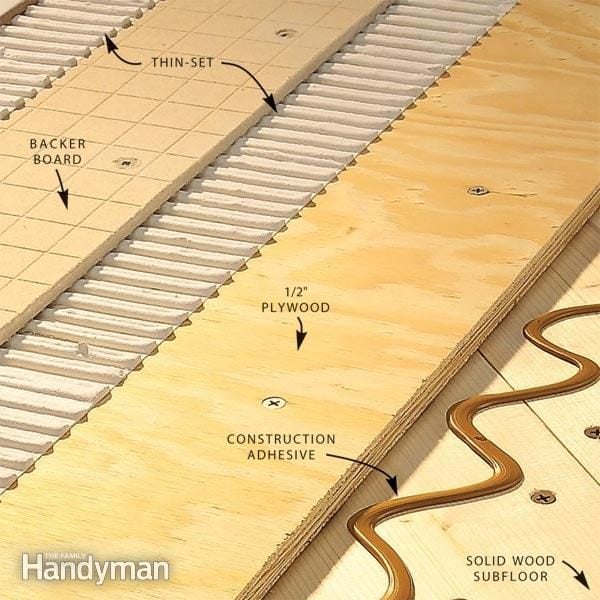
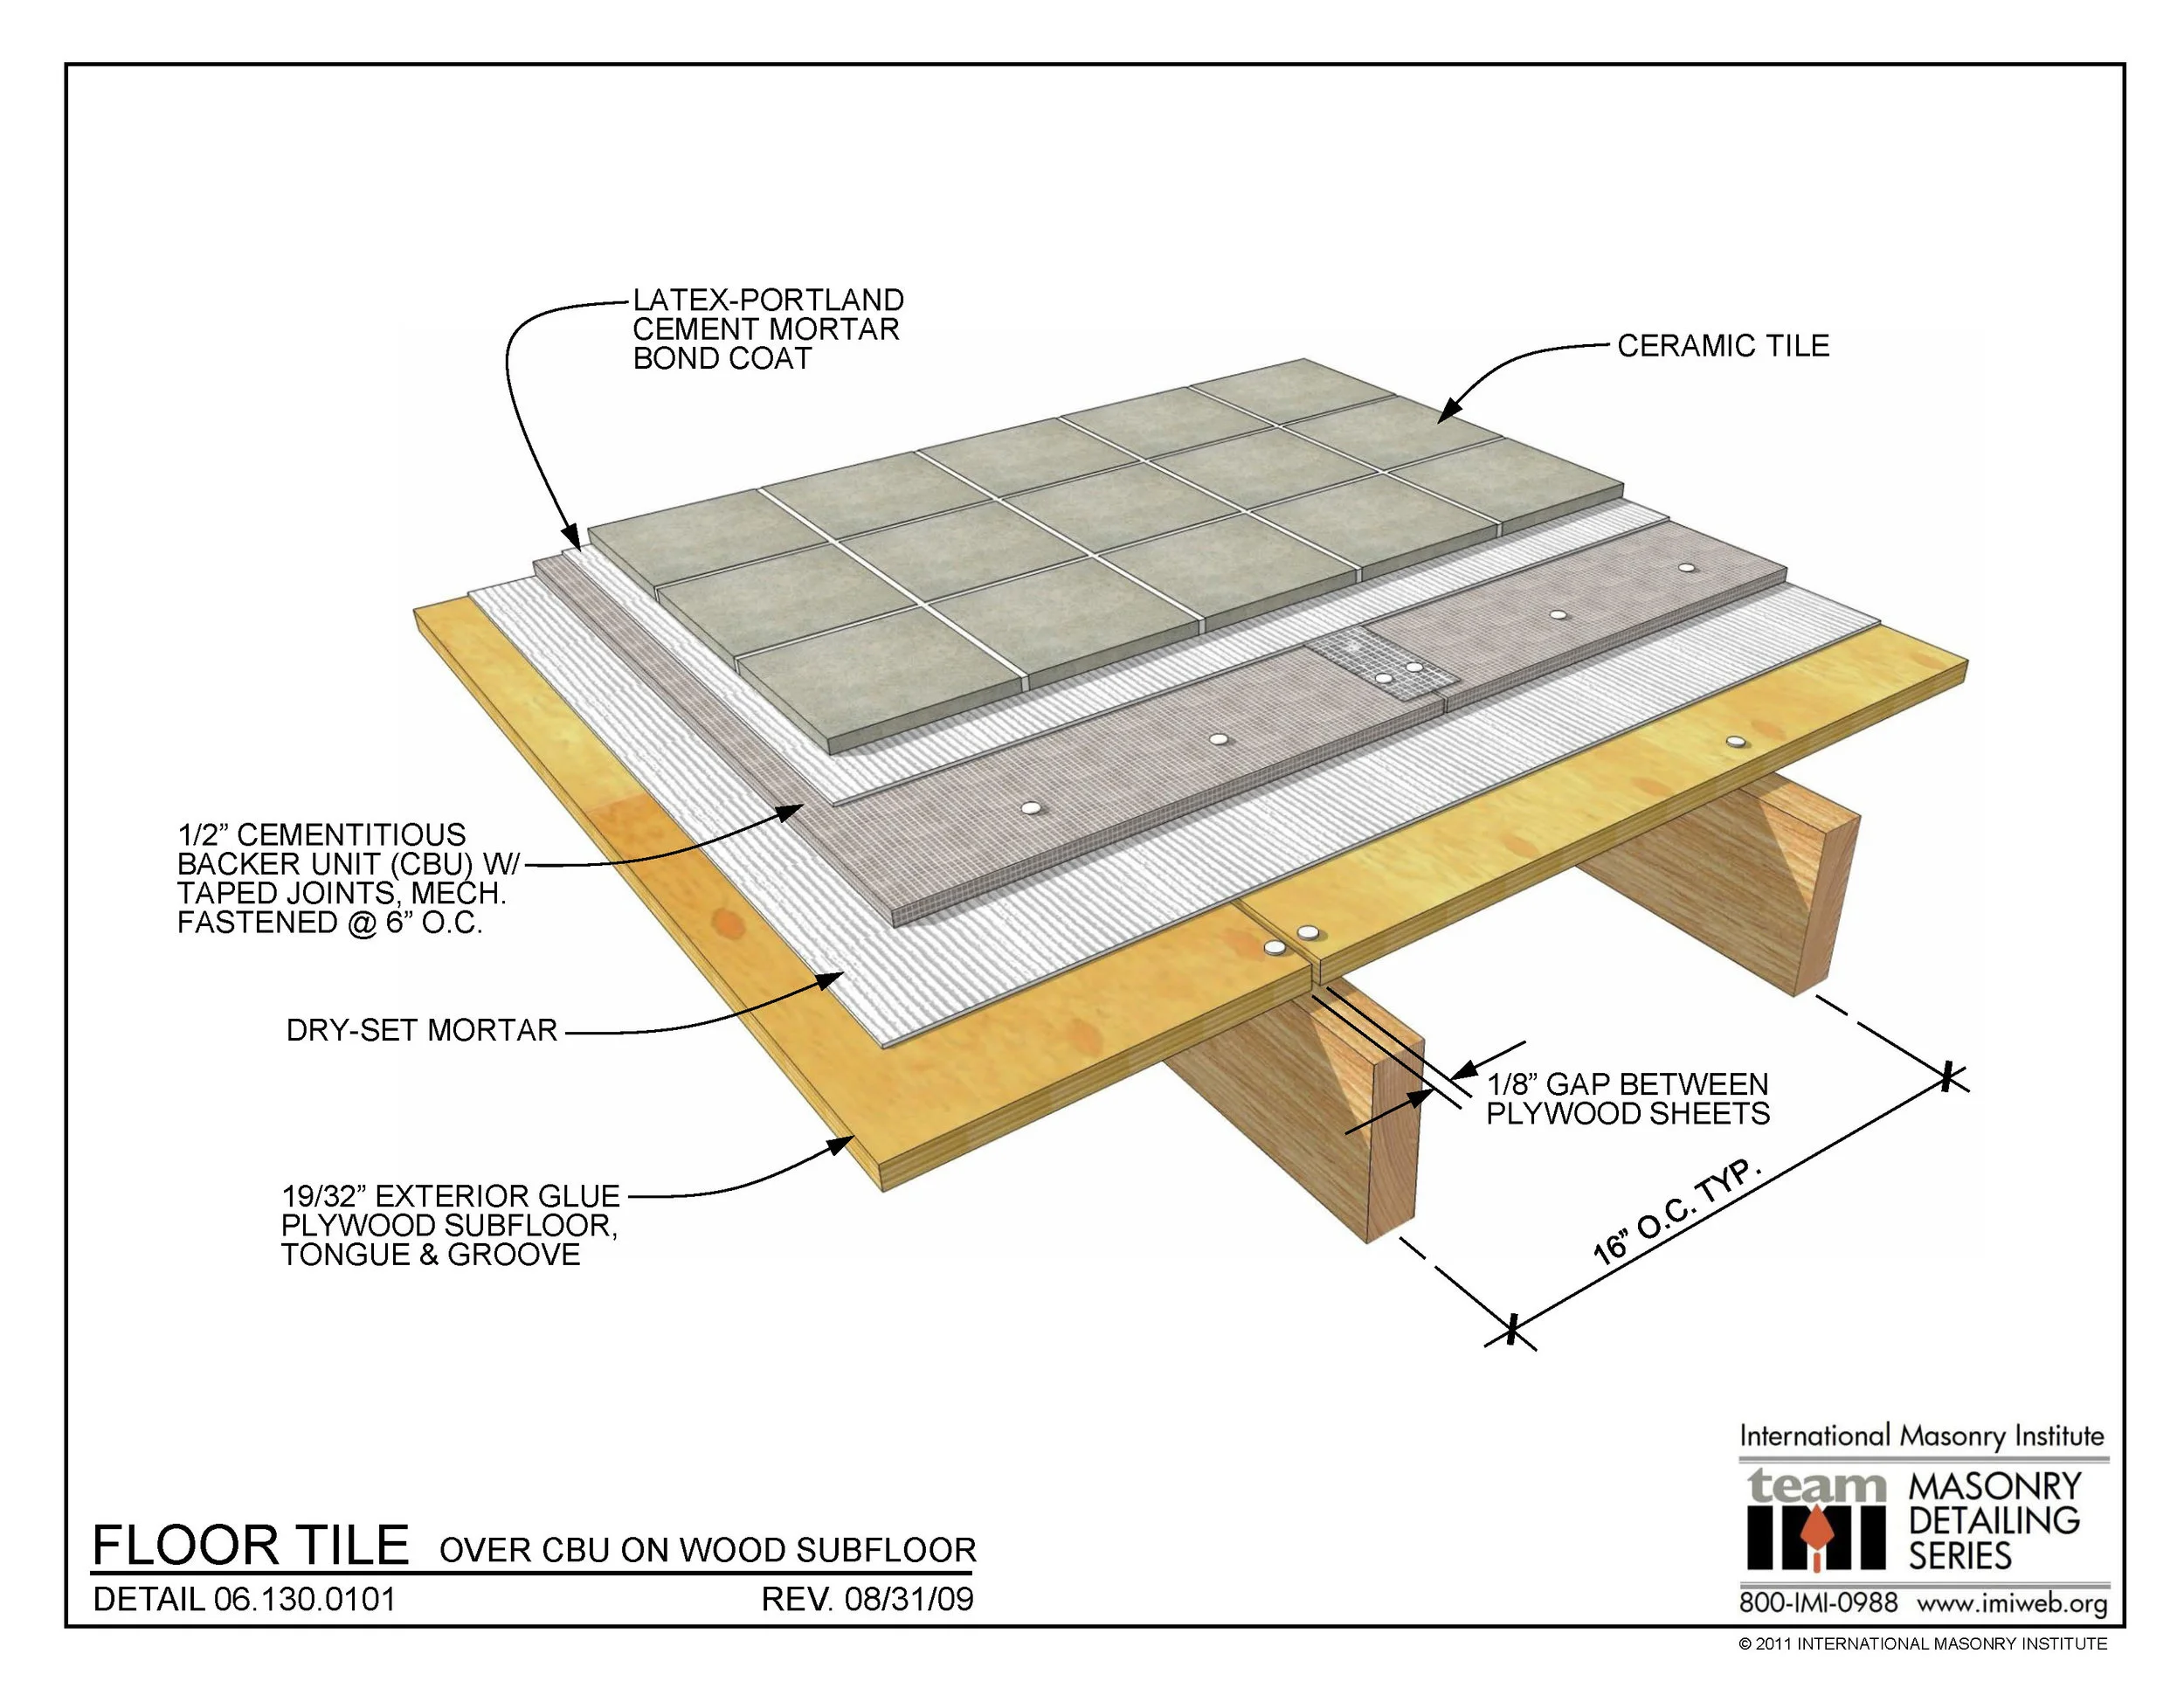
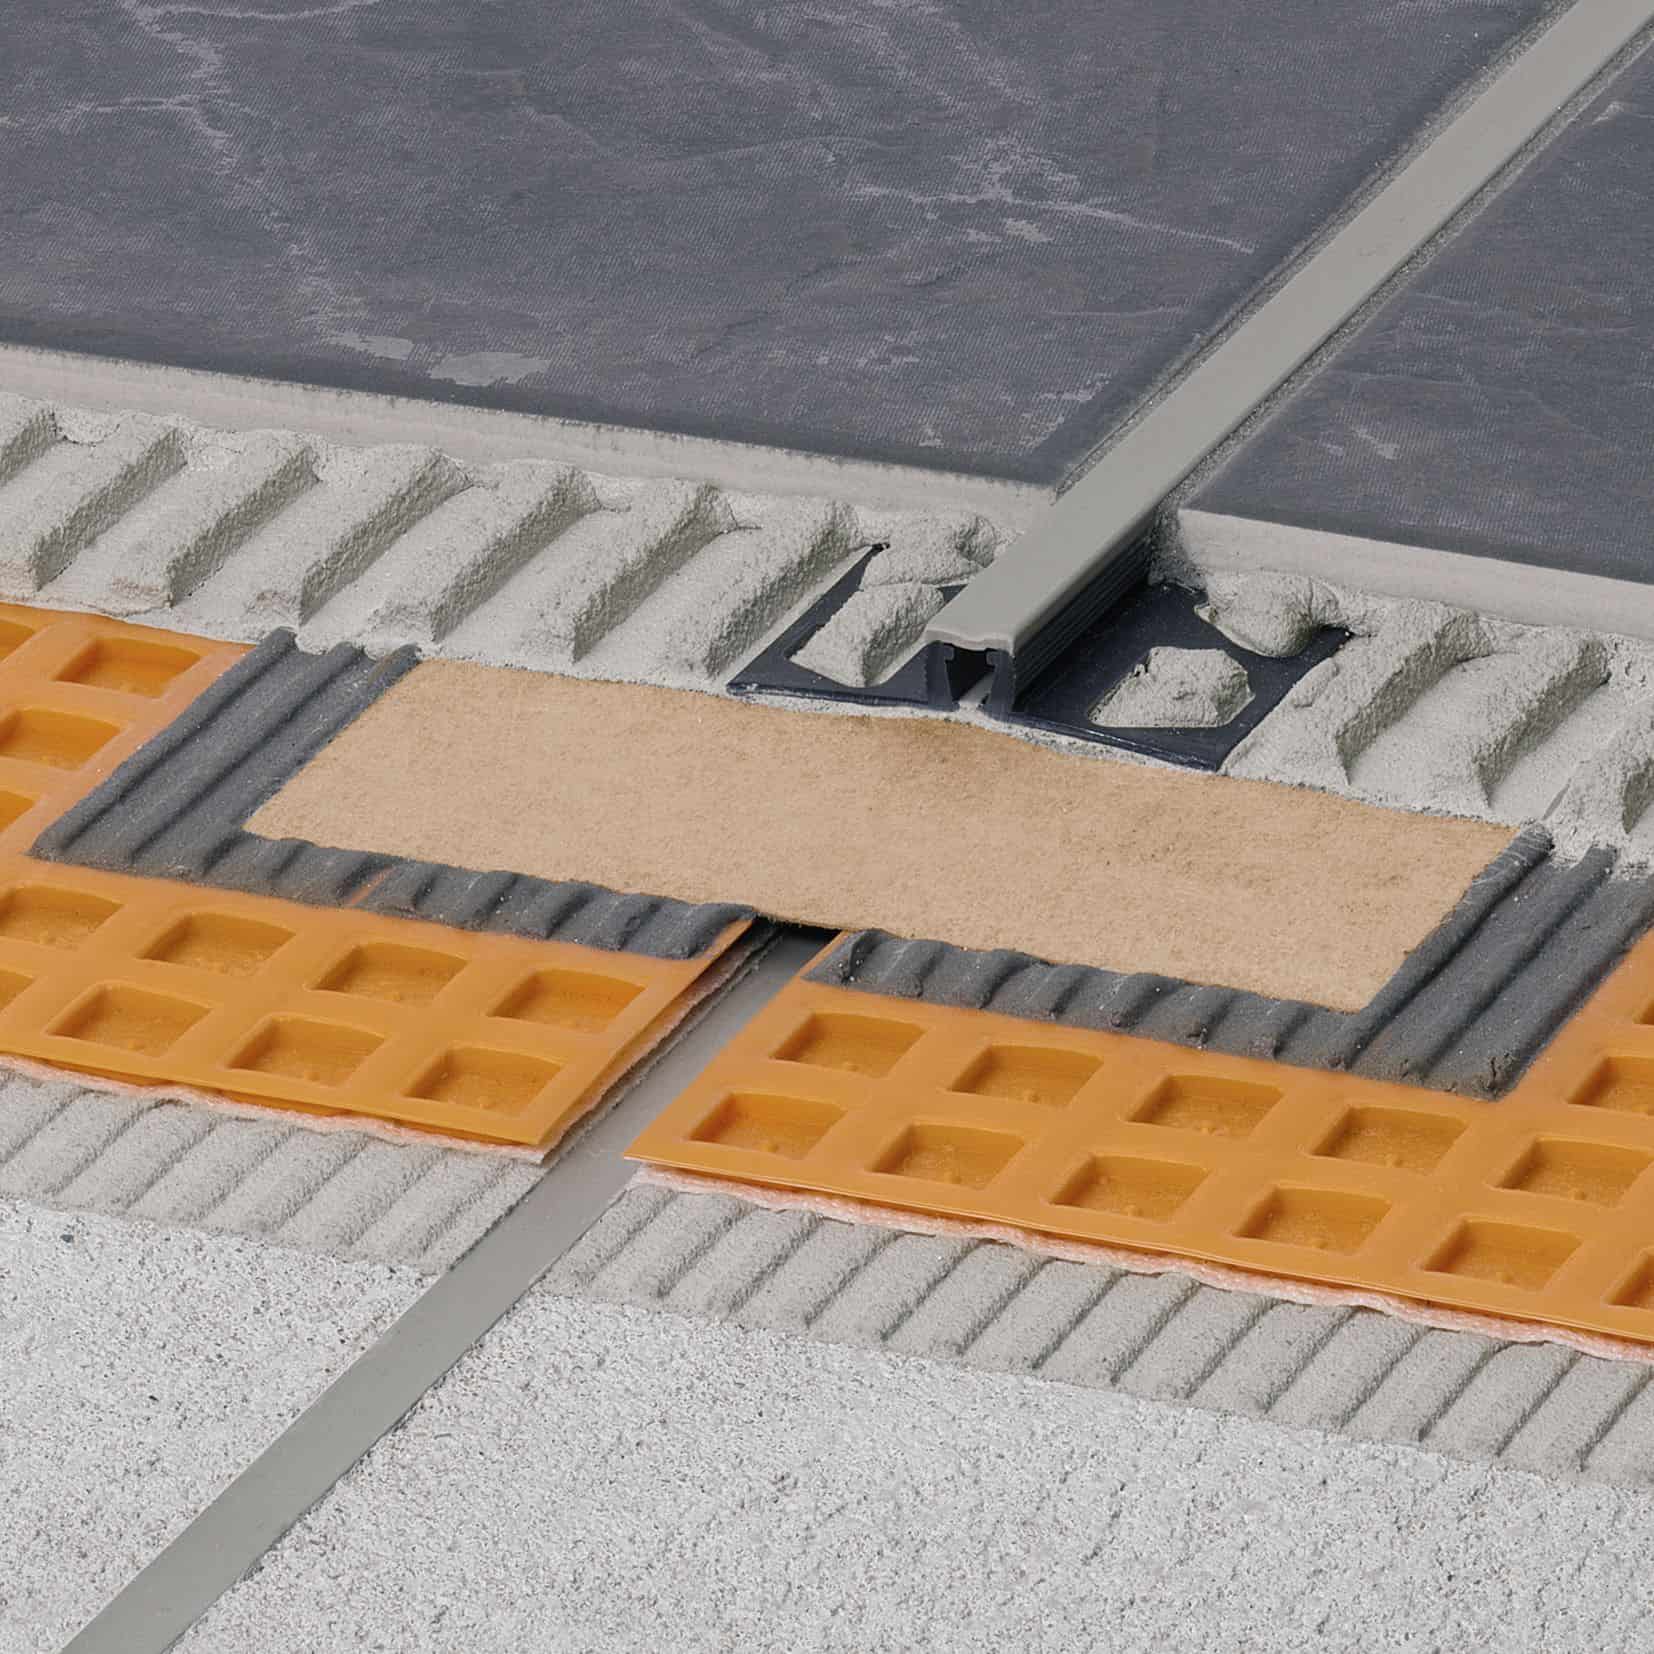
Subfloors and Underlayment for Ceramic Tile Floors
/best-subfloors-to-use-for-laying-tile-1822586-hero-efcfac9422ab457da5d2cbc7f7361df7.jpg)
How to Install Tile Backer Board on a Wood Subfloor (DIY)
Prep a Subfloor for Tile – Fine Homebuilding

Cement Board Installation u2014 Cabinet Painting – Kitchen Remodeling
Understand Tile Underlayment Principles before Floor Installation
How to Prepare a Subfloor for Tile Installation
Preparing Subfloor for Tile The Home Depot

Subfloors and Underlayment for Ceramic Tile Floors
:max_bytes(150000):strip_icc()/best-subfloors-to-use-for-laying-tile-1822586-02-631a13bfdb954ff5a1f80ff1690500f0.jpg)
Tile Underlayment – Schluter Ditra
How to Prepare a Subfloor for Tile Installation
The Best Tile Underlayment Options and How to Use Them – Bob Vila

How To Remove A Tile Floor and Underlayment
Related Posts:
- Installing Slate Tile Floor
- Painting Ceramic Tile Floor In Kitchen
- Anti Slip For Tile Floors
- Laminate Tile Flooring
- Marble Tile Floors
- Travertine Tile Flooring
- Modern Kitchen Tile Floor
- Country Style Tile Floors
- White Tile Flooring Ideas
- Herringbone Brick Tile Floor
How To Install Underlayment For Tile Floor
Installing a tile floor is a great way to add a luxurious look and feel to any room in your home. But in order to ensure that your tile floor will last for years to come, it’s important to take the time to properly install the underlayment. This article will walk you through the steps you need to take in order to properly install underlayment for your tile floor.
Preparing for Underlayment Installation
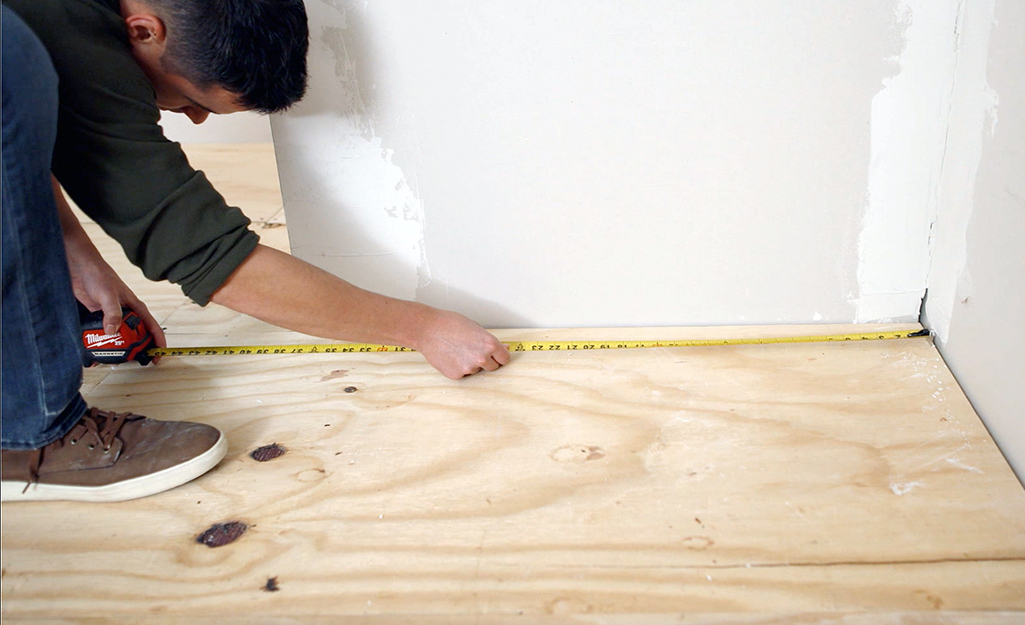
Before you even think about installing the underlayment, there are a few things you need to do first. The first step is to make sure that the subfloor is clean, level, and free of any debris. You want the surface to be as smooth as possible so that the tiles will lay flat and level. You should also inspect the subfloor for any signs of moisture or water damage. If you find any wet spots, it’s important to address these issues before continuing with the installation.
Next, you will need to measure your room and determine how much underlayment you will need for the space. Keep in mind that you may need more material than what is recommended on the package, so make sure to double check your measurements before heading out to the store.
Choosing The Right Underlayment For Your Tile Floor
Once you have all of your measurements in place, it’s time to choose the right type of underlayment for your tile floor. There are several types of underlayment available, and each one has its own unique benefits and features. For instance, some types of underlayment are designed specifically for use with ceramic or porcelain tiles, while others are better suited for natural stone or wood floors. Make sure to read all of the instructions on the packaging before making your selection.
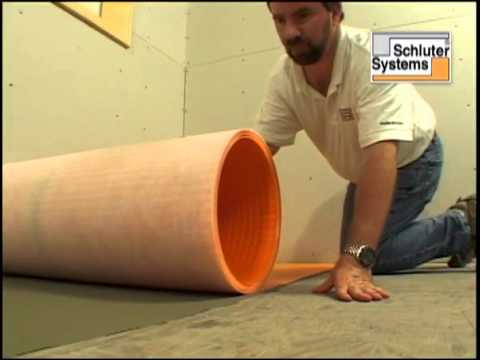
Installing The Underlayment
Once you’ve chosen the right type of underlayment for your tile floor, it’s time to start installing it. Before installing the material, make sure to spread out a layer of primer on the subfloor. This will help ensure that the underlayment sticks properly and won’t come loose over time. Once this is done, you can start laying down the material itself. Start from one corner of the room and work your way outwards. Make sure that each piece overlaps slightly with the previous one in order to create a watertight seal.
When laying down the underlayment, be sure to use a rubber mallet or a heavy roller in order to get rid of any air bubbles or gaps between pieces. Once all of the pieces are laid down, you can use an adhesive tape or foam sealant around any areas where pieces overlap in order to further secure them in place.
Finishing Up The Installation
The last step in installing an underlayment for your tile floor is to use an adhesive tape or foam sealant on all of the edges around the room in order to create an extra layer of protection against moisture and water damage. Be sure to follow all manufacturer instructions when doing this step in order to ensure that your installation will last for years to come. Once this is done, you can move onto laying down your tiles and completing the project!
FAQs About Installing Underlayment For Tile Floors
Q: What type of underlayment should I use for my tile floor?
A: The type of underlayment you should use will depend on what type of tiles you are using and what type of subfloor you have. Different types of underlayment are designed specifically for different types of floors, so make sure to read all instructions on the packaging before making your selection.
Q: What do I need in order to install an underlayment?
A: In order to install an underlayment for your tile floor, you will need a few tools such as a rubber mallet or heavy roller, an adhesive tape or foam sealant, and primer for coating your subfloor before installing the material itself. You may also need additional materials such as nails or screws depending on