Polished concrete flooring can be the first step on to building an allergy-free setting. Polished concrete is turning into a preferred office floor choice due to its durability, easy upkeep, and wide choice of colors and decorative options. You can further mop it using warm, soapy drinking water, but just utilizing a mild detergent.
Images about How To Lay Ceramic Tile On A Concrete Floor
How To Lay Ceramic Tile On A Concrete Floor

Low price, durability and minimal maintenance make this the perfect flooring option for manufacturing, business along with other high-traffic scenarios. With this particular technologies of concrete floors, the floor is kept warm even in probably the coldest climate and you can walk on the floor even with no shoe.
How to Prepare for Laying Tile Over a Concrete Floor
Maintaining the gloss and glamour on the concrete floors polishing is something which everyone will prefer to do however, the very first thing that has to be realized is that keeping the concrete floor completely clean is the first step. Next, diamond embedded abrasive pads buff and polish the floor until it shines.
Can You Install Tile Over Concrete?
How to Prepare Concrete for a Tile InstallationLearning Center

Tile Floor 101 Step by Step How to Install Tile for the First Time

How To Install Ceramic Tiles On Concrete Floor ? – Ceramic Tile
Can I Lay Tile Over Painted Concrete Floor? – Ready To DIY

How to Install Ceramic Tile Flooring in 9 Steps – This Old House
:no_upscale()/cdn.vox-cdn.com/uploads/chorus_asset/file/19496978/howto_tile_01.jpg)
Installing TILE FLOOR for the FIRST TIME 🛠 How To Lay Tile Floor
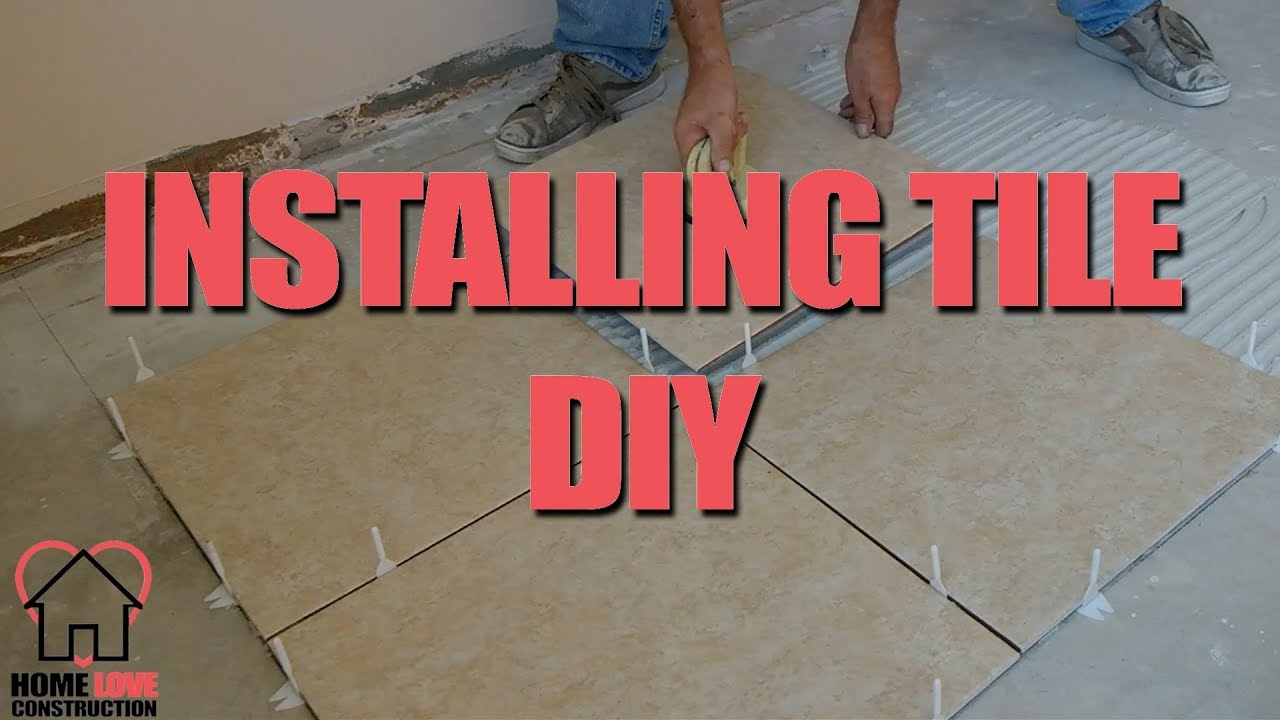
How To Install Ceramic Tile Over A Concrete Slab. Home Love Construction DIY
Subfloors and Underlayment for Ceramic Tile Floors

How to lay ceramic tiles Marazzi

How to Lay Tile on Concrete (with Pictures) – wikiHow

How to Install ceramic tile on concrete using thinset mortar
Related Posts:
- Acid Stain Concrete Floors Yourself
- Resurfacing A Concrete Floor
- Interior Concrete Floor Stain
- Acid Stained Concrete Floors
- Concrete Floor Paint Flakes
- Epoxy Concrete Floor DIY
- Fixing Concrete Floors
- Rustic Stained Concrete Floors
- Painting Concrete Floors Basement
- Concrete Floor Tiles Interior
How To Lay Ceramic Tile On A Concrete Floor
Installing ceramic tile on a concrete floor can be a difficult task if you don’t have the right tools and materials. However, with the right know-how and preparation, it is possible to lay beautiful tile that will last for years to come. This article will provide an in-depth guide about how to properly lay ceramic tile on a concrete floor.
Preparing the Concrete Floor
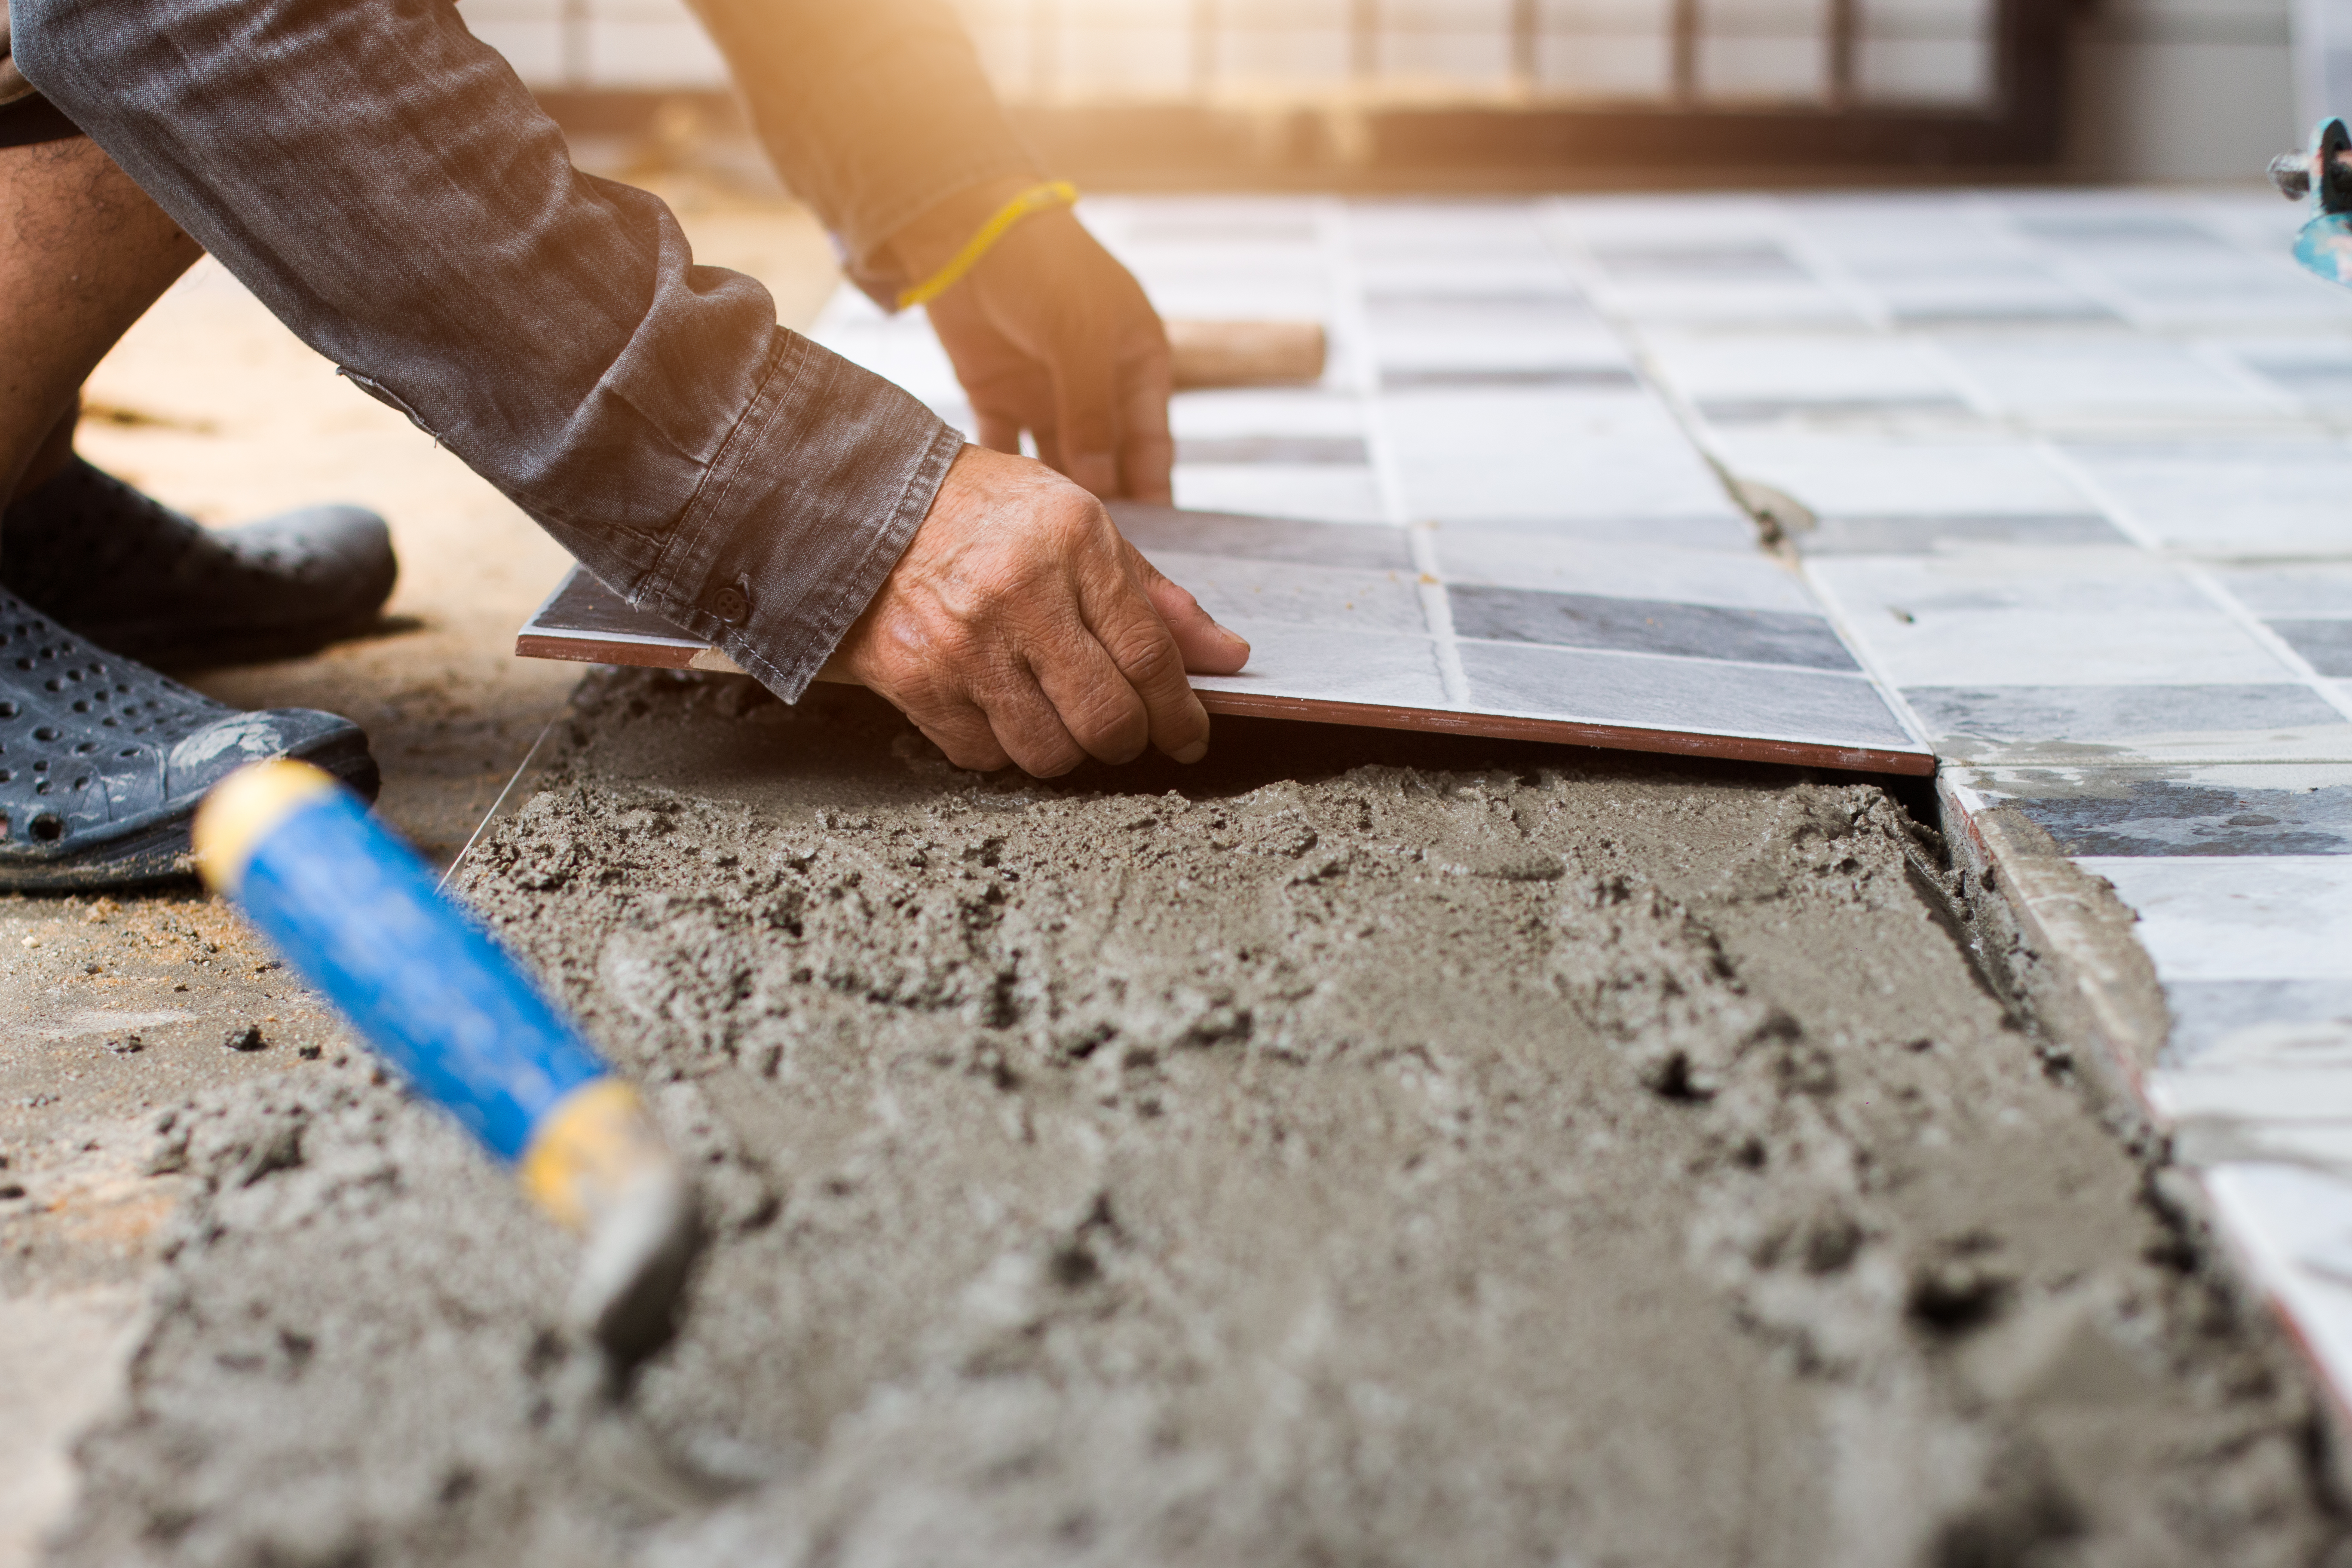
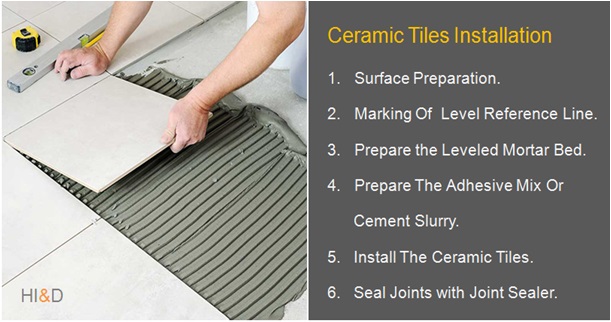
The first step in laying ceramic tile on a concrete floor is to prepare the surface. This is essential for ensuring that your tiles stay in place and look great for years to come. Start by sweeping the floor to remove any dirt or debris. If there are any cracks or chips in the concrete, fill them with a concrete patching compound. Once the patches are dry, sand them down until they are smooth. You should also use a masonry brush to remove any oils or dirt from the surface of the concrete.
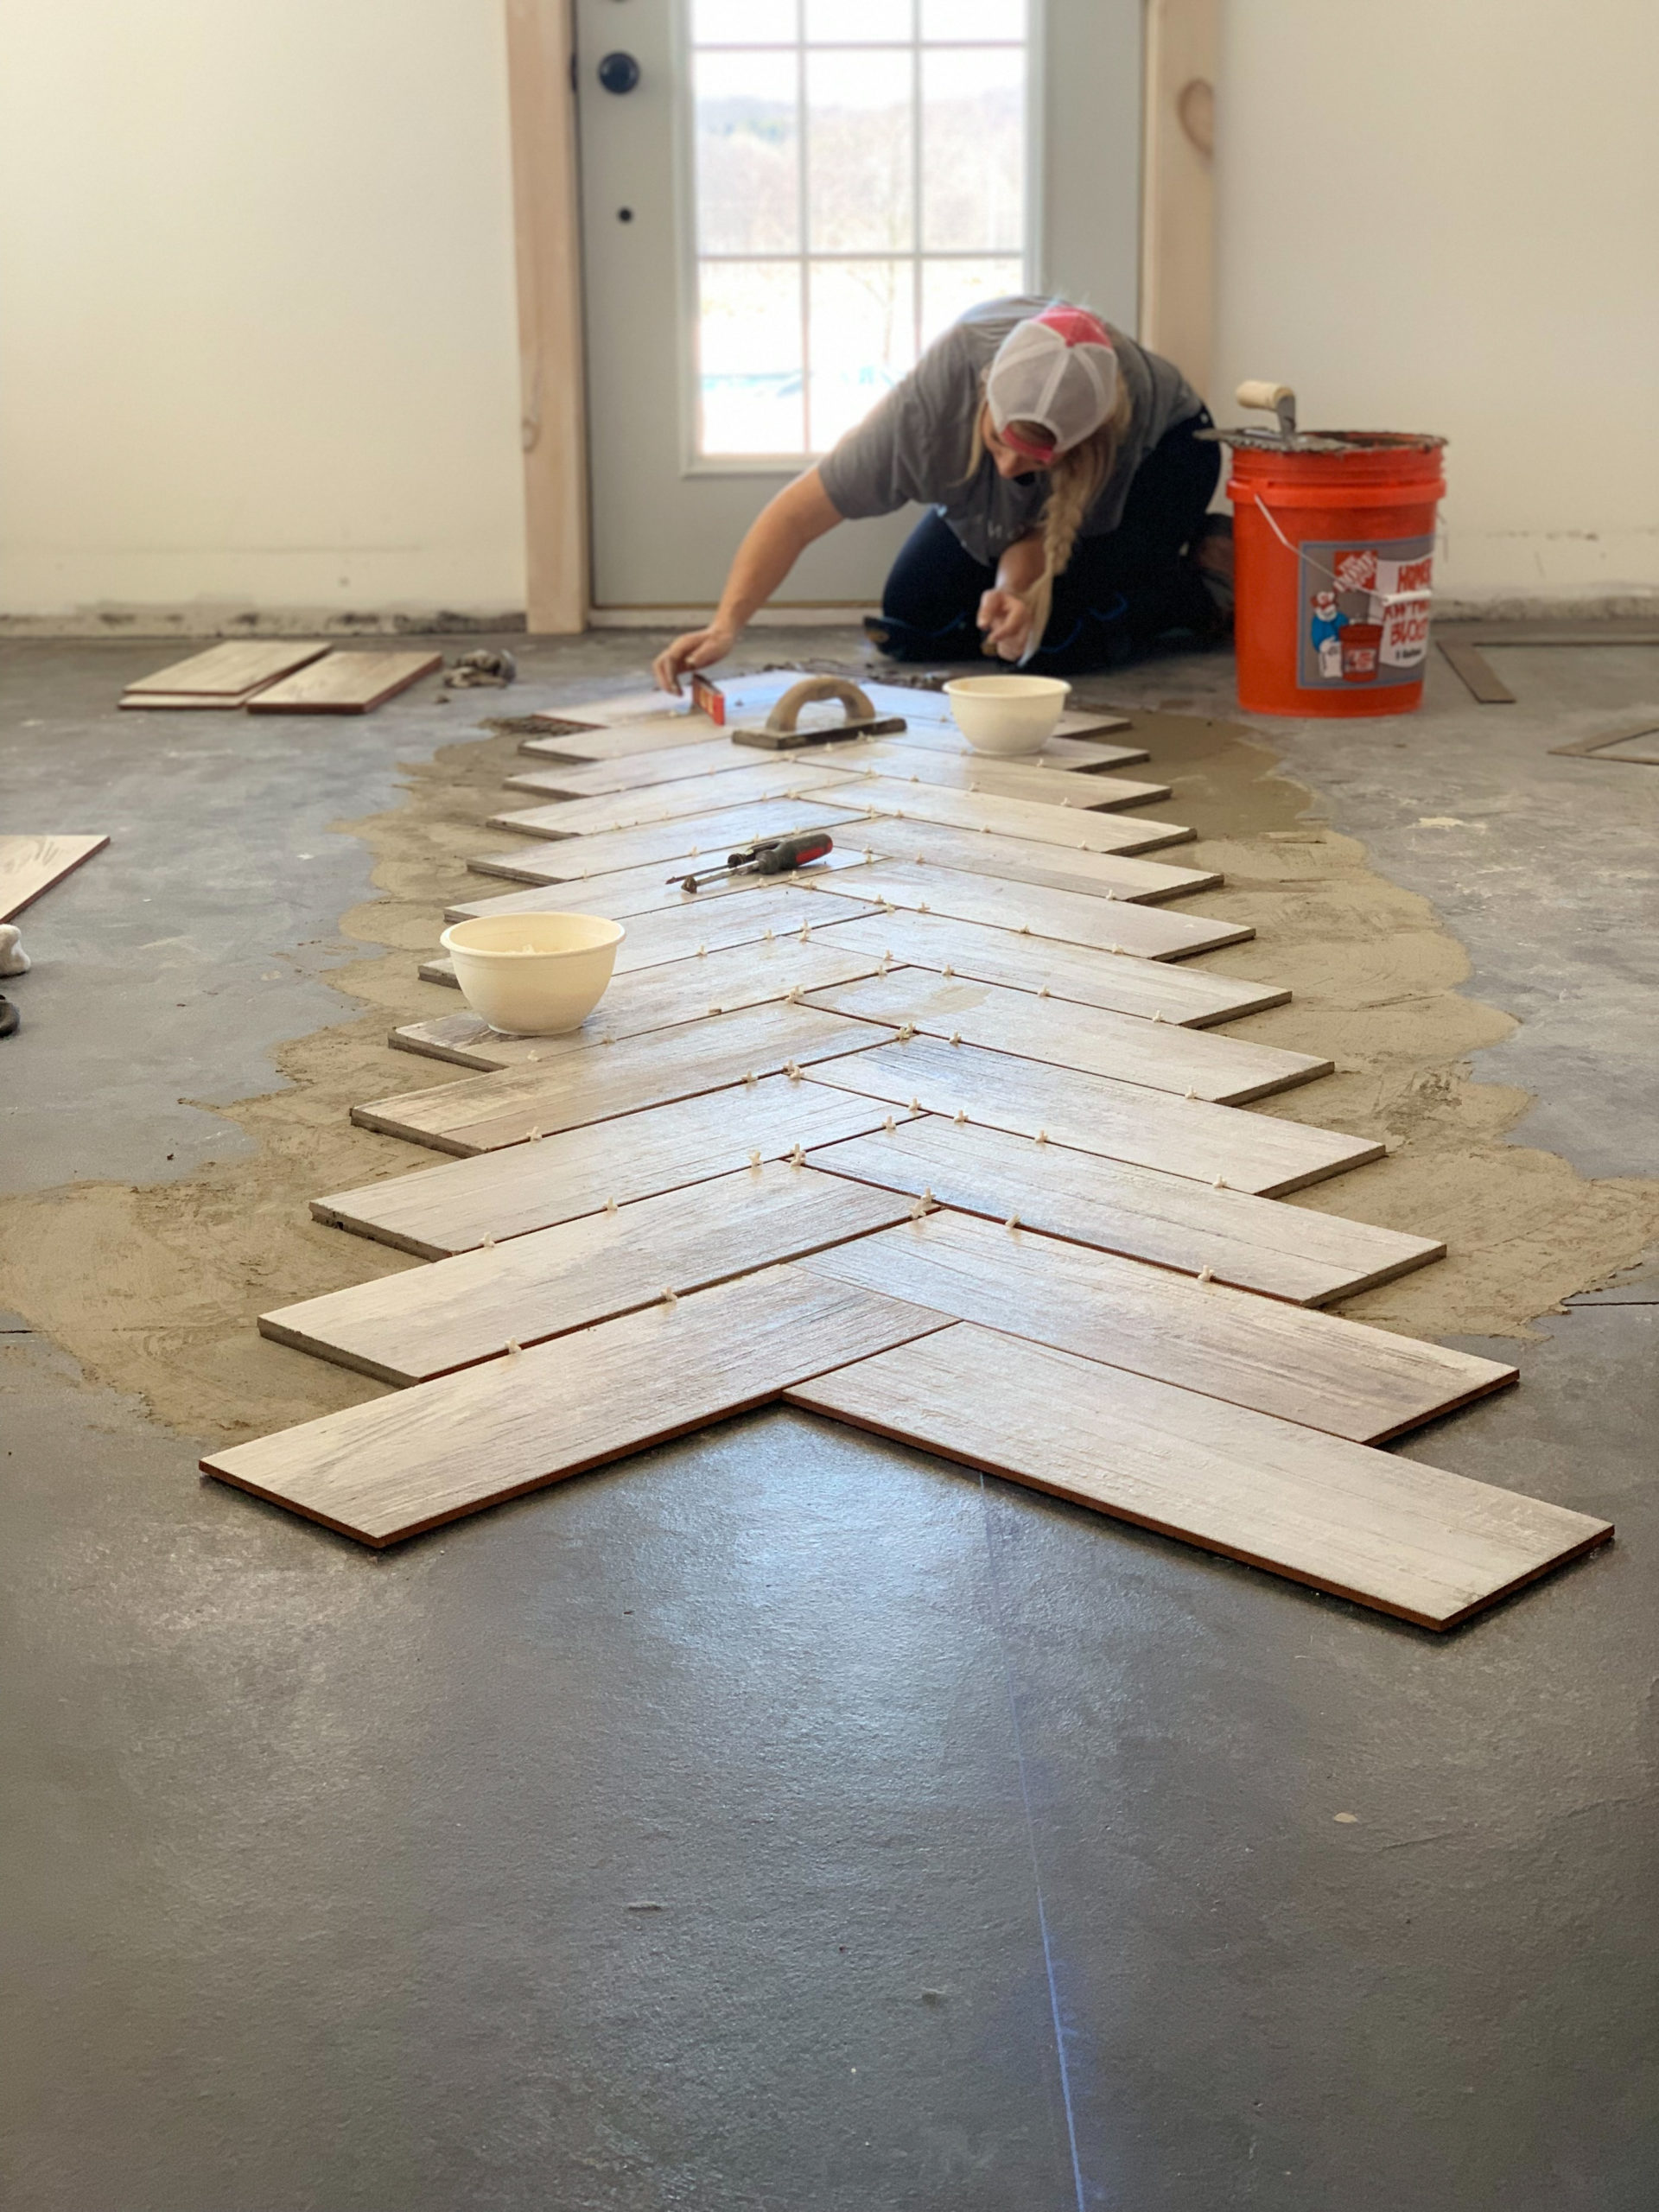
Layout and Measurement
The next step is to determine how much tile you need and how to lay it out. Begin by measuring the area you want to tile and subtracting any openings, such as doorways or windows. You should also factor in an extra 10% of tile just in case you make any mistakes while cutting or measuring. Once you have determined how much tile you need, use a chalk line or ruler to mark out a straight line along one side of the room. This will be your starting point for laying out your tiles.
Laying the Tiles
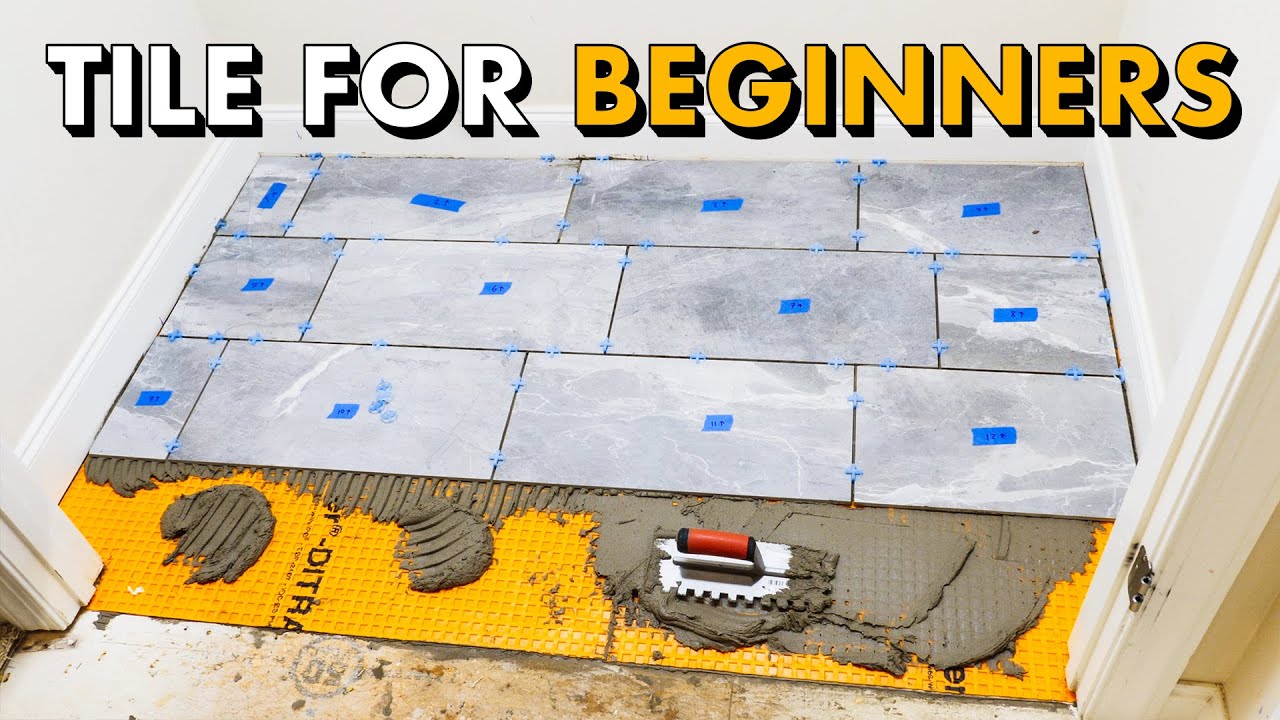
Once you have marked out your starting point, begin laying your tiles one at a time. Start in one corner and work your way outward until you reach your chalk line or ruler. Make sure to leave enough space between each tile for grout, which will help keep your tiles in place and add aesthetic appeal to your flooring. If you need to cut any tiles, use a wet saw to ensure that the edges are smooth and even.
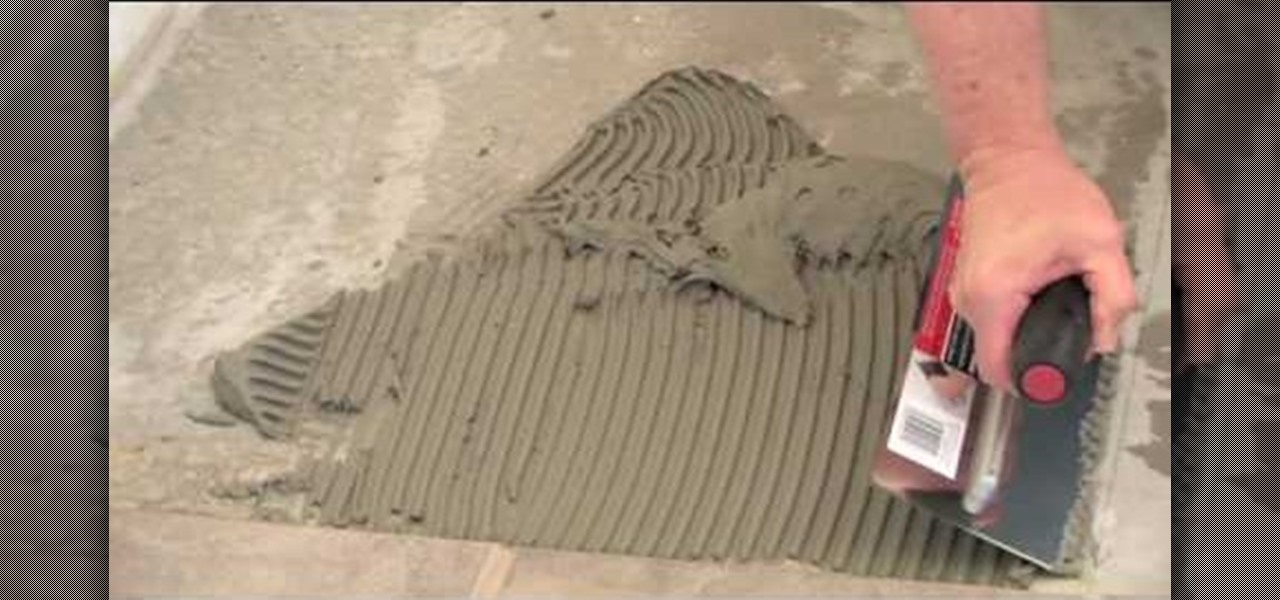
Applying Mortar
Once all of your tiles are laid out, it is time to apply mortar. Mortar is an adhesive that helps keep all of your tiles secure and prevents them from shifting over time. Start by mixing together the mortar according to the manufacturer’s instructions and spread it across the floor using a trowel. Apply a thin layer of mortar over each tile and then press them down firmly into place. Allow the mortar to dry for at least 24 hours before continuing with the next step.
Grouting
Grouting is essential for preventing water from seeping between your tiles and causing damage over time. Begin by mixing together grout according to the manufacturer’s instructions and then spread it across all of your tiles using a rubber float or trowel. Make sure that each joint is filled completely with grout and that none of the gaps are left uncovered. Once all of your joints are filled with grout, use a damp sponge to wipe away any excess grout from the surface of your tiles. Allow the grout to dry completely before walking on it or adding any furniture back into the room.
FAQs
Q: How long should I allow my mortar to dry before walking on it?
A: It is important to allow your mortar at least 24 hours before walking on it or adding any furniture back into the room.
Q: What type of tools do I need for this project?
A: You will need a masonry brush, chalk line or ruler, wet saw, trowel, rubber float, grout, sponge, and bucket for mixing mortar and grout.
Q: What type of grout should I use?
A: It is best to choose a grout that is designed specifically for use with ceramic tiles as this will provide maximum durability and resistance against water damage over time.