Lots of some other companies are likewise making labels for themselves by getting to industry amazingly top quality discount laminate floor surfaces and finishes that is going to delight any customer. If the temperature of the floors moves down the typical, what happens is the fact that the laminated floor boards appear to repel from each other, creating gaps in between these boards.
Images about Install Laminate Flooring DIY
Install Laminate Flooring DIY

Pulling bars are used after you reach the tail end of a row and don’t have enough space to work with a beating block. The budget friendly as well as durability factors of laminate are unbeatable. This’s surely a hard one as a flooring product is just as effective as the installation. Laminate will take a shorter time to clean. Nevertheless, in case you have laminates at your home, no need to be worried about the scratches.
How to Install Laminate Flooring
/how-to-lay-laminate-flooring-1822250-04-e2971fa6cba84aaabb1bd9d571fbd745.jpg)
It is often viewed as the best choice for flooring requirements, regardless of price, mainly due to the outstanding selection of its as well as the ease of adding laminate flooring. If you are installing laminate flooring in the kitchen of yours, you should have the cabinets in position in advance. Should you want the floor of yours to follow the hottest trends, different forms of laminate floor such as ceramics allow you to remain in trend.
How to Install Laminate Flooring on Your Own (DIY) – Flooring HQ
Laminate Flooring Installation: PRO or DIY? BuildDirect

Installing Our Laminate Flooring – Our DIY House The DIY Mommy

How to Install Laminate Flooring
:max_bytes(150000):strip_icc()/how-to-lay-laminate-flooring-1822250-08b-10f3572e10b14770b1e5da743da4226a.jpg)
Guide to Installing Laminate Flooring (DIY) Family Handyman
11 Common Mistakes When Installing Laminate Floors

How to Install Laminate Flooring
/how-to-lay-laminate-flooring-1822250-09-15b00e370b304baf934b1734fa2420be.jpg)
Installing Laminate Floors For Beginners Cabana State Of Mind

10 Great Tips for a DIY Laminate Flooring Installation The Happy
![]()
Laminate Floor Installation // Beginner How-To
10 Great Tips for a DIY Laminate Flooring Installation The Happy
Where Can Laminate Flooring Be Installed?Learning Center

Related Posts:
- 12mm White Oak Laminate Flooring
- Walnut Laminate Flooring
- Bamboo Laminate Flooring
- Laminate Flooring Trim
- High Gloss Laminate Flooring
- Dark Oak Laminate Flooring
- Dark Wood Laminate Flooring
- Laminate Flooring Color Ideas
- Victorian Laminate Flooring
- Wood Laminate Flooring Bathroom
Introduction
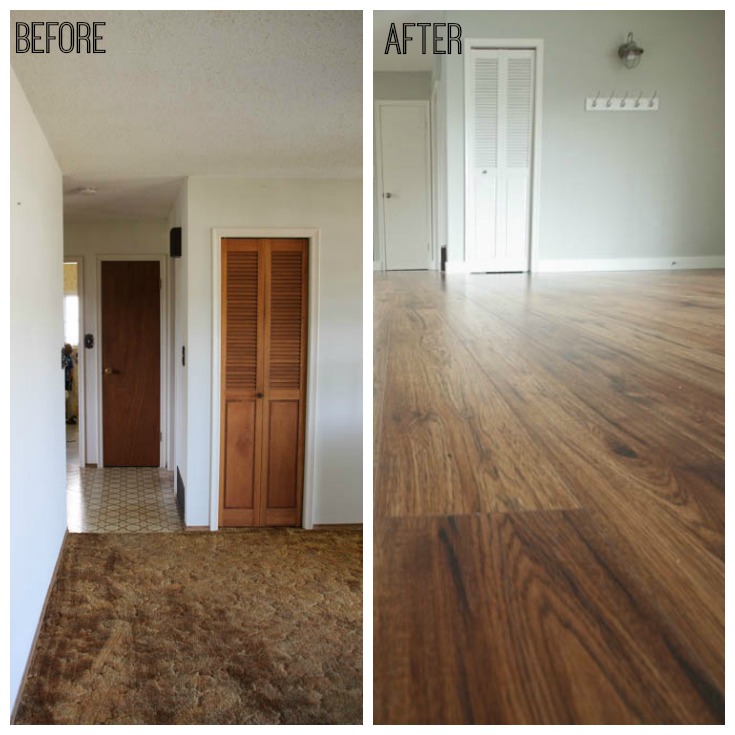
Installing laminate flooring is a great DIY project that can transform the look of any room. Laminate flooring is an attractive, durable, and cost-effective option for both residential and commercial spaces. It is easy to install and requires minimal preparation, making it ideal for do-it-yourselfers. In this article, we’ll go over the steps needed to install laminate flooring yourself and provide tips along the way.
What You’ll Need
Before you begin, make sure you have the following items:
– Laminate flooring
– Underlayment
– Tape measure
– Utility knife
– Hammer
– Nails
– Chalk line
– Tapping block
– Mallet or rubber mallet
Steps For Installing Laminate Flooring DIY
1. Measure the Room: Before you begin, measure the length and width of the room to determine how much laminate flooring you will need. Also take into account any fixtures or obstacles that may impact your measurements.
2. Prepare the Subfloor: Ensure that the subfloor is clean, dry, and level before you start installing your laminate flooring. If necessary, use a self-leveling compound to make sure the subfloor is level.
3. Lay Underlayment: Roll out the underlayment across the entire area where you will be installing your laminate flooring. This will provide extra cushion and insulation for your floor. Make sure it is cut to fit around doors and other obstacles.
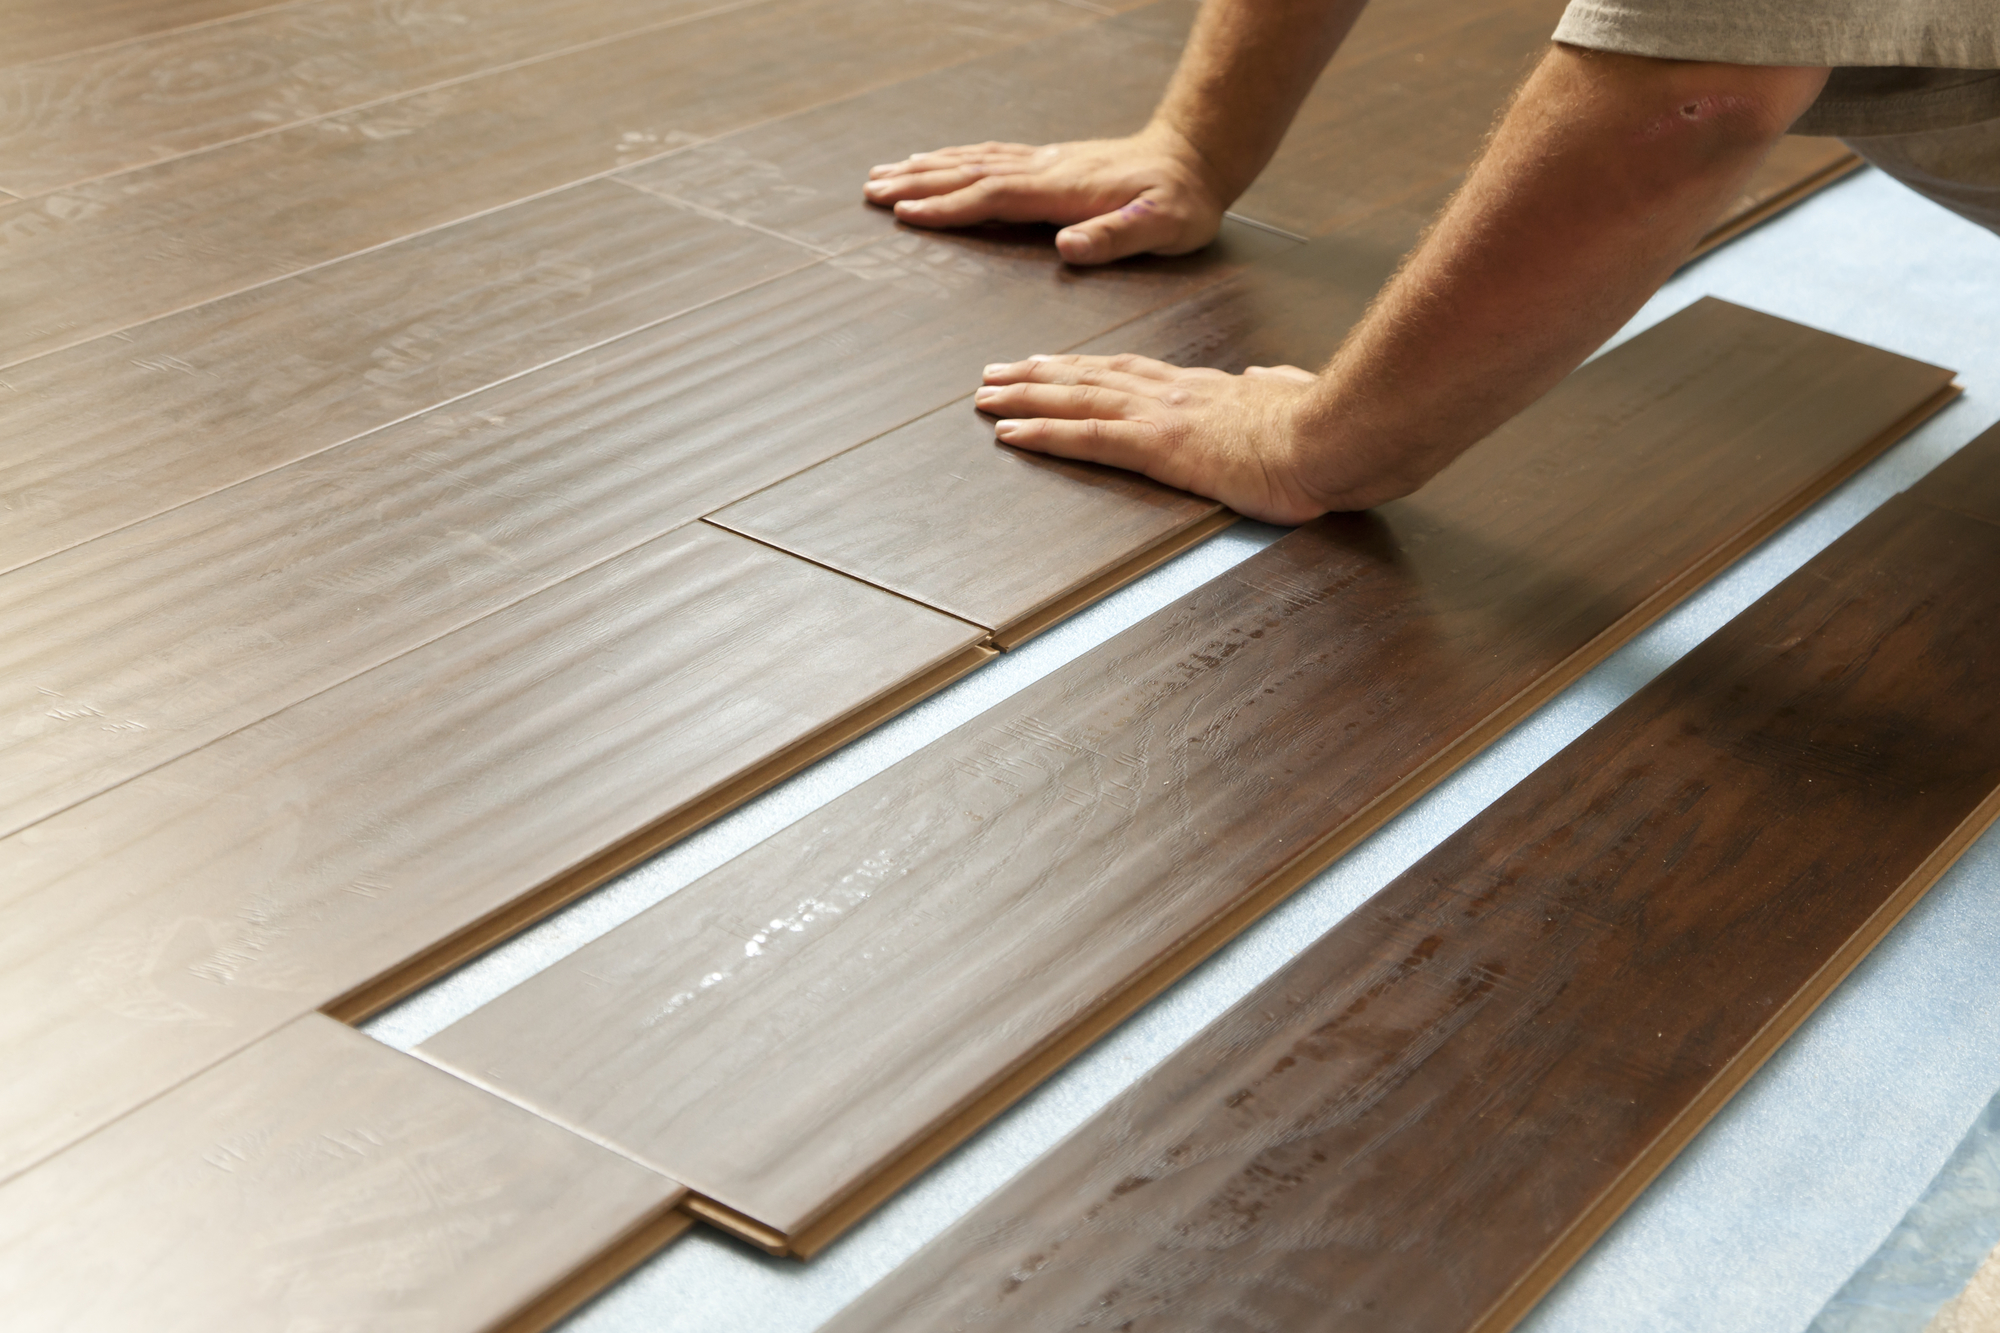
4. Install the First Row: Start by laying down the first row of boards with the tongue side facing outward. Use a tapping block and hammer to secure each board into place. Make sure you leave a gap between each board of approximately 1/4 inch for expansion purposes.
5. Continue Installing Rows: Once you have installed the first row, continue laying down rows of boards until you reach the opposite wall. Make sure that each row is securely fastened into place before moving onto the next one.
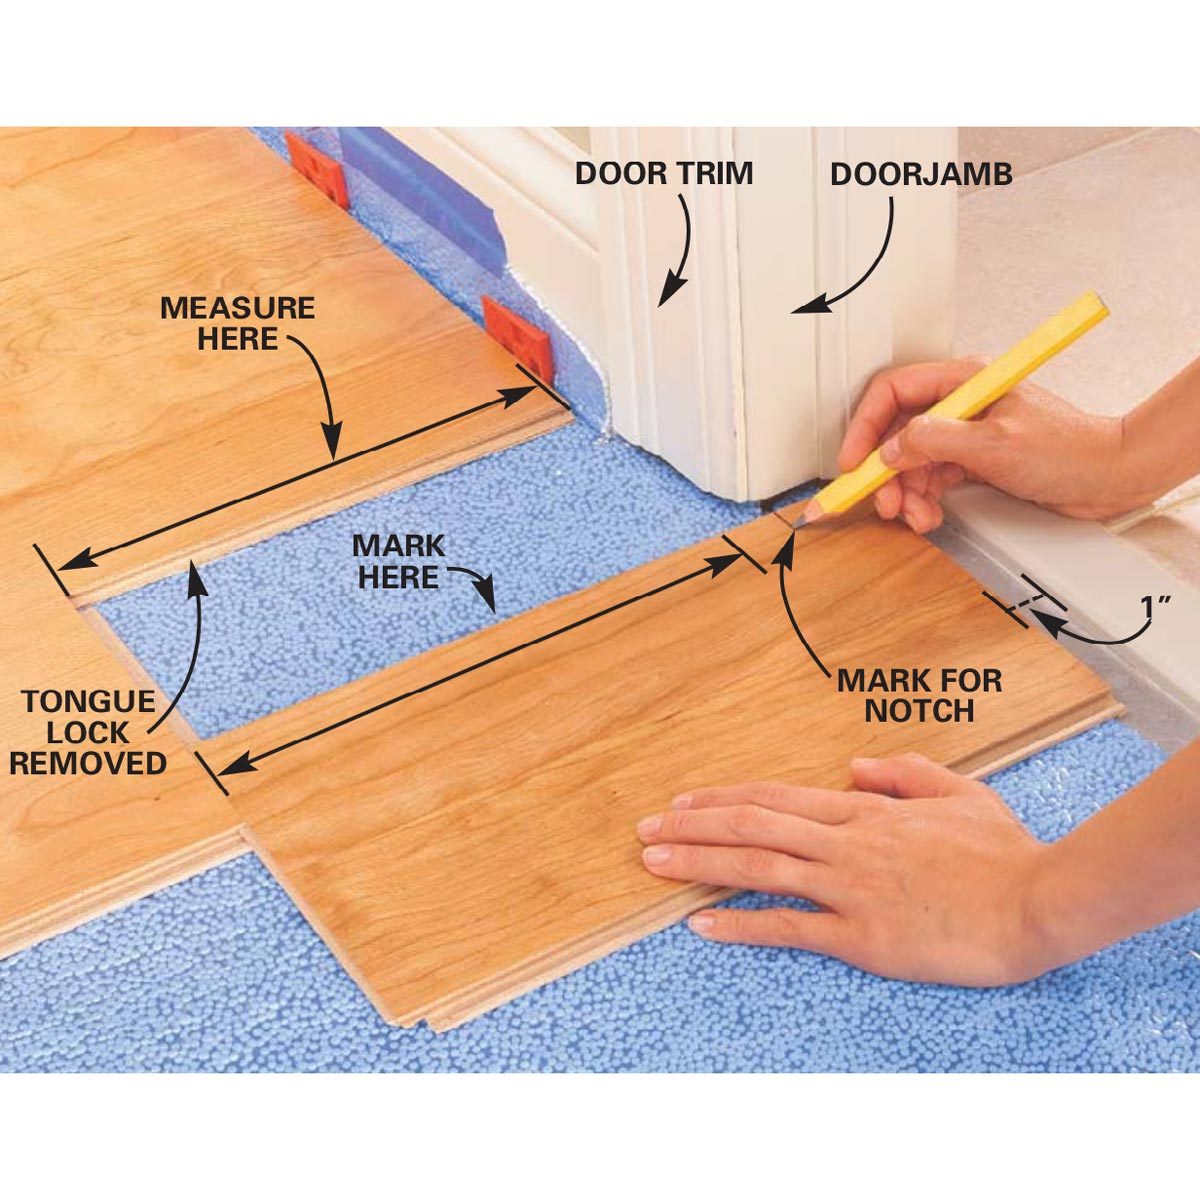
6. Cut Boards: As you approach the end of each run, you will need to cut the boards to fit around doorways and other obstacles. Place your cut piece in its place to ensure a perfect fit before using a utility knife to trim it down to size.
7. Secure Final Piece: Finally, use a hammer and nails to secure the final piece into place. Make sure that all pieces are securely fastened before walking on your newly installed laminate flooring!
Tips For Installing Laminate Flooring DIY
Here are some helpful tips to keep in mind when installing laminate flooring yourself:
– Take your time when measuring and cutting boards – accuracy is key!
– Remember to leave a gap between each board for expansion purposes.
– Always use a tapping block and mallet when securing boards into place – this will help prevent any damage to your laminate flooring.
– Make sure all pieces are securely fastened before walking on them!
FAQs About Installing Laminate Flooring DIY
Q: How long does it take to install laminate flooring?
A: The amount of time it takes to install laminate flooring depends on the size of the room, but it typically takes around one day for an average sized room (200 sq ft.).
Q: What kind of tools do I need for installation?
A: You will need a tape measure, utility knife, hammer, nails, chalk line, tapping block, and mallet or rubber mallet for installation.
Q: Can I install laminate flooring over existing floors?
A: Yes! As long as the existing floors are in good condition and completely flat, you can install laminate flooring directly over them with an appropriate underlayment material.