I’ve always been drawn to older homes with their intricate details, tall ceilings, and floors that feel like they’ve lived through something. When I renovated my hallway and front reception room, I wanted flooring that captured that Victorian spirit without the cost or fragility of genuine antique timber.
Victorian laminate flooring turned out to be exactly the answer I hadn’t known I was looking for. It gave me the narrow strip patterns, rich dark tones, and subtle surface detail of a period home at a fraction of the price of authentic hardwood, and the installation process was far more manageable than I expected. Here’s everything I learned along the way for anyone chasing the same aesthetic.
What Victorian Laminate Flooring Actually Looks Like
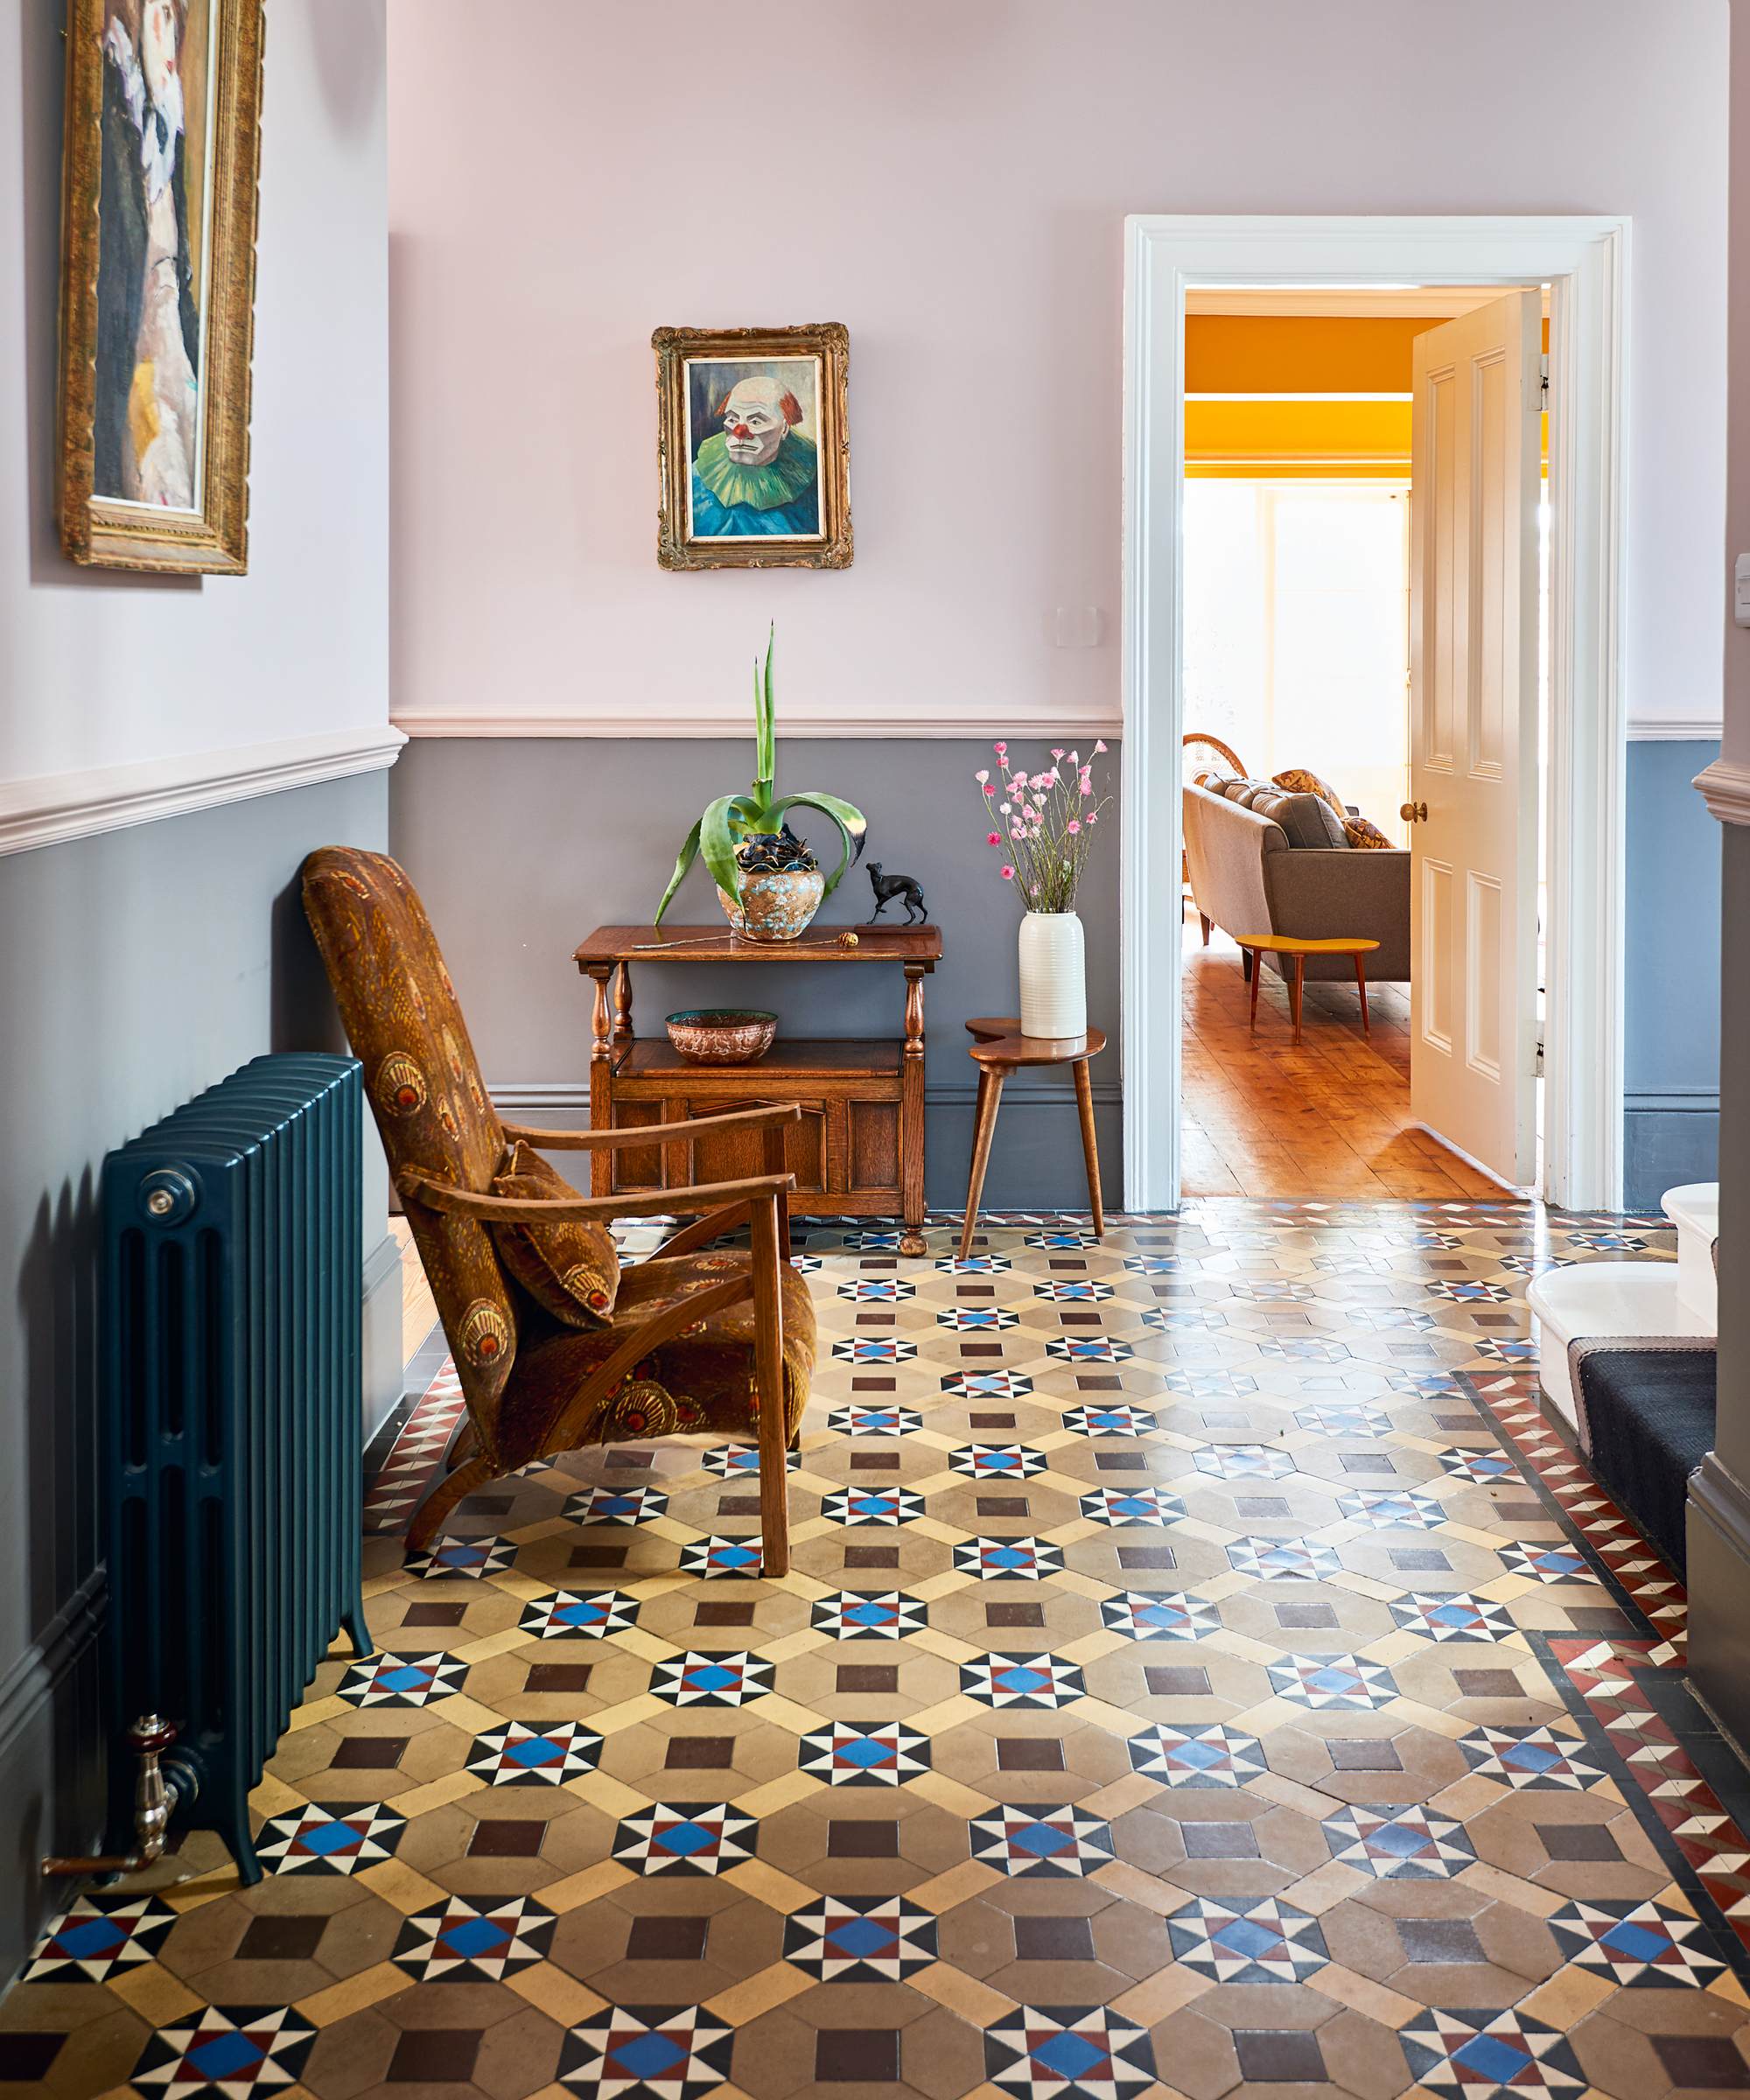
The defining characteristic of Victorian laminate flooring is the narrow plank width that references the original strip floorboards found in period homes from the mid to late 1800s. Where modern laminate often comes in wide planks designed to look contemporary and open, Victorian styles tend toward boards between two and a half and four inches wide, which creates that dense, formal pattern underfoot that period rooms are known for.
Color is the other major distinguishing feature. Authentic Victorian floors were typically laid in dark, rich timbers like mahogany, walnut, and stained pine, and quality Victorian laminate products replicate those tones beautifully.
I went with a deep mahogany-toned option that has warm red-brown undertones, and in the right light it genuinely reads as aged, stained timber rather than a manufactured product. The color variation between planks is subtle but present, which keeps the floor from looking flat or uniform.
Surface texture matters enormously in how convincing the final result looks, and I spent time running my hand across samples before deciding. The best Victorian laminate products have a slightly worn, hand-scraped, or lightly brushed texture that suggests age and use without being overdone.
That texture catches light differently across the floor’s surface and contributes more to the period feel than color alone. A perfectly smooth, glossy laminate in a dark tone would look modern and corporate, while the same color with the right texture reads as genuinely historical.

Choosing the Right Victorian Laminate for Your Home’s Style
Victorian architecture isn’t a single uniform look, and neither is Victorian laminate flooring. The period spanned several decades and encompassed everything from modest terrace houses to grand townhomes, and the flooring aesthetic varied accordingly. Understanding which end of that spectrum your home sits on, or which direction you want to push it toward, helps narrow down the product choices significantly before you start comparing specifications.
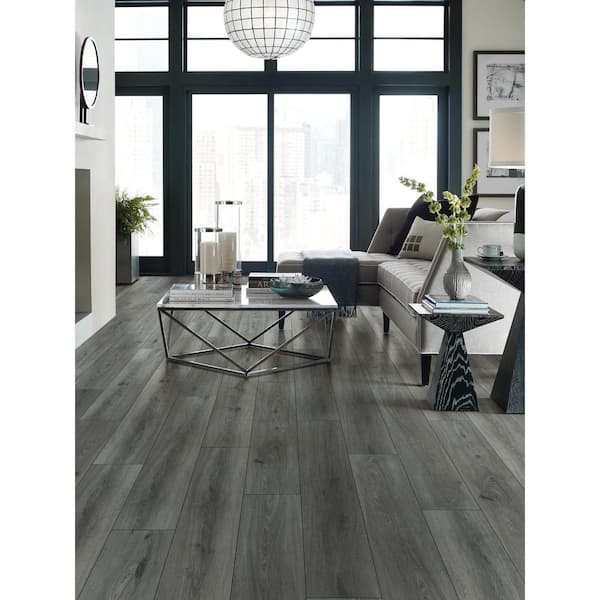
For grander, more formal Victorian interiors with high ceilings and ornate cornicing, a very dark mahogany or ebonized finish works beautifully and feels historically appropriate. These tones create a dramatic contrast with white or cream walls and add the kind of gravitas that makes a entrance hall or formal sitting room feel genuinely impressive. I went this direction in my hallway, and the transformation from pale oak laminate to deep mahogany was so dramatic it changed the entire character of the space.
For more modest Victorian or Edwardian-inspired interiors, a mid-tone walnut or warm chestnut finish tends to feel more at home than the deepest shades. These options still carry the narrow strip pattern and period character but feel less weighty in smaller rooms with lower ceilings. If your home is a Victorian terrace rather than a townhouse, you might find that a slightly lighter interpretation of the aesthetic sits more naturally in the proportions of the space and avoids making rooms feel smaller than they already are.

Understanding Laminate Quality and What to Look For
Shopping for laminate can feel overwhelming because the price range is enormous and the quality differences aren’t always obvious from looking at a product image or even handling a small sample. Before I bought anything for my Victorian project, I educated myself on the specifications that actually matter for long-term performance, and I’m glad I did because it steered me away from products that would have disappointed me within a couple of years.
AC rating is the first number worth understanding. Laminate flooring is graded on an Abrasion Class scale from AC1 to AC5, with higher numbers indicating greater resistance to wear and surface abrasion. AC3 is generally considered the minimum for residential use in moderate traffic areas, while AC4 and AC5 are rated for heavy residential or even light commercial use. For a hallway that gets daily traffic from shoes, bags, and everything else that passes through a front entrance, I went with AC4, and I’d make the same call again.
Thickness is the other specification I’d encourage anyone to pay close attention to. Thicker laminate, typically 10 to 12 millimeters, feels more solid and substantial underfoot and does a better job of hiding minor subfloor imperfections. Thin laminate can feel hollow and slightly springy when you walk on it, which undermines the feeling of quality that you’re trying to achieve with a Victorian aesthetic. Pairing good thickness with a quality attached underlay in the product itself gives you the best chance of a floor that feels as convincing as it looks.
Preparing Your Subfloor and Getting the Installation Right
Getting a Victorian laminate floor to look its best starts well before the first plank goes down, and I cannot overstate how much the subfloor preparation affects the finished result. Laminate doesn’t tolerate significant imperfections in the surface beneath it, and any bumps, dips, or soft spots will telegraph through the planks and create movement, squeaking, or an uneven surface that no amount of quality product can compensate for.
My subfloor was existing floorboards over joists, which required a different preparation approach than a concrete slab would. I checked every board for squeaking and movement, screwing down any that shifted underfoot before doing anything else. Then I laid a 6mm plywood overlay across the entire surface to create a flat, stable base for the laminate, which added cost and time to the project but made a very real difference in how solid and quiet the finished floor feels to walk on.
Acclimating the laminate in the room for at least 48 hours before installation is a step I followed carefully and would encourage everyone to take seriously. Laminate expands and contracts with humidity changes, and installing it before it has adjusted to your home’s specific conditions is a common cause of gapping or buckling after the fact. I stacked the boxes flat in the room away from direct sunlight and left them for two full days before my installer arrived, which set the project up for a stable result from the very beginning.
Laying Victorian Laminate: Direction, Pattern, and Details
The direction you lay narrow-strip Victorian laminate has a bigger impact on the final look than most people anticipate going in, and it’s worth thinking through deliberately before you start rather than defaulting to the most obvious choice. Running the planks parallel to the longest wall in a room is the standard advice, but with Victorian strip flooring specifically, the direction relative to the light source and the proportions of the space both deserve consideration.
In my hallway, I ran the planks lengthways down the corridor, which elongated the space visually and felt most natural for a narrow transitional area. In the front room, I ran them at a 45-degree angle to the walls in a diagonal pattern, which creates a more dynamic and period-authentic look that you see in many genuine Victorian interiors. The diagonal lay takes slightly more material due to waste at the cut edges, but the visual payoff in a formal room is significant and worth the additional cost if the budget allows for it.
Getting the expansion gaps right around the perimeter of every room is a detail that matters both for performance and for the neatness of the finished edge. Victorian-style skirting boards tend to be tall and elaborate, which actually works in your favor here because they cover a generous gap easily without any visible compromise to the look. I maintained a consistent 10mm gap around the entire perimeter, which gave the floor room to move with seasonal humidity changes while staying completely hidden behind the reinstated Victorian-profile skirting I sourced to complement the floor.

Living With Victorian Laminate and Keeping It Looking Period-Perfect
Two years of living with my Victorian laminate has taught me a lot about how to maintain the period look over time without putting in excessive effort or treating the floor as too precious to use comfortably. The fundamentals are the same as any laminate, but a few specific considerations apply when you’re trying to preserve the aesthetic integrity of a historical-style floor rather than just keeping a surface clean.
Daily sweeping or dusting with a microfiber mop is the habit I’ve found most protective of the surface finish. The embossed texture of Victorian laminate can trap fine grit in its grain detail, and that grit causes micro-scratches in the wear layer over time if it’s walked across repeatedly before being removed. A quick daily sweep, especially in the hallway where outdoor shoes bring in the most debris, keeps the floor looking sharp and extends the life of the surface finish noticeably.
For the aesthetic specifically, I’ve been careful about the products I use for wet cleaning, because the wrong cleaner can leave a residue or sheen that makes the floor look plasticky rather than period-appropriate. I use a pH-neutral hardwood and laminate cleaner applied with a barely damp mop rather than anything foamy or waxy, which keeps the matte, slightly aged quality of the surface intact. Wax-based products in particular build up on the embossed texture and fill in the grain detail that contributes most to the period authenticity of the floor.

Is Victorian laminate flooring suitable for hallways with heavy foot traffic?
Yes, as long as you choose a product with an AC4 or AC5 wear rating. I installed AC4 in my hallway and it has handled daily traffic, outdoor shoes, and everything a busy entrance endures without showing any meaningful wear after two years. The narrow strip pattern also hides minor scuffs and marks more effectively than wider plank formats because there’s more visual detail in the surface to blend them into.
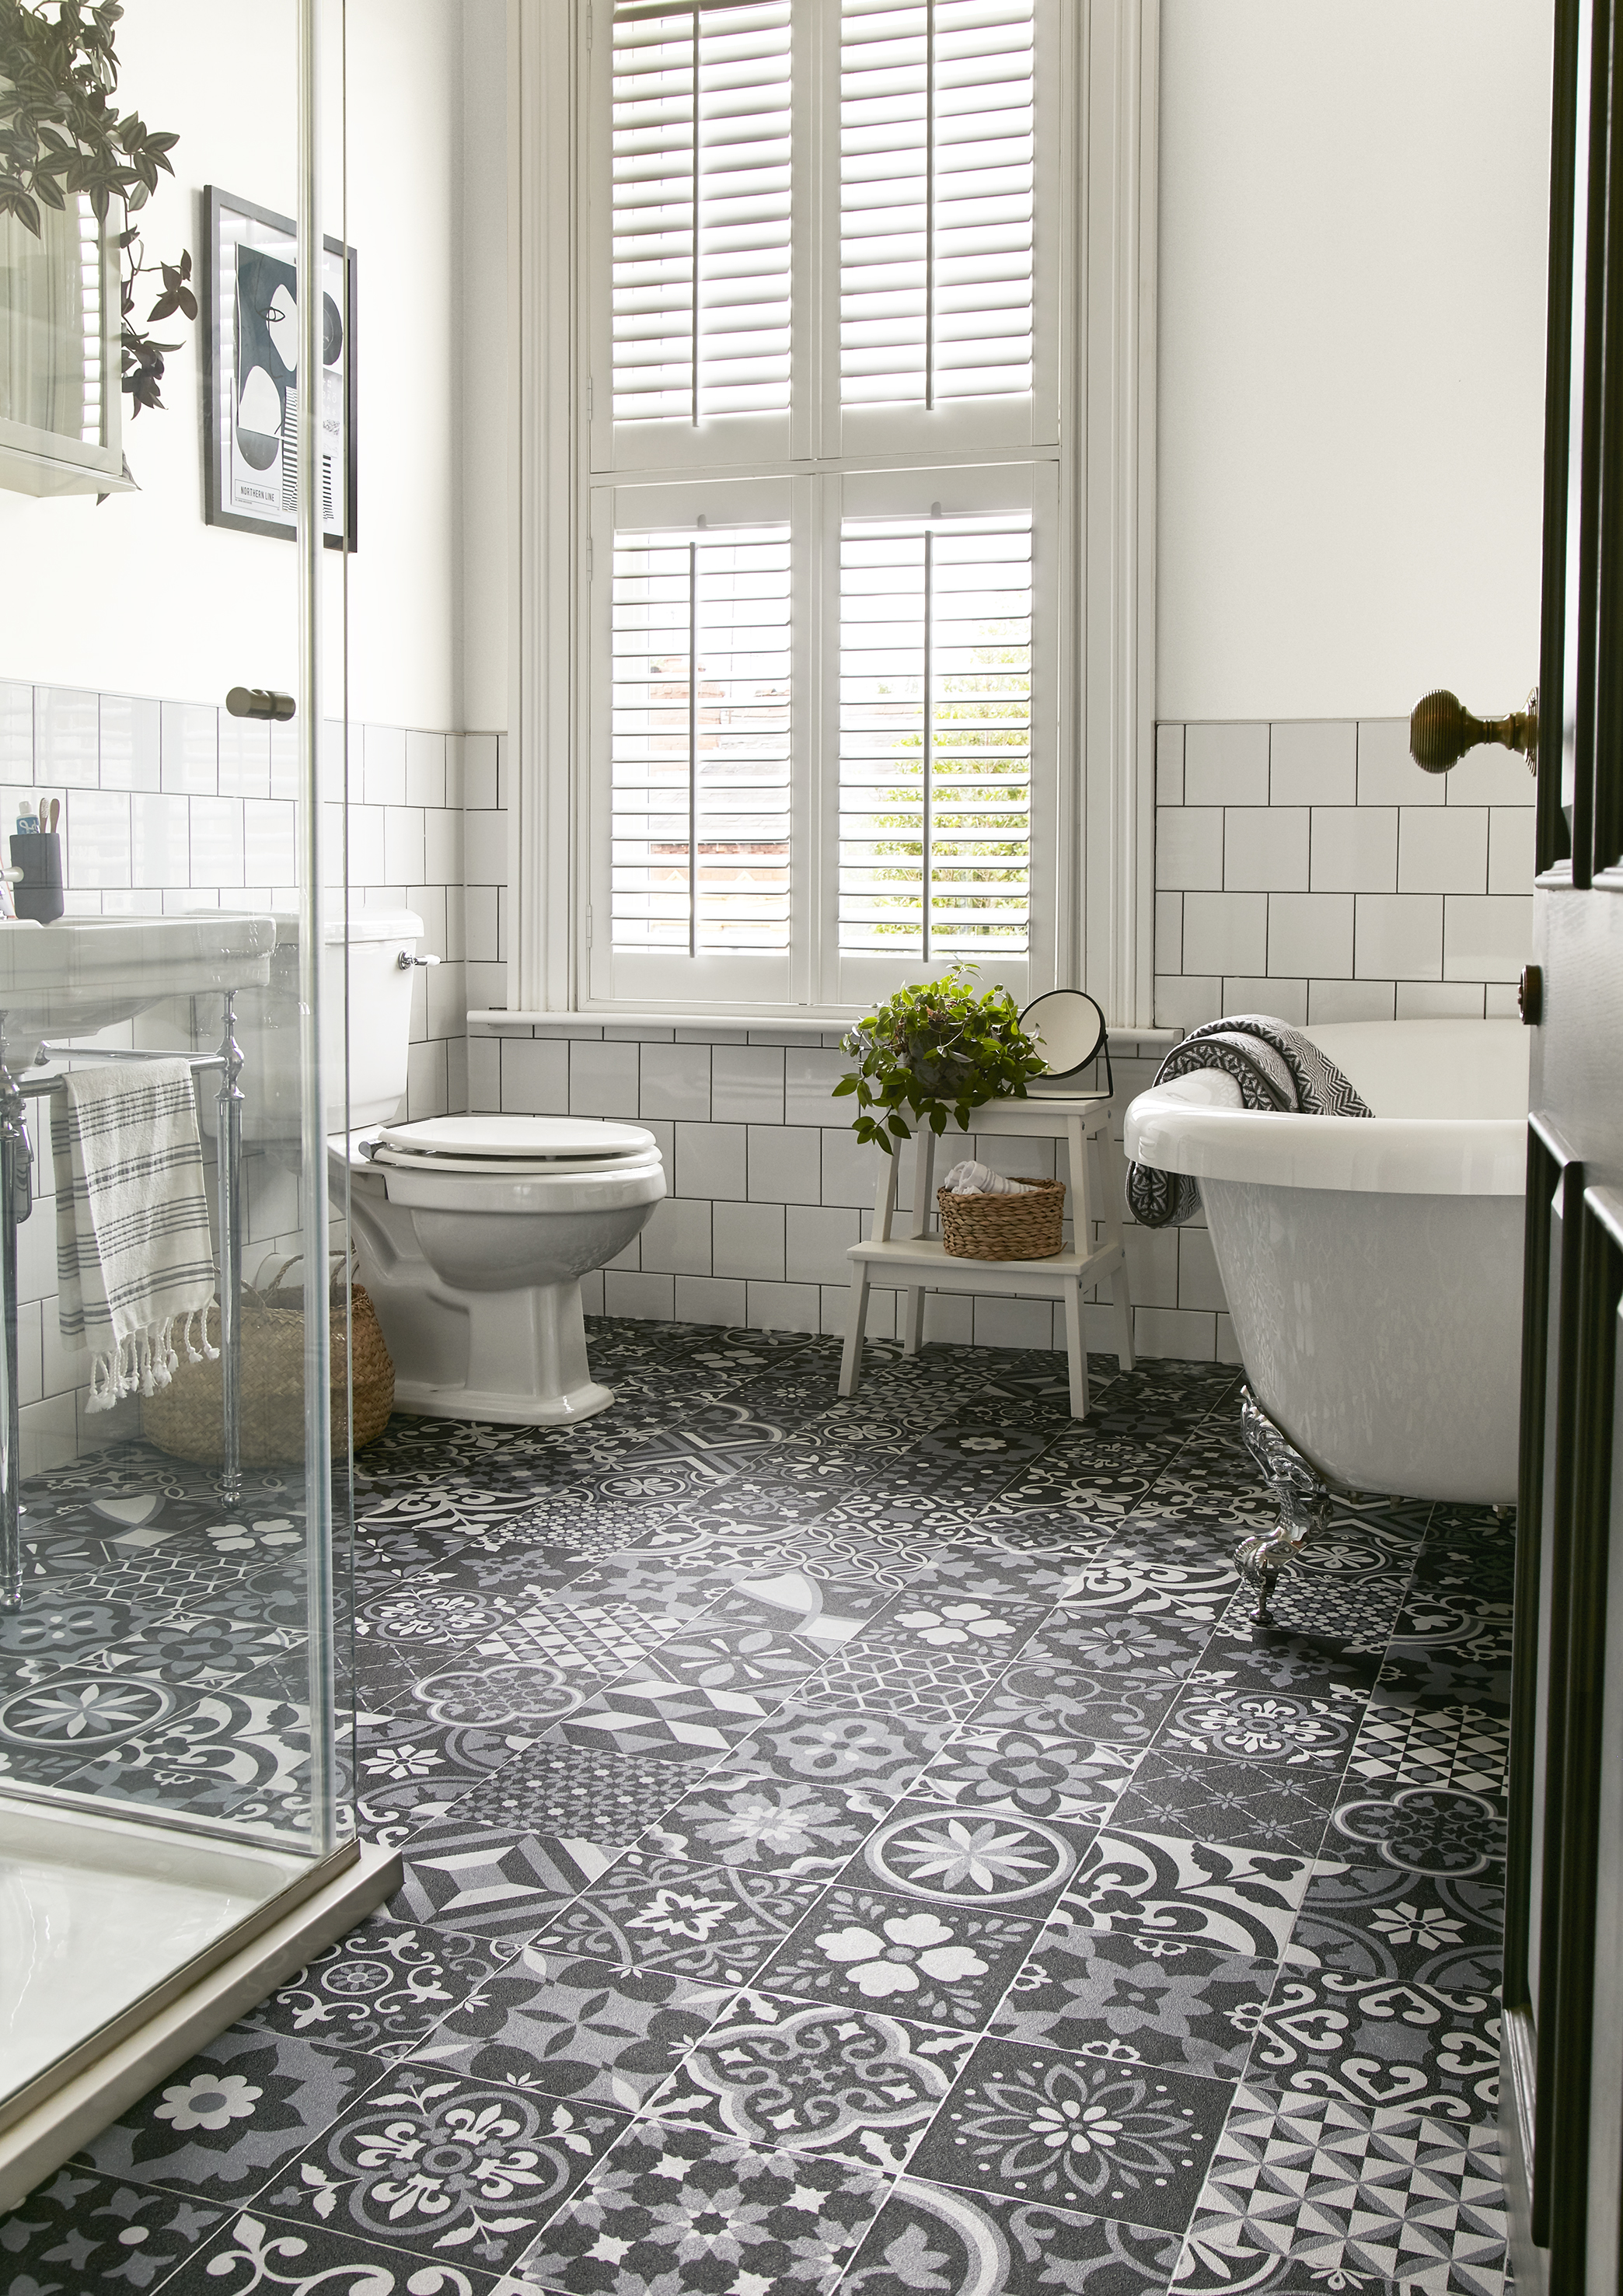
Can Victorian laminate flooring be used in kitchens or bathrooms?
Standard laminate is not waterproof and isn’t recommended for full bathrooms. Some newer water-resistant laminate products can handle occasional splashes in a kitchen if spills are wiped up quickly, but I wouldn’t install standard laminate anywhere standing water is a regular risk. For a kitchen with Victorian styling, a water-resistant laminate or a quality vinyl in a Victorian pattern would be more practical and give you better long-term results without the moisture anxiety.

How long does Victorian laminate flooring last before needing replacement?
Quality laminate with an AC4 rating in a residential setting can last 15 to 25 years with proper maintenance. Mine is two years old and still looks excellent, with no visible wear even in the high-traffic hallway. Longevity depends on the wear rating, subfloor preparation quality, and consistent maintenance habits. Avoiding excess moisture and protecting the surface from grit and abrasion are the two practices that matter most for maximizing how long the floor holds up.
Is Victorian laminate flooring a good DIY project for a first-timer?
The click-lock floating installation system makes laminate genuinely accessible for a confident first-timer willing to follow instructions and work carefully. The trickiest parts are getting the subfloor properly prepared, managing the expansion gaps consistently, and cutting accurately around door frames and architraves. I’d recommend watching several tutorial videos before starting and investing in proper pull bars and tapping blocks to avoid damaging the click joints during installation.
How does Victorian laminate compare in cost to genuine hardwood strip flooring?
Victorian laminate is significantly more affordable than genuine hardwood, often by 50 percent or more once you factor in both materials and installation. Authentic period hardwood strip flooring, especially in traditional species like mahogany or solid walnut, can be very expensive and often requires professional installation and finishing on-site. Laminate gives you 90 percent of the visual impact at a fraction of the cost, which for most renovation budgets makes it a very easy choice to justify.
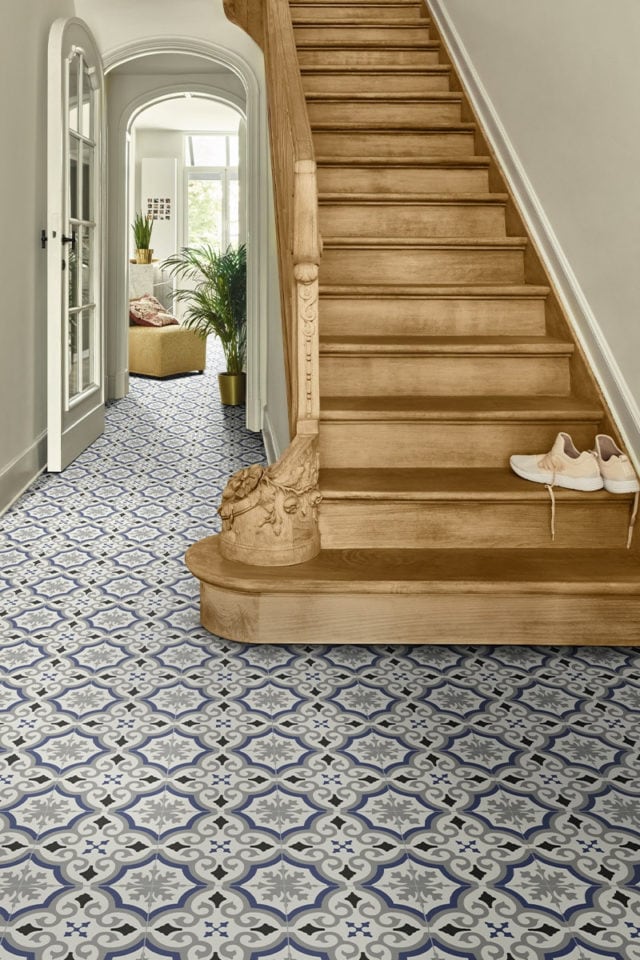
What skirting boards and trims work best with Victorian laminate flooring?
Tall, profiled Victorian-style skirting boards are the natural complement and make a dramatic difference in how authentic the overall look feels. I sourced MDF skirting in a traditional ogee profile at around 145mm height, which covers the expansion gap generously and creates the right visual weight for a period-style room. Matching door architraves in the same profile pulls the whole scheme together. Painting them in a period-appropriate off-white or deep heritage tone completes the Victorian atmosphere that the floor begins.
Related Posts: