When I installed laminate flooring in my hallway for the first time, I was so focused on getting the planks down perfectly that I barely thought about the trim until I was nearly done.
That was a mistake I paid for in extra trips to the hardware store, awkward gaps along the walls, and transitions that looked uneven and rushed. Trim might seem like an afterthought, but it’s actually the detail that ties the whole floor together and makes it look professionally finished rather than pieced together on a weekend. Here’s everything I’ve learned about laminate flooring trim after doing this several times now.
Why Laminate Flooring Trim Matters More Than You Think
The first thing my flooring contractor told me when I hired him for a later project was that a floor is only as good as its transitions and edges. At the time I nodded politely and didn’t fully understand what he meant. After seeing the difference between a floor with carefully matched, properly installed trim and one where the trim was clearly an afterthought, I completely understood what he was talking about.
Laminate flooring needs expansion gaps around the entire perimeter of the room because the material expands and contracts with temperature and humidity changes. Without those gaps, your floor can buckle and bow over time.
But those necessary gaps look unfinished and even unsightly without the right trim pieces covering them neatly. Trim serves both a functional and aesthetic purpose simultaneously, which is why choosing it carefully actually matters.
Beyond expansion gaps, trim is what handles transitions between rooms, between different flooring types, between floor and stairs, and between flooring and doorways. Each of those situations requires a specific trim profile designed for that exact purpose.
Using the wrong piece in any of those spots either looks wrong, creates a tripping hazard, or fails structurally within a year or two. Getting familiar with what each trim type does saved me a lot of confusion and return trips to the store.
The Different Types of Laminate Trim Pieces and When to Use Each
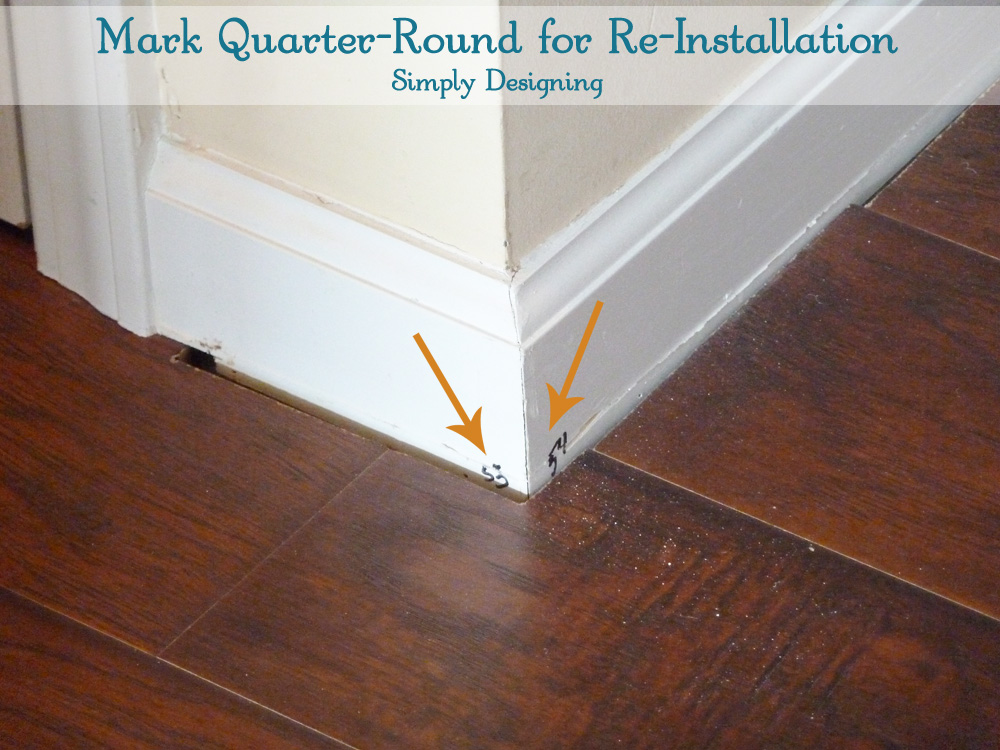
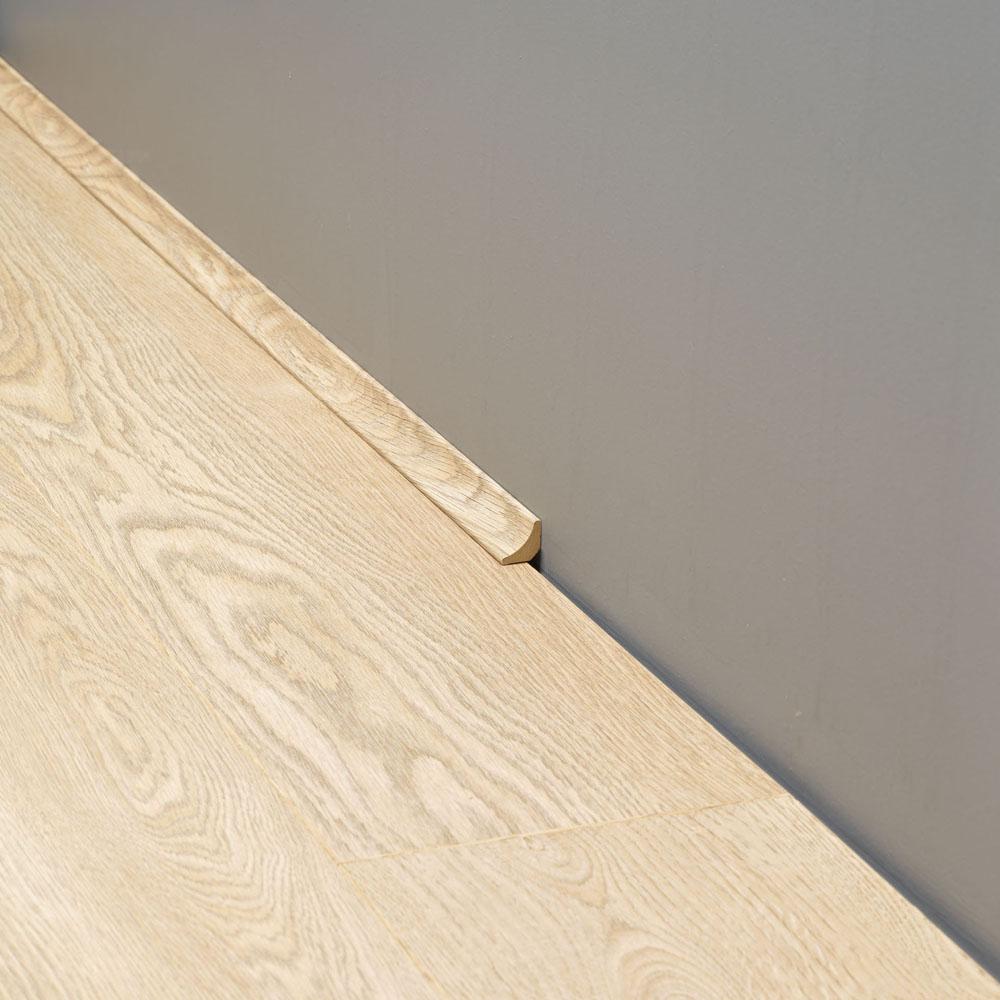
Quarter round and shoe molding were the first trim pieces I learned about because they’re the ones you see running along the base of walls in almost every laminate installation. Quarter round is a small, rounded molding that sits at the intersection of the baseboard and the floor, covering the expansion gap and creating a clean visual transition. I initially thought it looked unnecessary until I saw a floor without it and immediately noticed how raw and unfinished the edges looked.
T-molding is the piece used when two floors of the same or similar height meet in a doorway or open transition. It looks exactly like the letter it’s named after, with a flat top that spans the gap and two downward flanges that channel into tracks on each side. I’ve used T-molding countless times in doorways between rooms and it always gives a polished, intentional look to what would otherwise be an awkward meeting point between two floors.
Reducer strips are what you reach for when two floors at different heights need to transition smoothly, such as where laminate meets a lower tile floor or a thicker carpet. The reducer slopes gently from the higher surface down to the lower one, preventing a sharp edge that catches toes and looks clumsy. End caps serve yet another purpose, covering the exposed end of a laminate plank where it terminates at a sliding door track, fireplace hearth, or similar feature. Knowing which piece belongs where made my installations look dramatically more professional.

Matching Trim to Your Laminate Flooring Color and Style
Getting the color match right between trim and laminate was something I underestimated on my first project. I assumed I could pick up a generic oak-colored quarter round from the hardware store and it would blend in fine. What I actually got was a slightly orange trim running along a cooler-toned gray-brown floor, and the mismatch was visible from across the room. Now I always buy trim from the same manufacturer as my laminate whenever possible.
Most laminate flooring brands sell coordinating trim pieces specifically designed to match each of their floor collections. These manufacturer-matched pieces use the same color, grain pattern, and surface texture as the flooring planks themselves, which creates a seamless visual connection that generic trim simply can’t replicate. Yes, it costs a bit more than buying generic molding, but the difference in how it looks is immediately obvious to anyone who walks into the room.
When an exact match isn’t available or practical, the best strategy is to choose trim that coordinates rather than tries to match precisely. A floor with cool gray undertones looks best with trim in similar cool-toned wood finishes, while a warmer brown floor pairs better with amber or honey-toned molding. I’ve also seen people use painted white trim with laminate floors quite successfully when the room has white baseboards, which makes the trim feel intentional rather than mismatched.
![]()
Installing Quarter Round and Baseboard Trim the Right Way
The most important thing I learned about installing quarter round is that it should be attached to the baseboard or wall, never to the floor itself. This seems counterintuitive at first, but it makes complete sense once you understand why. The laminate floor needs to move freely beneath the trim as it expands and contracts. If you nail the quarter round to the floor, you’re essentially pinning down the edge of a floating floor and preventing the movement it needs, which leads to buckling.
I use a finish nailer for most of my trim work because it drives small, nearly invisible nails that can be countersunk and filled with color-matched putty. Hand nailing is possible but much more likely to split thin molding or leave hammer marks near the nail points. If you don’t own a finish nailer, they’re very affordable to rent for a day and make the whole process faster, cleaner, and genuinely enjoyable rather than tedious.
Coping inside corners instead of mitering them was a technique I picked up from a professional installer who watched me struggle with gaps in my miter joints one afternoon. A coped joint, where one piece of trim is cut to follow the profile of the adjoining piece, creates a much tighter fit that doesn’t open up as the wood moves with seasonal humidity changes. For outside corners, a miter cut at 45 degrees still works beautifully and looks very clean when the angle is precise.
Handling Transitions at Doorways and Between Rooms
Doorway transitions were the spots that gave me the most trouble early on because each doorway seems to present its own unique combination of floor heights, gap widths, and visual angles. I learned to take careful measurements at each transition point before purchasing any trim, noting the height difference between the two floors and the width of the gap that needs bridging. That five minutes of measuring saved me multiple exchanges at the hardware store.
Installing T-molding and reducer strips usually involves a track system that gets screwed or glued to the subfloor first, with the visible trim piece snapping or sliding into the track afterward. I always use construction adhesive rather than screws alone when installing into a concrete subfloor, and I make sure the track is centered precisely over the gap between the two floor surfaces before the adhesive sets. Rushing this step and having the track shift while curing happened to me once and required a complete redo.
One detail that makes a big visual difference at doorways is undercutting the door casing so the laminate and its trim can slide neatly underneath rather than butting awkwardly against the side. I use a small pull saw or a jamb saw to remove just enough material from the bottom of door casings for the flooring and transition piece to tuck under cleanly. It takes maybe five minutes per doorway and makes the finished result look like it was done by someone who really knew what they were doing.

Common Trim Mistakes I Made and How to Avoid Them
The biggest mistake I made in my early installations was not buying enough trim. I would measure the total linear footage of walls and transitions, then buy exactly that amount, leaving no room for cuts that went wrong, pieces that split during nailing, or miscalculations around corners. Now I always add at least 15 percent to my trim estimate and usually more in rooms with lots of angles or doorways. The cost of a little extra trim is always less than a second trip to the store mid-project.
Forgetting to account for the trim when planning my floor layout was another error that caused me unnecessary headaches. Quarter round typically adds about three quarters of an inch of visual height at the base of walls, and T-molding sits on top of the floor surface and adds visible width at transitions. If I’m placing furniture close to walls or if a doorway is very narrow, those dimensions matter. I now sketch out trim placement before finalizing my flooring layout so nothing surprises me during installation.
Skipping caulk along the top edge of quarter round where it meets the baseboard is a small thing that I used to dismiss as unnecessary extra work. After noticing dust and debris collecting in the tiny gap between trim and baseboard on older installations, I started running a thin bead of paintable caulk along that seam and wiping it smooth with a damp finger. It takes minutes, looks incredibly clean once painted, and prevents the slow accumulation of grime in that narrow joint that’s nearly impossible to clean once it builds up.

Do I have to use quarter round with laminate flooring or can I skip it?
You don’t have to use quarter round, but you do need to cover the expansion gap somehow. Some people use a taller baseboard that extends low enough to cover the gap without additional molding. Others use a flat shoe molding instead of rounded quarter round for a sleeker look. What you can’t do is leave the gap exposed, since it looks unfinished and collects debris over time. Pick the trim style that suits your aesthetic.
How do I match laminate trim if my exact flooring style is discontinued?
Start by contacting the manufacturer directly, since they sometimes have discontinued trim in inventory or can suggest a current match. If that doesn’t work, bring a plank sample to flooring stores and compare coordinating trim pieces in person. Online flooring retailers often have large trim selections where you can order samples. In a pinch, painted wood trim in a complementary color can look intentional and stylish rather than like a mismatch.

Can I install laminate trim myself or should I hire a professional?
Most laminate trim installation is very DIY-friendly. Quarter round, T-molding, and reducers are straightforward with basic tools and a little patience. Inside and outside corner cuts require some practice, but a miter saw makes it manageable for a careful beginner. Where I’d recommend professional help is on stair nose installation, since stairs involve precision cuts and safety considerations that are less forgiving of errors than wall trim.
How much does laminate flooring trim typically cost?
Manufacturer-matched trim pieces typically run $2 to $5 per linear foot for quarter round and shoe molding, and $3 to $8 per piece for T-moldings, reducers, and end caps. A standard room might need $50 to $150 in trim total depending on size and complexity. Generic trim from a hardware store costs less but often doesn’t match as well. Budget trim into your overall flooring project from the start rather than treating it as an afterthought.
What’s the best way to cut laminate trim without chipping it?
A miter saw with a fine-tooth blade designed for laminate or melamine gives the cleanest cuts with minimal chipping. Cutting with the decorative surface facing up helps on most saws. For hand cuts, a fine-tooth pull saw works well. Scoring the cut line with a utility knife before sawing also reduces chipping on the surface layer. Taking slow, steady cuts rather than rushing through the material makes a noticeable difference in cut quality.
How do I handle trim at floor vents and registers?
Floor vents interrupt the clean run of quarter round along a wall, and handling them neatly requires careful measuring and cutting around the vent frame. I cut the trim to stop cleanly at each side of the vent opening rather than trying to bridge over it. Some people use a decorative vent cover that sits flush with the floor surface and has its own finished frame, which eliminates the awkward gap entirely. Planning vent locations before installing trim makes the whole process much less stressful.

Related Posts: