Standing in my outdated bathroom, staring at the avocado-green ceramic tiles that screamed 1970s, I faced a dilemma that countless homeowners know all too well. Replacing the entire floor would cost thousands and require extensive demolition, but living with those hideous tiles felt unbearable. When I discovered that painting bathroom floor tiles was actually possible with modern products, I was skeptical but desperate enough to try. What started as a last-resort experiment became one of my most successful DIY projects, transforming my bathroom for under $200 and teaching me valuable lessons about preparation, patience, and the power of paint. This experience proved that sometimes the most unconventional solutions deliver the most satisfying results.
The Initial Skepticism About Painting Ceramic Tiles
My first reaction to the idea of painting bathroom floor tiles was pure disbelief, assuming that moisture and foot traffic would destroy any painted surface within weeks. The internet seemed divided between success stories and horror tales of peeling, chipping disasters that looked worse than the original tiles. I spent hours researching product reviews, watching YouTube tutorials, and reading manufacturer warranties before convincing myself this approach might work.
Professional contractors I consulted were equally divided on the feasibility of painted floor tiles, with older tradesmen dismissing the idea while younger professionals shared positive experiences with newer paint technologies. The key seemed to be using products specifically formulated for high-moisture, high-traffic environments rather than adapting wall paints for floor use. This distinction became crucial in my product selection process.
Testing the concept on a hidden corner of my laundry room floor helped build confidence before tackling the main bathroom project. The sample area held up perfectly through six months of washing machine vibrations, water splashes, and regular foot traffic. This successful trial run convinced me that painting my bathroom floor tiles could be effective with proper preparation and high-quality materials specifically designed for the application.
Surface Preparation That Determined Success or Failure
Cleaning my bathroom floor tiles became an intensive three-day process involving multiple degreasing agents, mold removal products, and thorough scrubbing to remove years of soap scum and grime buildup. I discovered that seemingly clean tiles harbored invisible residue that would prevent proper paint adhesion. Using a steam cleaner followed by TSP (trisodium phosphate) solution finally achieved the spotless surface necessary for successful painting.
Sanding the glossy ceramic surface proved essential for creating the slight texture needed for paint adhesion, though this step required careful technique to avoid damaging the underlying tile structure. I used 120-grit sandpaper attached to a palm sander, working systematically across the entire floor to dull the factory glaze without creating deep scratches. Vacuuming and tack cloth wiping removed all sanding dust before proceeding.
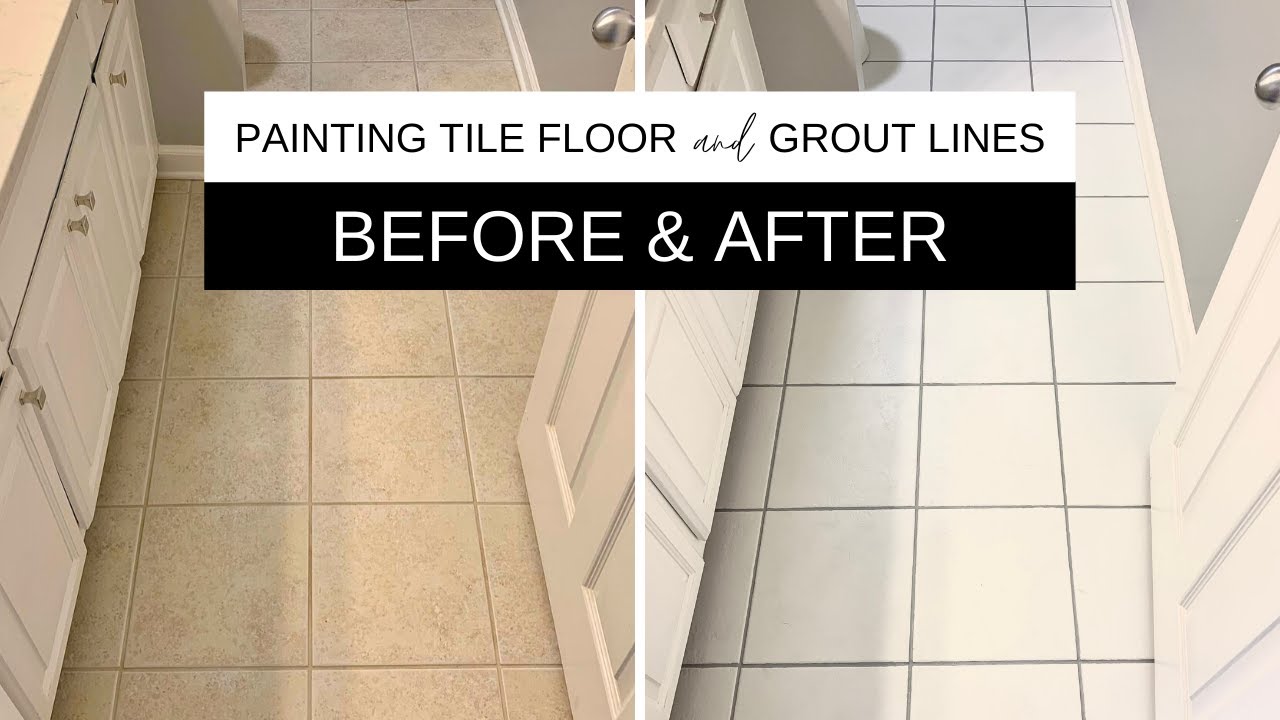
Grout preparation required separate attention, as the porous material absorbed cleaning products and needed different treatment than the ceramic tiles themselves. I used a grout brush with bleach solution to remove stains and discoloration, then applied grout sealer after cleaning to prevent the new paint from soaking into the grout lines unevenly. This extra step proved crucial for achieving uniform coverage and professional-looking results.
Choosing the Right Paint Products for Bathroom Conditions
Selecting appropriate paint for bathroom floor tiles required extensive research into products designed specifically for high-moisture, high-traffic environments. Standard wall paints would fail quickly under these conditions, while floor paints needed additional properties to handle ceramic surfaces and constant humidity exposure. I ultimately chose a two-part epoxy paint system designed for bathroom and kitchen applications with superior adhesion and moisture resistance.
The primer selection proved equally important, requiring a bonding primer specifically formulated for glossy surfaces like ceramic tiles. I learned that skipping primer or using the wrong type would result in paint failure regardless of the topcoat quality. The high-performance primer I selected cost almost as much as the paint itself but provided the crucial foundation for long-term durability and professional appearance.
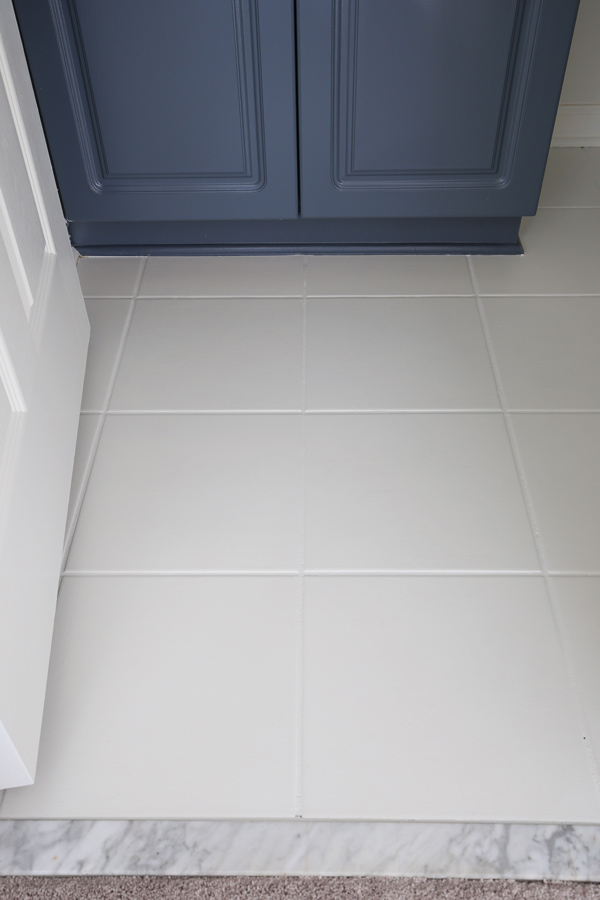
Color choice involved practical considerations beyond aesthetics, as lighter colors would show dirt and wear more readily than darker alternatives. I selected a sophisticated charcoal gray that would hide imperfections while providing a modern update to my bathroom’s overall design scheme. The neutral tone also ensured compatibility with future decor changes without requiring floor repainting, making this a versatile long-term solution.

Application Techniques That Made the Difference
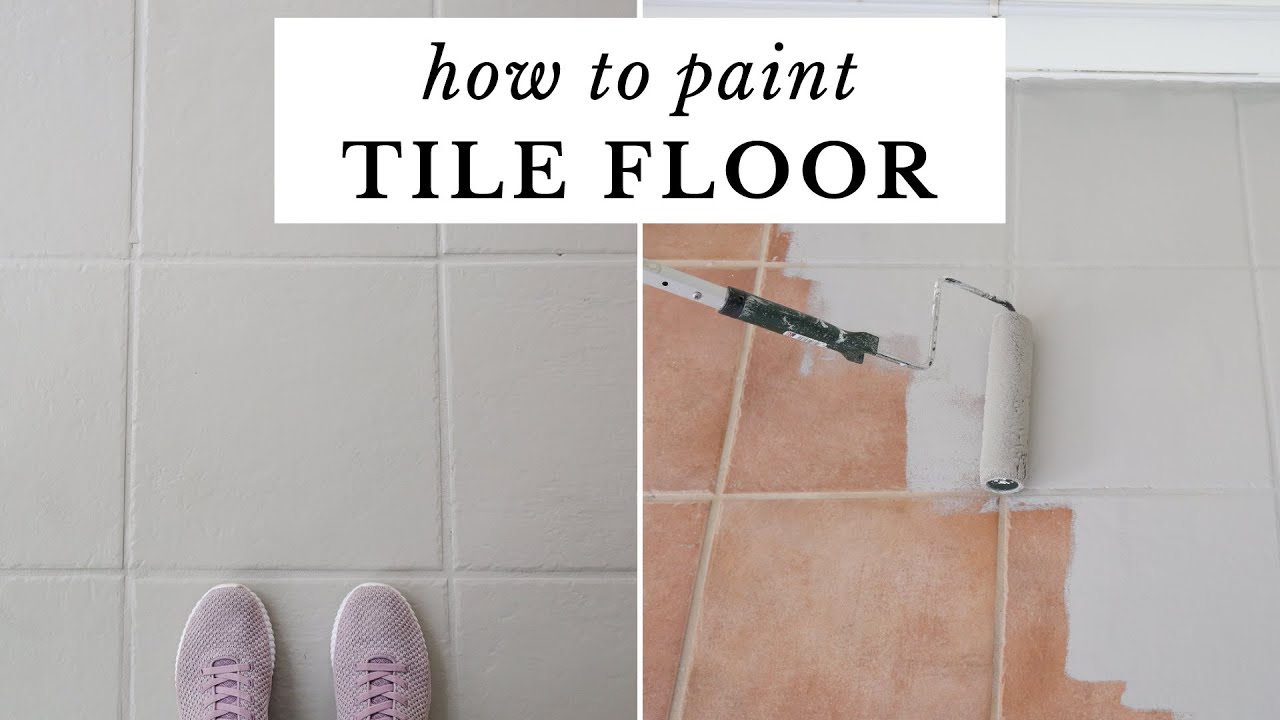
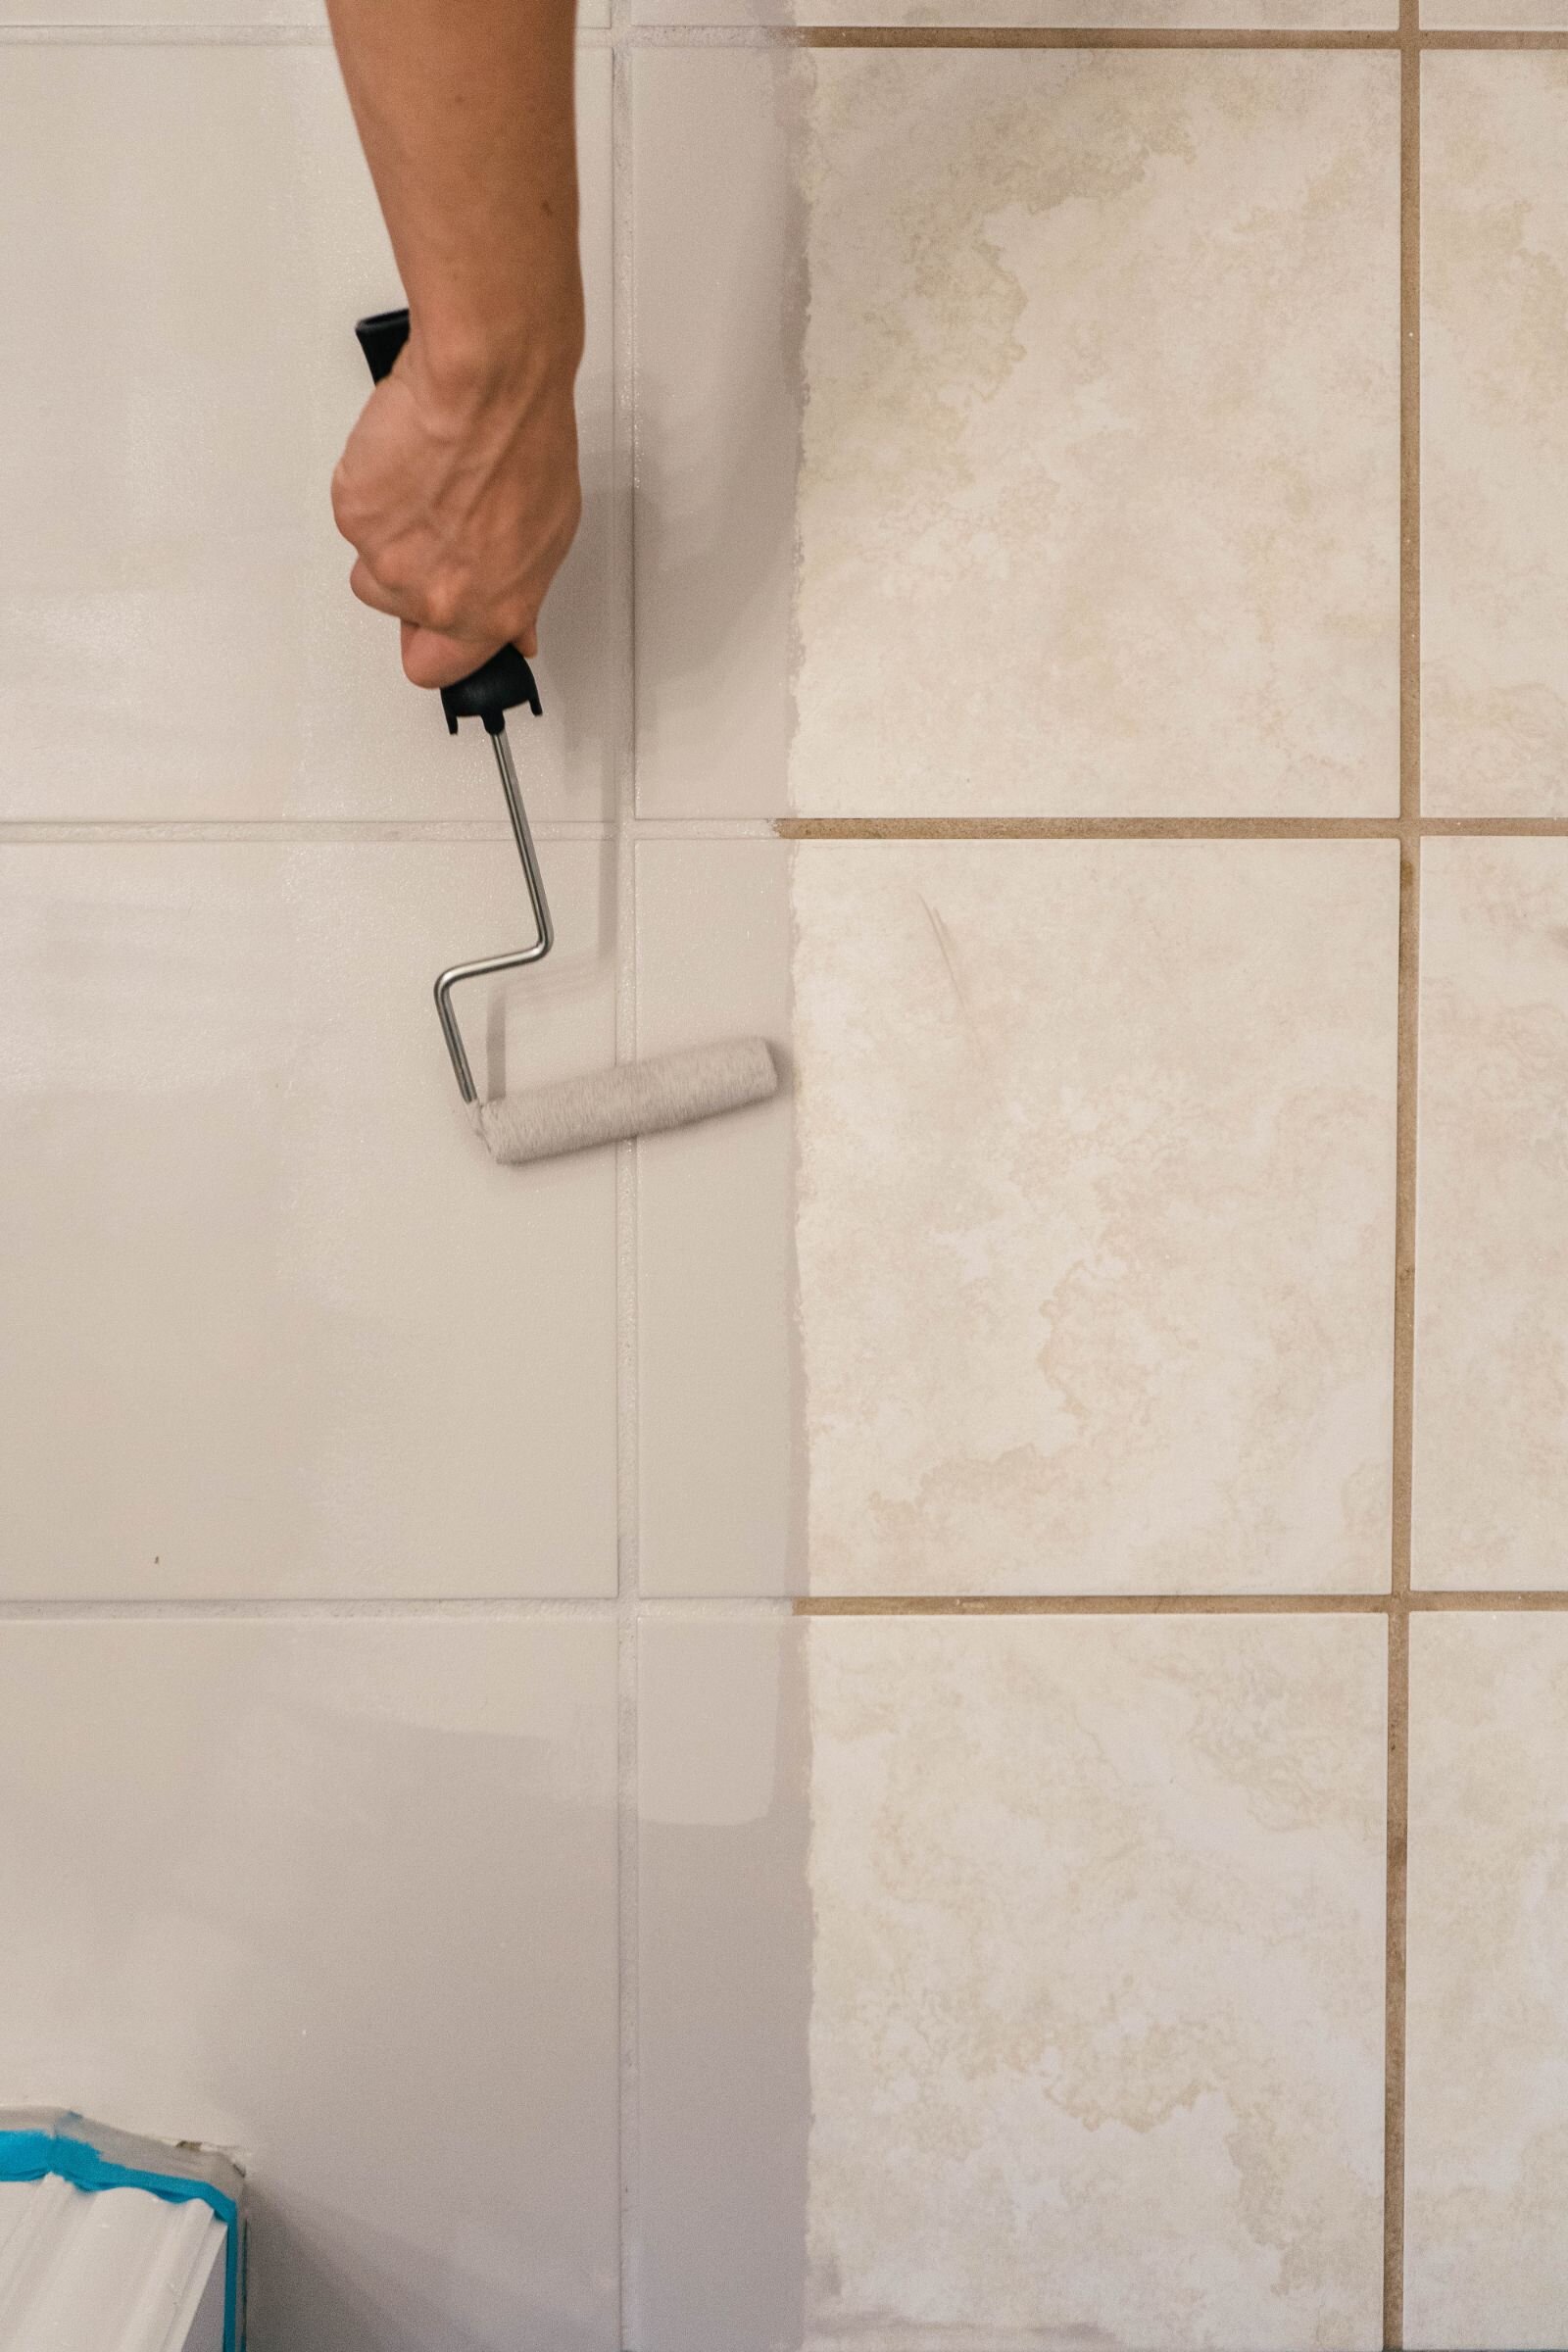
Rolling technique became critical for achieving smooth, even coverage on the textured ceramic surface without creating visible lap marks or brush strokes. I used high-quality rollers with appropriate nap length for the slight texture, working in small sections to maintain wet edges throughout the application process. Cross-rolling each section ensured complete coverage while eliminating air bubbles and achieving professional-quality results.
Temperature and humidity control proved essential during application and curing phases, requiring careful timing and environmental management for optimal results. I painted during a dry weather period with stable temperatures between 70-75°F, using a dehumidifier to maintain ideal conditions throughout the multi-day process. These controlled conditions prevented moisture-related paint failures and ensured proper chemical curing of the epoxy coating.
Multiple thin coats produced superior results compared to attempting single heavy applications, though this approach required patience and careful scheduling around bathroom usage needs. I applied three thin coats over five days, allowing complete curing between applications and protecting the surface from foot traffic during vulnerable periods. This methodical approach resulted in a smooth, durable finish that has maintained its appearance perfectly.
Drying Times and Bathroom Usage Management
Managing bathroom access during the extended curing process presented logistical challenges that required careful planning and family cooperation. The initial paint application needed 24 hours before light foot traffic, followed by full cure times of 72 hours for each coat. I scheduled the project during a long weekend and arranged alternative bathroom facilities for my family during the critical curing periods.
Temperature and ventilation control became crucial factors in achieving proper cure times and preventing moisture-related problems during the vulnerable drying phases. I used fans for air circulation while maintaining consistent temperatures, avoiding rapid temperature changes that could affect paint adhesion. Monitoring humidity levels with a hygrometer helped prevent condensation that could ruin the fresh paint surface.
The final cure time of seven days before normal use tested my patience but proved essential for achieving the durable, long-lasting results I desired. I protected the painted surface with cardboard walkways during this period, allowing minimal access while preventing damage to the curing paint. This careful protection phase determined the ultimate success and longevity of the entire project.

Long-Term Results and Maintenance Insights
After two years of daily use, my painted bathroom floor tiles continue to look remarkably fresh and professional, dispelling any doubts about the durability of this approach. The surface shows no signs of peeling, chipping, or wear despite constant exposure to moisture, cleaning products, and foot traffic from my family of four. Regular cleaning with standard bathroom cleaners maintains the appearance without damaging the painted surface.
The transformation’s impact on my bathroom’s overall appearance exceeded expectations, with the updated floor color serving as a foundation for other design improvements throughout the space. Friends and visitors consistently compliment the floor, often surprised to learn it’s painted rather than new tile installation. This positive feedback validates my decision to choose painting over expensive replacement options.
Maintenance requirements have proven minimal compared to the original ceramic tiles, which constantly showed soap scum and required frequent deep cleaning to look acceptable. The painted surface resists staining and wipes clean easily, actually reducing my bathroom cleaning time and effort. Annual touch-ups of high-wear areas take minimal time and materials while maintaining the floor’s fresh appearance indefinitely.

How long can I expect painted bathroom floor tiles to last before needing repainting or touch-ups?
Quality epoxy paint systems designed for bathroom floors typically last 3-5 years with normal residential use when properly applied over well-prepared surfaces. My painted tiles have maintained an excellent appearance after two years of heavy family use, including children and pets. High-traffic areas near the shower and vanity may need minor touch-ups sooner, but overall durability has exceeded my expectations. Proper surface preparation and using bathroom-specific paint products rather than general floor paints significantly extend the lifespan and maintain a professional appearance.
Will painting my bathroom floor tiles create a slippery surface that’s dangerous when wet?
Modern bathroom floor paints include anti-slip additives that provide better traction than glossy ceramic tiles, especially when wet from shower use. I was initially concerned about this safety issue, but found the painted surface offers a superior grip compared to my original slippery tiles. You can add additional texture with anti-slip granules mixed into the final coat for extra safety. The slight texture from proper surface preparation also contributes to improved traction without compromising the smooth, cleanable finish.

Can I paint over any type of bathroom floor tile, or are there limitations on tile materials?
Most ceramic and porcelain bathroom floor tiles can be successfully painted with proper preparation and appropriate products, though natural stone tiles require different approaches. I successfully painted standard ceramic tiles, but textured or heavily grooved tiles may present challenges for achieving smooth coverage. Damaged, loose, or constantly wet tiles should be repaired or replaced before painting. Always test paint adhesion on a small hidden area first to ensure compatibility between your specific tile type and chosen paint system.
What’s the best way to handle grout lines when painting bathroom floor tiles?
Grout lines can be painted along with tiles using the same paint system, though they may require additional coats for complete coverage due to porosity differences. I cleaned and sealed my grout lines before painting to prevent uneven absorption and achieve uniform color coverage. Some homeowners prefer masking grout lines to maintain contrast, but I found painting everything creates a more seamless, modern appearance. Use a small brush for detail work in grout lines, ensuring complete coverage without creating thick buildup.
How do I prepare my bathroom for the extended painting and curing process?
Plan for 7-10 days of limited bathroom access, arranging alternative facilities during critical curing periods when foot traffic must be avoided completely. I coordinated with family members and completed the project during a long weekend to minimize disruption. Remove all bathroom accessories, provide adequate ventilation, and maintain a consistent temperature throughout the process. Stock up on painting supplies beforehand, as trips to the store become complicated with wet paint. Consider the timing of shower use and humidity levels that could affect paint curing.
Is it more cost-effective to paint bathroom floor tiles compared to replacing them entirely?
Painting bathroom floor tiles costs approximately $150-300 for materials and supplies, compared to $2,000-5,000 for professional tile replacement, including demolition and installation. My total project cost was under $200 for a 50-square-foot bathroom, representing massive savings over replacement options. Factor in the avoided disruption, mess, and time required for full renovation when calculating true costs. While painted tiles may need refreshing every few years, the cumulative cost over 10-15 years still remains significantly lower than replacement with comparable results.

DIY: How to Paint Ceramic Floor Tile
How well do painted tile floors hold up?

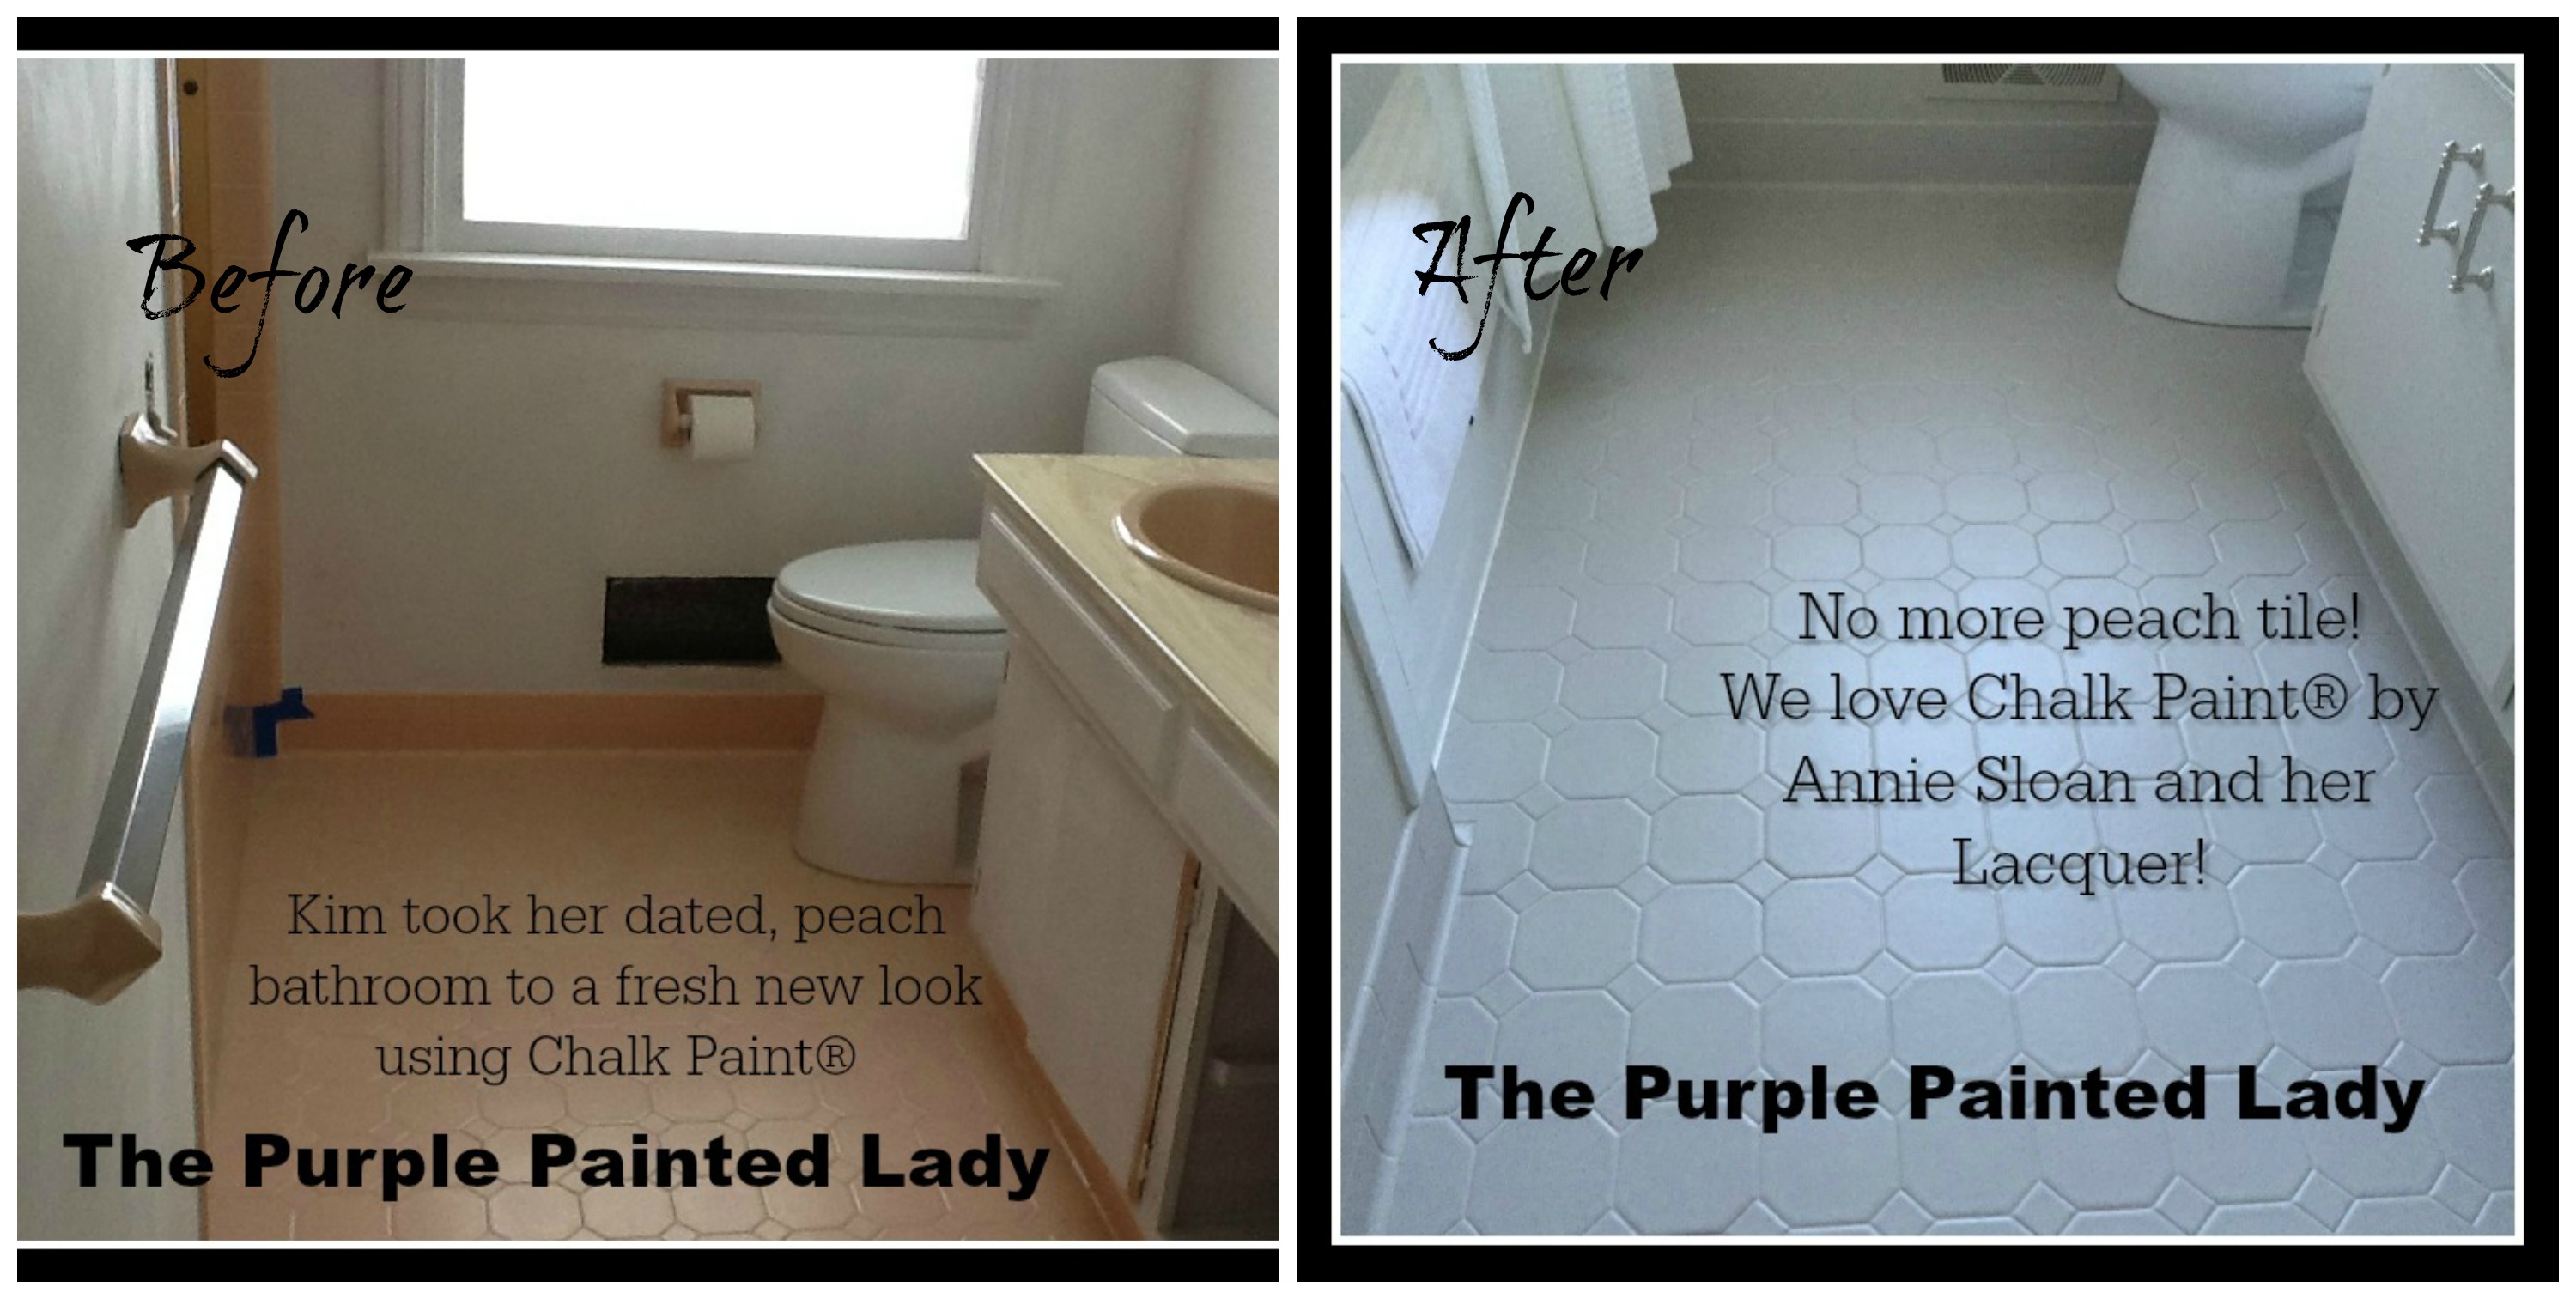
Painting Tile in the Bathroom with Chalk Paint® The Purple
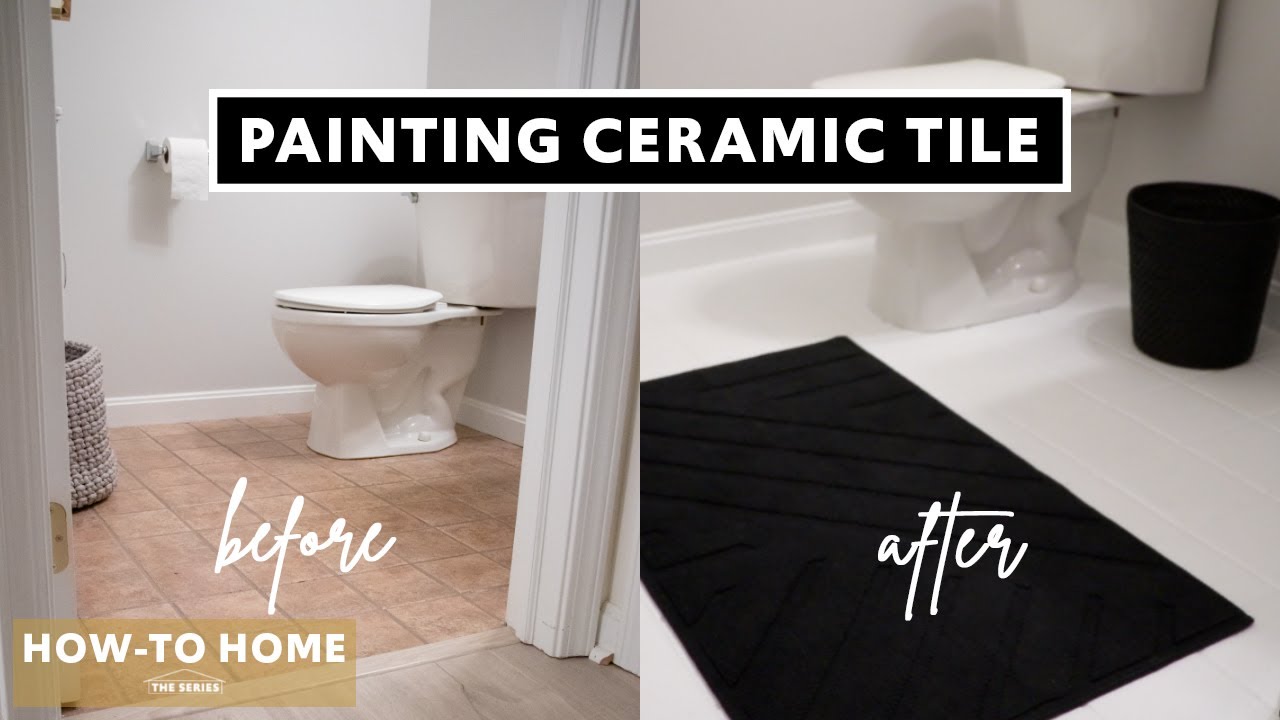
How To Paint Your Ceramic Tile Floor Ep. 1 HOW-TO HOME: THE SERIES
DIY: How to Paint Ceramic Floor Tile
Related Posts: