My garage floor was a dull, gray concrete slab that absorbed oil stains and looked increasingly dreary with each passing year. When I decided to convert part of this space into a workshop and entertainment area, the boring concrete had to go, but replacement costs seemed prohibitive. Researching alternatives led me to discover acid washing, a technique that could transform plain concrete into something resembling expensive natural stone. The process seemed intimidating at first, involving dangerous chemicals and precise timing, but the potential results motivated me to tackle this challenging DIY project. What followed was three days of careful preparation, nerve-wracking application, and ultimately stunning results that exceeded every expectation I had for my concrete floor transformation.
Understanding the Science Behind Acid Washing Concrete
Acid washing concrete involves applying muriatic acid solutions that react chemically with the alkaline cement paste, creating unique etching patterns and exposing aggregate beneath the surface. This process doesn’t simply stain the concrete like paint or sealers, but changes the physical structure by dissolving the top layer of cement. The reaction creates natural-looking variations in color and texture that mimic expensive stone or marble surfaces at a fraction of the cost.
The chemical reaction between hydrochloric acid and concrete produces calcium chloride and water, along with carbon dioxide gas that creates the characteristic bubbling action during application. Understanding this process helped me appreciate why timing and technique matter so much in achieving consistent results. Too little acid exposure creates minimal effect, while too much can damage the concrete structure or create unwanted pitting and surface irregularities.
Different concrete compositions react differently to acid washing, with factors like age, mix design, and curing conditions affecting the final appearance. My 15-year-old garage floor had developed a hard surface layer that required longer acid contact time than newer concrete would need. This variability means each acid washing project produces unique results, making it impossible to predict exactly how the finished surface will look.
Safety Preparations That Probably Saved My Life
Working with muriatic acid demanded extensive safety preparations that I initially underestimated, requiring full protective equipment and emergency procedures before beginning the project. I invested in chemical-resistant gloves, safety goggles, respirator masks, and rubber boots rated for acid exposure. The confined garage space also needed powerful ventilation to prevent dangerous fume accumulation that could cause respiratory damage or worse.
Creating an emergency neutralization station with baking soda and plenty of fresh water became my priority before opening any acid containers. I practiced emergency procedures with my spouse, ensuring someone always knew my location and timing during the acid application phases. Having a garden hose ready and keeping emergency contact numbers accessible provided additional safety backup for potential accidents or exposure incidents.
The acid mixing process required careful attention to proper dilution ratios and mixing techniques to prevent violent reactions or dangerous splashing. I learned to always add acid to water, never the reverse, to control the exothermic reaction that generates heat and potentially dangerous conditions. This fundamental chemistry principle could mean the difference between a successful application and a trip to the emergency room.
Surface Preparation and Cleaning Requirements
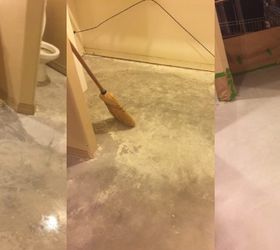
Preparing my concrete floor for acid washing required intensive cleaning to remove all traces of oil, grease, dirt, and previous sealers that would interfere with the chemical reaction. I spent two full days degreasing the surface with commercial concrete cleaners, followed by pressure washing to remove embedded contaminants. Any remaining residue would create uneven acid reaction patterns, resulting in blotchy or inconsistent final appearances.
Crack repair and surface patching became necessary before acid application, as the chemical reaction would highlight any imperfections in the concrete substrate. I filled hairline cracks with concrete repair compound and ground down high spots that could create uneven acid pooling. This attention to surface uniformity proved crucial for achieving the consistent, professional-looking results I desired for my workshop space.
Testing the concrete’s absorption rate helped determine appropriate acid concentration and application timing for my specific floor conditions. I sprinkled water droplets across different areas, observing how quickly they absorbed to identify variations in concrete density and porosity. Areas that absorbed water slowly would need longer acid contact time, while highly porous sections required more diluted solutions to prevent over-etching.

The Acid Application Process and Timing Challenges
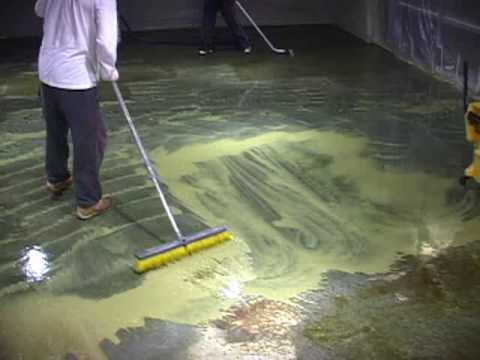
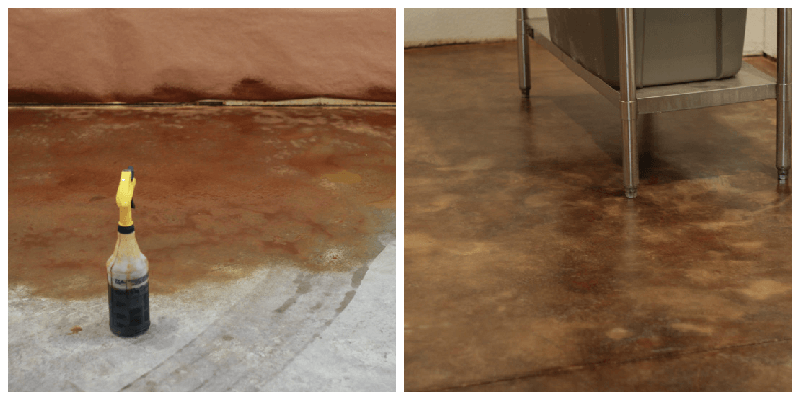
Mixing the acid solution required precise measurements and careful attention to safety protocols, starting with a conservative 1:10 acid-to-water ratio for my first test section. I quickly learned that working in small, manageable areas allowed better control over the chemical reaction and prevented the acid from working too long in any single location. The bubbling action indicated active etching, but timing the neutralization required constant attention and quick decision-making.
The application technique involved spraying the acid solution evenly across the concrete surface using a plastic pump sprayer designed for chemical applications. I worked systematically across the floor in 4×4-foot sections, watching for the characteristic fizzing reaction that indicated proper chemical activity. The reaction intensity varied across different areas of my floor, requiring adjustments to contact time and solution strength for consistent results.
Neutralizing the acid reaction at precisely the right moment proved to be the most challenging aspect of the entire process, requiring immediate action when the desired etching level was achieved. I used a baking soda solution applied with a separate sprayer, followed by thorough rinsing with clean water to remove all chemical residues. This neutralization step couldn’t be rushed or delayed, as over-etching would damage the concrete permanently.
Color Variations and Pattern Development Surprises
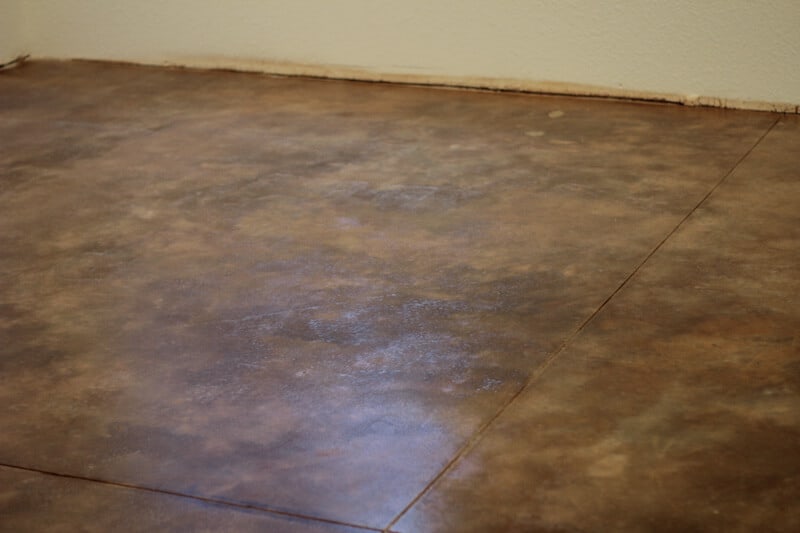
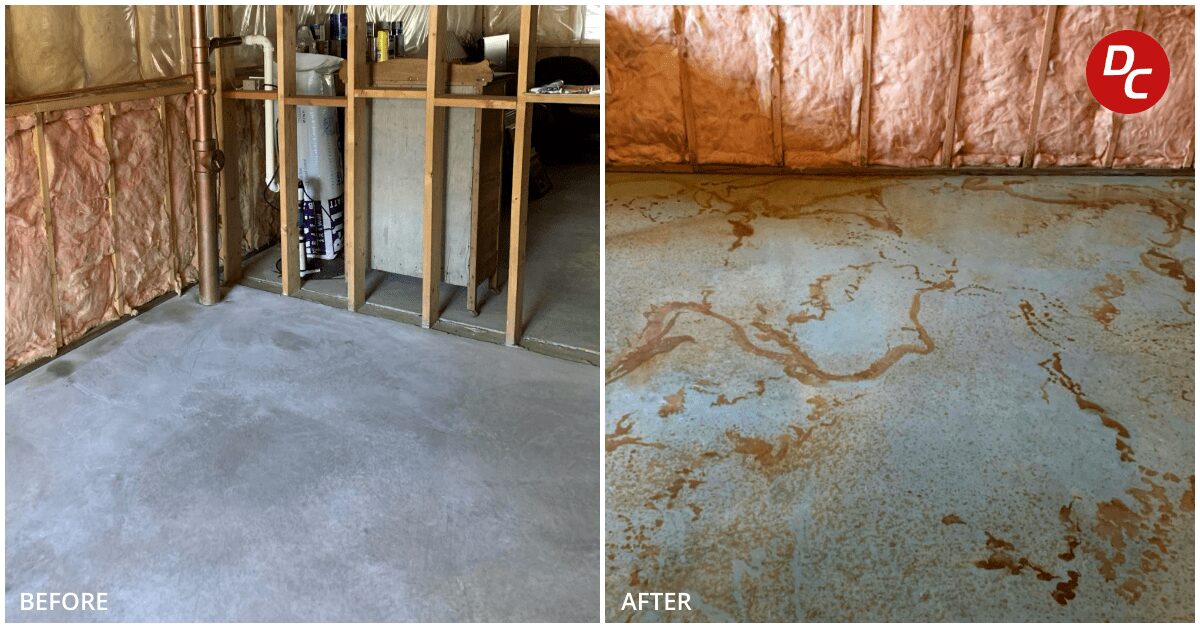
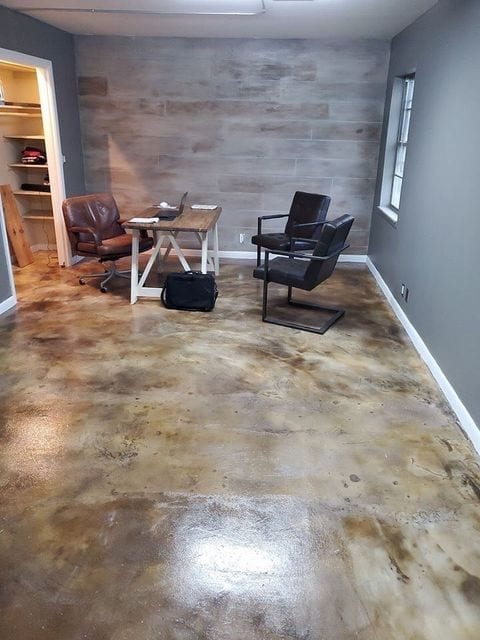
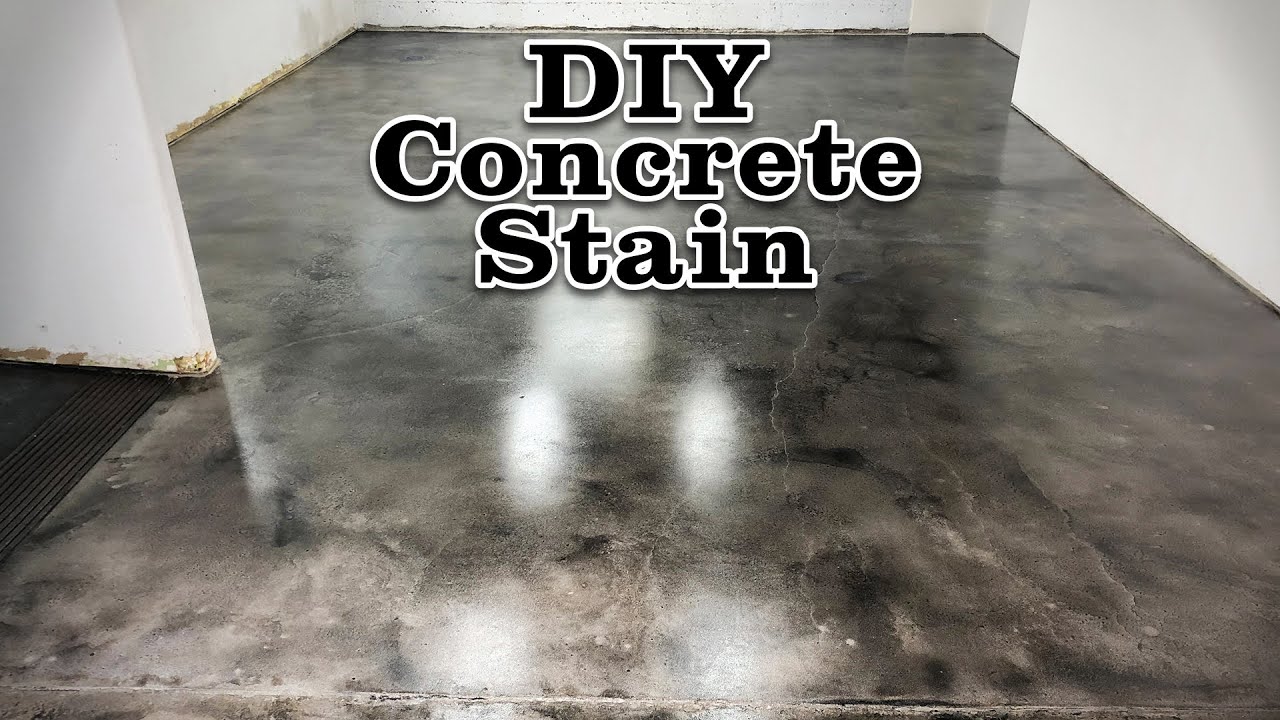
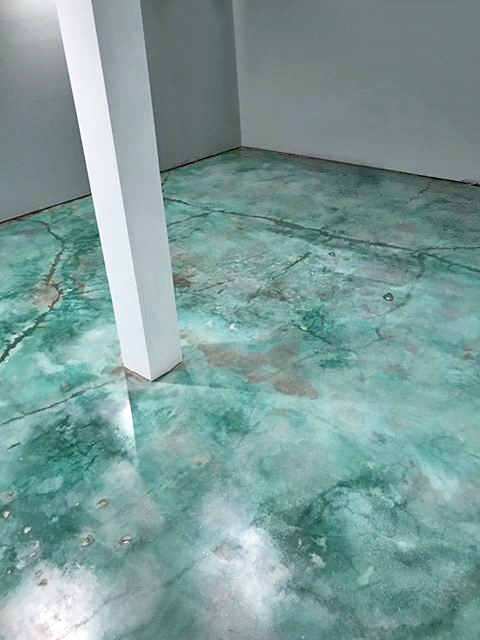
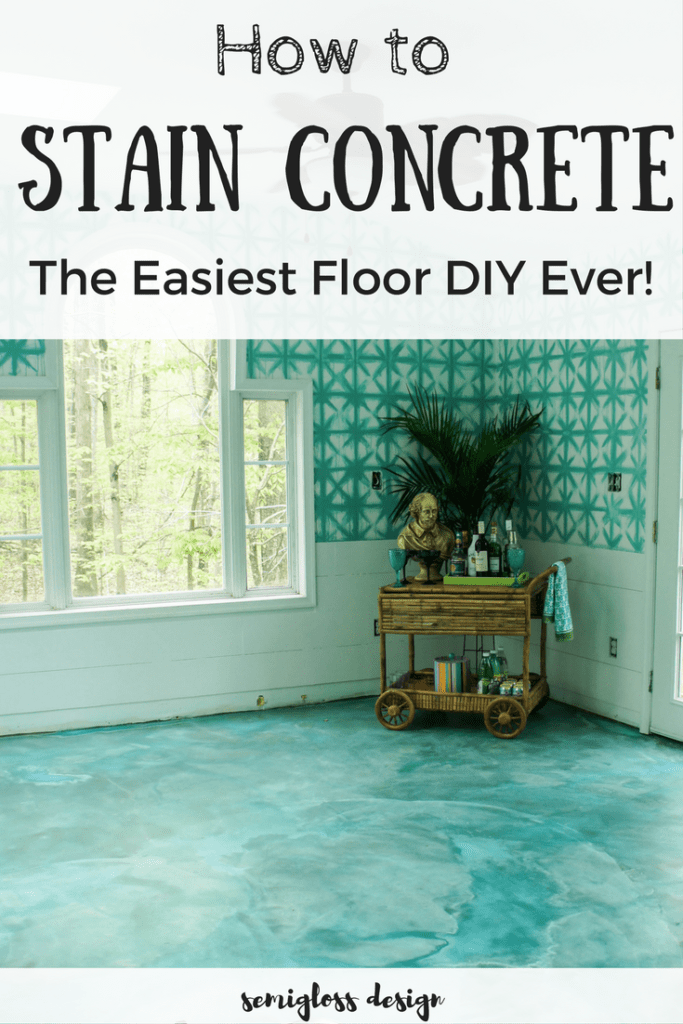
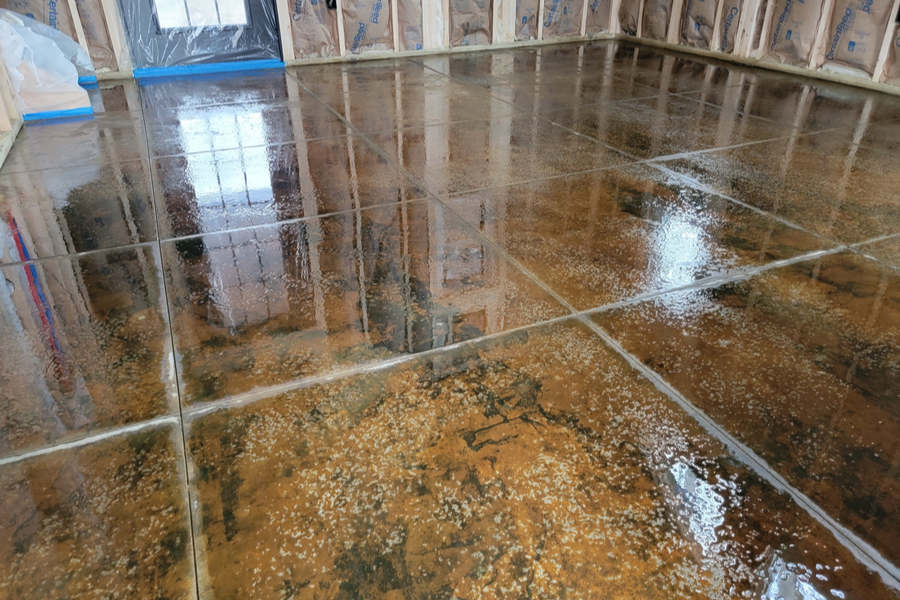
The acid washing process revealed a hidden character in my concrete floor that had been invisible under the original gray surface layer. Aggregate stones, sand particles, and cement variations created natural patterns that resembled expensive terrazzo or stone surfaces. Each section developed unique coloring from cream and tan to deeper browns and grays, creating organic variations that no manufactured flooring could replicate.
Iron deposits in the concrete aggregate produced unexpected rust-colored highlights that added warmth and visual interest to the overall appearance. These metallic accents appeared randomly throughout the floor, creating focal points that drew the eye and added complexity to the surface texture. The random nature of these color variations made each square foot of my floor unique and visually engaging.
Some areas of the floor revealed interesting geometric patterns where control joints and construction lines created natural boundaries between different concrete pours. These subtle divisions added architectural interest without appearing intentional or contrived. The acid washing process enhanced these existing features rather than hiding them, celebrating the industrial heritage of the space while creating contemporary visual appeal.
Sealing and Long-Term Maintenance Considerations
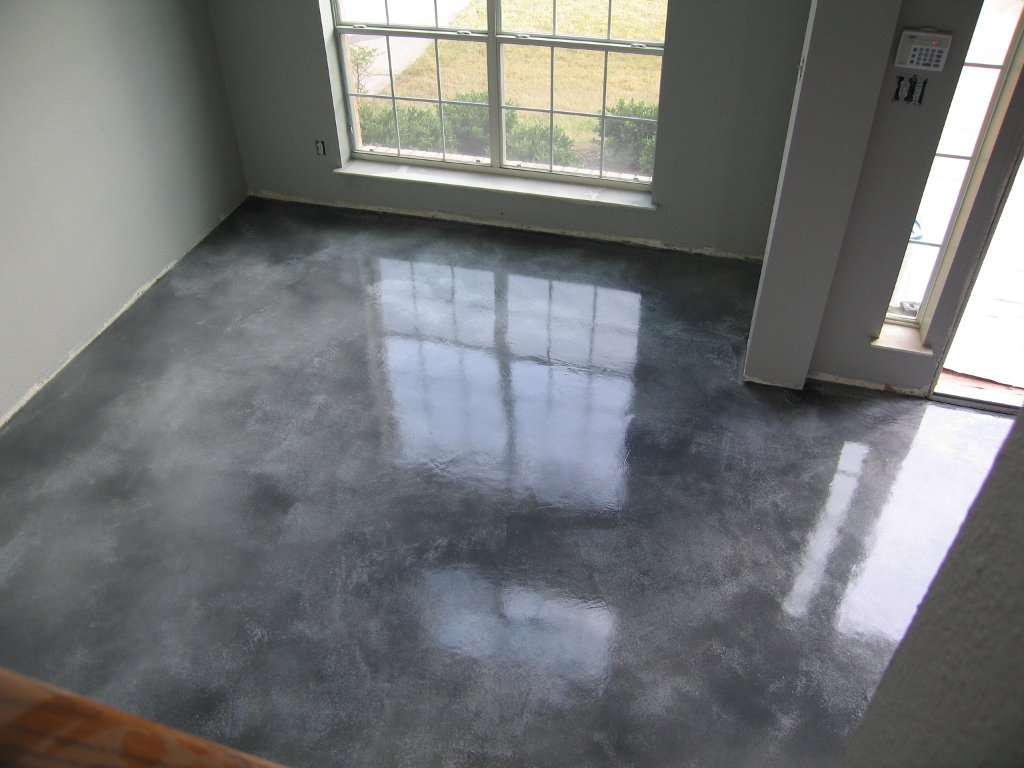
Sealing my acid-washed concrete floor became essential for protecting the newly exposed surface from stains, moisture, and wear damage that could compromise the beautiful results I had achieved. I chose a penetrating concrete sealer that would protect without creating a glossy surface film that might peel or wear unevenly. The sealer application required perfect timing after the acid washing process was complete and the surface had thoroughly dried.
The sealing process involved two coats of high-quality concrete sealer applied with a pump sprayer and back-rolled for even distribution across the textured surface. I learned that acid-washed concrete absorbs sealer differently than untreated surfaces, requiring careful attention to avoid over-application that could create a cloudy or uneven appearance. The first coat absorbed quickly, while the second coat provided the protective barrier necessary for long-term durability.
Maintenance of my acid-washed and sealed concrete floor has proven remarkably simple compared to other flooring options I’ve owned previously. Regular sweeping and occasional damp mopping with pH-neutral cleaners keep the surface looking fresh and clean. The sealed surface resists oil stains and water damage that previously plagued my garage floor, while the varied coloring helps hide normal wear patterns and minor soiling.

Is DIY acid washing concrete floors safe for homeowners without professional experience?
DIY acid washing is possible with proper safety equipment, preparation, and respect for the dangerous chemicals involved, but it requires a serious commitment to safety protocols. I spent significant time researching techniques, purchasing quality protective gear, and practicing emergency procedures before starting. The biggest risks involve chemical burns, respiratory damage from fumes, and eye injuries from splashing. Adequate ventilation, full protective equipment, and emergency neutralization supplies are essential. Consider hiring professionals if you’re uncomfortable with hazardous chemicals or lack proper safety equipment.
How much does it cost to acid wash a concrete floor compared to other flooring options?
My DIY acid washing project cost approximately $3-5 per square foot, including acid, neutralizer, sealer, and safety equipment for a 400-square-foot garage floor. Professional acid washing typically costs $6-12 per square foo,t depending on location and complexity. This compares favorably to epoxy coatings ($4-8 per square foot), polished concrete ($8-15 per square foot), or tile installation ($10-20+ per square foot). The biggest cost factors are safety equipment and quality sealers, but these represent one-time investments that can be used for future projects or maintenance applications.
What types of concrete floors are best suited for acid washing treatments?
Older concrete floors with hard, dense surfaces often produce the best acid washing results, as they have developed character and aggregate exposure over time. My 15-year-old garage floor was ideal because it had cured completely and developed surface hardness that created interesting etching patterns. New concrete less than 30 days old should be avoided as it may react unpredictably. Heavily sealed or painted concrete requires complete removal of surface treatments before acid washing. Decorative concrete with integral colors may produce unexpected results that could be undesirable.
How long does the acid washing process take from start to finish?
The complete acid washing process typically requires 3-5 days from initial cleaning through final sealing, depending on floor size and drying conditions. I spent two days on surface preparation and cleaning, one day for the actual acid application and neutralization, and two days for sealing after proper drying time. Weather conditions significantly affect timing, as humidity and temperature impact drying rates and chemical reactions. Plan for potential delays due to weather or unexpected surface conditions. The actual acid application happens quickly, but preparation and finishing steps consume most of the project timeline.
Can I control the final appearance and color of my acid-washed concrete floor?
Acid washing produces organic, unpredictable results that cannot be precisely controlled, which is part of its natural appeal but may disappoint those expecting a uniform appearance. I tested different acid concentrations and contact times on hidden areas to understand how my specific concrete would react. Factors like aggregate type, concrete age, and mix design all influence final coloring. You can somewhat control intensity through acid strength and contact time, but exact colors and patterns remain unpredictable. This randomness creates a unique character that manufactured flooring cannot replicate.
What ongoing maintenance does an acid-washed concrete floor require?
Properly sealed acid-washed concrete requires minimal maintenance beyond regular cleaning with pH-neutral products and periodic sealer reapplication every 2-3 years. I sweep regularly and damp mop monthly, avoiding harsh chemicals that could damage the sealer. The varied coloring hides normal wear and minor stains better than plain concrete. Annual inspection for sealer wear and prompt resealing of high-traffic areas maintains protection and appearance. Avoid acidic cleaners that could restart the etching process or damage the protective sealer coating that preserves your investment.
How to Acid Stain Concrete Floors
DIY Concrete Floor Remodel With Acid Stain
The Beginner’s Guide to DIY Stained Concrete, A Step by Step Tutorial
Stained Concrete Floors: Cost, How to Stain DIY, Maintenance Tips
How To Acid Stain Concrete Floors – Create Easy Care Floors With
Related Posts: