My obsession with retro bathroom flooring began when I inherited my aunt’s 1950s ranch home. The original pink and black checkered tiles in her powder room captivated me instantly, transporting me to an era of bold design choices and fearless color combinations. This discovery ignited my passion for vintage bathroom aesthetics, leading me down a path of restoration projects, design research, and countless hours spent in architectural salvage yards. Through renovating multiple vintage bathrooms, I’ve learned that retro flooring isn’t just about nostalgia; it’s about embracing quality craftsmanship and timeless patterns that modern design often overlooks.
Classic Checkerboard Patterns: Timeless Geometric Appeal
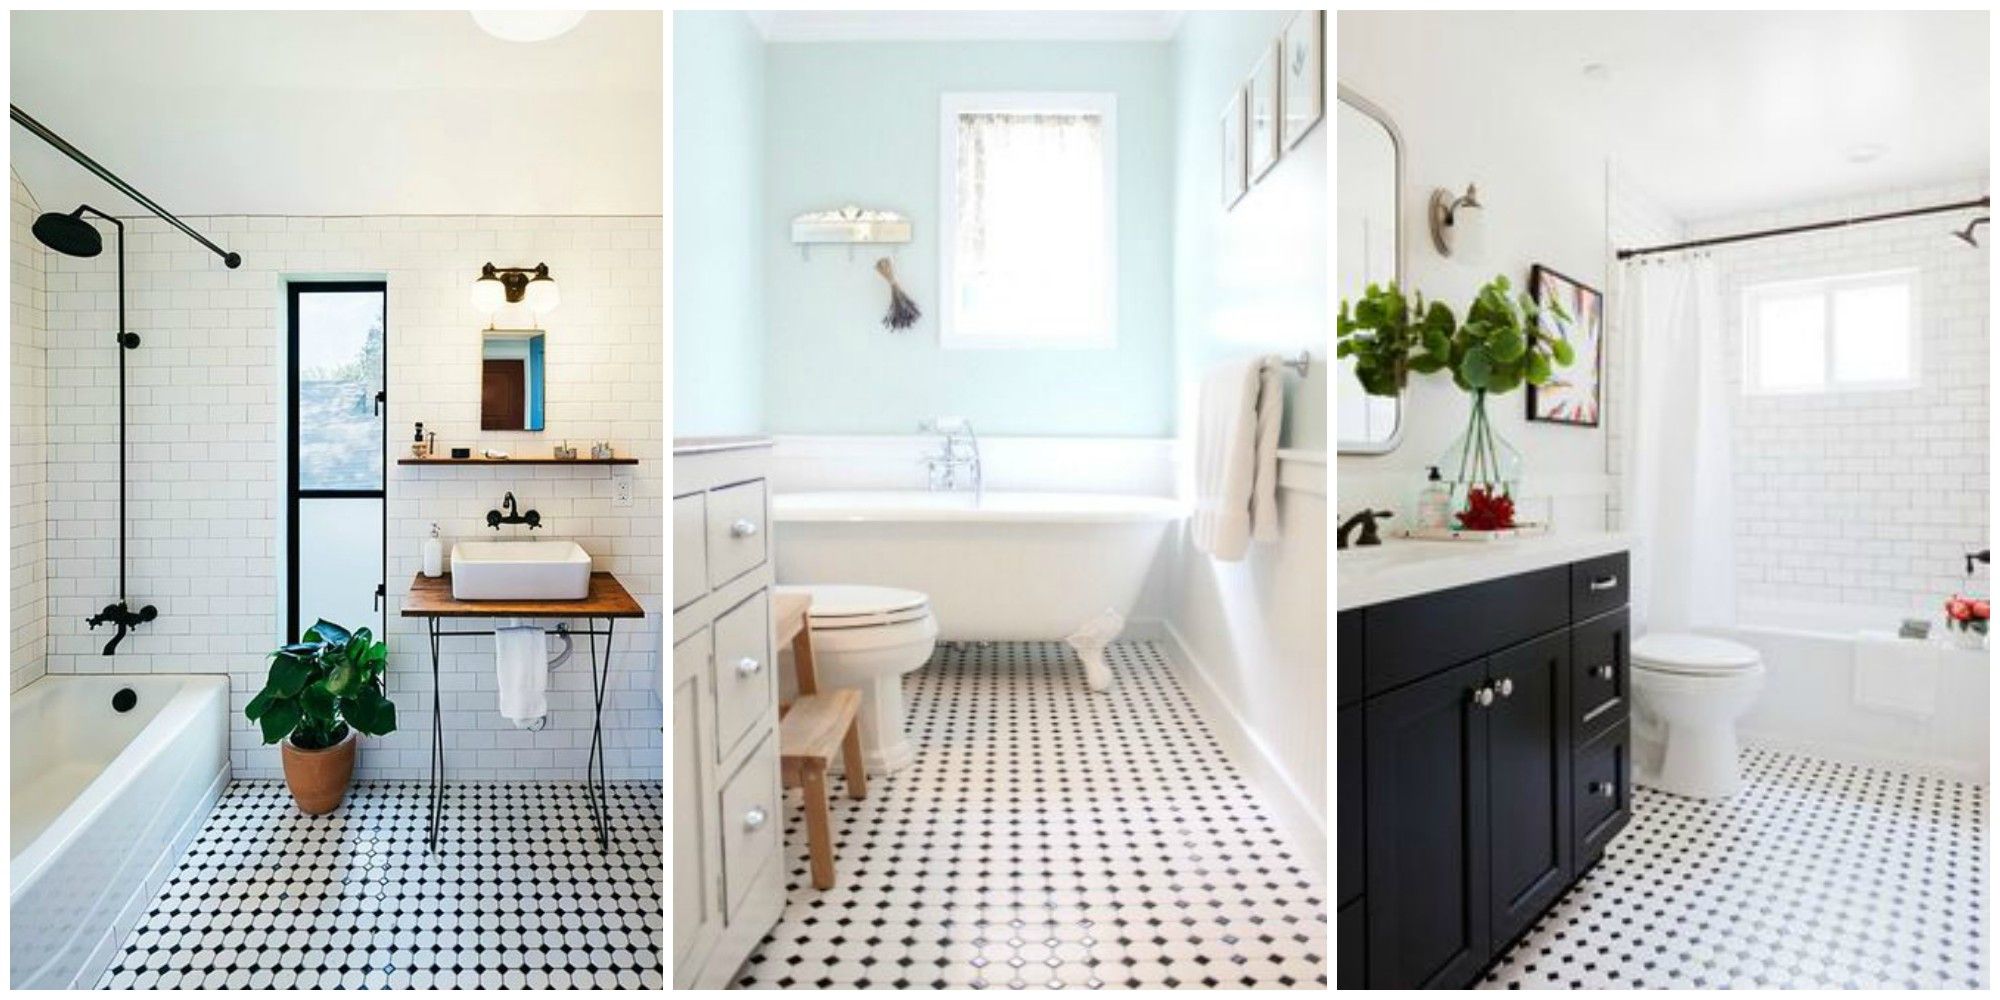
My first encounter with checkerboard flooring taught me about the power of contrast in small spaces. The alternating black and white squares in my aunt’s bathroom created visual interest that made the compact room feel larger and more dynamic. I discovered that this pattern works because it draws the eye across the floor, creating movement and energy that plain tiles simply cannot achieve. The geometric precision required for proper installation challenged my DIY skills initially.
During my research into checkerboard history, I learned that this pattern gained popularity in the 1920s and experienced a major revival in the 1950s. The post-war era embraced bold patterns as a departure from wartime austerity, and checkerboard floors became symbols of optimism and prosperity. I found original advertisements from major tile manufacturers promoting these designs as modern and sophisticated, a stark contrast to today’s minimalist trends.
The installation process for checkerboard patterns requires meticulous planning and patience. I learned to start from the center of the room and work outward, ensuring perfect alignment of each square. The key to success lies in using high-quality spacers and maintaining consistent grout lines. My first attempt resulted in slightly crooked lines that became more noticeable over time, teaching me the importance of precision in geometric patterns.
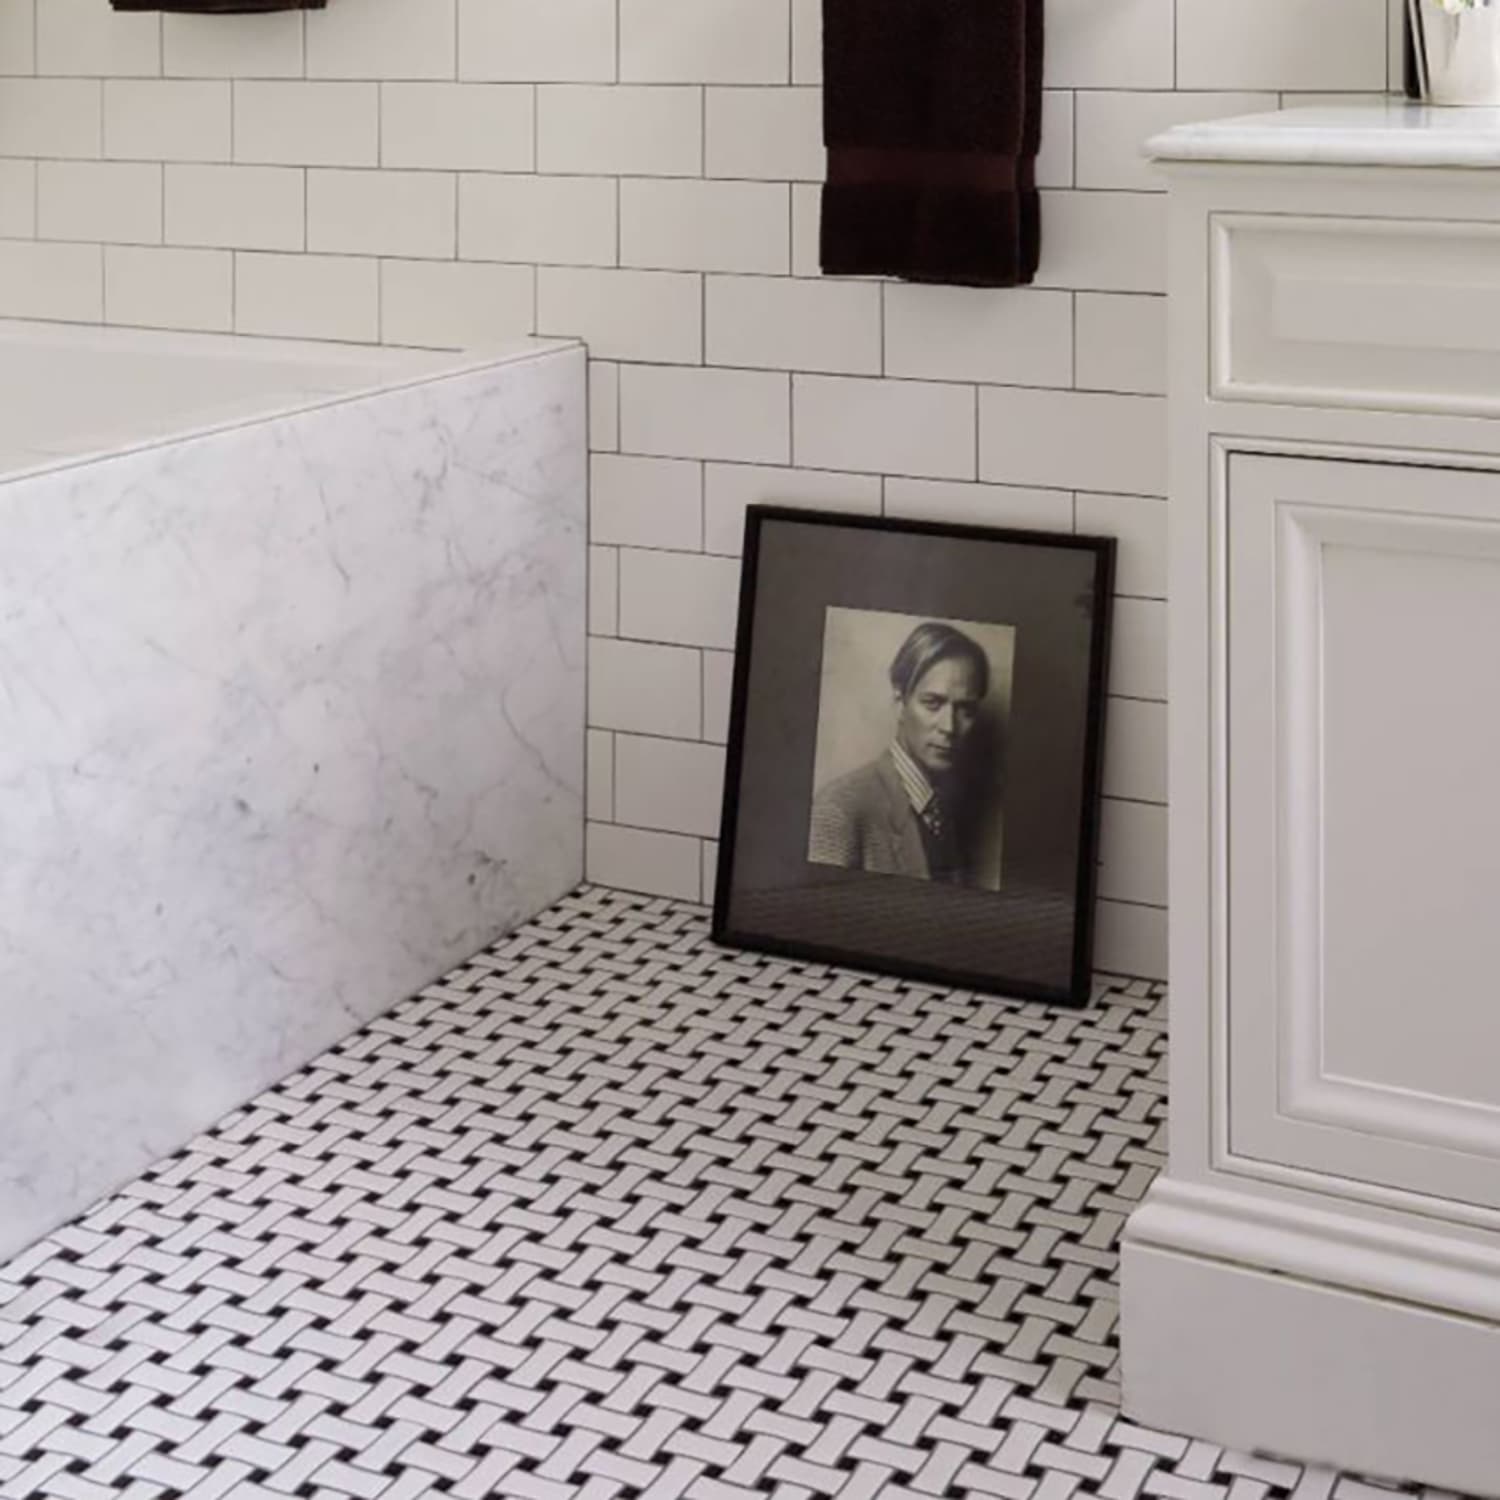
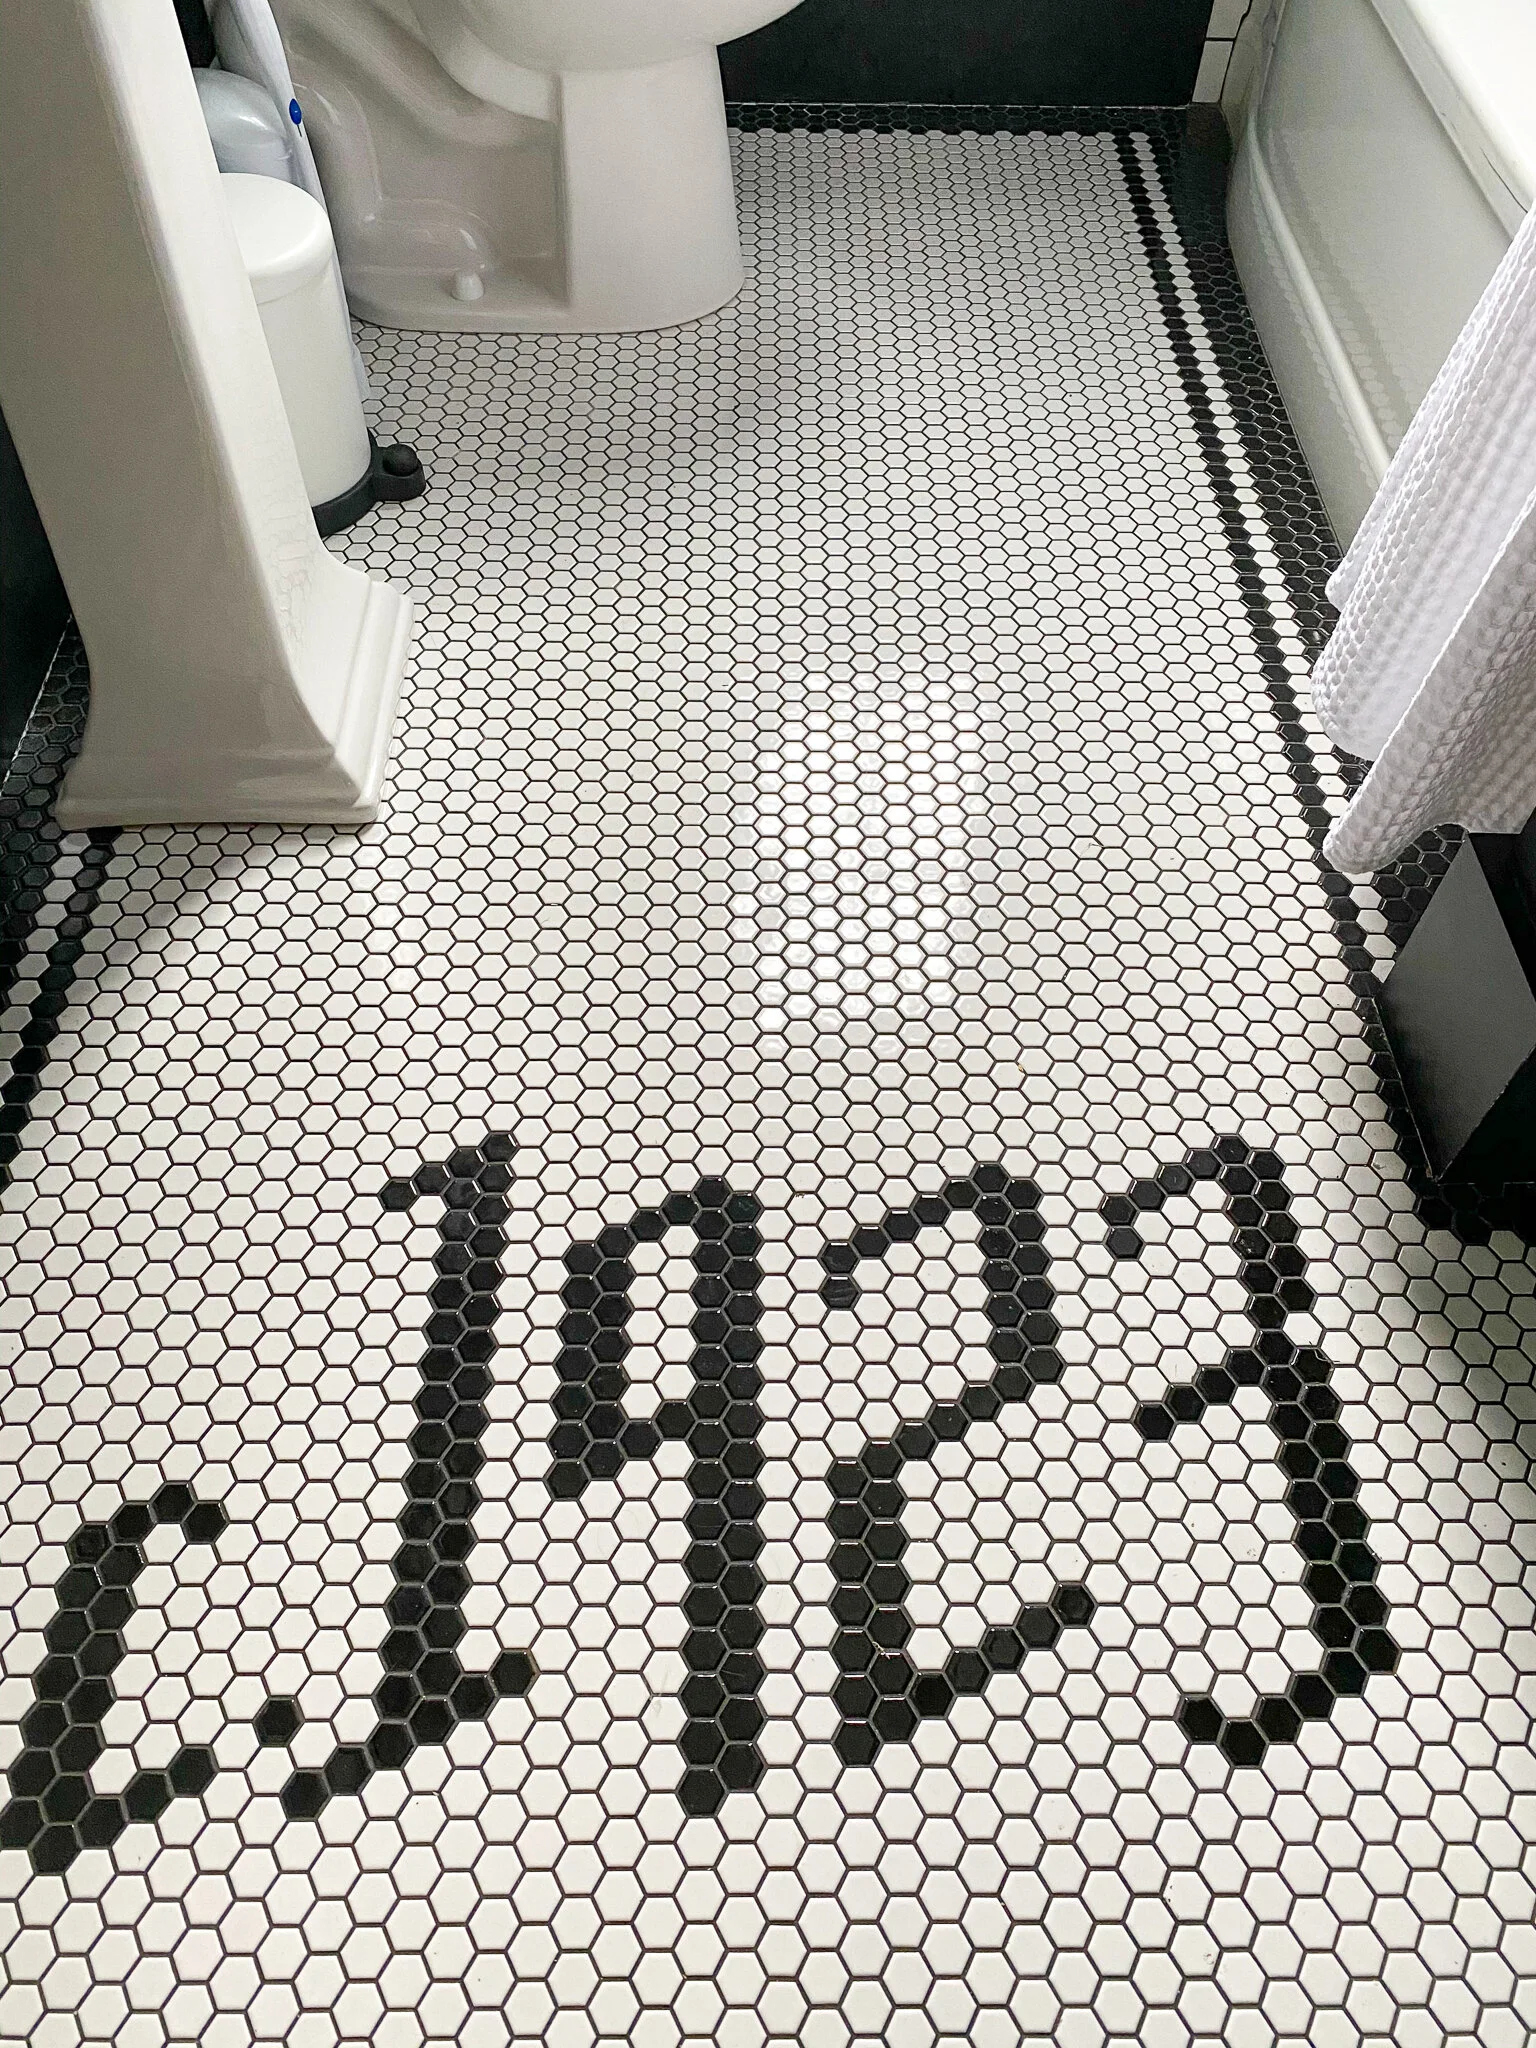
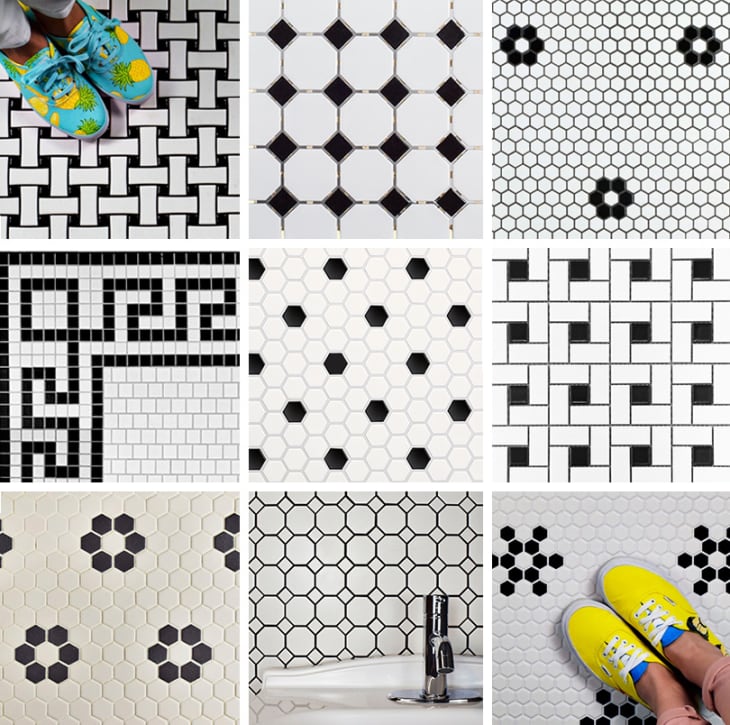
Hexagonal Penny Tiles: Small Details, Big Impact
My introduction to penny tiles came during a restoration project in a 1930s bungalow. The tiny hexagonal tiles covered every surface, creating a honeycomb effect that felt both intricate and cohesive. I was amazed by how these small individual pieces combined to create such a striking visual impact. The original installation had survived decades of use, a testament to the durability of this classic format when properly installed.
The color possibilities with penny tiles opened up exciting design opportunities. I experimented with monochromatic schemes, gradual color transitions, and bold accent patterns within the hexagonal grid. My favorite project involved creating a flower motif using different colored tiles, a technique popular in the 1940s. The small tile size allows for detailed patterns that would be impossible with larger formats, giving designers incredible creative freedom.
Working with penny tiles requires different techniques than standard ceramic installation. I learned to use mesh backing sheets to handle multiple tiles simultaneously, dramatically speeding up the installation process. The numerous grout lines require extra attention to cleaning and sealing, but the final result justifies the additional effort. My experience taught me that penny tiles reward patience with stunning, long-lasting results that never go out of style.

Bold Color Combinations: Embracing Vintage Vibes
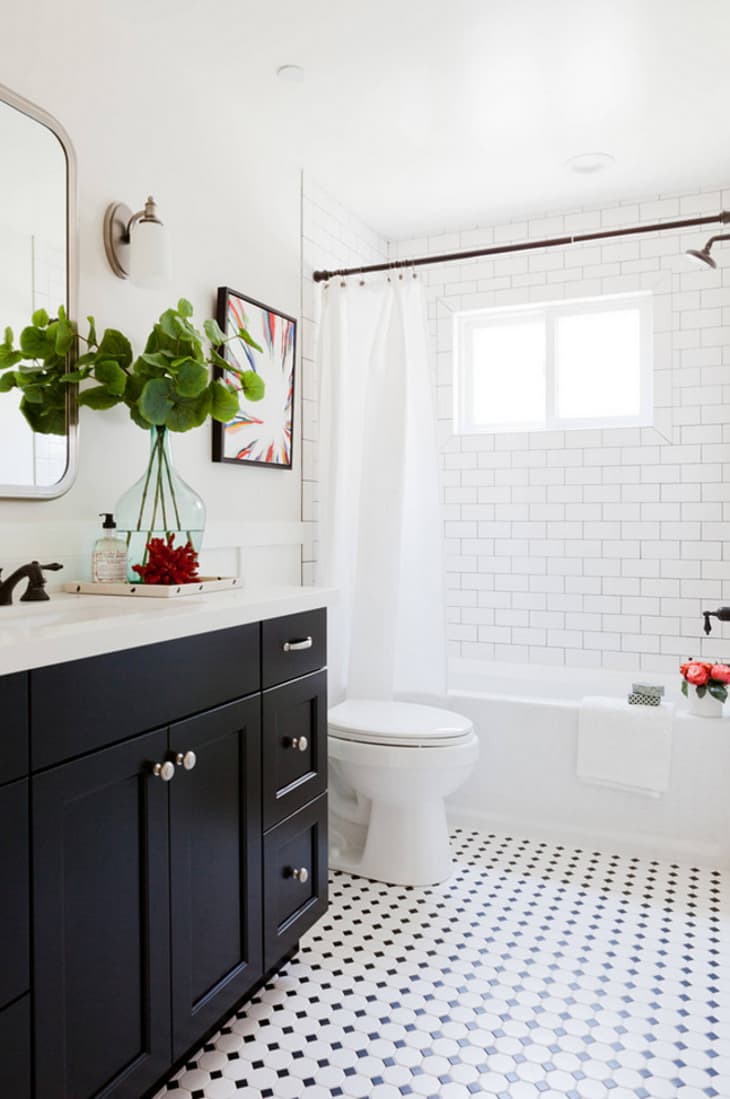
My exploration of retro color schemes challenged my preconceptions about bathroom design. I discovered that mid-century homeowners weren’t afraid of bold combinations like turquoise and coral, mint green and pink, or yellow and black. These vibrant pairings created bathrooms that felt more like jewel boxes than utilitarian spaces. My first bold color project involved a pink and gray combination that initially seemed risky but ultimately became my favorite bathroom.
The psychological impact of retro colors became apparent as I lived with these bold choices. I found that bright, saturated colors energized my morning routine and created a sense of optimism that neutral tones couldn’t match. The key to successful vintage color schemes lies in balance and proportion, using one color as the dominant tone while the second serves as an accent. This approach prevents overwhelming the space while maintaining visual interest.
Sourcing authentic vintage colors proved challenging in today’s market. I learned to work with specialty tile manufacturers who reproduce historic glazes and finishes. Some original tiles from salvage sources provided perfect matches for restoration projects, but new production tiles offered better consistency for complete renovations. My color experimentation taught me that successful retro schemes require confidence and commitment to the vision.

Terrazzo Floors: Speckled Sophistication
My first terrazzo installation project revealed the complexity behind this seemingly simple flooring type. The combination of marble chips, cement, and pigments creates a surface that’s both durable and beautiful. I learned that terrazzo originated in Italy but became popular in American commercial and residential applications during the 1950s. The speckled appearance adds visual texture without overwhelming patterns, making it perfect for bathrooms where other elements compete for attention.
The durability of terrazzo impressed me throughout my restoration work. I encountered original terrazzo floors from the 1940s that looked nearly new after proper cleaning and polishing. The material’s resistance to moisture and staining makes it ideal for bathroom applications, while its seamless installation eliminates grout lines that can harbor bacteria. My research revealed that terrazzo can last 40-50 years with minimal maintenance when properly installed.
Creating custom terrazzo involves artistic choices about aggregate size, color, and pattern distribution. I experimented with different marble chip sizes, from fine sand-like particles to large chunks that create bold visual statements. The pigment selection allows for unlimited color possibilities, though I found that subtle earth tones and pastels work best for bathroom applications. My terrazzo projects taught me patience, as proper curing takes weeks to achieve optimal strength and appearance.

Vintage Linoleum: Rediscovering a Classic
My prejudice against linoleum vanished when I discovered authentic vintage patterns in an architectural salvage shop. The intricate marbled designs and bold geometric patterns bore no resemblance to the cheap imitations I associated with the material. I learned that genuine linoleum, made from linseed oil and natural materials, was considered a premium flooring choice in the early to mid-20th century. The craftsmanship and artistry in vintage linoleum patterns rivaled any modern flooring option.
The installation of vintage linoleum requires specialized knowledge and tools. I found that original linoleum is much thicker and more substantial than modern versions, requiring different cutting techniques and adhesives. The material’s natural composition makes it more challenging to work with than synthetic alternatives, but the authentic appearance justifies the extra effort. My linoleum projects taught me to appreciate the skill of mid-century installers who created seamless, beautiful floors without modern conveniences.
Maintaining vintage linoleum involves understanding its unique properties and limitations. I learned that the natural materials respond differently to cleaning products than synthetic floors, requiring pH-neutral cleaners and regular waxing to maintain their appearance. The material’s durability impressed me, as properly maintained linoleum can last decades longer than many modern alternatives. My experience with vintage linoleum changed my perspective on sustainable flooring choices and historical craftsmanship.

Restoration Techniques: Bringing History Back to Life
My restoration journey taught me that saving original retro flooring requires patience, research, and specialized techniques. I learned to assess damage carefully, distinguishing between surface wear that can be repaired and structural problems requiring replacement. Original tiles often contain lead-based glazes or asbestos backing materials, requiring professional testing and safe removal procedures. My restoration projects balanced historical accuracy with modern safety standards.
The cleaning and repair of vintage tiles became a specialized skill I developed through trial and error. I discovered that gentle cleaning with appropriate products could reveal original colors and patterns hidden under decades of grime. Epoxy repairs for cracked tiles, careful regrouting, and proper sealing techniques helped preserve original installations while ensuring continued functionality. My restoration work taught me to respect the craftsmanship of previous generations.
Sourcing replacement materials for restoration projects requires persistence and creativity. I built relationships with architectural salvage dealers, specialty tile manufacturers, and other restoration enthusiasts to locate matching materials. Sometimes I found perfect matches, while other projects required creative solutions using similar tiles or custom reproductions. My restoration experiences taught me that preservation requires both technical skill and artistic vision to maintain the integrity of original designs.
What are the most popular retro bathroom flooring patterns, and which era do they represent?
The most iconic retro bathroom flooring patterns include checkerboard (1920s-1950s), hexagonal penny tiles (1900s-1940s), and bold geometric designs (1950s-1960s). I’ve found that checkerboard patterns represent the Art Deco movement and post-war optimism, while penny tiles reflect early 20th-century craftsmanship. The 1950s brought vibrant colors and larger geometric patterns that expressed prosperity and modern living. Each era had distinct characteristics: the 1920s favored black and white contrast, the 1940s embraced small-scale patterns, and the 1960s introduced bold colors and abstract designs.
How do I determine if my existing vintage bathroom flooring is worth restoring versus replacing?
I evaluate vintage flooring based on several factors: structural integrity, historical significance, and overall condition. If tiles are firmly attached with minimal cracking and original patterns remain intact, restoration is usually worthwhile. I check for loose tiles, water damage, and substrate issues that might indicate deeper problems. Original installations from quality manufacturers often justify restoration costs due to their superior materials and craftsmanship. However, if more than 30% of tiles need replacement or structural damage exists, complete replacement might be more practical and cost-effective.
What modern alternatives exist for homeowners who want retro bathroom flooring without using vintage materials?
Modern manufacturers offer excellent reproductions of vintage patterns using contemporary materials and installation methods. I’ve used new hexagonal tiles, reproduction checkerboard patterns, and modern terrazzo that capture vintage aesthetics while providing current performance standards. Digital printing technology allows for accurate color matching and pattern reproduction. These alternatives eliminate concerns about lead content, asbestos backing, or material degradation while maintaining authentic appearance. Many companies specialize in historically accurate reproductions that provide the vintage look with modern durability and safety standards.
How do I properly maintain and care for authentic vintage bathroom flooring?
Vintage flooring requires gentle, specialized care to preserve original finishes and prevent damage. I use pH-neutral cleaners and avoid harsh chemicals that can damage historic glazes or natural materials. Regular sealing protects porous surfaces from moisture and staining. For linoleum, I apply protective wax coatings periodically to maintain appearance and prevent wear. Original grout may need careful cleaning and occasional resealing to prevent water penetration. The key is understanding each material’s specific needs and using appropriate products designed for vintage surfaces rather than modern alternatives.
What should I budget for a retro bathroom flooring project, including both materials and installation?
Retro bathroom flooring costs vary significantly based on material choice and installation complexity. I typically budget $8-15 per square foot for quality reproduction tiles, while authentic vintage materials can cost $15-30 per square foot when available. Installation costs range from $5-10 per square foot for standard patterns, increasing to $10-20 for complex designs like penny tiles or custom terrazzo. Total project costs for a typical bathroom range from $800-2,500, depending on size and material selection. Restoration projects may cost less in materials but require specialized labor that can increase overall expenses.
Are there any special considerations for installing retro bathroom flooring in terms of moisture resistance and durability?
Retro flooring installation requires careful attention to moisture protection and substrate preparation. I always use appropriate waterproofing membranes and ensure proper drainage to prevent water damage. Original materials may be more porous than modern alternatives, requiring additional sealing and maintenance. Terrazzo and ceramic tiles generally provide excellent moisture resistance, while linoleum needs careful edge sealing to prevent water infiltration. The key is understanding each material’s properties and installing appropriate barriers and drainage systems to ensure long-term performance in wet bathroom environments.
This Versatile Vintage Classic is Back & in Bathrooms Everywhere

Our Favorite Vintage Mosaic Floor Tiles for Bathrooms Apartment
Related Posts: