My basement transformation began with a simple problem: my home gym was becoming unbearable during the winter months. The concrete floor felt like ice beneath my feet, and every dropped weight echoed through the house like thunder. After researching numerous flooring options, I discovered rubber basement flooring, a solution that would completely transform my perception of my underground space. What started as a practical necessity for my workout area evolved into a comprehensive renovation that turned my basement into a comfortable, functional extension of my home.
Understanding Rubber Flooring Types: Finding the Perfect Match
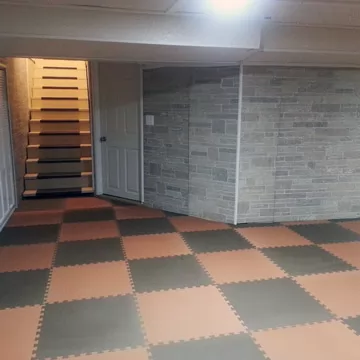
My first challenge was navigating the overwhelming variety of rubber flooring options available. I learned that rubber basement flooring comes in three main forms: tiles, rolls, and interlocking mats. Each type serves different purposes and installation requirements. During my research phase, I visited multiple suppliers to touch and feel the other materials, understanding that texture and thickness would significantly impact both comfort and performance in my basement environment.
Rubber tiles became my preferred choice for most areas due to their versatility and ease of replacement. I found tiles ranging from 12-inch squares to larger 24-inch options, with thicknesses varying from 1/4 inch to 3/4 inch. The modular nature appealed to me because individual tiles could be replaced if damaged, unlike roll goods that require larger section replacements. I selected different thicknesses for different zones, using thicker tiles in my workout area and thinner ones in storage spaces.
Roll rubber flooring impressed me with its seamless appearance and quick installation potential. I considered rolls for my main basement area, but ultimately decided against them due to the difficulty of maneuvering large, heavy rolls down narrow basement stairs. However, I did use roll material in my workshop area where the continuous surface provides easy cleanup and prevents small parts from getting lost in seams. The decision taught me that different rubber formats work better for specific applications.
Installation Process: Transforming Cold Concrete
My installation journey began with extensive concrete preparation that I initially underestimated. I learned that rubber flooring requires a clean, level, and completely dry surface for optimal performance. Spending two weekends grinding down high spots and filling cracks seemed tedious, but this preparation proved crucial for the final result. I discovered that any imperfections in the concrete would telegraph through the rubber, creating uncomfortable bumps and potential wear points.
The actual installation process surprised me with its simplicity once the prep work was complete. I started with loose-lay installation, simply placing tiles without adhesive to test the layout and fit. This approach allowed me to make adjustments and ensure proper alignment before committing to permanent installation. I found that quality rubber tiles lay flat naturally due to their weight, reducing the need for adhesive in many applications.
Adhesive selection became crucial for areas requiring permanent installation. I chose pressure-sensitive adhesives for most zones, allowing future removal if needed. In my workout area, I used stronger adhesives to handle the stress of heavy equipment and intense movement. The installation process taught me patience, as rushing led to misaligned tiles and visible seams. Taking time to properly align each tile resulted in a professional-looking floor that exceeded my expectations.

Moisture Management: Conquering Basement Humidity
My basement’s moisture challenges became apparent during my first summer with rubber flooring. I learned that rubber’s water-resistant properties create a barrier that can trap moisture underneath if not properly managed. Initial condensation problems taught me the importance of proper ventilation and moisture control systems. I installed a dehumidifier and improved air circulation to maintain optimal humidity levels below 50%.
The vapor barrier discussion with my contractor proved enlightening. I discovered that installing rubber over concrete requires careful consideration of moisture migration. In some areas, I used a moisture barrier beneath the rubber, while in others, I relied on the rubber’s natural resistance. The key was understanding my basement’s specific moisture patterns and addressing them systematically rather than assuming rubber would solve all problems.
Drainage became a crucial consideration in areas prone to occasional water intrusion. I learned to create subtle slopes directing water away from living spaces and toward floor drains. The rubber’s water resistance helped by preventing moisture from soaking into the subfloor, but proper drainage planning ensured that water didn’t pool on the surface. This comprehensive approach to moisture management protected both the flooring and the overall basement environment.

Comfort and Performance: Beyond Cold Concrete
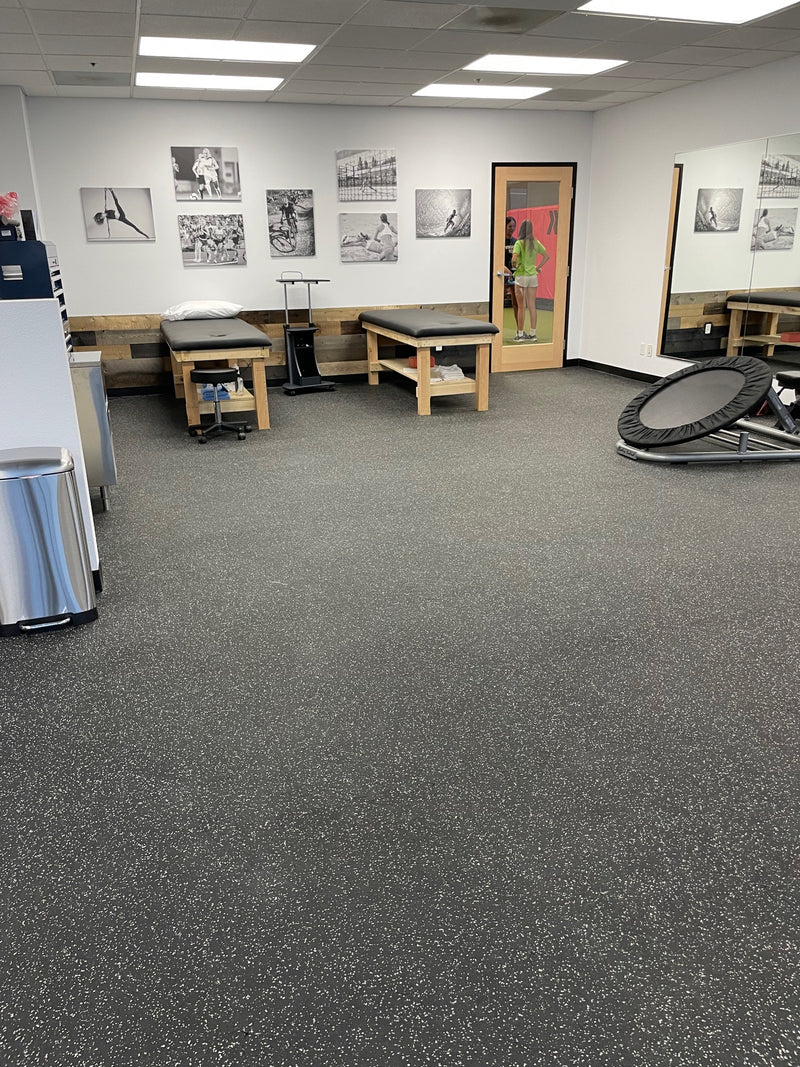
The immediate comfort improvement from rubber flooring amazed me every morning when I stepped onto my basement floor. The thermal insulation properties eliminated the shock of cold concrete, making barefoot walking comfortable year-round. I measured surface temperatures and found rubber floors stayed 10-15 degrees warmer than concrete, significantly improving the basement’s overall comfort level. This temperature difference transformed my basement from a space I avoided to one I actively enjoyed.
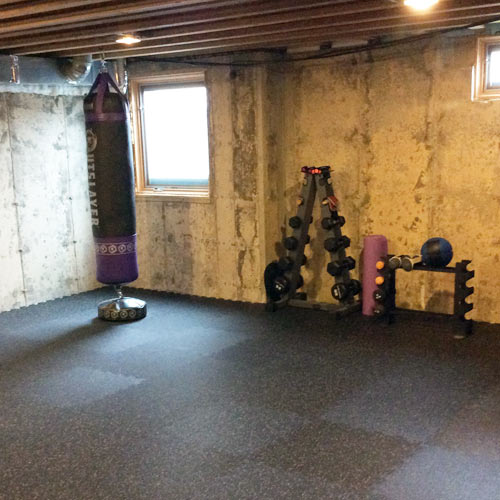
Impact absorption became crucial for my home gym applications. I tested the rubber’s shock-absorbing properties by dropping weights and monitoring both sound transmission and floor protection. The rubber surface absorbed impacts that would have cracked concrete and created noise problems for rooms above. I found that thicker rubber provided better protection, leading me to use 3/4-inch tiles in my heaviest workout areas while using thinner materials in walking spaces.
The slip resistance of rubber flooring provided safety benefits I hadn’t anticipated. Even when wet from humidity or occasional spills, the textured rubber surface maintained traction better than smooth concrete. This characteristic proved valuable in my workshop area, where occasional oil spills occurred. I learned that different rubber textures provide varying levels of slip resistance, allowing me to choose appropriate surfaces for different activities and safety requirements.
Maintenance and Longevity: Keeping Rubber Floors Fresh
My maintenance routine for rubber basement flooring was developed through trial and error over several years. I learned that regular sweeping and occasional mopping with pH-neutral cleaners keep rubber floors looking fresh and performing well. Harsh chemicals can damage rubber surfaces, so I switched to gentler cleaning products specifically designed for rubber flooring. This adjustment eliminated the surface degradation I experienced with inappropriate cleaners.
Dealing with stains and odors taught me about rubber’s absorption properties. While rubber resists most stains, certain substances like oil and some chemicals can penetrate the surface. I developed a spot-cleaning protocol using degreasing agents for oil stains and enzymatic cleaners for organic odors. Quick response to spills prevents most staining issues, but I learned which substances require immediate attention to avoid permanent damage.
The longevity of rubber flooring impressed me as years passed with minimal wear. I noticed that high-traffic areas showed some surface polishing but maintained their structural integrity and comfort properties. The modular tile system allowed me to rotate tiles periodically, ensuring even wear patterns. After five years, my rubber floors still provide the same comfort and performance as when newly installed, validating the investment in quality materials.

Cost Analysis: Evaluating Long-Term Value
My initial sticker shock at rubber flooring prices required careful consideration of long-term value versus upfront costs. I compared rubber pricing to other basement flooring options, finding that quality rubber falls in the mid-to-upper price range but offers superior performance characteristics. The initial investment of $3-8 per square foot seemed high compared to basic carpet or laminate, but the durability and maintenance advantages justified the premium pricing.
Installation cost considerations varied significantly between DIY and professional installation. I chose to install most areas myself, saving labor costs while gaining valuable experience. However, I hired professionals for areas requiring adhesive installation and complex cuts around obstacles. The mixed approach balanced cost savings with professional results where needed. My total project cost included materials, tools, and selective professional help.
The return on investment became apparent through increased basement usability and reduced maintenance costs. I calculated that my rubber flooring paid for itself within three years by eliminating carpet replacements and reducing heating costs due to improved insulation. The basement’s transformation from storage space to functional living area added value to my home that exceeded the flooring investment. This analysis confirmed that rubber basement flooring represents excellent long-term value despite higher initial costs.
How does rubber basement flooring handle temperature fluctuations and seasonal changes?
Rubber flooring performs exceptionally well through temperature variations due to its stable molecular structure. I’ve monitored my basement floors through multiple seasons and found minimal expansion or contraction compared to other materials. The rubber maintains its flexibility in cold conditions while remaining stable in heat. Unlike vinyl or laminate, which can buckle or gap, rubber adjusts gradually to temperature changes without visible seams or warping. This stability makes it ideal for basements where temperature control may be inconsistent, ensuring year-round comfort and performance.
Can rubber basement flooring be installed directly over existing concrete without additional preparation?
While rubber can be installed over concrete, proper preparation is essential for optimal performance. I learned that concrete must be clean, level, and completely dry before installation. Minor imperfections can be tolerated, but significant cracks or uneven areas require repair. A moisture test is crucial to ensure the concrete isn’t actively releasing vapor that could cause adhesion problems. In my experience, spending time on proper preparation prevents future issues and ensures the rubber flooring performs as expected for years to come.
What are the best cleaning methods for rubber basement flooring, and what should be avoided?
My cleaning routine focuses on pH-neutral cleaners and gentle methods to preserve the rubber’s integrity. I sweep regularly to remove debris that could cause scratching, then mop with warm water and mild soap solutions. Avoid harsh chemicals, abrasive cleaners, or petroleum-based products that can damage rubber surfaces. For stubborn stains, I use specialized rubber floor cleaners or mild degreasers. The key is prompt attention to spills and regular maintenance rather than aggressive cleaning methods. This approach has kept my floors looking new for years.
How does rubber basement flooring compare to other popular basement flooring options in terms of cost and performance?
Rubber flooring typically costs more upfront than carpet or basic vinyl but less than premium hardwood or ceramic tile. However, its performance advantages often justify the investment. Compared to carpet, rubber won’t retain moisture or odors and doesn’t require replacement due to water damage. Unlike vinyl, rubber provides superior comfort and impact resistance. While ceramic offers durability, rubber provides better insulation and comfort underfoot. My analysis shows rubber offers the best balance of performance, durability, and comfort for basement applications, making it cost-effective long-term despite a higher initial investment.

Are there any health or safety concerns associated with rubber basement flooring?
Quality rubber flooring poses minimal health risks when properly manufactured and installed. I researched VOC emissions and found that modern rubber floors typically have low or no harmful emissions. However, cheaper products may contain recycled materials with unknown additives. I recommend purchasing from reputable manufacturers who provide certification for low emissions and safe materials. The slip-resistant properties improve safety compared to smooth surfaces. Some people may have latex allergies, but synthetic rubber flooring typically doesn’t contain natural latex proteins that cause reactions.
How long does rubber basement flooring typically last, and what factors affect its lifespan?
Based on my experience and research, quality rubber basement flooring can last 10-20 years or more with proper care. The lifespan depends on several factors: traffic levels, maintenance quality, environmental conditions, and material quality. Heavy commercial use reduces lifespan compared to residential applications. Regular cleaning and avoiding harsh chemicals extend durability significantly. UV exposure can cause gradual degradation, but basements typically have minimal natural light. My floors show minimal wear after five years of moderate use, suggesting they’ll meet or exceed expected lifespan with continued proper maintenance.
Basement Flooring Long Island – Infinity Epoxy Floors Best Epoxy

Related Posts: