When I started planning my kitchen renovation three years ago, I thought choosing stone tiles would be the hard part, but I quickly discovered that selecting the right pattern would make or break the entire design. After falling in love with a beautiful travertine at the stone yard, I spent weeks obsessing over pattern options, creating cardboard mockups on my living room floor, and driving my family crazy with my indecision. What started as a simple flooring choice turned into a fascinating exploration of how different laying patterns could completely transform the same stone, affecting everything from the perceived size of my space to the overall style and mood. The pattern I ultimately chose exceeded my expectations, but the journey taught me lessons about design, installation, and living with stone floors that I wish I’d known from the beginning.
Classic Running Bond: My Gateway Pattern Discovery
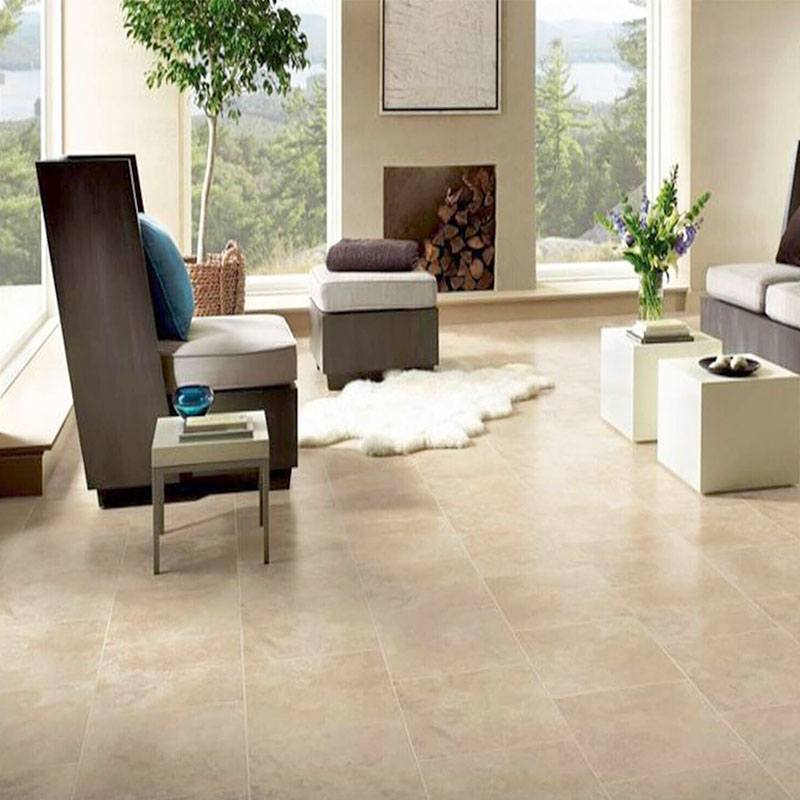
The running bond pattern was my introduction to the impact that layout can have on the appearance of stone tile, and it quickly became my baseline for comparison with other options. This straightforward pattern, where each tile is offset by half its length from the row above, reminded me of classic brick walls and felt both timeless and approachable. When I laid out samples in this pattern on my kitchen floor, the 12×24 travertine tiles created clean, horizontal lines that made my galley kitchen appear wider than it was. This optical illusion immediately caught my attention.
What surprised me most about the running bond layout was how it showcased the natural variation in my stone tiles without creating visual chaos. Each tile’s unique veining and color variations were highlighted while the orderly offset pattern provided structure that tied everything together harmoniously. I noticed that the horizontal emphasis created by this pattern complemented my kitchen’s linear layout beautifully, drawing the eye along the length of the room and making the narrow space feel more proportional and less tunnel-like.
The practical benefits of running bond became apparent during the installation process, as my contractor explained that this pattern is forgiving of minor size variations in natural stone and creates strong structural bonds that resist shifting over time. The offset joints distribute stress more effectively than straight grid patterns, reducing the likelihood of cracks traveling across multiple tiles. While I ultimately chose a different pattern for my kitchen, running bond remains my go-to recommendation for friends seeking a classic, versatile option that works beautifully with virtually any stone type or room configuration.
Herringbone Pattern: Drama That Changed Everything
The moment I saw herringbone pattern samples laid out at the showroom, I knew I was looking at something special that could transform my ordinary kitchen renovation into something extraordinary. The zigzag pattern created by alternating rectangular tiles at 90-degree angles added a level of visual sophistication that made my travertine tiles look like they belonged in a European villa. I spent an entire weekend creating a cardboard mockup of this pattern in my kitchen, and the dramatic impact convinced me to stretch my budget for the additional installation complexity this pattern required.
Installing herringbone proved significantly more challenging than I anticipated, requiring precise measurements and careful planning to ensure the pattern remained consistent throughout the room. My contractor had to create a center reference line and work outward in both directions, constantly checking alignment to prevent the zigzag pattern from drifting off-course. The cutting requirements around room perimeters were complex, often requiring partial tiles cut at precise angles to maintain the pattern’s integrity. This attention to detail extended the installation timeline by several days but resulted in flawless execution that continues to impress visitors years later.
Living with herringbone has been pure joy, as the pattern creates visual movement that makes my kitchen feel dynamic and alive rather than static. The interplay of light and shadow across the alternating tile directions changes throughout the day, ensuring the floor never looks monotonous or boring. I’ve found that this pattern works particularly well with the natural variation in my travertine, as the busy pattern helps camouflage any slight color differences between tiles while creating an overall cohesive appearance that feels both traditional and contemporary, depending on the lighting and surrounding décor elements.
Basketweave Pattern: Sophisticated Simplicity
When I discovered the basketweave pattern during my research phase, I was immediately drawn to its elegant simplicity and the way it created texture without overwhelming visual complexity. This pattern alternates pairs of tiles laid horizontally with pairs laid vertically, creating squares that remind me of woven baskets or textile patterns. The geometric regularity felt more formal than herringbone but less severe than straight grid layouts, striking a perfect balance between visual interest and classic restraint that appealed to my desire for timeless design.
The installation process for basketweave taught me about the importance of precise tile spacing and consistent grout lines in creating pattern success. Unlike more forgiving patterns, basketweave requires exact measurements and perfect right angles to maintain its geometric integrity. My installer spent considerable time ensuring that the alternating pairs of tiles formed perfect squares, as even minor variations would be immediately noticeable and disruptive to the overall pattern flow. This precision requirement meant higher labor costs but resulted in architectural-quality results that justify the additional investment.
I’ve been consistently pleased with how basketweave ages and wears over time, as the pattern’s inherent structure helps distribute visual wear and makes minor imperfections less noticeable than they might be in simpler laying patterns. The textural quality created by the alternating grain directions adds depth and interest that prevents the floor from appearing flat or monotonous. This pattern has proven particularly effective at hiding the natural variation in my stone tiles while creating an upscale appearance that complements both my casual family dinners and more formal entertaining occasions with equal sophistication.
Diagonal Layouts: Opening Up My Space
Rotating traditional patterns to run diagonally across my room created one of the most dramatic transformations I experienced during my pattern exploration process. When I laid out my travertine samples in a diagonal grid pattern, the immediate effect was stunning, making my modest kitchen appear significantly larger and more spacious than any straight-laid pattern had achieved. The diagonal lines drew the eye across the room rather than along its length, effectively disguising the narrow proportions that had always bothered me about this space.
The installation complexity of diagonal patterns surprised me, requiring careful calculation of starting points and significantly more cutting around room perimeters. My contractor had to establish diagonal reference lines across the room and work from the center outward to ensure the pattern remained square to the space rather than drifting off-angle. The increased waste factor from diagonal cuts meant ordering additional tiles, and the complex perimeter cuts required skilled craftsmanship to maintain clean lines where the diagonal pattern met walls and cabinets.
Living with diagonal stone tile patterns has reinforced my appreciation for their space-enhancing properties, though I’ve learned they work best in rooms with relatively simple layouts and minimal obstacles. The dynamic visual movement created by diagonal lines keeps the floor interesting and prevents the space from feeling static or predictable. However, I’ve noticed that this pattern can be visually busy in smaller spaces or rooms with lots of furniture, so careful consideration of the room’s overall design is essential for success with diagonal layouts.
Mixed Pattern Combinations: Creative Freedom
After mastering individual patterns, I began experimenting with combining different layouts within the same space, creating custom designs that reflected my style more accurately than any single pattern could achieve. I used a basketweave pattern in the main kitchen area while transitioning to herringbone in the breakfast nook, separating the two areas with a border of running bond tiles that created definition without harsh boundaries. This approach allowed me to create zones within the open floor plan while maintaining material consistency throughout the space.
The design process for mixed patterns required careful planning and consultation with my contractor to ensure smooth transitions between different layouts. We created detailed drawings showing how each pattern would terminate and where transition borders would be placed, paying particular attention to maintaining consistent grout line spacing across pattern changes. The key was selecting patterns with compatible proportions and ensuring that transition areas felt intentional rather than arbitrary or awkward.
The installation of mixed patterns tested both my contractor’s skills and my patience, as each pattern change required stopping the installation process to carefully lay out the new pattern and ensure proper alignment with adjacent areas. The additional complexity meant higher labor costs and an extended timeline, but the finished result created a unique floor that perfectly reflected my vision for the space. I’ve received countless compliments on this custom approach, and the floor has become a conversation starter that adds character and personality to my home.
Large Format Tiles: Modern Minimalism
My exploration of large format stone tiles opened up entirely new possibilities for pattern creation that traditional, smaller tiles simply couldn’t achieve. Working with 24×48 inch limestone slabs, I discovered that even simple patterns take on architectural significance when executed with oversized materials. The reduced number of grout lines created clean, contemporary aesthetics that made my stone’s natural beauty the star rather than competing with busy pattern elements for visual attention.
The handling and installation of large format stone tiles presented unique challenges that required specialized equipment and techniques I hadn’t encountered with standard-sized tiles. My contractor needed heavy-duty suction cup lifters and additional manpower to position the massive slabs safely and precisely. The substrate preparation became even more critical, as any imperfections in the subfloor would telegraph through the large tiles more noticeably than with smaller formats. The investment in proper preparation paid dividends in achieving perfectly flat, professional results.
Living with large format stone patterns has been a study in appreciating subtlety and restraint in design, as the minimal grout lines allow the stone’s natural characteristics to dominate the visual experience. The contemporary aesthetic works beautifully with modern furnishings while providing enough visual weight and substance to anchor traditional elements when I want to mix styles. Maintenance has proven easier than anticipated, as fewer grout lines mean less cleaning and sealing requirements, though any damage to individual tiles becomes more noticeable and expensive to repair than with smaller format materials.
Which stone tile pattern works best for small spaces?
In my experience, diagonal patterns create the most dramatic space-enhancing effect in small rooms. The diagonal lines trick the eye into perceiving more square footage than exists. However, large format tiles with minimal grout lines also work well by reducing visual interruption. I avoid busy patterns like herringbone in very small spaces as they can feel overwhelming and make the room appear even smaller.
Do complex patterns significantly increase installation costs?
Yes, complex patterns like herringbone or basketweave typically increase labor costs by 25-40% in my experience. The precision required and additional cutting time justify the premium. However, the visual impact often makes this investment worthwhile. I always get detailed quotes upfront and factor installation complexity into my budget planning to avoid surprises during the project.

How do I choose patterns that won’t look dated in ten years?
I stick with classic patterns that have been popular for decades rather than trendy layouts. Running bond, herringbone, and basketweave have a timeless appeal that transcends design fads. The key is selecting patterns that complement your stone’s natural characteristics rather than fighting against them. Quality installation of classic patterns creates floors that age beautifully and maintain their sophisticated appearance over time.
Can I mix different stone types in pattern combinations?
I’ve successfully mixed different stones, but it requires careful planning to ensure compatible thickness, hardness, and expansion characteristics. Working with similar stone types in different colors or finishes is safer than mixing completely different materials. I always consult with my contractor and stone supplier about compatibility before committing to mixed-material patterns to avoid long-term performance issues.

What’s the maintenance difference between simple and complex patterns?
Complex patterns with more grout lines require additional cleaning and sealing attention, but the difference isn’t as dramatic as I initially expected. The key is establishing good maintenance routines regardless of pattern complexity. I find that busy patterns hide dirt and wear better than simple layouts, making maintenance less noticeable. The visual payoff of complex patterns typically outweighs the minimal additional maintenance requirements.
How do I visualize pattern options before committing to installation?
I create physical mockups using cardboard cutouts or actual tile samples whenever possible. Many stone suppliers will lend samples for home evaluation, and I take advantage of this service extensively. Digital design tools and apps can help, but nothing replaces seeing the actual materials in your lighting conditions. I also photograph different layout options to compare them objectively when making final decisions.
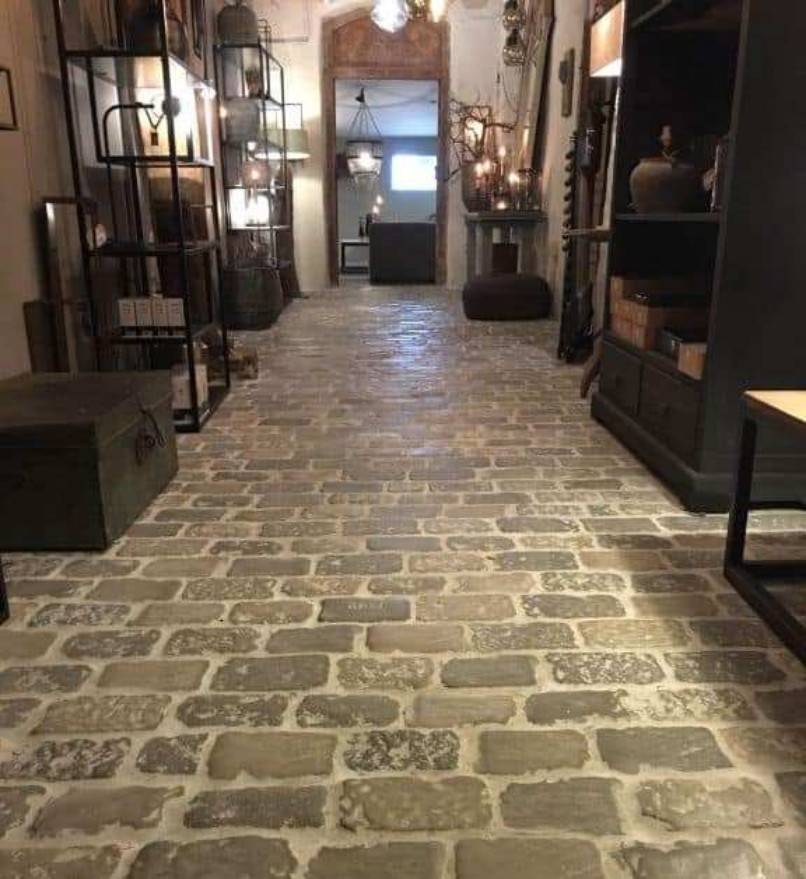
English reclaimed stone tile floor

Stone Flooring Ideas With Pros And Cons
Daltile peruvian home depot Natural stone flooring, Tile floor

What Is Natural Stone Flooring? Types, Pros & Cons, Cleaning
How to Create a Patterned Stone Floor
Related Posts: