Two years ago, I stared at the boring gray concrete floor in my basement workshop and decided to transform it into something spectacular. After researching various flooring options, acid staining caught my attention with its unique ability to create stunning, variegated colors that penetrate deep into concrete. What started as a weekend project turned into a three-month learning experience filled with trial, error, and ultimately triumph. I discovered that acid staining concrete is both an art and a science, requiring patience, proper preparation, and respect for the chemical processes involved. My journey taught me invaluable lessons about surface preparation, safety protocols, application techniques, and finishing methods that I wish I had known before starting.
Understanding the Acid Staining Process and Chemistry
The first thing I learned about acid staining is that it’s not paint or dye; it’s a chemical reaction that permanently alters the concrete surface. The acid solution contains metallic salts that react with the lime content in concrete, creating insoluble compounds that become part of the concrete itself. This chemical bond means the color won’t peel, chip, or fade like surface coatings might over time.
I discovered that concrete age and composition dramatically affect staining results. My ten-year-old basement floor contained enough lime for good color development, but newer concrete often lacks sufficient free lime for proper reaction. I learned to test small inconspicuous areas first, as different concrete mixes, aggregates, and curing methods produce varying results even within the same pour.
The unpredictable nature of acid staining initially frustrated me, but eventually became its greatest appeal. No two floors look identical because the concrete composition varies throughout each slab. I embraced this organic quality, understanding that acid staining creates unique patterns and color variations that can’t be replicated artificially. This randomness produces natural-looking results that complement both rustic and contemporary design styles.
Safety Preparations and Equipment I Needed
Safety became my top priority after researching the hazards of muriatic acid and metal chlorides used in staining solutions. I invested in proper protective equipment, including acid-resistant gloves, safety goggles,a respirator mask, and rubber boots. I also purchased a neutralizing agent, baking soda, to have on hand for spills or skin contact emergencies that could occur during the application process.
Ventilation planning consumed considerable time and effort in my basement workshop. I installed temporary exhaust fans and opened all possible windows to ensure adequate air circulation during the application and drying phases. Acid fumes can be dangerous in enclosed spaces, and proper ventilation prevents the accumulation of harmful vapors that could cause respiratory issues or other health problems.
I learned that having a water source nearby is crucial for both mixing solutions and emergency cleanup. I connected a garden hose to my utility sink and kept multiple buckets of clean water available throughout the project. Quick access to water proved essential for diluting spills, cleaning tools, and neutralizing acid residue during the cleaning phases of the process.

Surface Preparation Techniques That Actually Work
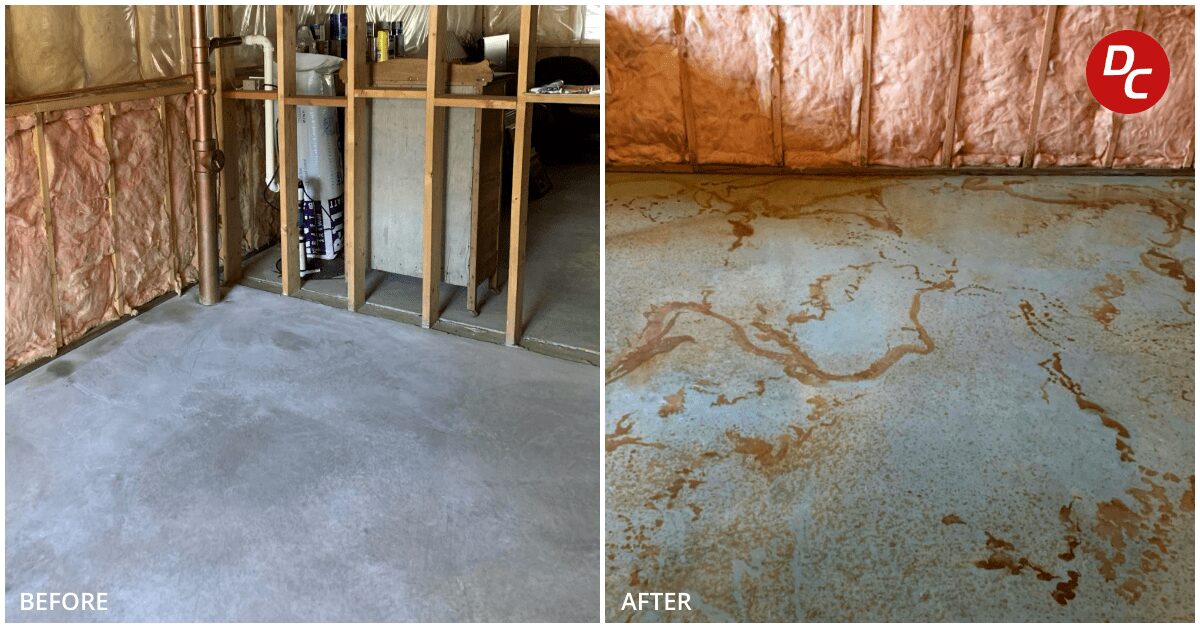
Concrete preparation proved more critical than I initially realized. I spent two full weekends grinding, etching, and cleaning my basement floor to remove all traces of paint, sealers, oils, and surface contaminants. Any residue prevents acid penetration and creates blotchy, uneven staining results that can’t be corrected once the stain is applied and has reacted with the concrete.
Mechanical grinding with a diamond cup wheel attachment removed old paint and surface glazing that had developed over the years. I rented a professional grinder for this step because hand sanding would have taken weeks. The grinding process exposed fresh concrete and created the slightly rough texture needed for optimal acid penetration and uniform color development throughout the entire surface area.
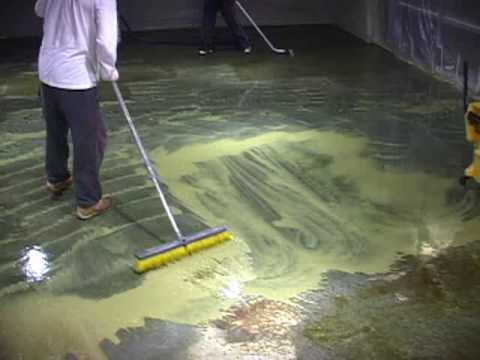
After grinding, I performed acid etching using muriatic acid solution to open the concrete pores further and remove any remaining alkaline residue. I scrubbed the entire floor with stiff brushes, then neutralized and rinsed it thoroughly multiple times. The final rinse water had to run completely clear before I considered the surface ready for staining. This preparation phase took longer than the actual staining, but was essential.
Application Methods and Techniques I Discovered
I experimented with several application methods before finding the techniques that worked best for my project. Spraying produced the most even coverage and natural-looking results, but I had to master the spray pattern and distance to avoid streaking or over-concentration in certain areas. I practiced on sample boards until I developed a consistent technique and understood how different spray angles affected the final appearance.
Working in manageable sections became crucial for maintaining wet edges and consistent color development. I divided my 400-square-foot floor into 6×6-foot sections, completing each area entirely before moving to the next. This approach prevented lap marks and allowed me to maintain the proper dwell time for chemical reaction while ensuring uniform color saturation across the entire surface area.
The dwell time and neutralization timing required careful attention and patience. I allowed the acid stain to react for exactly four hours, monitoring color development throughout the process. Some areas reacted faster than others, but I resisted the urge to neutralize early. After four hours, I thoroughly neutralized with ammonia solution, then rinsed multiple times until the runoff water tested neutral with pH strips.
Color Development and Artistic Enhancement
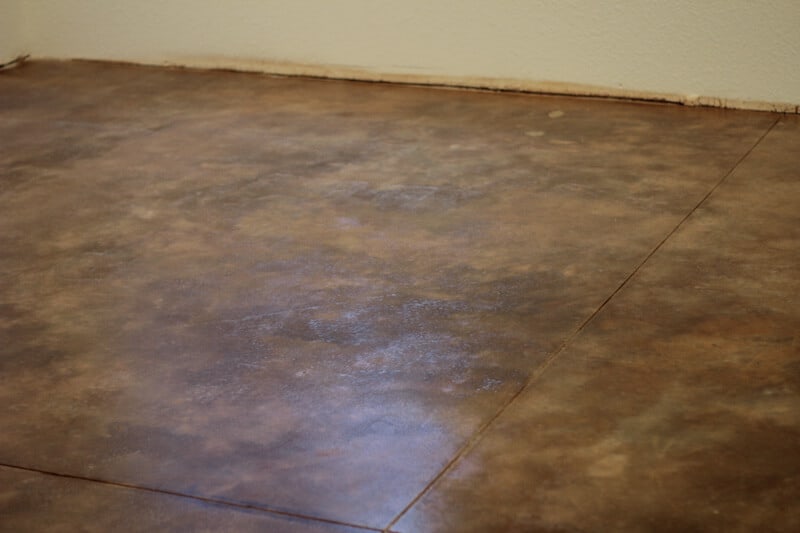
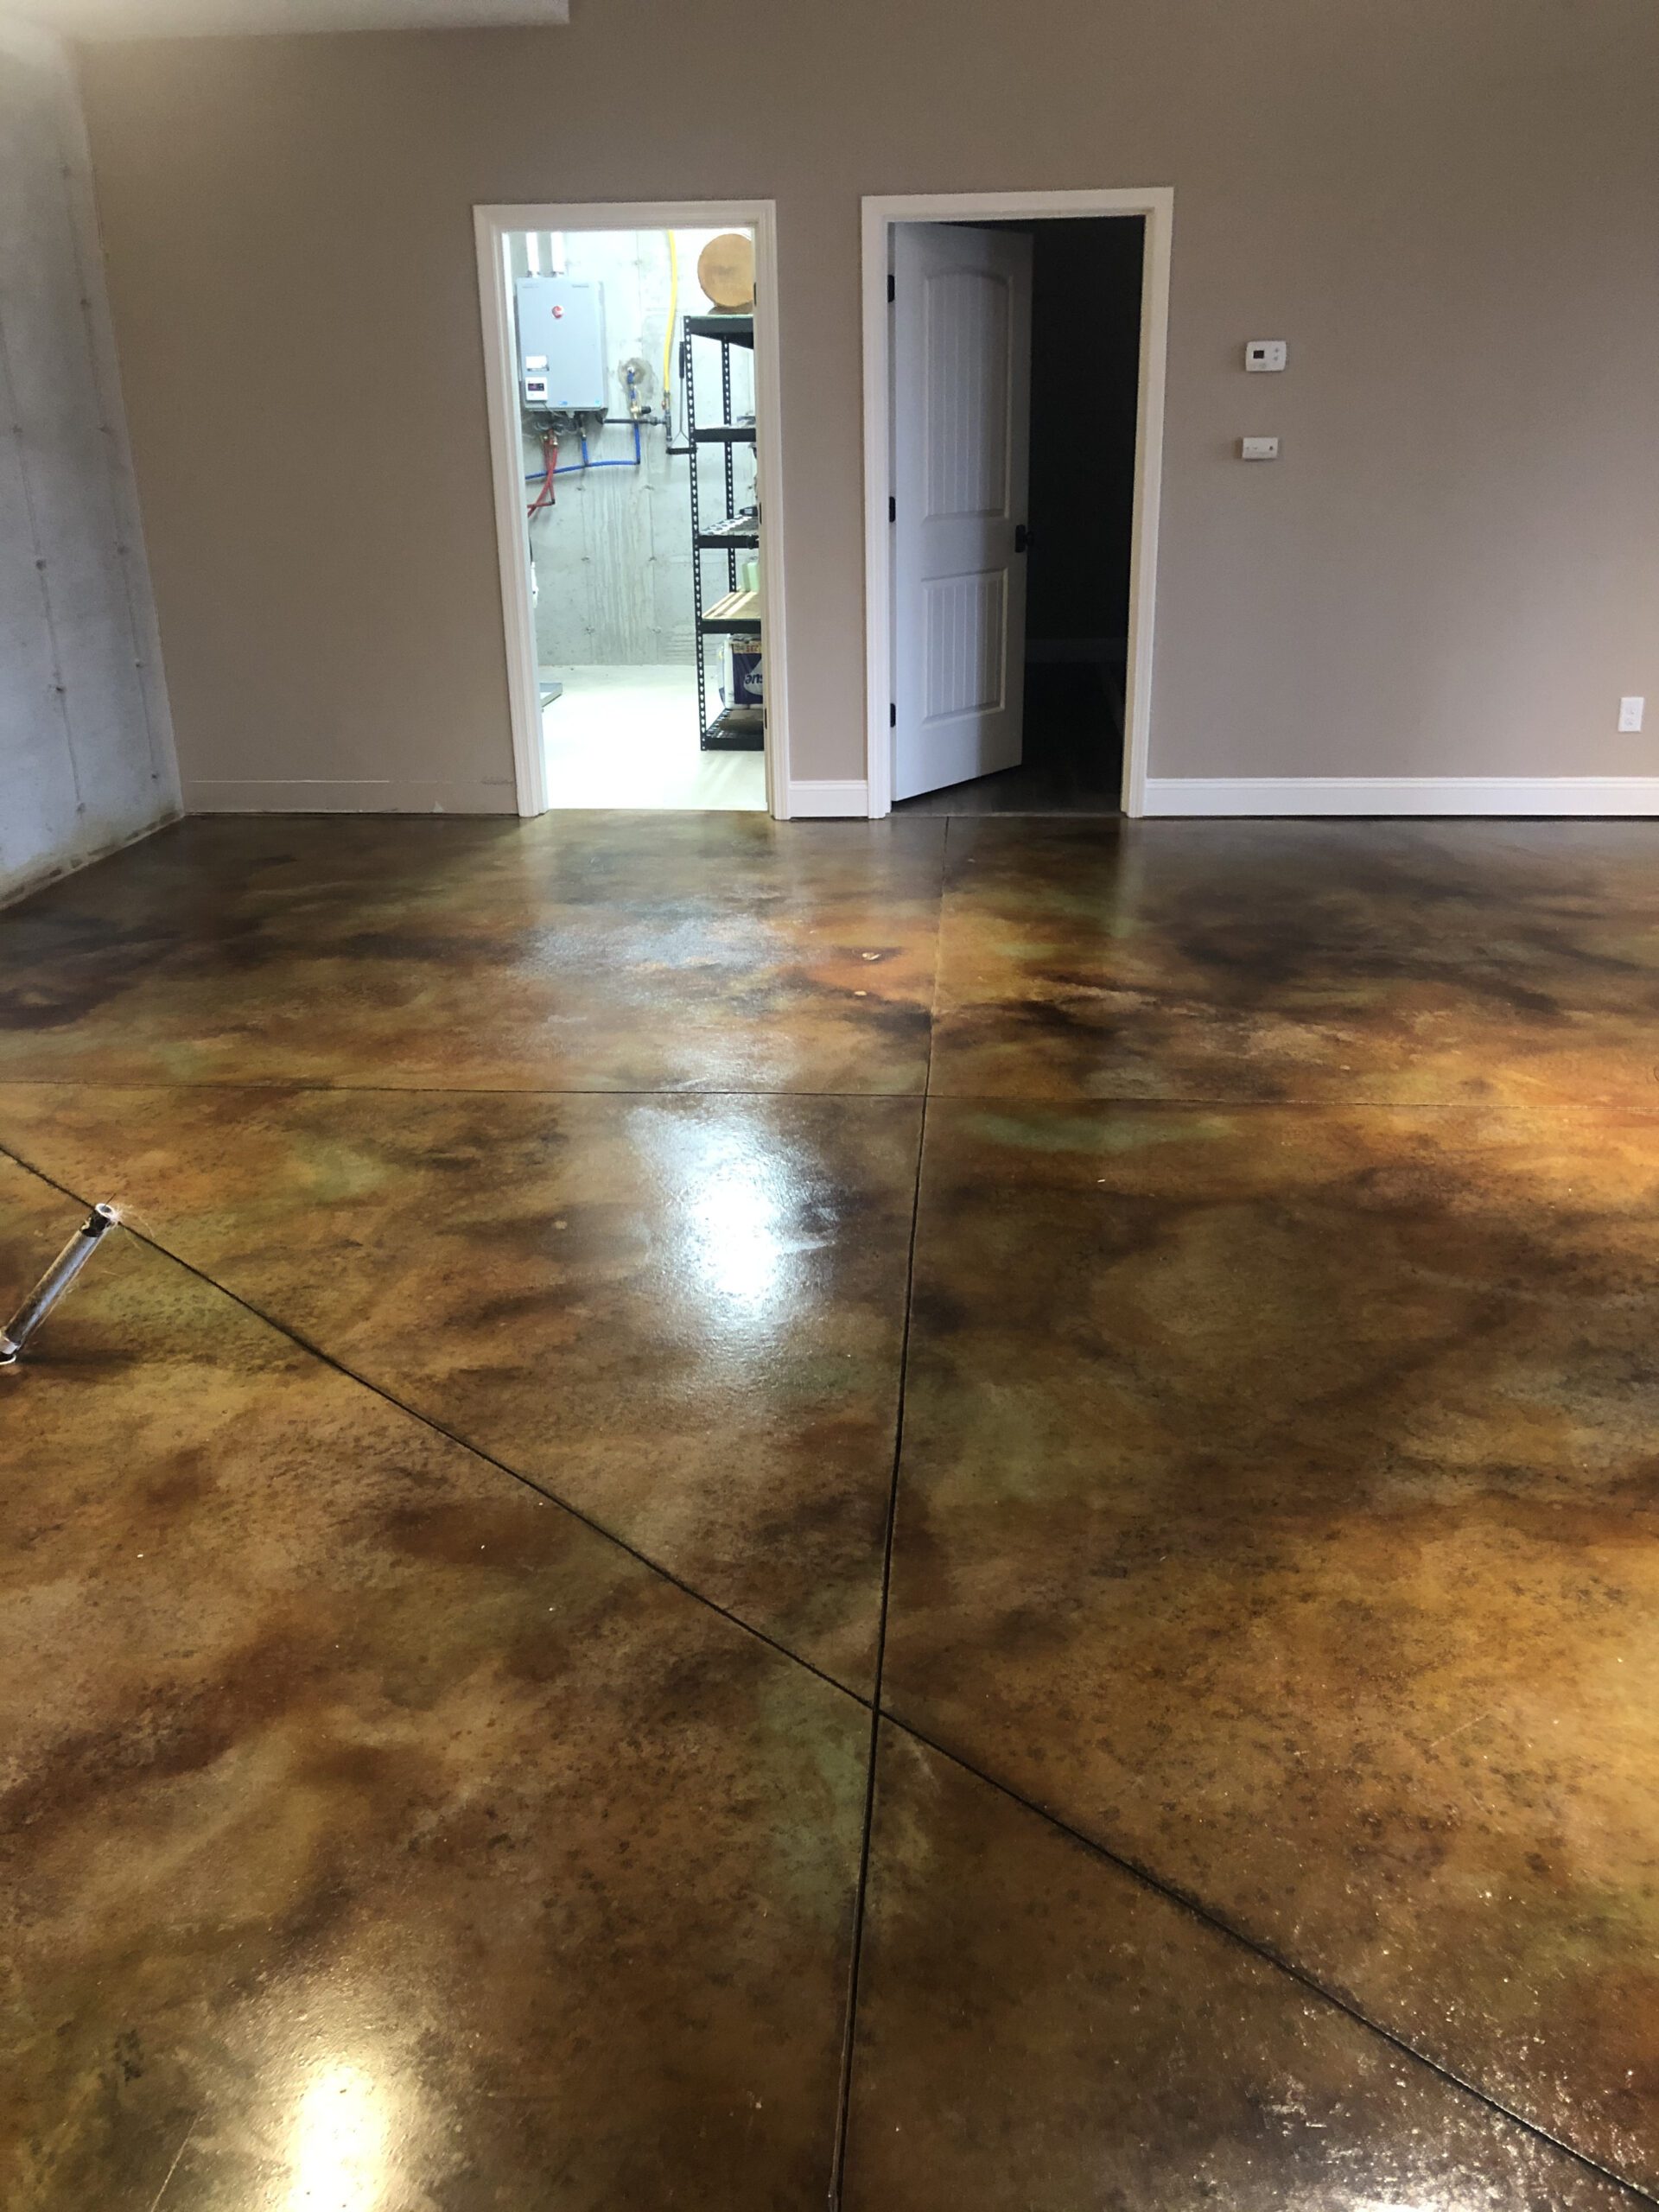
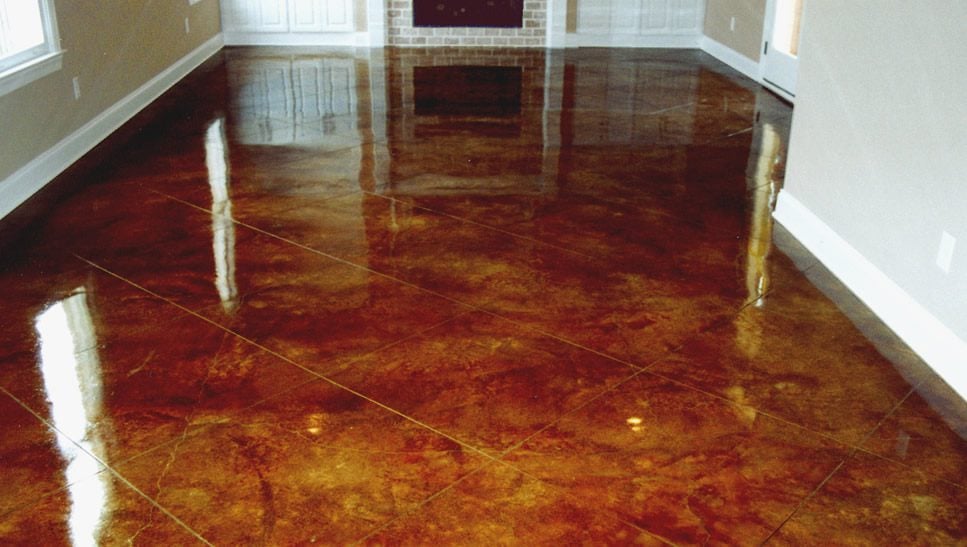
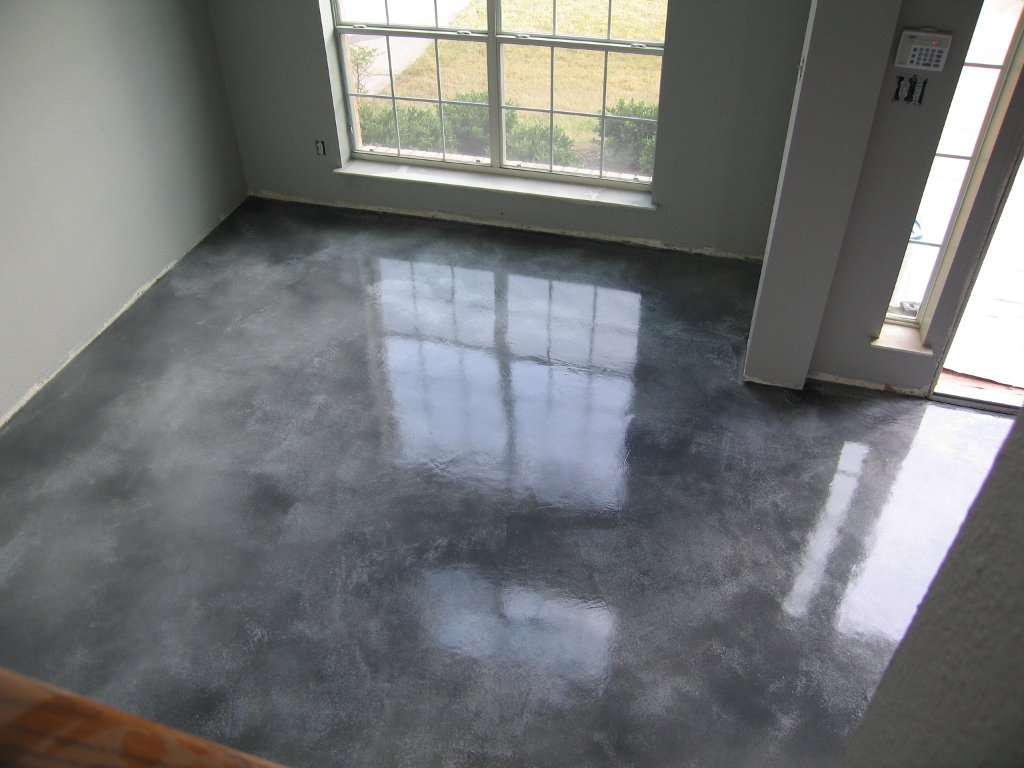
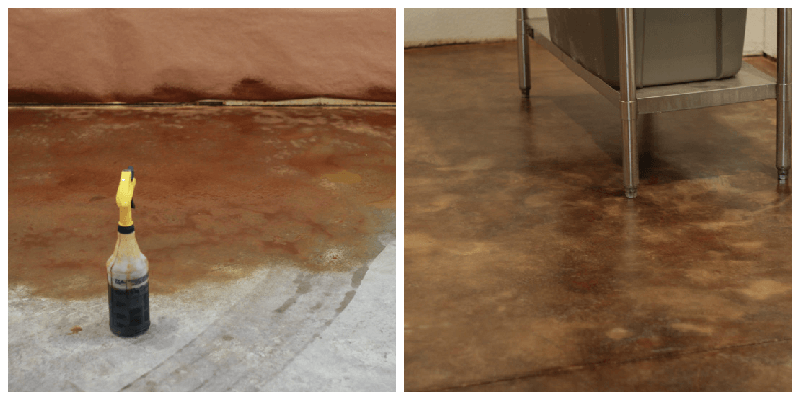
Color prediction proved nearly impossible despite manufacturer’s color charts and sample applications. My basement floor developed rich amber and terra cotta tones in some areas while remaining pale gold in others. I learned that concrete’s mineral content, porosity, and age create these natural variations that make each acid-stained floor unique and visually interesting rather than monotonously uniform.
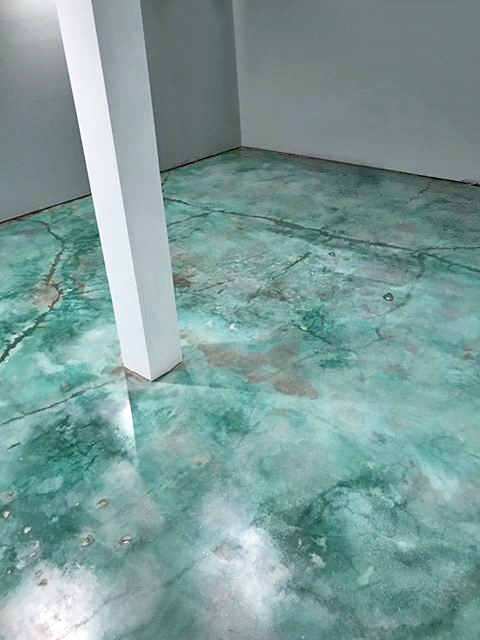
I enhanced the natural variegation by applying multiple stain colors in overlapping patterns. After the initial brown stain fully developed and was neutralized, I applied green stain to selected areas for contrast and depth. The layering technique created complex color interactions that resembled natural stone patterns and added sophisticated visual interest to the otherwise plain concrete surface.
Artistic techniques like masking, sponging, and selective application allowed me to create intentional patterns within the random staining effects. I used painter’s tape to create geometric borders and applied stain with sea sponges in some areas for textural variation. These controlled artistic elements balanced the organic randomness of the chemical staining process, creating a floor that looked both natural and intentionally designed.
Sealing and Long-Term Maintenance Strategies
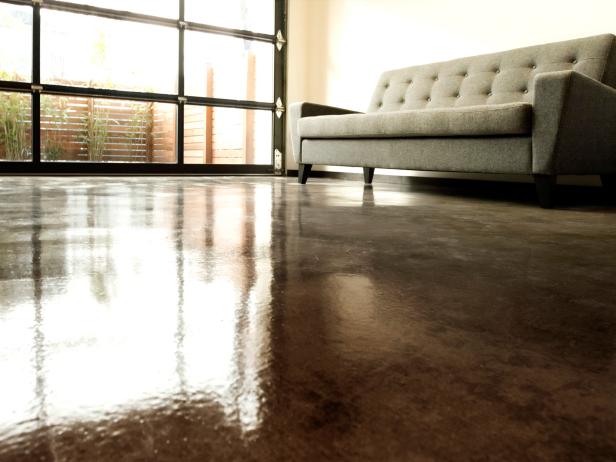
Choosing the right sealer became critical for protecting my investment and achieving the desired appearance. I selected a penetrating acrylic sealer that enhanced the stain colors without creating a high-gloss surface that would show every footprint and scratch. The sealer soaked into the concrete, protecting while maintaining the natural matte appearance I preferred for my workshop environment.
Application of the sealer required the same attention to detail as the staining process. I applied thin, even coats with a microfiber roller, maintaining wet edges to prevent lap marks or streaking. Two coats provided adequate protection, but I waited 24 hours between applications to ensure proper curing. The sealer transformed the appearance, deepening colors and adding a subtle sheen that made the floor look professionally finished.
Maintenance has proven surprisingly simple over the past two years. I sweep regularly and mop with pH-neutral cleaners designed for sealed concrete. I avoid acidic or alkaline cleaners that could damage the sealer or affect the stain. Annual reapplication of the sealer maintains protection and appearance. The floor has developed a beautiful patina with age, and minor wear patterns enhance its character rather than detracting from the overall appearance.

How long does the entire acid staining process take from start to finish?
The complete acid staining process typically takes 5-7 days when done properly, though actual working time is much less. Surface preparation consumes 2-3 days, including grinding, etching, and thorough cleaning with drying time between steps. The staining application takes one day, followed by 4-6 hours of reaction time before neutralization and rinsing. After neutralization, the floor needs 24-48 hours to dry completely before sealer application. Finally, the sealer application requires another day with a 24-hour cure time between coats. Weather and humidity significantly impact drying times throughout the process.
What safety precautions are essential for DIY acid staining projects?
Safety equipment is non-negotiable when working with acid stains containing muriatic acid and metallic salts. I use acid-resistant gloves, safety goggles, a respirator mask rated for acid vapors, and rubber boots as minimum protection. Adequate ventilation is crucial. I set up exhaust fans and open all windows to prevent vapor accumulation. I keep neutralizing agents like baking soda readily available for spills and have a water source nearby for emergency cleanup. Never work alone, and always have someone aware of your project timeline in case of emergencies during the chemical application process.

Can acid staining be applied over existing painted or sealed concrete floors?
Acid staining cannot penetrate through paint, sealers, or other surface coatings, making complete removal essential for success. I spent considerable time grinding away old paint and sealers from my basement floor before staining. Any remaining residue prevents acid penetration and creates blotchy, uneven results that can’t be corrected. Even clear sealers must be removed completely. I recommend professional grinding equipment for this step because hand removal is extremely time-consuming and often incomplete. Testing small areas helps identify coating removal effectiveness before proceeding with the entire floor preparation process.
How do I achieve consistent color results across the entire concrete surface?
Consistent results require understanding that concrete composition varies throughout each pour, creating natural color variations that are part of acid staining’s appeal. However, I improved consistency through thorough surface preparation, uniform application techniques, and proper timing. I used spray application for even coverage, worked in manageable sections to maintain wet edges, and strictly followed the manufacturer’s dwell time recommendations. Testing stain reactions on sample areas or inconspicuous spots helps predict color development. Embracing natural variation rather than fighting it produces more satisfying results than attempting perfect uniformity.
What type of sealer works best for acid stained concrete floors?
Sealer selection depends on desired appearance and intended use, but I prefer penetrating acrylic sealers that enhance color while protecting without high gloss. Topical sealers create surface films that can peel or scratch, while penetrating sealers soak into concrete for longer-lasting protection. For high-traffic areas, polyurethane sealers offer superior durability but change the floor’s appearance more dramatically. I avoid wax-based sealers that require frequent reapplication and can trap dirt. Always test sealers on sample areas first to ensure compatibility with your specific stain and desired appearance before applying to the entire surface.
How much does DIY acid staining cost compared to professional installation?
DIY acid staining costs approximately $2-4 per square foot, including materials, tools, and equipment rental, compared to $8-15 per square foot for professional installation. My 400-square-foot basement project cost roughly $800 in materials, including stain, sealer, safety equipment, and tool rental. Professional installation would have cost $3200-6000 for the same area. However, factor in your time investment, learning curve, and potential mistakes that could require starting over. The cost savings are significant, but success requires patience, attention to detail, and a willingness to invest considerable time in proper preparation and application techniques.
How to Apply an Acid-Stain Look to Concrete Flooring
Stained Concrete Floors: Cost, How to Stain DIY, Maintenance Tips
Pin on Home Ideas/Projects

How to acid stain a floor – How to stain concrete floors
How to Acid Stain Concrete Floors u2022 The Prairie Homestead
Related Posts: