Walking into my garage five years ago, I saw nothing but cracked, oil-stained concrete that had witnessed decades of neglect. Today, visitors stop in their tracks, mesmerized by the swirling galaxy of blues, purples, and silver that flows beneath their feet like liquid starlight. My journey into artistic epoxy flooring began as a simple garage renovation. Still, it evolved into a passion for creating functional art that transforms spaces in ways I never imagined possible. What started as a weekend project became an obsession with pushing the boundaries of what floors could become.
The Spark That Ignited My Creative Fire
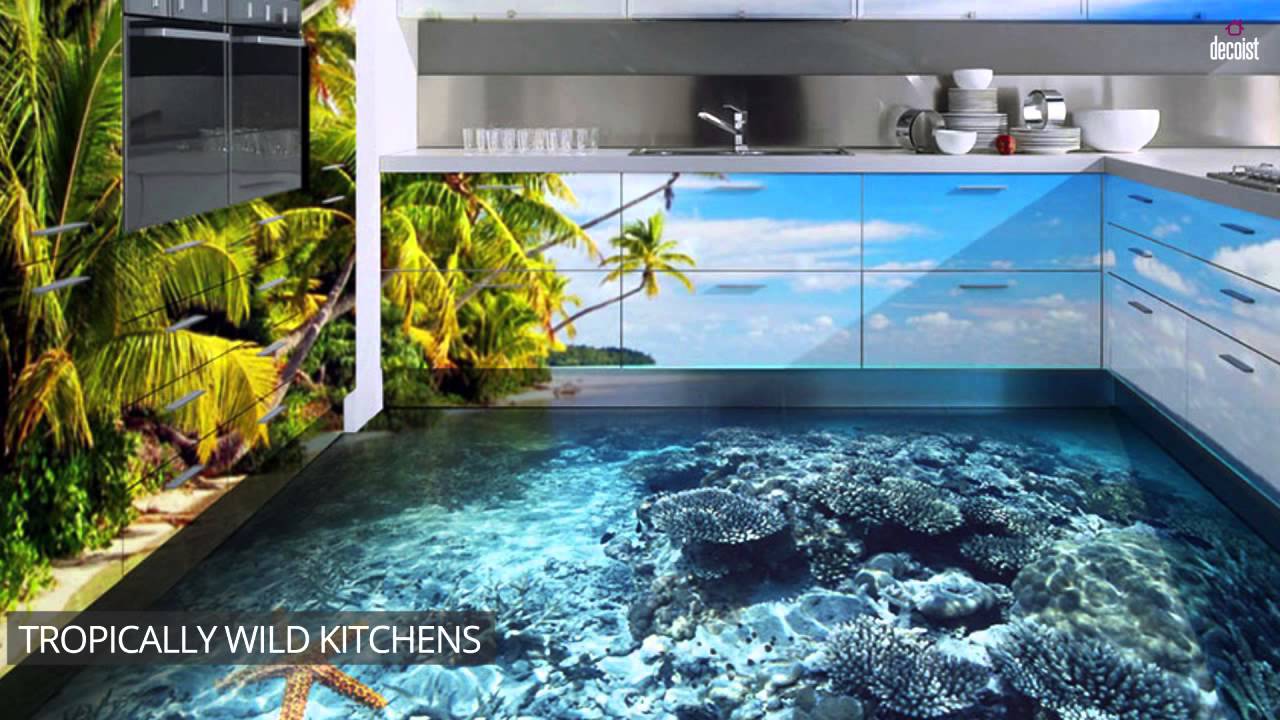
I discovered artistic epoxy floors completely by accident while scrolling through social media during lunch break. A video showed someone pouring metallic pigments into wet epoxy, creating patterns that resembled ocean waves frozen in time. The transformation was so dramatic that I watched it dozens of times, studying how colors blended and moved organically across the surface before curing into permanent beauty.
Research has revealed the incredible versatility of modern epoxy systems, which are designed specifically for artistic applications. Unlike basic garage floor coatings, these specialized products allowed unlimited creativity through pigments, metallics, glitters, and even three-dimensional effects. I spent hours watching tutorials, learning about color theory, and understanding how different additives created unique visual effects that could transform any space.
The more I learned, the more excited I became about the possibilities. Artistic epoxy could mimic everything from marble and granite to abstract paintings and cosmic scenes. Unlike traditional flooring that simply covered surfaces, this medium offered the chance to create something truly unique that reflected my personality while serving practical purposes. I knew I had found my next major creative challenge.
Planning and Design Process That Tested My Vision
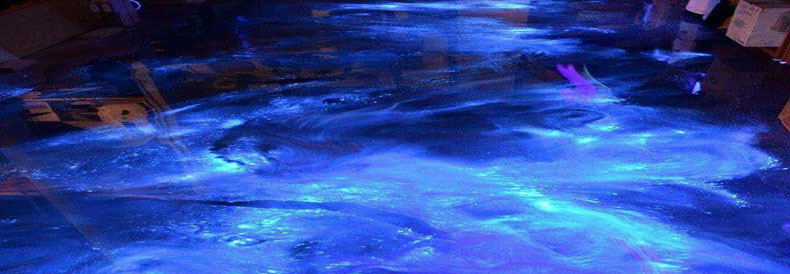
Choosing a design proved more challenging than I anticipated. I created countless sketches, experimenting with color combinations and pattern ideas that would work in my garage’s lighting conditions. My final concept drew inspiration from deep space photography, featuring swirling galaxies with metallic accents that would catch light from different angles throughout the day.
Color selection required careful consideration of how pigments would interact during the blending process. I purchased sample kits and practiced on small test pieces, learning how metallics behaved differently from solid colors and how timing affected the final appearance. Each test revealed new possibilities while teaching me about the importance of working quickly once the chemical reactions began.
I mapped out my garage floor into sections, planning the pour sequence to achieve seamless transitions between color zones. This preparation included calculating exact quantities of each component, organizing tools for efficient workflow, and establishing backup plans for potential problems. The planning phase took three weeks, but this foundation proved essential for executing my vision successfully.
Surface Preparation That Nearly Defeated Me
Preparing my garage floor was far more intensive than any tutorial had suggested. Years of oil stains, paint drips, and concrete deterioration required aggressive treatment before epoxy could properly bond. I rented a concrete grinder and spent an entire weekend removing the top layer, creating dust clouds that invaded every corner of my garage despite plastic barriers.
Crack repair became an unexpected art form itself. Using concrete crack filler and fiberglass mesh, I sealed dozens of hairline fractures that could have compromised the final appearance. Each repair required perfect smoothness to prevent visible lines in the finished floor. This tedious process tested my patience but proved crucial for achieving the flawless surface I envisioned.
The final cleaning phase involved multiple acid washes and thorough rinsing to remove all residue and contaminants. I tested the surface porosity by dropping water to ensure even absorption across the entire area. Any remaining oils or chemicals could prevent proper adhesion, potentially causing expensive failures months later. This preparation consumed two weeks but created the foundation necessary for professional results.
The Magical Pour Day That Changed Everything
Application day arrived with perfect weather conditions and carefully coordinated timing. I began by mixing the base coat, adding my primary blue pigment while maintaining constant stirring to prevent hot spots. The chemical reaction started immediately, giving me roughly 30 minutes to complete each section before the epoxy became too thick to manipulate effectively.
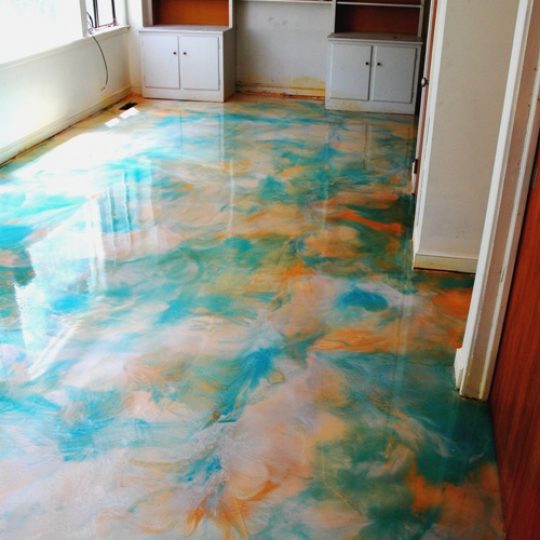
Pouring the metallic accents required artistic intuition I didn’t know I possessed. Using squeeze bottles and brushes, I added silver and purple metallics in organic patterns, then used heat guns and air blowers to encourage movement and blending. Watching colors flow and merge in real-time was mesmerizing, like conducting an orchestra of liquid art across my floor.
The final decorative layer incorporated glass beads and holographic flakes that would create depth and light reflection once cured. I scattered these elements strategically, ensuring even distribution while the epoxy remained tacky enough for adhesion. This delicate timing required complete focus, as corrections became impossible once the surface began setting up.

Curing Process and Unexpected Revelations
The 48-hour curing period tested my patience like nothing else. I checked the floor every few hours, watching the transformation from liquid art to solid surface. Temperature and humidity fluctuations caused minor variations in curing speed, creating subtle differences in pattern development that enhanced the organic appearance I’d hoped to achieve.
Day three revealed the true magic as I applied the clear topcoat that would protect my artwork while enhancing its depth and clarity. This final layer brought colors to life with incredible vibrancy, making the metallic elements shimmer and dance under different lighting conditions. The three-dimensional effect exceeded my wildest expectations, creating an illusion of infinite depth.
Walking on my completed floor for the first time was emotional. The surface felt perfectly smooth yet provided excellent traction, while the visual impact was simply stunning. Light from my garage door opening created constantly changing patterns as shadows moved across the metallic elements. I had successfully transformed utilitarian concrete into functional art that improved every moment spent in the space.

Living With My Masterpiece and Lessons Learned
Six months later, my epoxy floor continues to surprise me with new details I discover in different lighting conditions. Morning sunlight reveals subtle color variations invisible under artificial light, while evening illumination emphasizes the metallic elements’ sparkle and depth. The floor has become a conversation starter that guests photograph and share on social media platforms.
Maintenance has been remarkably simple compared to my expectations. Weekly mopping with pH-neutral cleaners keeps the surface looking pristine, while the seamless installation prevents dirt accumulation in cracks or seams. Hot tire marks from my motorcycle wipe away easily, and dropped tools cause no visible damage to the durable surface coating.
If I were starting over, I would only change my initial color selection to include more contrasting elements for greater visual impact. The technical execution exceeded my expectations, proving that artistic epoxy floors offer incredible creative potential for anyone willing to invest time in proper preparation and technique. This project opened my eyes to flooring as an artistic medium rather than a simple functional covering.
How long does the entire artistic epoxy floor process take from start to finish?
My complete project required six weeks from initial planning to final curing. Surface preparation consumed two weeks, including grinding, crack repair, and thorough cleaning. Design planning and material ordering took another week. The actual application required two days for base coat and artistic layers, followed by 48 hours curing before applying protective topcoats. Final curing for full durability took another week. Weather conditions significantly impact timing, as humidity and temperature affect curing rates and working time for artistic manipulation.
What’s the realistic cost for a DIY artistic epoxy floor project?
My 400-square-foot garage floor cost approximately $1,200 in materials, including specialized artistic epoxy, metallic pigments, decorative elements, and all preparation supplies. Equipment rental for grinding and cleaning added $300. Professional installation quotes ranged from $8-15 per square foot, making DIY significantly more affordable. However, factor in substantial time investment and learning curve risks. Mistakes can be expensive to correct, potentially requiring complete removal and restart. Quality materials are essential for durability and appearance.

Can artistic epoxy floors be applied over existing flooring materials?
Epoxy requires excellent adhesion to perform properly, so most existing flooring must be removed completely. I applied mine directly to prepared concrete, but vinyl, tile, and other materials create adhesion problems that lead to failures. Hardwood might work with extensive preparation, but concrete provides the ideal substrate. Any existing coatings, sealers, or contaminants prevent proper bonding. Surface preparation is critical regardless of substrate, often requiring professional assessment to determine feasibility and preparation requirements.
How durable are artistic epoxy floors under heavy-use conditions?
My floor has withstood two years of garage use, including vehicle traffic, dropped tools, chemical spills, and temperature extremes without visible damage. Quality artistic epoxy systems offer excellent durability when properly applied over correctly prepared surfaces. The clear protective topcoat prevents wear to decorative layers underneath. However, sharp impacts can chip edges, and dragging heavy objects may cause scratches. UV exposure can cause slight color fading over time, making indoor applications ideal for preserving artistic elements long-term.

What safety precautions are necessary during artistic epoxy floor installation?
Ventilation is critical throughout the entire process. I used industrial fans and kept garage doors open to prevent fume accumulation that can cause respiratory problems or dizziness. Skin protection requires nitrile gloves and long sleeves, as uncured epoxy causes severe chemical burns. Eye protection prevents splashes during mixing and application. The workspace must be completely clear of ignition sources, as epoxy vapors are flammable. I kept fire extinguishers nearby and avoided all electrical tools during the application phases.
Can you create custom designs, or are you limited to certain patterns?
Artistic epoxy offers virtually unlimited creative possibilities, limited only by imagination and skill level. My galaxy design was completely custom, but techniques exist for marble effects, geometric patterns, logos, murals, and abstract art. Stencils enable precise shapes and lettering, while freehand techniques create organic flowing patterns. Multiple pour techniques, various pigment types, and decorative additives expand options exponentially. Practice on sample boards helps develop skills before attempting complex designs on actual floors. Professional artists can create incredibly detailed custom artwork using advanced techniques.

Epoxy Flooring Blogs Get Creative With Epoxy Floor Coatings
Related Posts: