It can sit in there for many years when popped off return to the normal shape of its without wear or harm. You might be wanting to know just how a wood based merchandise could be eco-friendly and sustainable. Another one of the main advantages of cork flooring is its amazing durability.
Images about Cork Flooring How To Install
Cork Flooring How To Install

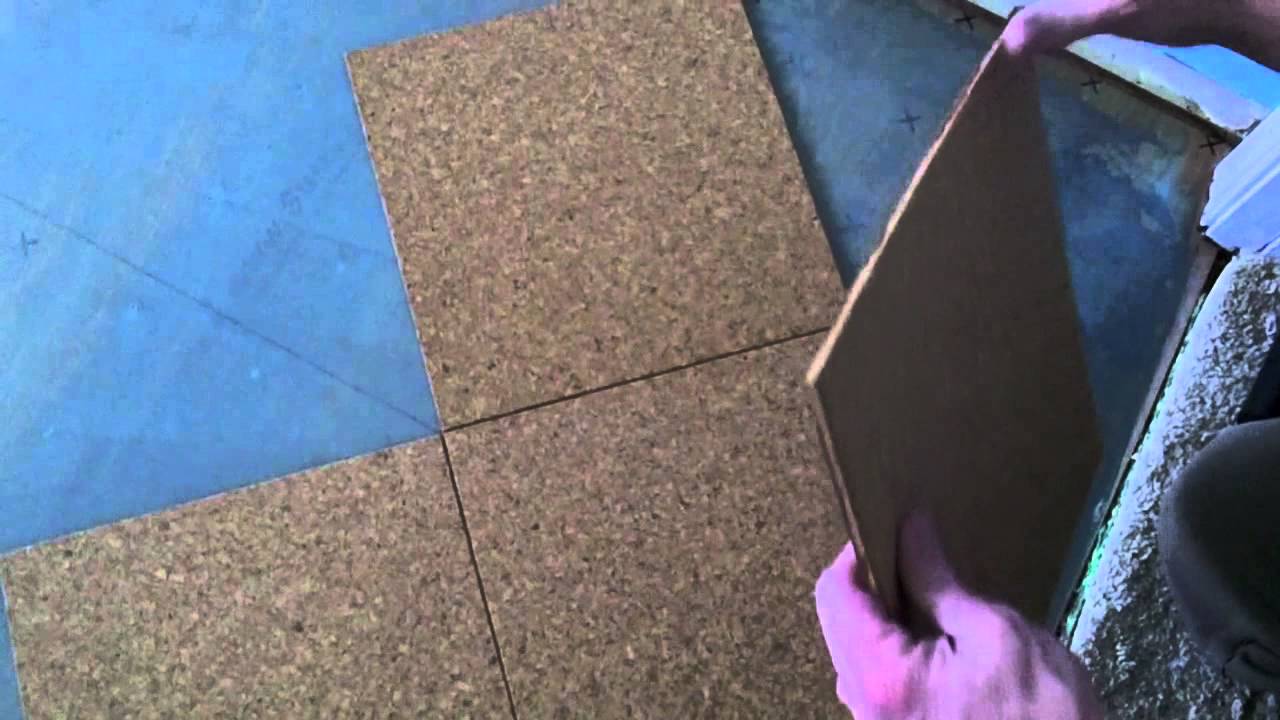
Just because cork is resist to moisture and water you will still want to clean up all spills as well as standing water to stop it from getting underneath the tiles. This particular baked mold is then used for flooring. It is able to also be a low cost project if you use a floating cork floor program and put in it yourself. For most people among the greatest advantages of cork flooring is that it's earth helpful product.
How to Install a Cork Floor – This Old House
/cdn.vox-cdn.com/uploads/chorus_asset/file/22873091/H1006HANDBOOK01.jpg)
This removal procedure actually leaves the cork oak tree unharmed as well as able to re-grow its bark for later harvests. The full creation process is ecologically renewable conserving the environmental pollutants of oxygen from the trees inside the functioning. Actually, majority of the countries which produce cork have strict laws protecting these trees and the harvesting procedure.
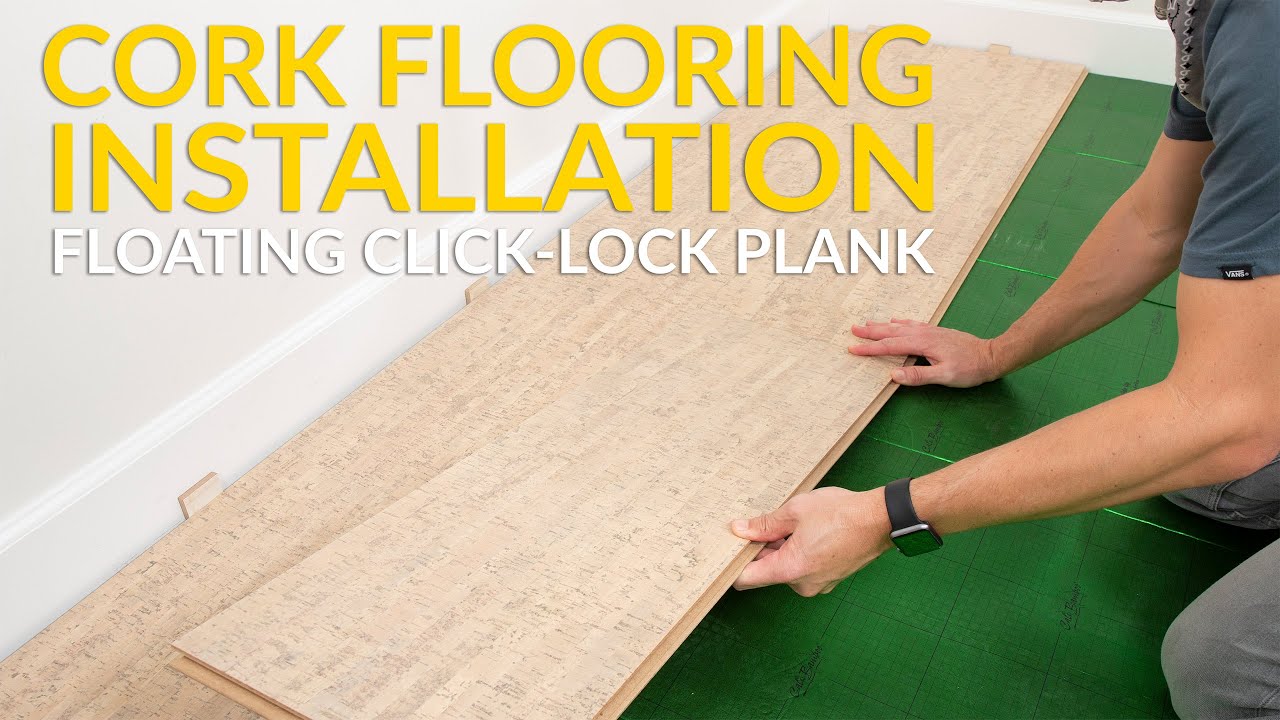
Cali Cork Flooring Floated Click-lock Installation
How to Install a Cork Floor – This Old House
/cdn.vox-cdn.com/uploads/chorus_asset/file/19495909/h1006handbook08.jpg)
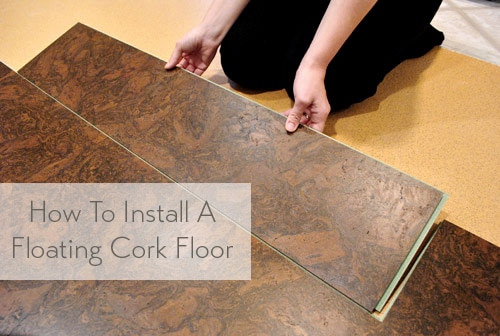
How To Install A Floating Cork Floor Young House Love
How to Install Cork Tile Flooring (DIY) Family Handyman

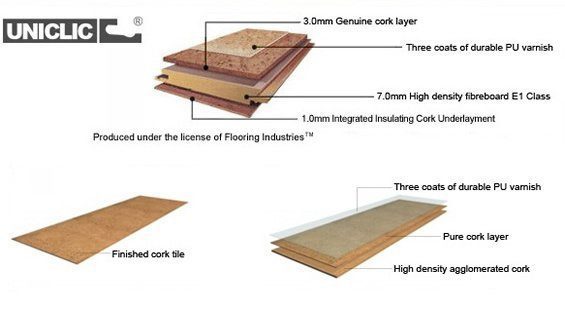
Cork Flooring Tiles Or Cork Floating Floor – ICork Floor
Cork Floor Install – How to install a cork glue down floor.
Cork Works: Installing Cork Flooring – Mother Earth Living

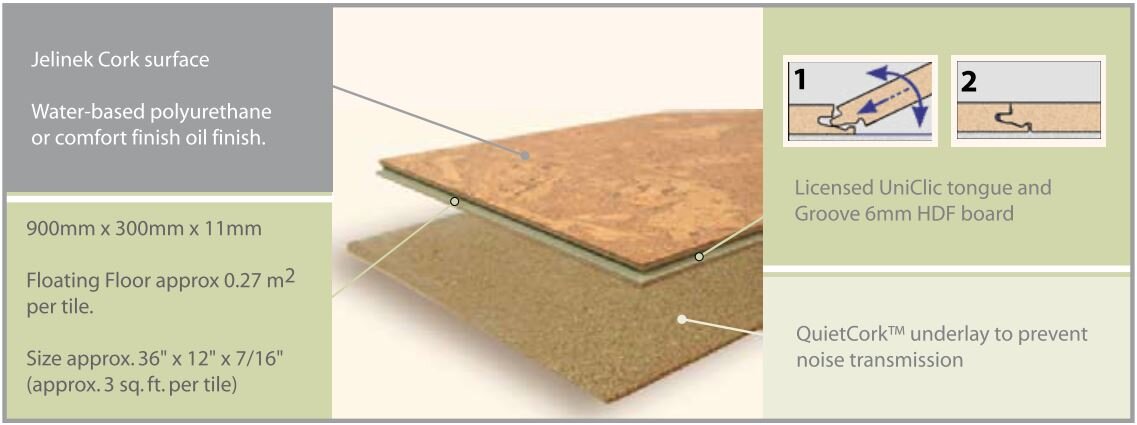
Cork Floating Floors u2014 Jelinek Cork Group®
Cork Flooring 101: Cost, Types, u0026 Installation – This Old House
/cdn.vox-cdn.com/uploads/chorus_asset/file/23088021/0421_NB_All_About_Cork_Floors_Cork_flooring_iStock_950010876.jpg)
Cork Flooring: What Are the Pros u0026 Cons?

How To Install A Floating Cork Floor Young House Love
How to Install Cork Flooring – (Tips and Guidelines For Your DIY

Related Posts:
- Cork Flooring Colors
- Cork Flooring Dining Room
- Light Cork Flooring
- Engineered Cork Flooring
- Cork Flooring In Kitchen
- Cork Flooring Modern
- Cork Flooring White
- Herringbone Cork Flooring
- Outdoor Cork Flooring
- Cork Flooring Bathroom
Introduction to Cork Flooring
Cork flooring is a unique and stylish flooring solution that has become increasingly popular among homeowners. Cork is an incredibly durable, sustainable, and ecologically friendly material that is perfect for any home. It is not only attractive but it is also easy to maintain and install. Cork flooring is warm and comfortable underfoot, making it ideal for any room in your home. In this article, we will discuss how to install cork flooring in order to get the most out of this eco-friendly and stylish alternative to traditional flooring.
Prepare the Subfloor
The first step in installing cork flooring is to prepare the subfloor. The subfloor should be clean, dry, level, and free of any debris or contaminants. It is important to make sure that the subfloor is level and flat in order to ensure the best possible installation. If the subfloor is not level, it may cause the cork tiles to warp or become uneven over time. If there are any areas of the subfloor that are uneven, they should be filled in with a self-leveling compound prior to installation.
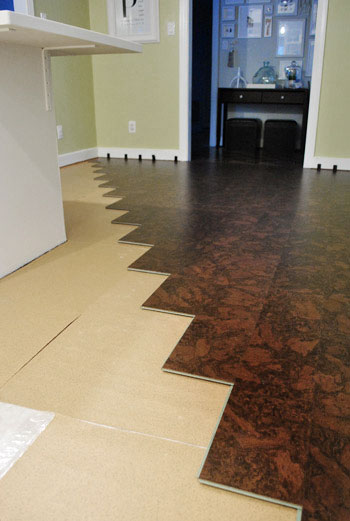
Lay Out the Cork Tiles
Once the subfloor has been properly prepared, it is time to lay out the cork tiles in order to ensure a proper fit before installation. The tiles should be laid out in a staggered pattern so that no two tiles are directly adjacent to each other. This will help prevent warping and buckling over time due to expansion and contraction of the cork material. It is also important to make sure that all tiles are evenly spaced with no gaps between them in order to ensure a uniform look once the flooring is installed.
Start Installing
Once the cork tiles have been properly laid out, it is time to start installing them on the subfloor. Begin by applying a thin layer of adhesive to the back of each tile using a notched trowel. Once the adhesive has been applied, firmly press each tile into place on the subfloor using a rubber mallet or hand roller. It is important to make sure that each tile is firmly pressed down into the adhesive in order to ensure a secure bond between the tile and subfloor.
Cutting Tiles
In some cases, it may be necessary to cut some of the tiles in order to fit them around obstacles such as doorframes or baseboards. This can easily be done using a utility knife or jigsaw. When cutting cork tiles, it is important to make sure that all cuts are straight and precise in order for them to fit properly when installed on the subfloor. It may also be necessary to use a backer board or other type of underlayment in order for certain cuts to fit properly when installed.
Finishing Touches
Once all of the tiles have been installed on the subfloor, it is important to add any finishing touches such as grout or sealant. Grout should be applied between each tile in order to fill in any gaps and ensure a uniform look. Sealing the cork tiles will help protect them from stains and moisture over time while also adding an extra layer of protection against water damage. Both grout and sealant should be applied according to manufacturer’s instructions in order for them to be effective.
FAQs About Installing Cork Flooring
Q: What type of adhesive should I use when installing cork flooring?
A: It is important to use an adhesive that has been specifically designed for use with cork flooring in order for it to adhere properly and provide long-lasting results. A water-based adhesive should be used if possible as this will allow for easier cleanup during installation and better overall results when finished.
Q: How do I cut cork tiles if I need them for specific areas?
A: Cutting cork tiles can easily be done using a utility knife or jigsaw depending on your needs. When cutting cork tiles, it is important to make sure that all cuts are straight and precise in order for them to fit properly when installed on the subfloor. You may also need to use a backer board or other type of underlayment in order for certain cuts to