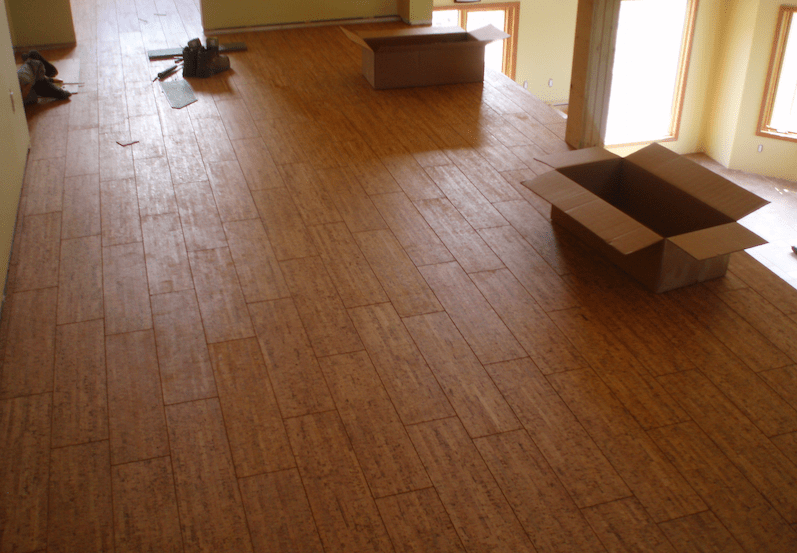
Are you considering a new flooring option for your home? Look no further than DIY cork flooring installation. Not only is cork flooring eco-friendly and visually appealing, but it also offers a range of benefits that make it a top choice for many homeowners. Here are the advantages of installing cork flooring yourself and why you should seriously consider it for your next home improvement project.
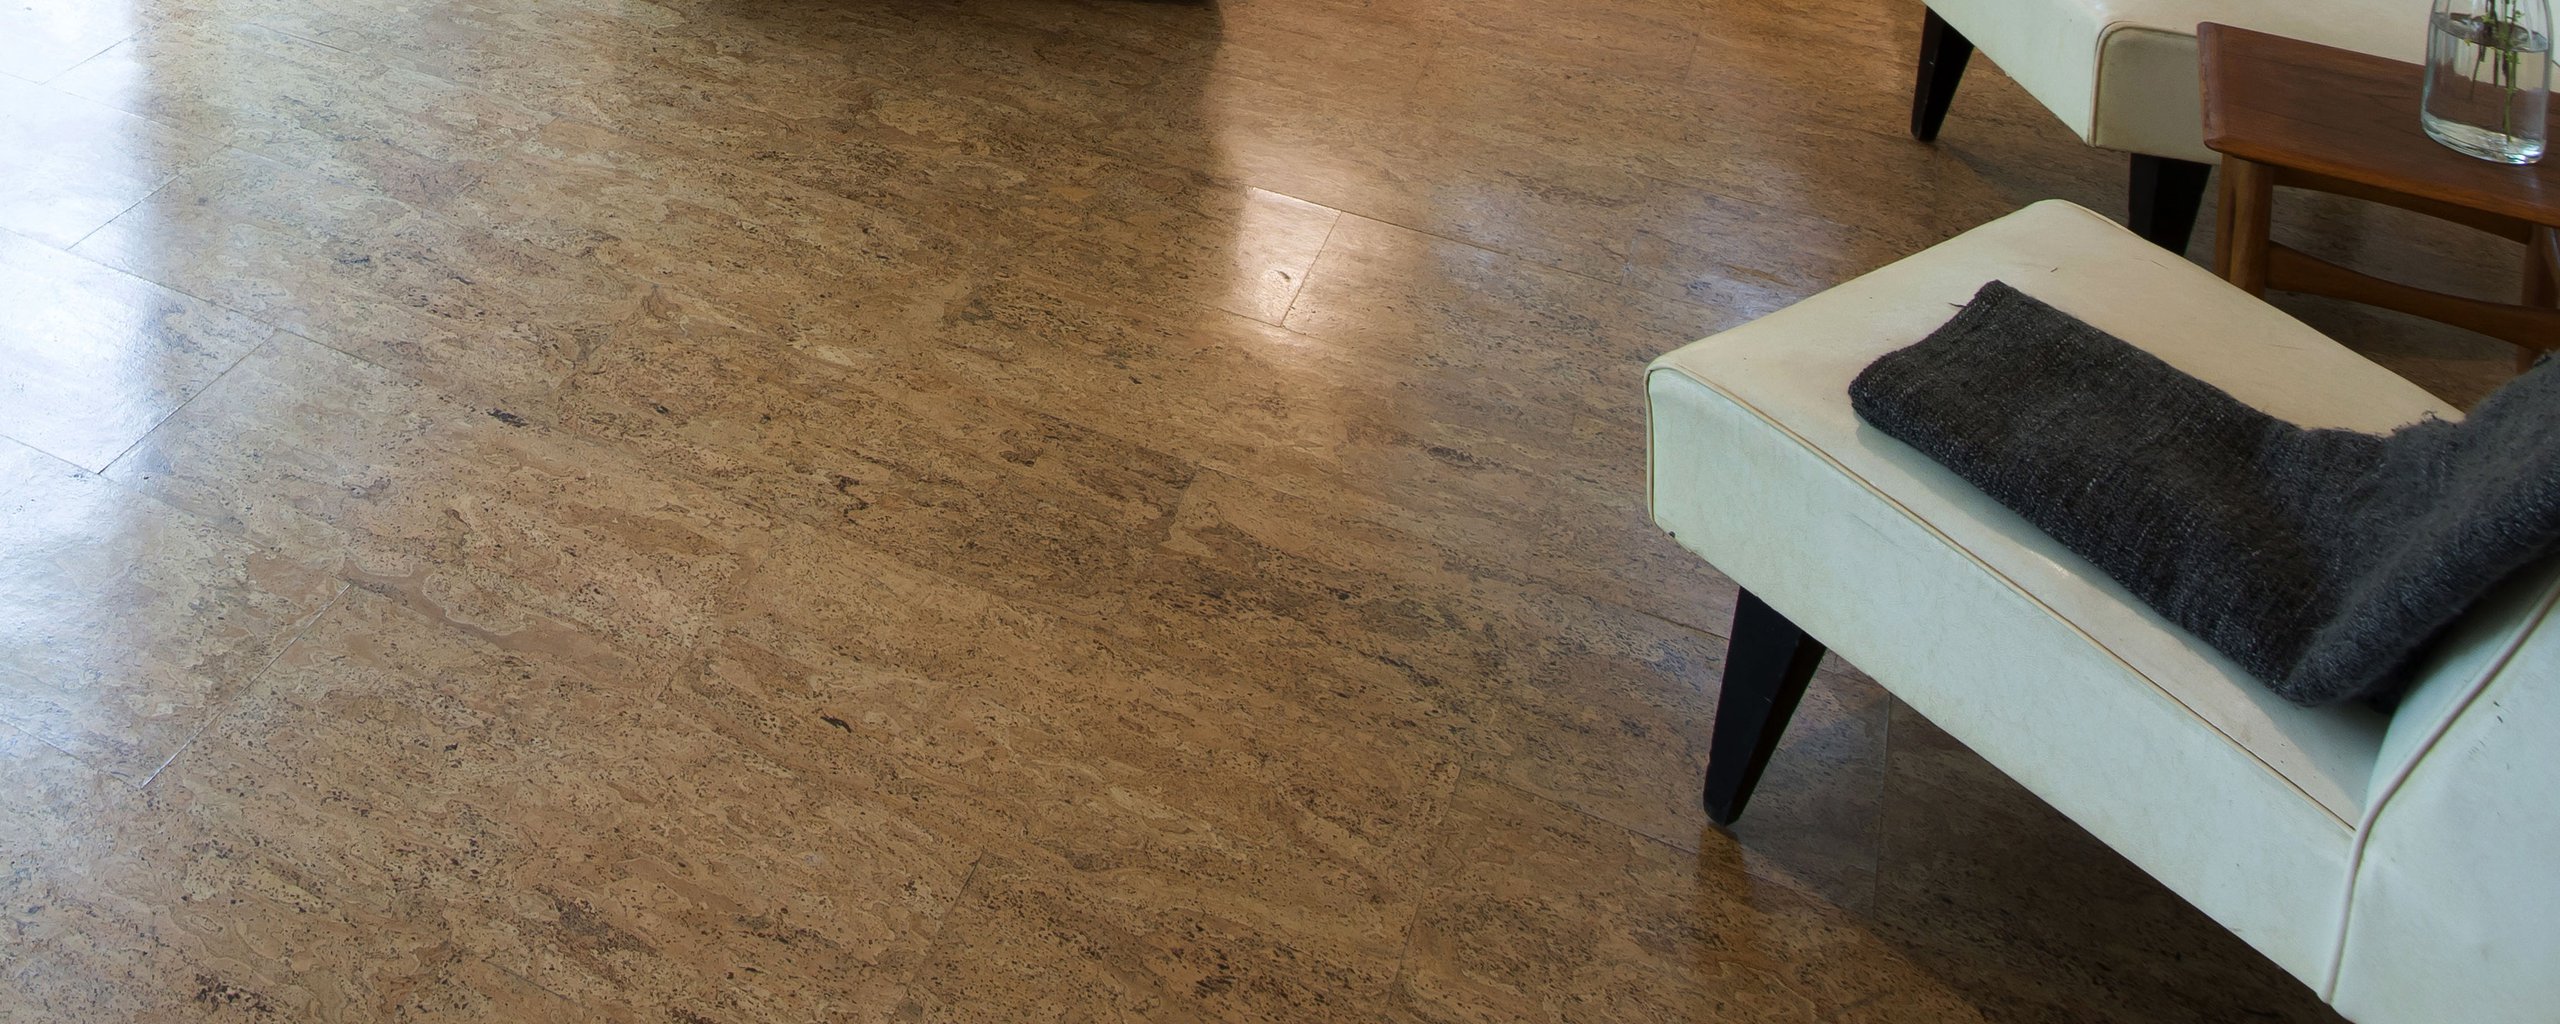
Durability and Longevity: Cork flooring is known for its durability and longevity. It can withstand heavy foot traffic and is resistant to scratches and dents, making it an ideal choice for high-traffic areas such as the kitchen or living room. With proper care and maintenance, cork flooring can last for decades, providing you with a long-lasting and cost-effective flooring solution.
Comfort and Insulation: One of the standout features of cork flooring is its exceptional comfort underfoot. The natural elasticity of the cork provides a cushioning effect, making it comfortable to walk on for extended periods. Additionally, cork has excellent insulation properties, helping to keep your home warm in the winter and cool in the summer. This insulation also helps to reduce noise transmission, making cork flooring a great choice for apartments or multi-story homes.
Eco-Friendly and Sustainable: If you’re conscious of your environmental impact, cork flooring is an excellent choice. Cork is harvested from the bark of cork oak trees, which naturally regenerate, making it a renewable resource. No trees are cut down during the extraction process, making cork flooring a sustainable and eco-friendly option. Additionally, cork is free from harmful chemicals and pollutants, ensuring a healthy indoor environment for you and your family.
Versatility in Design: Cork flooring offers a wide range of design options, allowing you to create a unique and personalized look for your space. It is available in various colors, patterns, and textures, making it suitable for any style or aesthetic. Whether you prefer a classic and timeless look or a more modern and contemporary feel, cork flooring can effortlessly complement your interior design vision.
Easy Maintenance: Maintaining cork flooring is a breeze compared to other flooring options. Regular sweeping or vacuuming, along with occasional damp mopping, is all that’s needed to keep your cork floors looking pristine. Unlike hardwood or laminate flooring, cork is naturally resistant to mold, mildew, and pests, eliminating the need for extensive cleaning routines or chemical treatments.
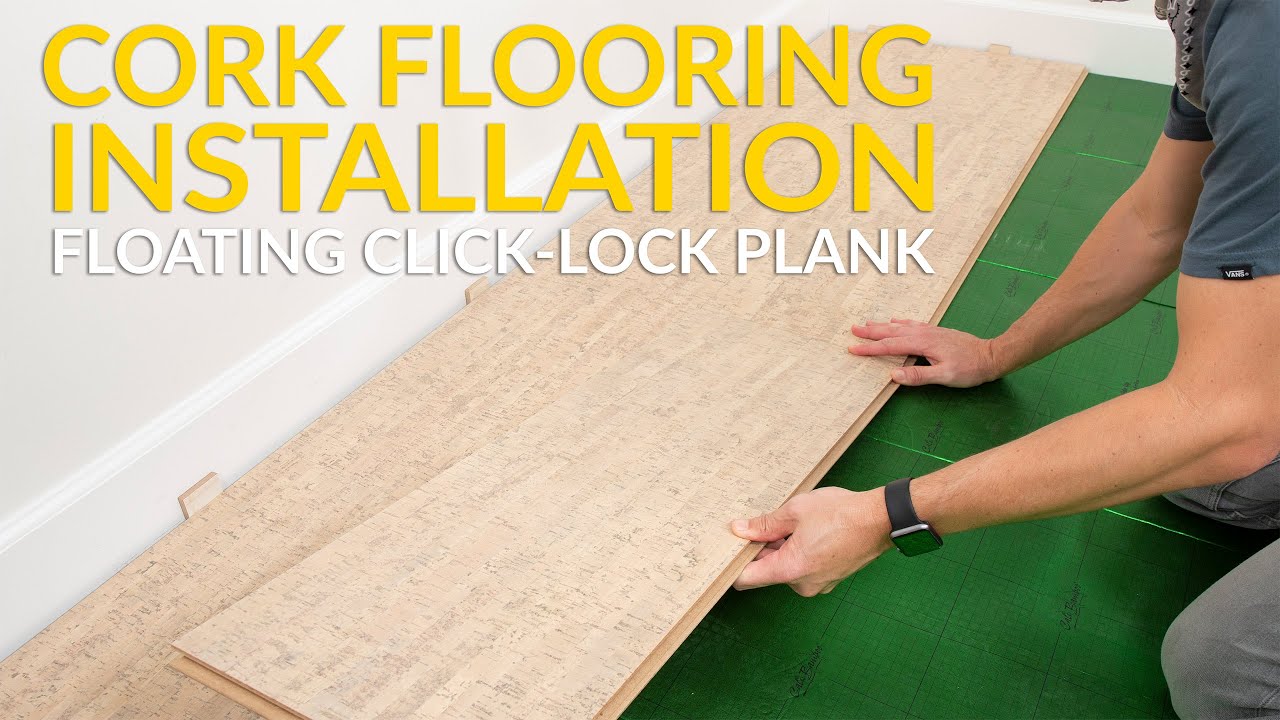
Step-by-Step Guide to Installing Cork Flooring: A DIY Tutorial
Installing cork flooring yourself can be a rewarding and cost-effective project that adds beauty and functionality to your home. With the right tools, materials, and knowledge, you can achieve professional-looking results. Below we provide you with a step-by-step guide to installing cork flooring, ensuring a successful DIY experience.
Preparation: Before you begin installing cork flooring, thorough preparation is crucial. Start by removing any existing flooring and ensuring the subfloor is clean, dry, and level. Repair any imperfections or cracks in the subfloor to create a smooth surface for the cork tiles.
Acclimation: Cork flooring needs to acclimate to the room’s temperature and humidity levels before installation. Lay the cork tiles in the room for at least 48 hours, allowing them to adjust to the environment. This step is essential to prevent any expansion or contraction issues once the flooring is installed.
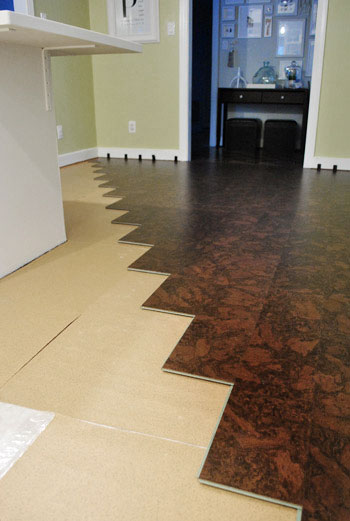
Layout and Planning: Careful planning is necessary to ensure a visually appealing and balanced installation. Start by determining the layout and orientation of the cork tiles. Consider the room’s shape, size, and natural light sources when deciding where to begin. Mark guidelines on the subfloor to guide your installation process.
Adhesive Application: Apply a high-quality cork adhesive to the subfloor using a trowel, following the manufacturer’s instructions. Work in small sections to ensure the adhesive remains workable throughout the installation. Avoid applying adhesive to areas that you won’t be able to cover with cork tiles immediately.
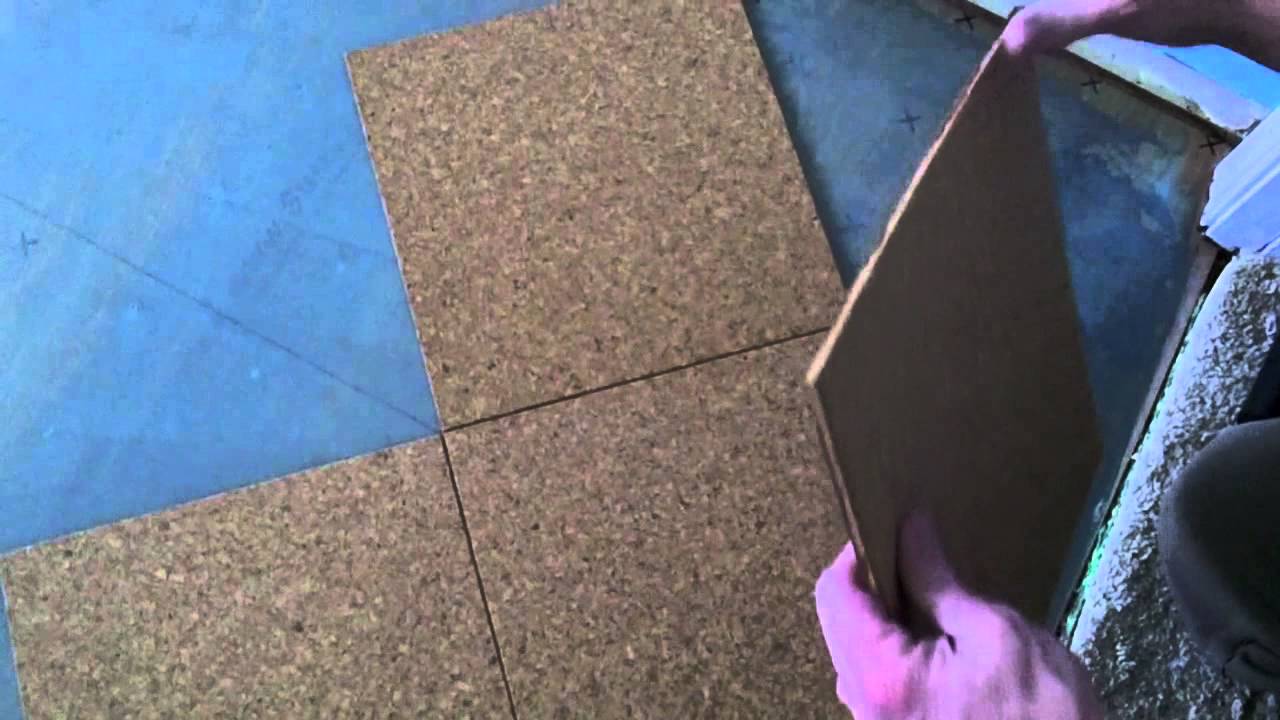
Tile Installation: Start laying the cork tiles according to your planned layout. Press each tile firmly into the adhesive, ensuring a secure bond. Use a rubber mallet or a tapping block to gently tap the tiles into place, creating a seamless look. Maintain consistent spacing between tiles for a professional finish.
Finishing Touches: Once all the cork tiles are installed, allow the adhesive to dry completely according to the manufacturer’s instructions. Trim any excess cork with a utility knife and install baseboards or molding to conceal the edges. Use a quality cork sealant to protect the flooring and enhance its longevity.
Tools and Materials for DIY Cork Flooring Installation
Before embarking on a DIY cork flooring installation project, it’s essential to gather the necessary tools and materials to ensure a smooth and successful process. We will outline the key tools and materials you’ll need to have on hand for a DIY cork flooring installation.
Tools:
Tape Measure: A tape measure is crucial for accurately measuring the dimensions of the room and determining the layout of the cork tiles.
Utility Knife: A sharp utility knife will be used to cut the cork tiles to the desired size and shape.
Trowel: A trowel is necessary for applying the adhesive evenly onto the subfloor.
Rubber Mallet or Tapping Block: A rubber mallet or tapping block is essential for gently tapping the cork tiles into place and ensuring a secure bond.
Chalk Line: A chalk line helps in creating straight guidelines on the subfloor for accurate tile placement.
Pry Bar: A pry bar is handy for removing existing baseboards or moldings before installation.
Knee Pads: Knee pads provide comfort and protection while working on the floor for extended periods.
Materials:
Cork Tiles: Purchase high-quality cork tiles that are suitable for flooring applications. Consider the thickness and design options that best suit your needs and preferences.
Cork Adhesive: Choose a cork-specific adhesive recommended by the tile manufacturer. Make sure to have enough adhesive to cover the entire installation area.
Cork Sealant: A quality cork sealant helps protect the flooring from moisture and stains and enhances its durability.
Underlayment: Depending on the condition of the subfloor, you may need to install an underlayment to provide additional insulation, moisture resistance, and a smooth surface for the cork tiles.
Spacers: Spacers are used to maintain consistent spacing between the cork tiles during installation, ensuring a professional finish.
Moisture Barrier: If the subfloor has moisture issues, consider using a moisture barrier to prevent any moisture from seeping into the cork tiles.
Baseboards or Moldings: Plan to install baseboards or moldings to cover the edges of the cork flooring and provide a finished look.
Safety Equipment:
Safety Glasses: Protect your eyes from any debris or flying particles during the installation process.
Dust Mask: A dust mask is essential to prevent inhalation of dust particles while cutting or sanding the cork tiles.
Gloves: Wear gloves to protect your hands and provide a better grip while handling tools and materials.
Tips for a Successful DIY Cork Flooring Project
Embarking on a DIY cork flooring project is an exciting endeavor that can transform the look and feel of your space. To ensure a successful installation, it’s helpful to be aware of some tips and tricks that can make the process smoother and more efficient. Below we share valuable tips and tricks for a successful DIY cork flooring project.
Acclimate the Cork Tiles: Allow the cork tiles to acclimate to the room’s temperature and humidity levels before installation. This step helps prevent any expansion or contraction issues once the flooring is installed. Lay the tiles in the room for at least 48 hours, ensuring they adjust to the environment.
Plan the Layout: Take the time to plan the layout of your cork flooring to ensure a visually appealing and balanced installation. Consider the room’s shape, size, and natural light sources when determining the starting point and orientation of the tiles. Creating guidelines on the subfloor will help guide the installation process and ensure straight lines.
Use a Quality Adhesive: Invest in a high-quality cork adhesive that is recommended by the tile manufacturer. Follow the manufacturer’s instructions for proper application and drying times. Applying the adhesive evenly and in the right amounts is crucial for a secure bond between the cork tiles and the subfloor.
Take Care with Cutting: When cutting the cork tiles to fit specific areas, use a sharp utility knife and make precise cuts. Measure twice and cut once to ensure accuracy. Consider using a straight edge or a template to guide your cuts and achieve clean and precise edges.
Maintain Consistent Spacing: Use spacers to maintain consistent spacing between the cork tiles during installation. This ensures a professional and uniform look. Remove the spacers after the adhesive has dried, and fill the gaps with cork-specific filler if necessary.
Protect the Cork Flooring: Once the installation is complete, protect the cork flooring by applying a cork sealant. The sealant will help guard against moisture, stains, and scratches, prolonging the lifespan of your cork floor. Follow the manufacturer’s instructions for application and drying times.
Regular Maintenance: Proper maintenance is crucial to keep your cork flooring in optimal condition. Sweep or vacuum regularly to remove dirt and debris. Avoid using harsh chemicals or abrasive cleaners that can damage the cork. Instead, use a damp mop with a mild cleaning solution specifically formulated for cork floors.
Common Mistakes to Avoid When Installing Cork Flooring Yourself
While DIY cork flooring installation can be a rewarding project, it’s important to be aware of common mistakes that can lead to unsatisfactory results. By understanding these mistakes and how to avoid them, you can ensure a smooth and successful installation. We will highlight some common mistakes to avoid when installing cork flooring yourself.
Insufficient Subfloor Preparation: Failing to properly prepare the subfloor can lead to an uneven or unstable surface for the cork tiles. Ensure the subfloor is clean, dry, and level before installation. Repair any cracks or imperfections and remove any old flooring materials that may affect the installation process.
Skipping the Acclimation Process: Acclimating the cork tiles to the room’s temperature and humidity levels is crucial. Skipping this step can result in the tiles expanding or contracting after installation, leading to gaps or buckling. Allow the tiles to acclimate for at least 48 hours in the room where they will be installed.
Inadequate Adhesive Application: Improper application of the adhesive can result in tiles coming loose or not adhering properly to the subfloor. Follow the manufacturer’s instructions for the specific adhesive being used. Apply the adhesive evenly and in the recommended amount, working in small sections to ensure it remains workable.
Poor Planning of Tile Layout: Failing to plan the layout of the cork tiles can result in an unbalanced or visually unappealing installation. Consider the room’s dimensions, shape, and natural light sources when determining the starting point and orientation of the tiles. Take the time to create guidelines on the subfloor for accurate tile placement.
Incorrect Cutting Techniques: Using improper cutting techniques can result in ill-fitting or unevenly shaped tiles. Always use a sharp utility knife and make precise cuts. Measure twice and cut once to ensure accuracy. Consider using a straight edge or template to guide your cuts and achieve clean and precise edges.
Neglecting to Maintain Consistent Spacing: Inconsistent spacing between cork tiles can create an unprofessional and uneven appearance. Use spacers to maintain consistent spacing during installation. Remove the spacers after the adhesive has dried and fill any gaps with cork-specific filler if necessary.
Skipping Protective Measures: Failing to protect the cork flooring after installation can lead to premature wear and damage. Apply a cork sealant to protect against moisture, stains, and scratches. Follow the manufacturer’s instructions for application and drying times. Regular maintenance, such as sweeping or vacuuming, is also essential to keep the cork flooring in optimal condition.
How To Install A Floating Cork Floor Young House Love
DIY Cork Flooring – Pros, Cons u0026 Green Installation Guide for LEED
How To Replace Carpet With Lovely Cork Flooring Without Hiring A
Cork Flooring Installation – How to Do It DIY Home Improvement
We use cookies on our website to give you the most relevant experience by remembering your preferences and repeat visits. By clicking “Accept All”, you consent to the use of ALL the cookies. However, you may visit "Cookie Settings" to provide a controlled consent.
This website uses cookies to improve your experience while you navigate through the website. Out of these, the cookies that are categorized as necessary are stored on your browser as they are essential for the working of basic functionalities of the website. We also use third-party cookies that help us analyze and understand how you use this website. These cookies will be stored in your browser only with your consent. You also have the option to opt-out of these cookies. But opting out of some of these cookies may affect your browsing experience.
Necessary cookies are absolutely essential for the website to function properly. These cookies ensure basic functionalities and security features of the website, anonymously.
Cookie
Duration
Description
cookielawinfo-checkbox-analytics
11 months
This cookie is set by GDPR Cookie Consent plugin. The cookie is used to store the user consent for the cookies in the category "Analytics".
cookielawinfo-checkbox-functional
11 months
The cookie is set by GDPR cookie consent to record the user consent for the cookies in the category "Functional".
cookielawinfo-checkbox-necessary
11 months
This cookie is set by GDPR Cookie Consent plugin. The cookies is used to store the user consent for the cookies in the category "Necessary".
cookielawinfo-checkbox-others
11 months
This cookie is set by GDPR Cookie Consent plugin. The cookie is used to store the user consent for the cookies in the category "Other.
cookielawinfo-checkbox-performance
11 months
This cookie is set by GDPR Cookie Consent plugin. The cookie is used to store the user consent for the cookies in the category "Performance".
viewed_cookie_policy
11 months
The cookie is set by the GDPR Cookie Consent plugin and is used to store whether or not user has consented to the use of cookies. It does not store any personal data.
Functional cookies help to perform certain functionalities like sharing the content of the website on social media platforms, collect feedbacks, and other third-party features.
Performance cookies are used to understand and analyze the key performance indexes of the website which helps in delivering a better user experience for the visitors.
Analytical cookies are used to understand how visitors interact with the website. These cookies help provide information on metrics the number of visitors, bounce rate, traffic source, etc.
Advertisement cookies are used to provide visitors with relevant ads and marketing campaigns. These cookies track visitors across websites and collect information to provide customized ads.


 Related Posts: