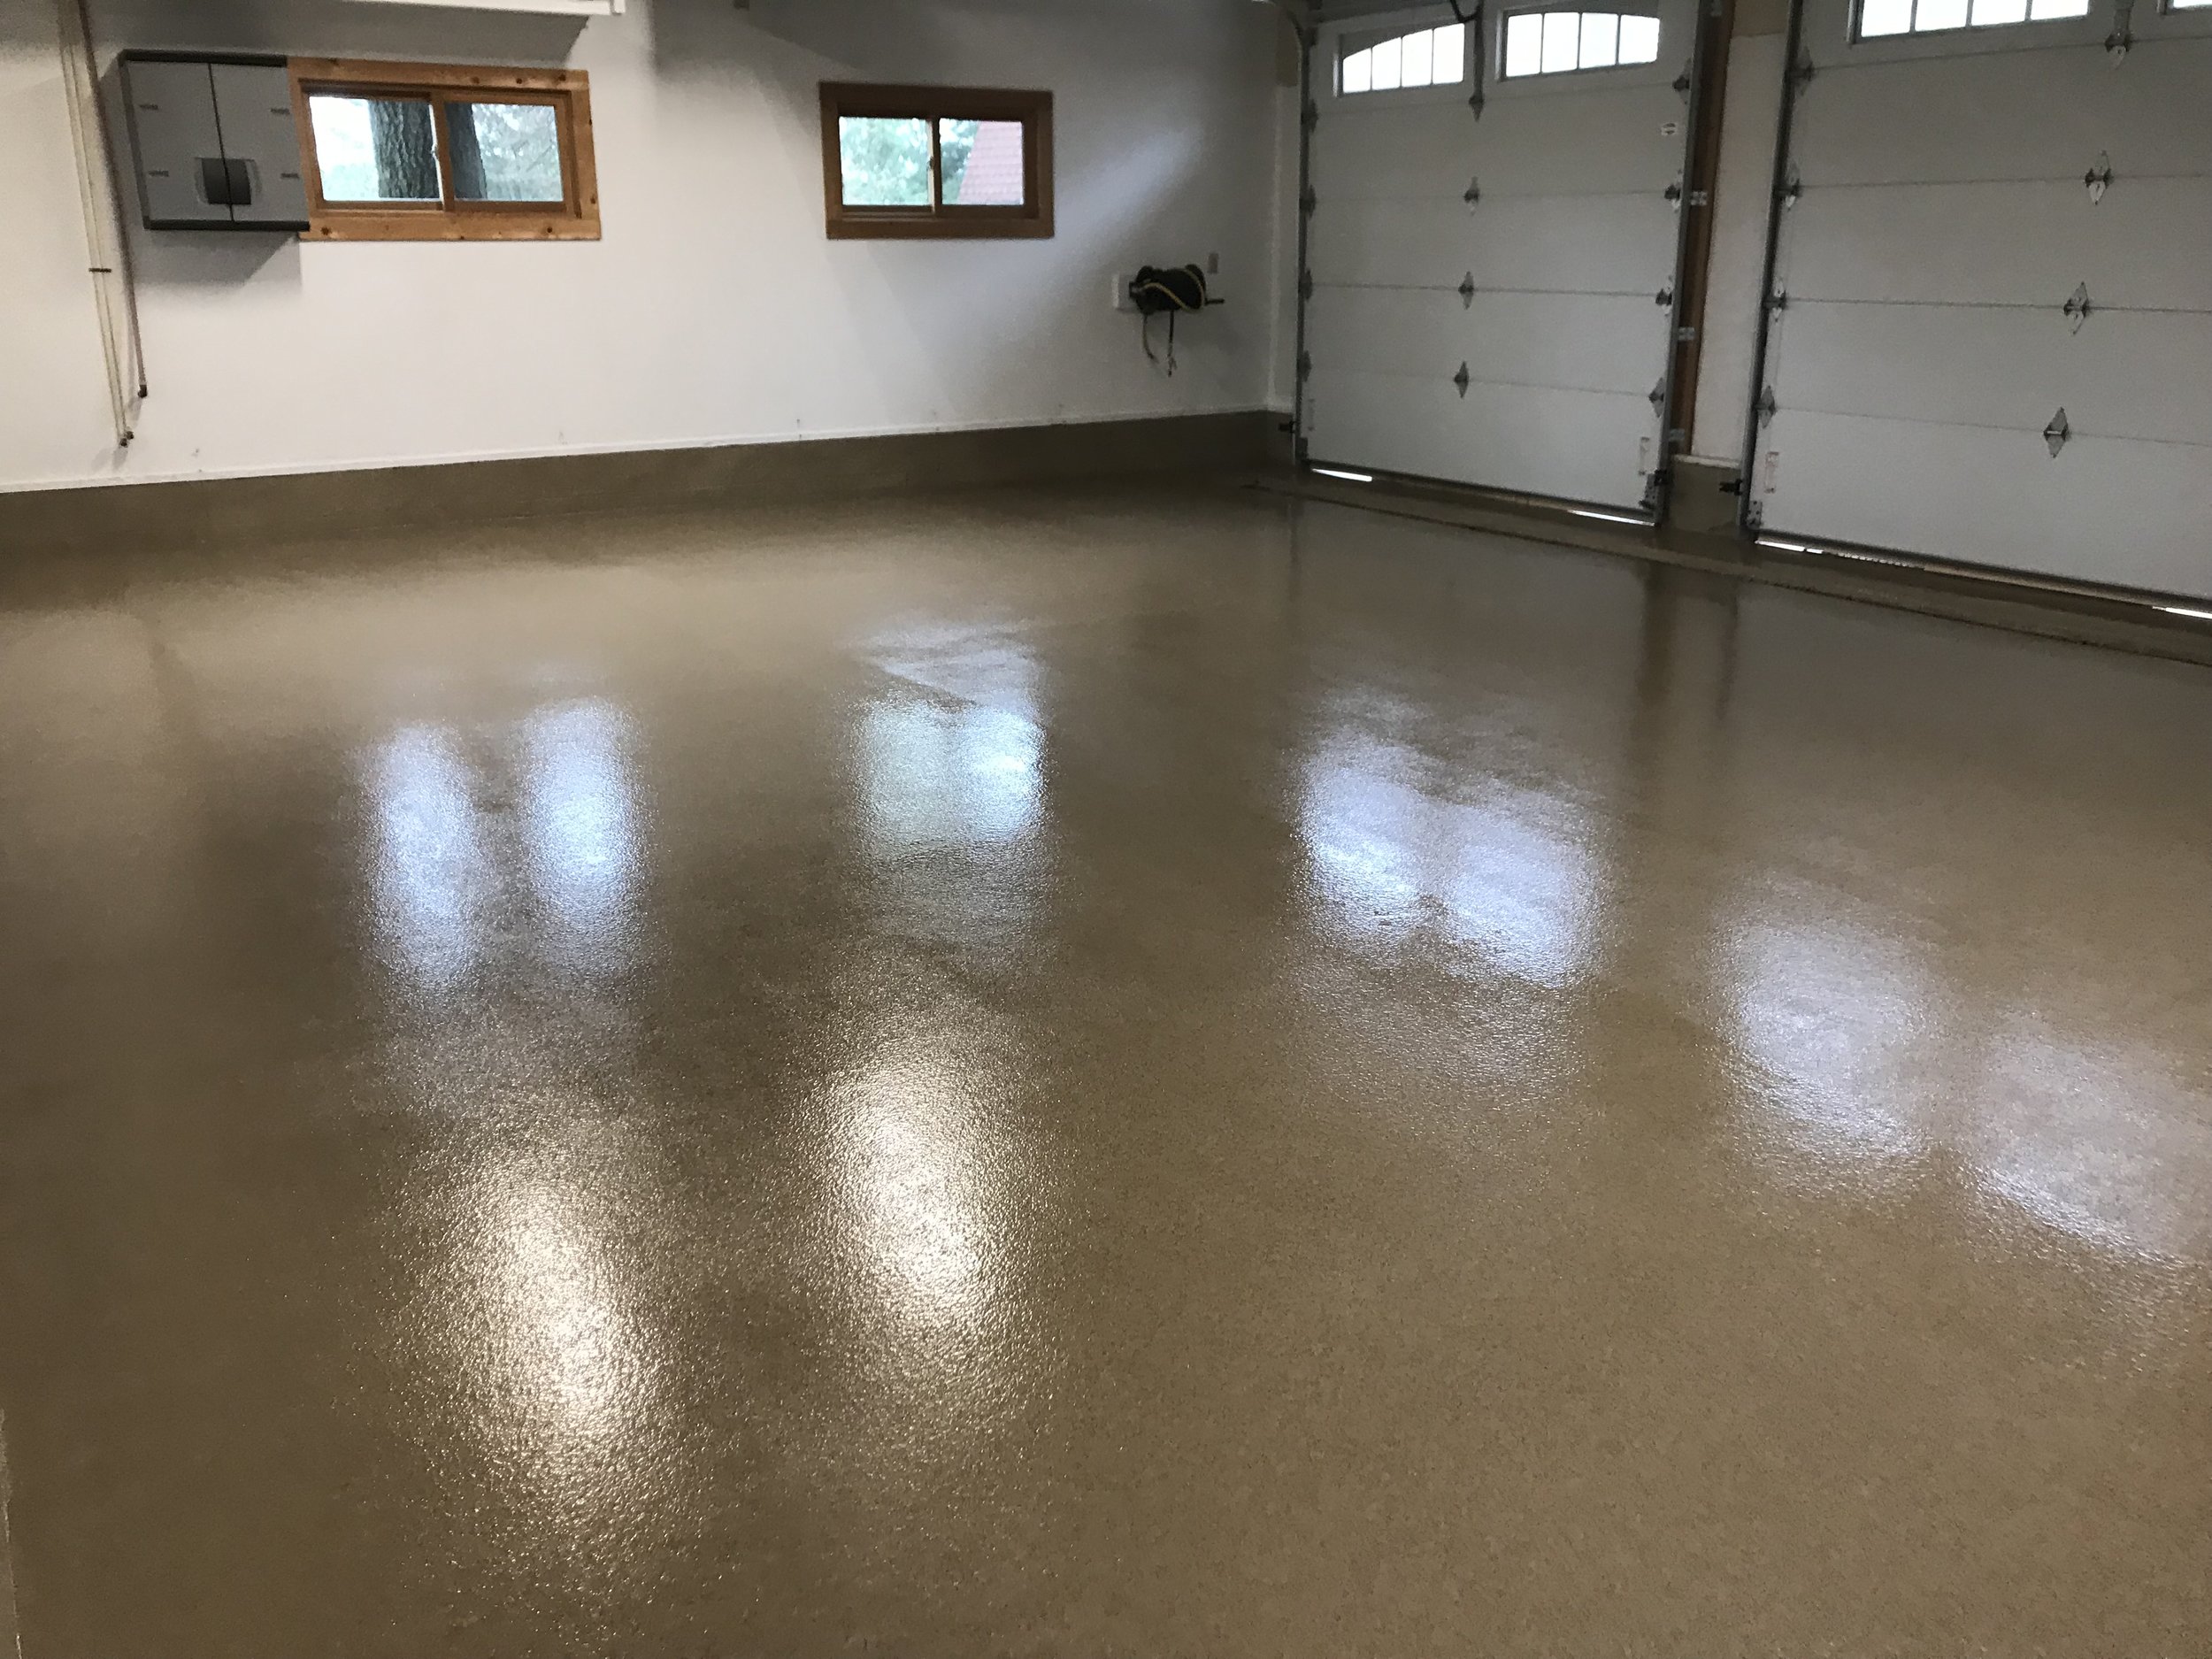
My garage transformation journey began when I grew tired of the stained, cracked concrete that had plagued my space for years. After researching various flooring options, epoxy emerged as the perfect solution for durability, aesthetics, and cost-effectiveness. This comprehensive guide shares my hands-on experience with installing epoxy flooring, from initial preparation through final curing, including the mistakes I made and the lessons I learned along the way.
Understanding Epoxy Flooring Fundamentals
I discovered that epoxy flooring consists of resin and hardener components that chemically bond to create an incredibly durable surface. This chemical reaction produces a coating that’s significantly harder than the original concrete, resistant to chemicals, impacts, and abrasion. My research revealed that properly installed epoxy can last 10-20 years with minimal maintenance, making it an excellent long-term investment for high-traffic areas.
The variety of epoxy types initially overwhelmed me until I understood the basic categories. Water-based epoxies offer easier cleanup and lower odor but provide less durability than solvent-based options. I ultimately chose 100% solids epoxy for maximum durability and thickness, though it required more careful handling and proper ventilation during application. The higher cost proved worthwhile for superior performance.
Temperature and humidity significantly impact epoxy performance, something I learned through trial and error. Ideal conditions range between 60-80°F with humidity below 85%. I made the mistake of starting my first attempt during a humid summer week, resulting in cloudy curing and poor adhesion. Waiting for optimal weather conditions prevented costly do-overs and ensured professional-quality results.
Surface Preparation and Concrete Assessment
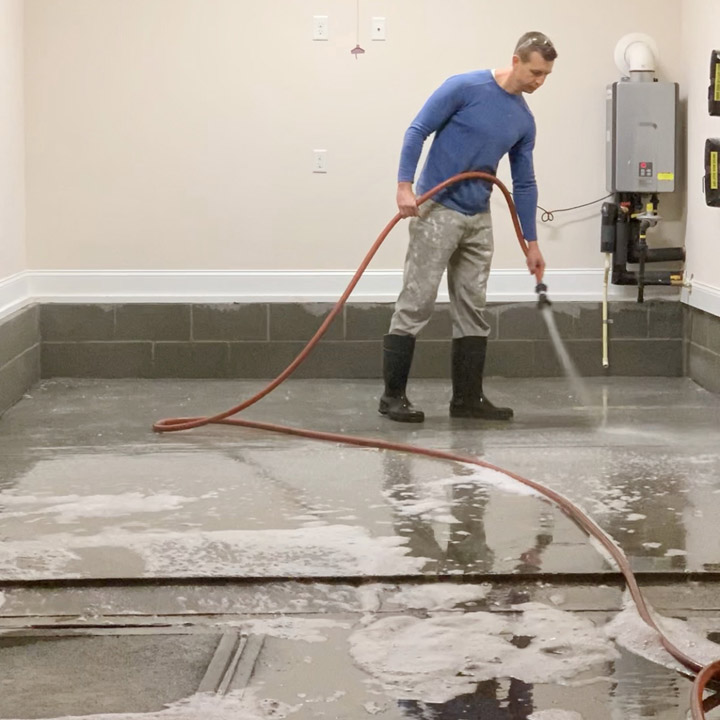
Concrete preparation consumed 70% of my project time, but it determined the success of the entire installation. I began by thoroughly cleaning the surface with degreasing agents, paying special attention to oil stains that could prevent proper adhesion. Power washing, followed by an adequate drying time, removed the remaining contaminants. Skipping thorough preparation leads to peeling, bubbling, and premature failure.
I tested concrete porosity using the simple water drop method, watching how quickly water was absorbed into the surface. Dense, non-porous concrete required acid etching to create adequate surface texture for epoxy bonding. I used muriatic acid solution, following safety protocols with proper ventilation and protective equipment. The etching process creates microscopic ridges that dramatically improve adhesion strength.
Crack and hole repair proved more challenging than anticipated. I used concrete crack filler for hairline cracks and patching compound for larger imperfections. Each repair required complete curing before proceeding with epoxy application. I learned that rushing this step creates weak points where moisture can penetrate and cause future coating failure, potentially ruining the entire installation.
Essential Tools and Materials Required
My tool collection expanded significantly for this project. Essential items included acid-resistant brushes, squeegees, spiked rollers for bubble removal, and proper mixing containers. I invested in quality protective equipment, including respirators, chemical-resistant gloves, and safety glasses. Professional-grade tools cost more initially but provide better results and safer working conditions throughout the installation process.
Material calculations proved more complex than simple square footage measurements. Beyond base epoxy components, I needed primer for enhanced adhesion, decorative flakes for texture and appearance, and topcoat for additional protection. I purchased 15% extra material to account for absorption into porous concrete and potential application errors that required additional coverage in certain areas.
Mixing equipment became crucial for achieving proper chemical reactions. I used paddle mixers attached to power drills for thorough blending of resin and hardener components. Improper mixing creates weak spots and uneven curing that compromise the entire installation. I practiced mixing techniques with small batches before tackling the full project, preventing costly mistakes during actual application.
Step-by-Step Installation Process
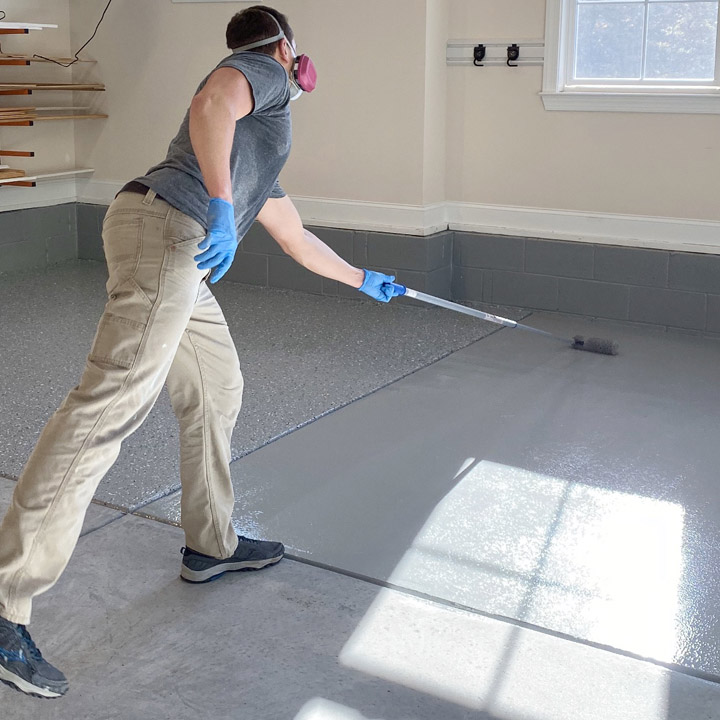
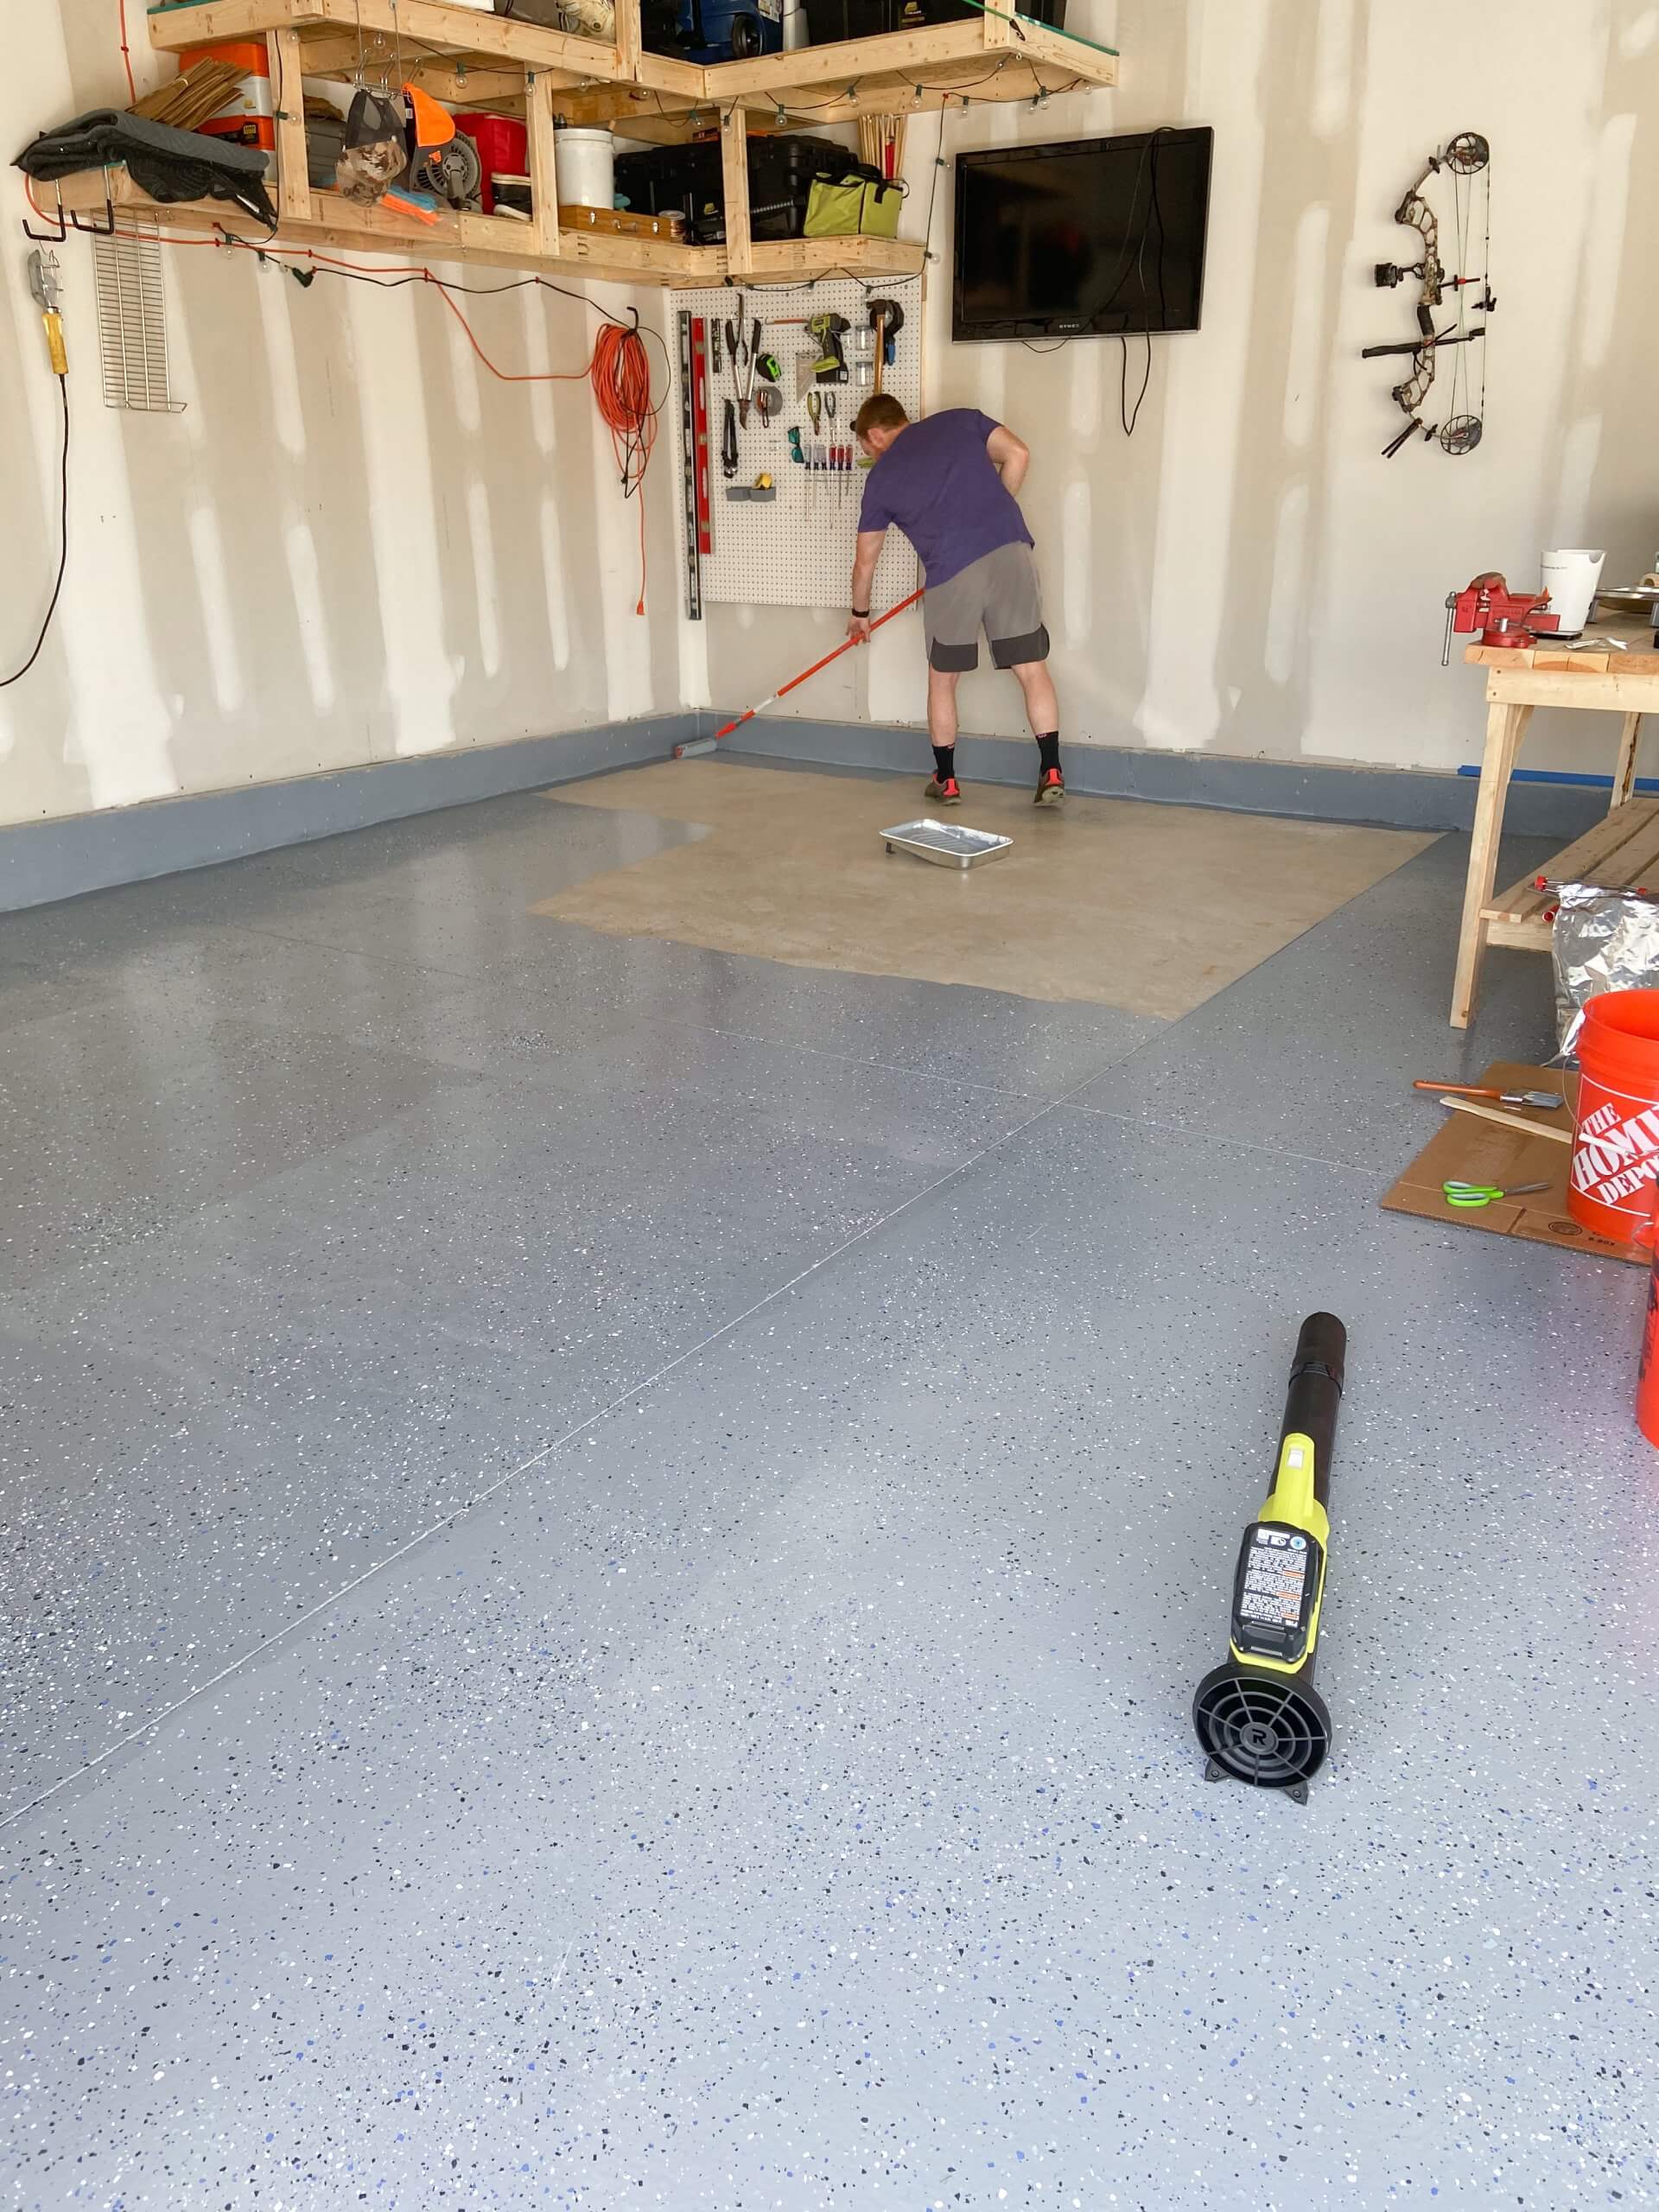
I began installation early morning to maximize working time before temperature extremes affected curing. Starting with primer application using brush and roller techniques ensured complete coverage and proper penetration into prepared concrete. Working in manageable sections prevented lap marks and maintained wet edges throughout the application process. Proper primer application creates the foundation for superior epoxy adhesion.
Epoxy mixing requires precise timing and thorough blending to achieve optimal performance. I combined resin and hardener components according to manufacturer’s specifications, mixing thoroughly for the recommended duration. Working quickly but carefully, I applied epoxy using squeegee and roller techniques, maintaining consistent thickness throughout each section. Spiked rollers removed trapped air bubbles that could create weak spots.
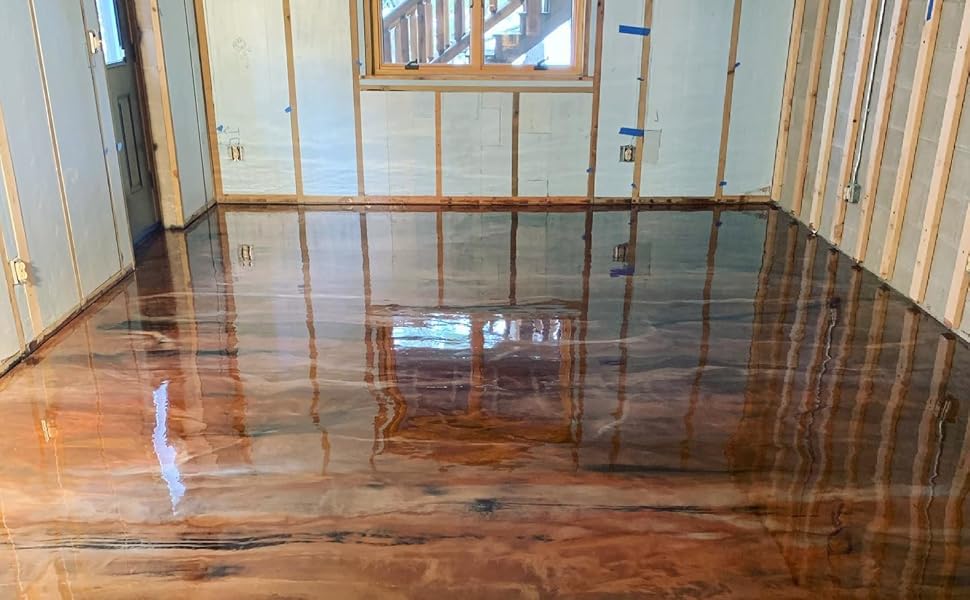
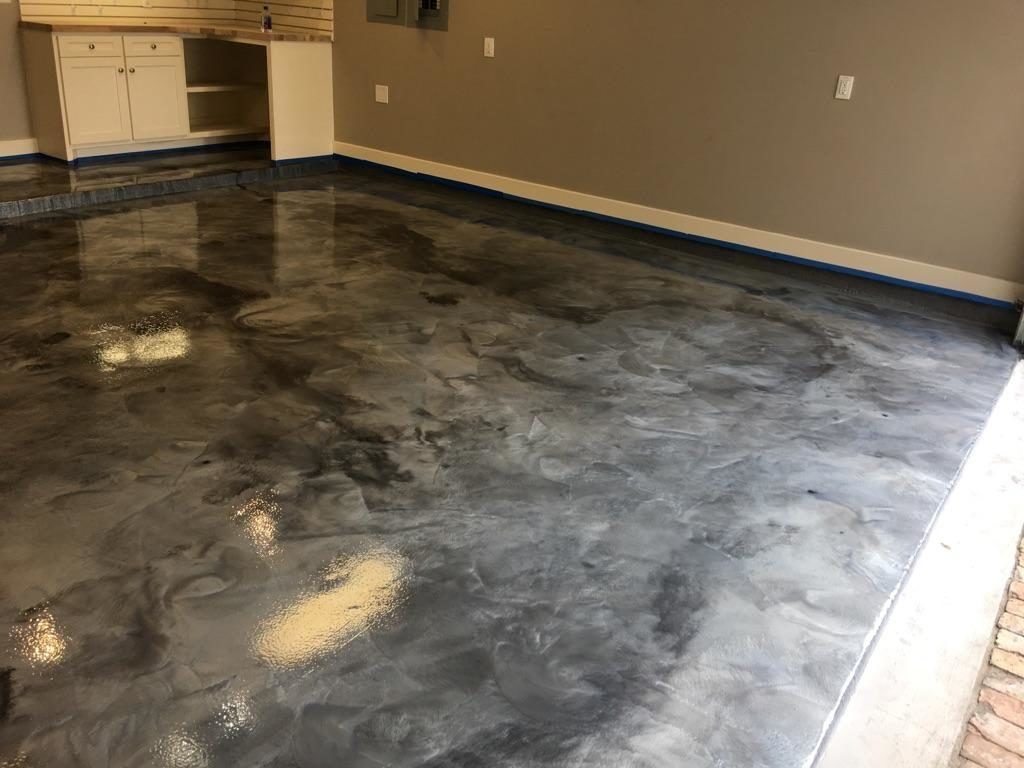
Decorative flake application added both texture and visual appeal to my finished floor. I broadcast flakes while epoxy remained tacky, ensuring proper embedding and coverage. Excess flakes required removal after initial curing but before topcoat application. The timing proved critical, as flakes applied too early sink completely while late application results in poor adhesion and premature wear.

Common Installation Challenges and Solutions
Temperature fluctuations during curing created my most significant challenge. Rapid temperature changes caused thermal shock that produced small cracks in the cured epoxy surface. I learned to monitor weather forecasts carefully and avoid installation during unstable conditions. Maintaining consistent temperatures throughout the curing process prevents thermal stress and ensures uniform coating properties.
Moisture issues from concrete or ambient humidity caused cloudy curing and poor adhesion in several areas. I invested in moisture meters to verify concrete moisture levels before beginning and used fans to control ambient humidity during application. Moisture contamination requires complete removal and reapplication, making prevention far more cost-effective than remediation after problems develop.
Color matching and consistency proved challenging when working across large areas or over multiple days. I learned to mix sufficient material for complete sections and maintain detailed records of mixing ratios and techniques. Batch-to-batch color variations become permanent once cured, so careful planning and consistent mixing procedures prevent unsightly color mismatches that compromise the finished appearance.
Maintenance and Long-Term Performance
Daily maintenance requires only basic sweeping and occasional mopping with mild detergents. I avoid harsh chemicals and abrasive cleaners that can damage the epoxy surface over time. Regular cleaning prevents dirt accumulation and maintains the glossy appearance that makes epoxy flooring so attractive. Simple maintenance routines preserve both function and aesthetics for many years.
I inspect my epoxy floor quarterly for signs of wear, cracking, or delamination that might require attention. Small chips or scratches can often be repaired with matching epoxy compounds, preventing minor damage from spreading. Early intervention prevents costly full refinishing projects and extends the lifespan of the original installation significantly.
Recoating becomes necessary every 3-5 years in high-traffic areas, though decorative areas may last much longer. I plan recoating projects during optimal weather conditions and prepare surfaces using light sanding to ensure proper adhesion. Regular recoating maintains protection and appearance while costing far less than complete removal and reinstallation of the entire flooring system.

How long does epoxy flooring take to fully cure and become usable?
Most epoxies reach initial cure within 24-48 hours for light foot traffic, but I waited a full week before parking vehicles or placing heavy equipment on my garage floor. Complete chemical cure takes 7-14 days, depending on temperature, humidity, and epoxy type. I learned that rushing this process can damage the surface permanently. Temperature affects curing speed, with cooler conditions extending cure times significantly. Patience during curing prevents costly damage and ensures maximum durability.
Can I apply epoxy flooring over existing paint or sealers?
I attempted this initially and experienced complete adhesion failure within months. Existing coatings must be completely removed through grinding, chemical stripping, or shot blasting before epoxy application. Paint and sealers prevent proper bonding between epoxy and the concrete substrate. The removal process adds time and cost but remains necessary for long-term success. I learned this expensive lesson and now always verify complete coating removal before proceeding.
What’s the realistic cost difference between DIY and professional installation?
My DIY installation cost approximately $3-6 per square foot including materials and tool purchases, while professional quotes ranged from $8-15 per square foot. However, I invested significant time learning techniques and correcting mistakes that professionals avoid. The learning curve includes potential failures and rework that can increase DIY costs. Factor in your skill level, available time, and risk tolerance when deciding between DIY and professional installation options.
How does epoxy flooring perform in extreme temperature conditions?
I’ve experienced temperature ranges from below freezing to over 100°F, and my epoxy floor has performed excellently throughout these extremes. Quality epoxy maintains flexibility and adhesion across wide temperature ranges without cracking or delamination. However, thermal cycling can cause slight expansion and contraction that may create hairline cracks over many years. Proper installation techniques and quality materials minimize temperature-related problems significantly.

What safety precautions are essential during epoxy installation?
Ventilation became my top priority after experiencing mild chemical sensitivity during my first attempt. I used fans, opened all doors, and wore appropriate respirators throughout mixing and application. Chemical-resistant gloves prevent skin contact, while safety glasses protect eyes from splashes. I kept neutralizing agents nearby for acid etching and maintained first aid supplies. Proper safety equipment costs little compared to the potential health consequences of inadequate protection.
How do I repair damaged areas in existing epoxy flooring?
Small chips and scratches can be repaired using matching epoxy compounds applied with careful feathering techniques. I clean damaged areas thoroughly, lightly sand edges, and apply repair material in thin layers. Larger damage areas require complete removal and reapplication of base coat and topcoat layers. Color matching becomes challenging with aged epoxy, so I keep leftover materials for future repairs. Professional repair may be necessary for extensive damage or color-critical applications.

Flooring Epoxy 1.5 Gallon Kit – Stone Coat Countertops
Garage Floor Coating Cost – Guide – Garage Sanctum
Related Posts: