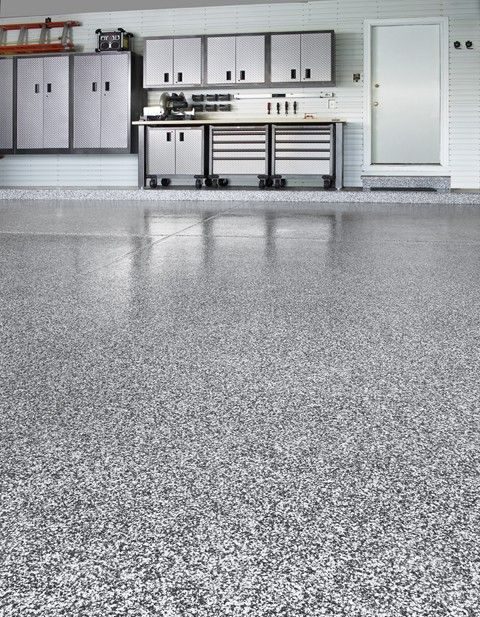
My pursuit of the ultimate garage floor began when standard residential epoxy failed to withstand my automotive restoration projects and heavy equipment storage needs. After researching industrial-grade options, I decided to install a professional system designed for manufacturing facilities and commercial workshops. This guide documents my experience creating a garage floor that rivals those found in high-end automotive dealerships and industrial facilities.
Understanding Industrial Epoxy Systems
Industrial epoxy differs dramatically from consumer-grade products in both chemical composition and performance characteristics. I discovered that these systems use higher solids content, advanced cross-linking agents, and specialized additives that create surfaces capable of withstanding extreme loads, chemical exposure, and constant traffic. The thickness alone ranges from 60-125 mils compared to residential systems at 2-10 mils, providing substantially superior protection.
My research revealed that industrial systems incorporate multiple coating layers, including penetrating primers, high-build base coats, and protective topcoats. Each layer serves specific functions in creating a monolithic surface that bonds permanently with prepared concrete substrates. The complexity initially intimidated me, but understanding each component’s purpose helped me appreciate why industrial systems outperform residential alternatives so dramatically.
Chemical resistance became a primary consideration for my automotive workshop environment. Industrial epoxy systems resist hydraulic fluids, motor oils, brake cleaners, and battery acids that would quickly damage standard coatings. I tested various products and selected a system rated for continuous chemical exposure, ensuring my investment would withstand the harsh conditions typical of serious automotive work and equipment maintenance.
Advanced Surface Preparation Techniques
Industrial installations require more aggressive preparation methods than residential applications. I invested in diamond grinding equipment to create the proper concrete surface profile, removing laitance and creating microscopic anchor points essential for mechanical bonding. Shot blasting would have been ideal, but equipment rental costs led me to choose grinding as a more economical alternative that still achieved professional results.
Concrete moisture testing became crucial given the thickness and impermeability of industrial coatings. I used calcium chloride tests and relative humidity probes to verify moisture levels below the manufacturer’s specifications. High moisture content causes catastrophic adhesion failure in thick industrial systems, making thorough testing essential before proceeding. I waited additional weeks for moisture levels to stabilize properly.
Joint preparation required special attention since industrial coatings bridge expansion joints differently than thin residential systems. I routed and sealed control joints using flexible polyurethane sealants designed for industrial environments. Proper joint treatment prevents cracking and maintains the monolithic appearance that distinguishes professional installations from amateur attempts that ignore critical construction details.

Specialized Equipment and Materials
Professional mixing equipment became essential for handling industrial epoxy volumes and viscosities. I rented a paddle mixer capable of thoroughly blending thick, high-solids materials without introducing excessive air. Hand mixing proves inadequate for industrial products, leading to incomplete curing and performance problems. The equipment rental cost justified itself through consistent mixing quality and reduced material waste.
Material quantities surprised me with their scale and complexity. Beyond base resin and hardener components, I needed specialized primers, aggregate fillers, and broadcast media designed for industrial applications. The system required nearly twice the material thickness of residential products, resulting in higher costs but dramatically superior performance characteristics that justified the investment for serious workshop use.
Application tools required upgrading to handle industrial material properties and coverage requirements. I purchased heavy-duty squeegees, specialized rollers, and spiked shoes designed for thick coating applications. Standard residential tools proved inadequate for achieving proper coverage and finish quality with high-viscosity industrial products. Quality tools remain essential for professional results.
Professional Installation Process
Installation timing became critical due to industrial epoxy’s extended working times and complex curing schedules. I planned the project during stable weather conditions with temperatures between 65-75°F and low humidity. Industrial systems offer longer working times than residential products but require more precise environmental control throughout the extended curing process that can span several days.
Primer application established the foundation for superior adhesion and performance. I applied penetrating primer using brush and roller techniques, ensuring complete coverage and penetration into prepared concrete surfaces. Industrial primers contain higher solids and specialized bonding agents that create mechanical and chemical bonds far superior to residential primer systems, justifying the additional time and material costs.
Base coat application required careful attention to film thickness and uniformity across large areas. I used gauge rakes to achieve consistent 60-mil thickness, followed by roller and squeegee techniques for proper leveling. Working in sections prevented lap marks while maintaining wet edges throughout the application process. The thick industrial coating self-levels better than thin residential systems, creating smoother final surfaces.

Heavy-Duty Performance Features
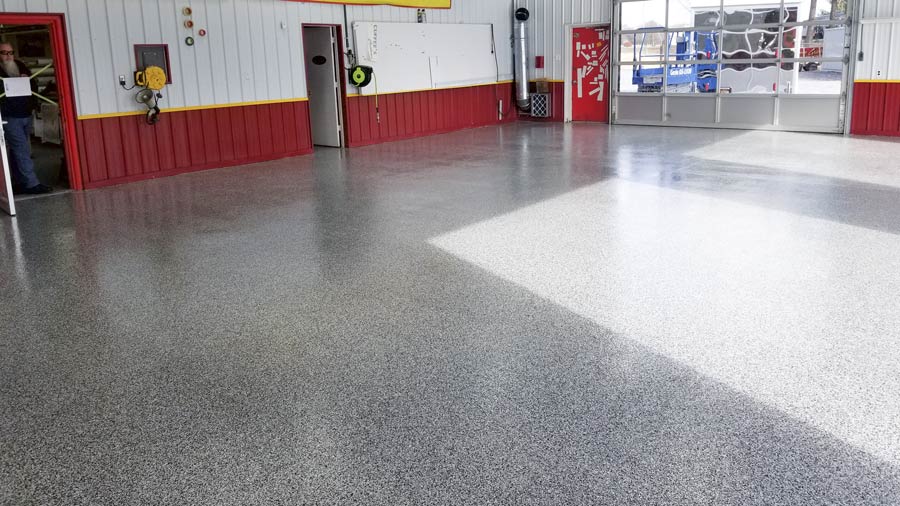
Load-bearing capacity impressed me most during initial use with heavy automotive lifts and equipment. Industrial epoxy systems handle concentrated loads exceeding 3000 PSI without cracking or indentation, compared to residential systems that fail under similar stresses. I regularly park multiple vehicles, operate hydraulic equipment, and drag heavy parts across the surface without concern for damage or wear.
Chemical resistance testing validated my material selection when various automotive fluids spilled during projects. Battery acid, brake fluid, and penetrating oils cleaned up easily without staining or surface damage. I accidentally left brake cleaner puddles overnight with no visible effects, confirming that industrial-grade chemical resistance provides real protection in working environments where spills occur regularly.
Thermal stability exceeded expectations during hot summer months when garage temperatures approached 120°F. The industrial coating maintained hardness and adhesion, while the residential epoxy in adjacent areas showed softening and tire marking. Temperature resistance becomes crucial in automotive applications where hot exhaust components and heated parts contact the floor surfaces regularly during maintenance operations.

Long-Term Durability and Maintenance
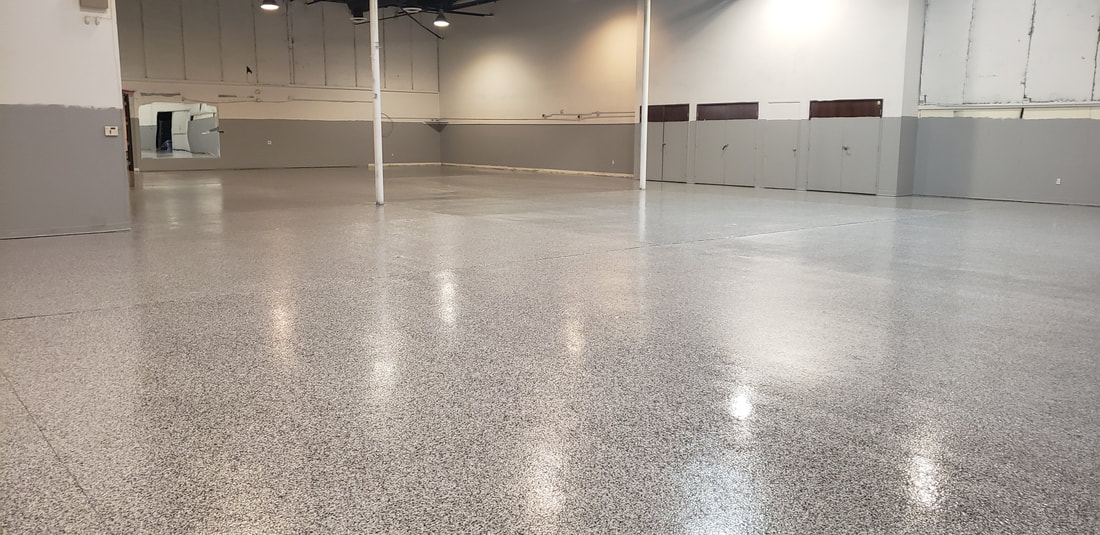
After two years of intensive use, my industrial epoxy floor shows minimal wear despite constant traffic from automotive projects, welding operations, and heavy equipment movement. The thick coating absorbs impacts and distributes loads that would crack or chip thinner residential systems. Initial investment costs seem minimal compared to the long-term performance and appearance retention I’ve experienced.
Daily maintenance requires only basic sweeping and occasional mopping with industrial degreasers when necessary. The seamless surface eliminates dirt accumulation points and resists staining from oils and chemicals. I use pressure washing monthly to remove accumulated grime, and the coating withstands high-pressure cleaning without damage or wear that would affect thinner residential alternatives.
Professional recoating intervals extend far beyond residential systems due to superior initial thickness and wear resistance. Manufacturers recommend recoating every 10-15 years for industrial applications compared to 3-5 years for residential systems. The extended service life reduces long-term maintenance costs and provides consistent performance throughout the coating’s extended lifespan in demanding workshop environments.

What’s the cost difference between industrial and residential epoxy systems?
Industrial epoxy systems cost 3-4 times more than residential products when considering materials alone, but the total project cost, including preparation and application, ranges from $12-20 per square foot compared to $4-8 for residential systems. However, the superior performance and extended lifespan make industrial systems more economical over time. I calculated that my industrial system will last 15-20 years compared to 5-7 years for residential alternatives, making the higher initial cost worthwhile for serious workshop applications.
Can I install industrial epoxy over existing residential epoxy coatings?
I attempted this initially and experienced complete adhesion failure within months. Existing coatings require complete removal through aggressive grinding or chemical stripping before industrial system application. The thick, impermeable nature of industrial coatings demands direct bonding to prepared concrete substrates. Shortcuts in preparation lead to catastrophic failure and expensive remediation. I learned this lesson and now always verify complete coating removal before proceeding with industrial installations.
How long does industrial epoxy take to cure for heavy equipment use?
Industrial systems require extended curing times due to their thickness and chemical complexity. I waited 7-10 days for initial cure and 14-21 days for full chemical cure before operating heavy equipment. Temperature and humidity significantly affect curing speed, with cooler conditions extending cure times substantially. Rushing the process can damage the coating permanently and void manufacturer warranties. Patience during curing ensures maximum performance and durability for demanding applications.
What safety precautions are essential for industrial epoxy installation?
Industrial epoxy systems require more stringent safety measures due to higher chemical concentrations and longer exposure times. I used supplied-air respirators rather than cartridge masks, maintained continuous ventilation throughout application and curing, and wore full chemical protection suits. Skin and eye protection become critical with industrial-strength chemicals. I kept neutralizing agents, eyewash stations, and emergency contacts readily available throughout the project for safety compliance.

How do I repair damaged areas in industrial epoxy flooring?
Small damage areas can be repaired using matching industrial repair compounds applied with professional techniques. I clean damaged areas thoroughly, grind edges to create mechanical bonding surfaces, and apply repair materials in multiple thin layers. Large damage areas require complete section removal and reapplication of primer, base coat, and topcoat layers. Professional repair services may be necessary for extensive damage or where color matching becomes critical for appearance.
What preparation is required for concrete before industrial epoxy application?
Concrete preparation for industrial systems requires aggressive mechanical preparation methods including diamond grinding or shot blasting to achieve proper surface profile. I tested concrete strength, moisture content, and pH levels before beginning preparation. Weak or contaminated concrete requires repair or replacement before coating application. The preparation process typically consumes 60-70% of total project time but determines the success of the entire installation. Shortcuts in preparation lead to catastrophic adhesion failure.
Related Posts: