When I finally decided to tackle my dingy, oil-stained garage floor last spring, I had no idea I was about to learn so much about surface preparation, chemical reactions, and my own patience levels. I’d watched my neighbor’s professionally coated garage floor look amazing for years and assumed I couldn’t achieve similar results myself.
After countless hours of research, one very long weekend of hard work, and some genuine trial and error, I can tell you that DIY garage floor coating is absolutely doable. Here’s everything I wish I’d known before I started.
Understanding Your Garage Floor Coating Options
The first thing that confused me when I started researching was the sheer number of coating types available. Epoxy, polyurethane, polyaspartic, acrylic sealer, and various hybrid combinations all promised different benefits. I spent weeks reading product descriptions and reviews before I finally understood the meaningful differences. Epoxy became my choice for reasons I’ll explain, but knowing what each type offers helps you make the right decision for your specific garage situation.
Epoxy coating is the most popular DIY option and what I ultimately used. It’s a two-part system that chemically cures into an extremely hard, durable surface that bonds directly to concrete. The thickness you can achieve with epoxy provides excellent protection against hot tire pickup, chemical spills, and impact damage.
It’s also the most forgiving for first-time DIYers because you have reasonable working time before it sets. The main downside is that epoxy can yellow slightly over time with UV exposure, though this matters more for outdoor applications than most garage situations.
Polyurethane and polyaspartic coatings are typically used as top coats over epoxy in professional installations, though some products work as standalone coatings. They’re more UV-resistant than epoxy and create a glossier finish, but they’re also harder to apply because they cure much faster, leaving less room for error.
For my first garage coating project, I appreciated the slower cure time and more forgiving nature of straight epoxy. If I coat another garage in the future, I might experiment with a polyurethane topcoat for added durability and gloss, but epoxy alone has performed excellently for my two-car garage that sees daily use.

The Surface Preparation No One Wants to Do But Everyone Must
I cannot overstate how critical surface preparation is to the success of a garage floor coating. This is where most DIY projects fail, not because people choose the wrong coating, but because they rush or skip the prep work. I initially planned to spend one day on prep and one day on coating. I ended up spending three full days on preparation alone, and that time investment is the single reason my floor turned out beautifully and has held up for over a year with zero issues.
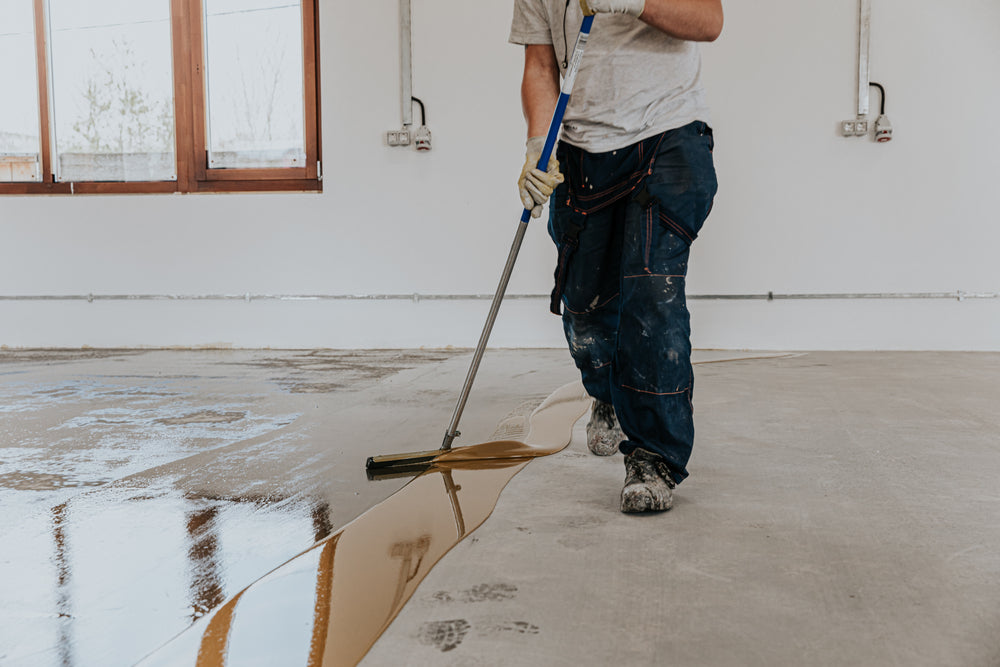
My concrete garage floor was 15 years old with oil stains, tire marks, and some surface dusting. I started by thoroughly cleaning with a degreaser, scrubbing stubborn spots with a stiff brush. Then came the critical step: acid etching. I used a muriatic acid solution diluted per the product instructions, which opens up the concrete pores and creates the surface profile needed for proper epoxy adhesion. This process was honestly unpleasant, requiring respirator, gloves, and eye protection, but watching the concrete fizz and foam as the acid reacted showed me it was working. I rinsed thoroughly multiple times until the water ran completely clear.
After etching, I rented a concrete grinder for $75 to address some stubborn spots and create an even better surface profile. This step isn’t always necessary, but my floor had some previous sealer that needed removal. The grinder also knocked down some high spots and smoothed rough areas. I finished by vacuuming meticulously with a shop vac and then using a leaf blower to remove every last bit of dust. The floor needs to be absolutely clean and dry before coating, and I mean absolutely. Any contamination, dust, moisture, or oil will prevent proper adhesion and cause coating failure.
Choosing and Mixing Epoxy: The Details That Matter
Shopping for epoxy coating kits was more complex than I expected. Big-box stores carry several brands in the $50 to $150 range for a two-car garage, while specialty products from dedicated epoxy suppliers run $200 to $400 for the same coverage. I went middle-of-the-road with a $180 100% solids epoxy system from a reputable manufacturer after reading that cheaper water-based epoxies are thinner, less durable, and more prone to failure. The higher solids content means a thicker coating with better protection.
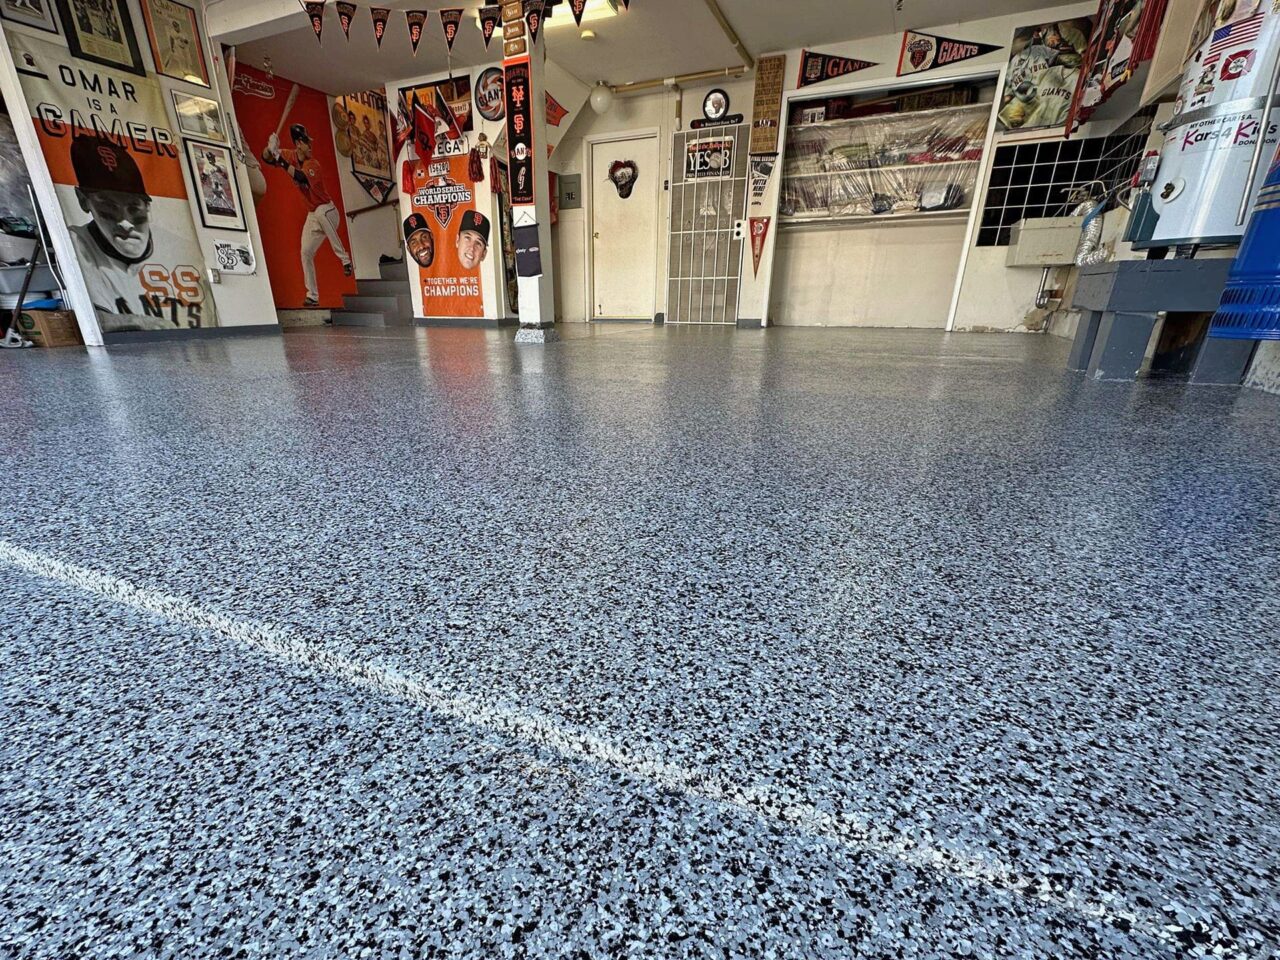
Color and finish choices also required thought. I chose a light gray base with multicolored decorative flakes, which has proven practical for hiding dirt and tire marks between cleanings. Solid colors show every speck of dust and dirt, while flake systems disguise everyday garage mess remarkably well. I bought extra flakes beyond what came in the kit, about $30 more, to achieve heavier flake coverage. This created a more textured, slip-resistant surface that looks more professional and high-end than sparse flake coverage.
Mixing epoxy properly is genuinely critical and slightly nerve-wracking. The two parts, resin and hardener, must be combined thoroughly and in the exact ratio specified. I used a drill with a mixing paddle attachment and mixed for a full five minutes, making sure to scrape the sides and bottom of the bucket. The mixed epoxy begins its chemical cure immediately, and you typically have 45 minutes to two hours of working time depending on temperature. I mixed one batch at a time rather than trying to mix everything at once, which gave me better control and prevented waste from epoxy setting up in the bucket before I could apply it.
Application Day: My Process and Timeline
I picked a weekend with forecasted temperatures between 60 and 85 degrees and low humidity for my coating application. Temperature matters enormously with epoxy, too cold and it won’t cure properly, too hot and it sets up too quickly to work with. I started at 8 AM to give myself maximum daylight and working time. My wife and kids knew they were banned from the garage for 48 hours minimum, and I set up clear barriers and warning signs to prevent anyone from accidentally walking on wet epoxy.
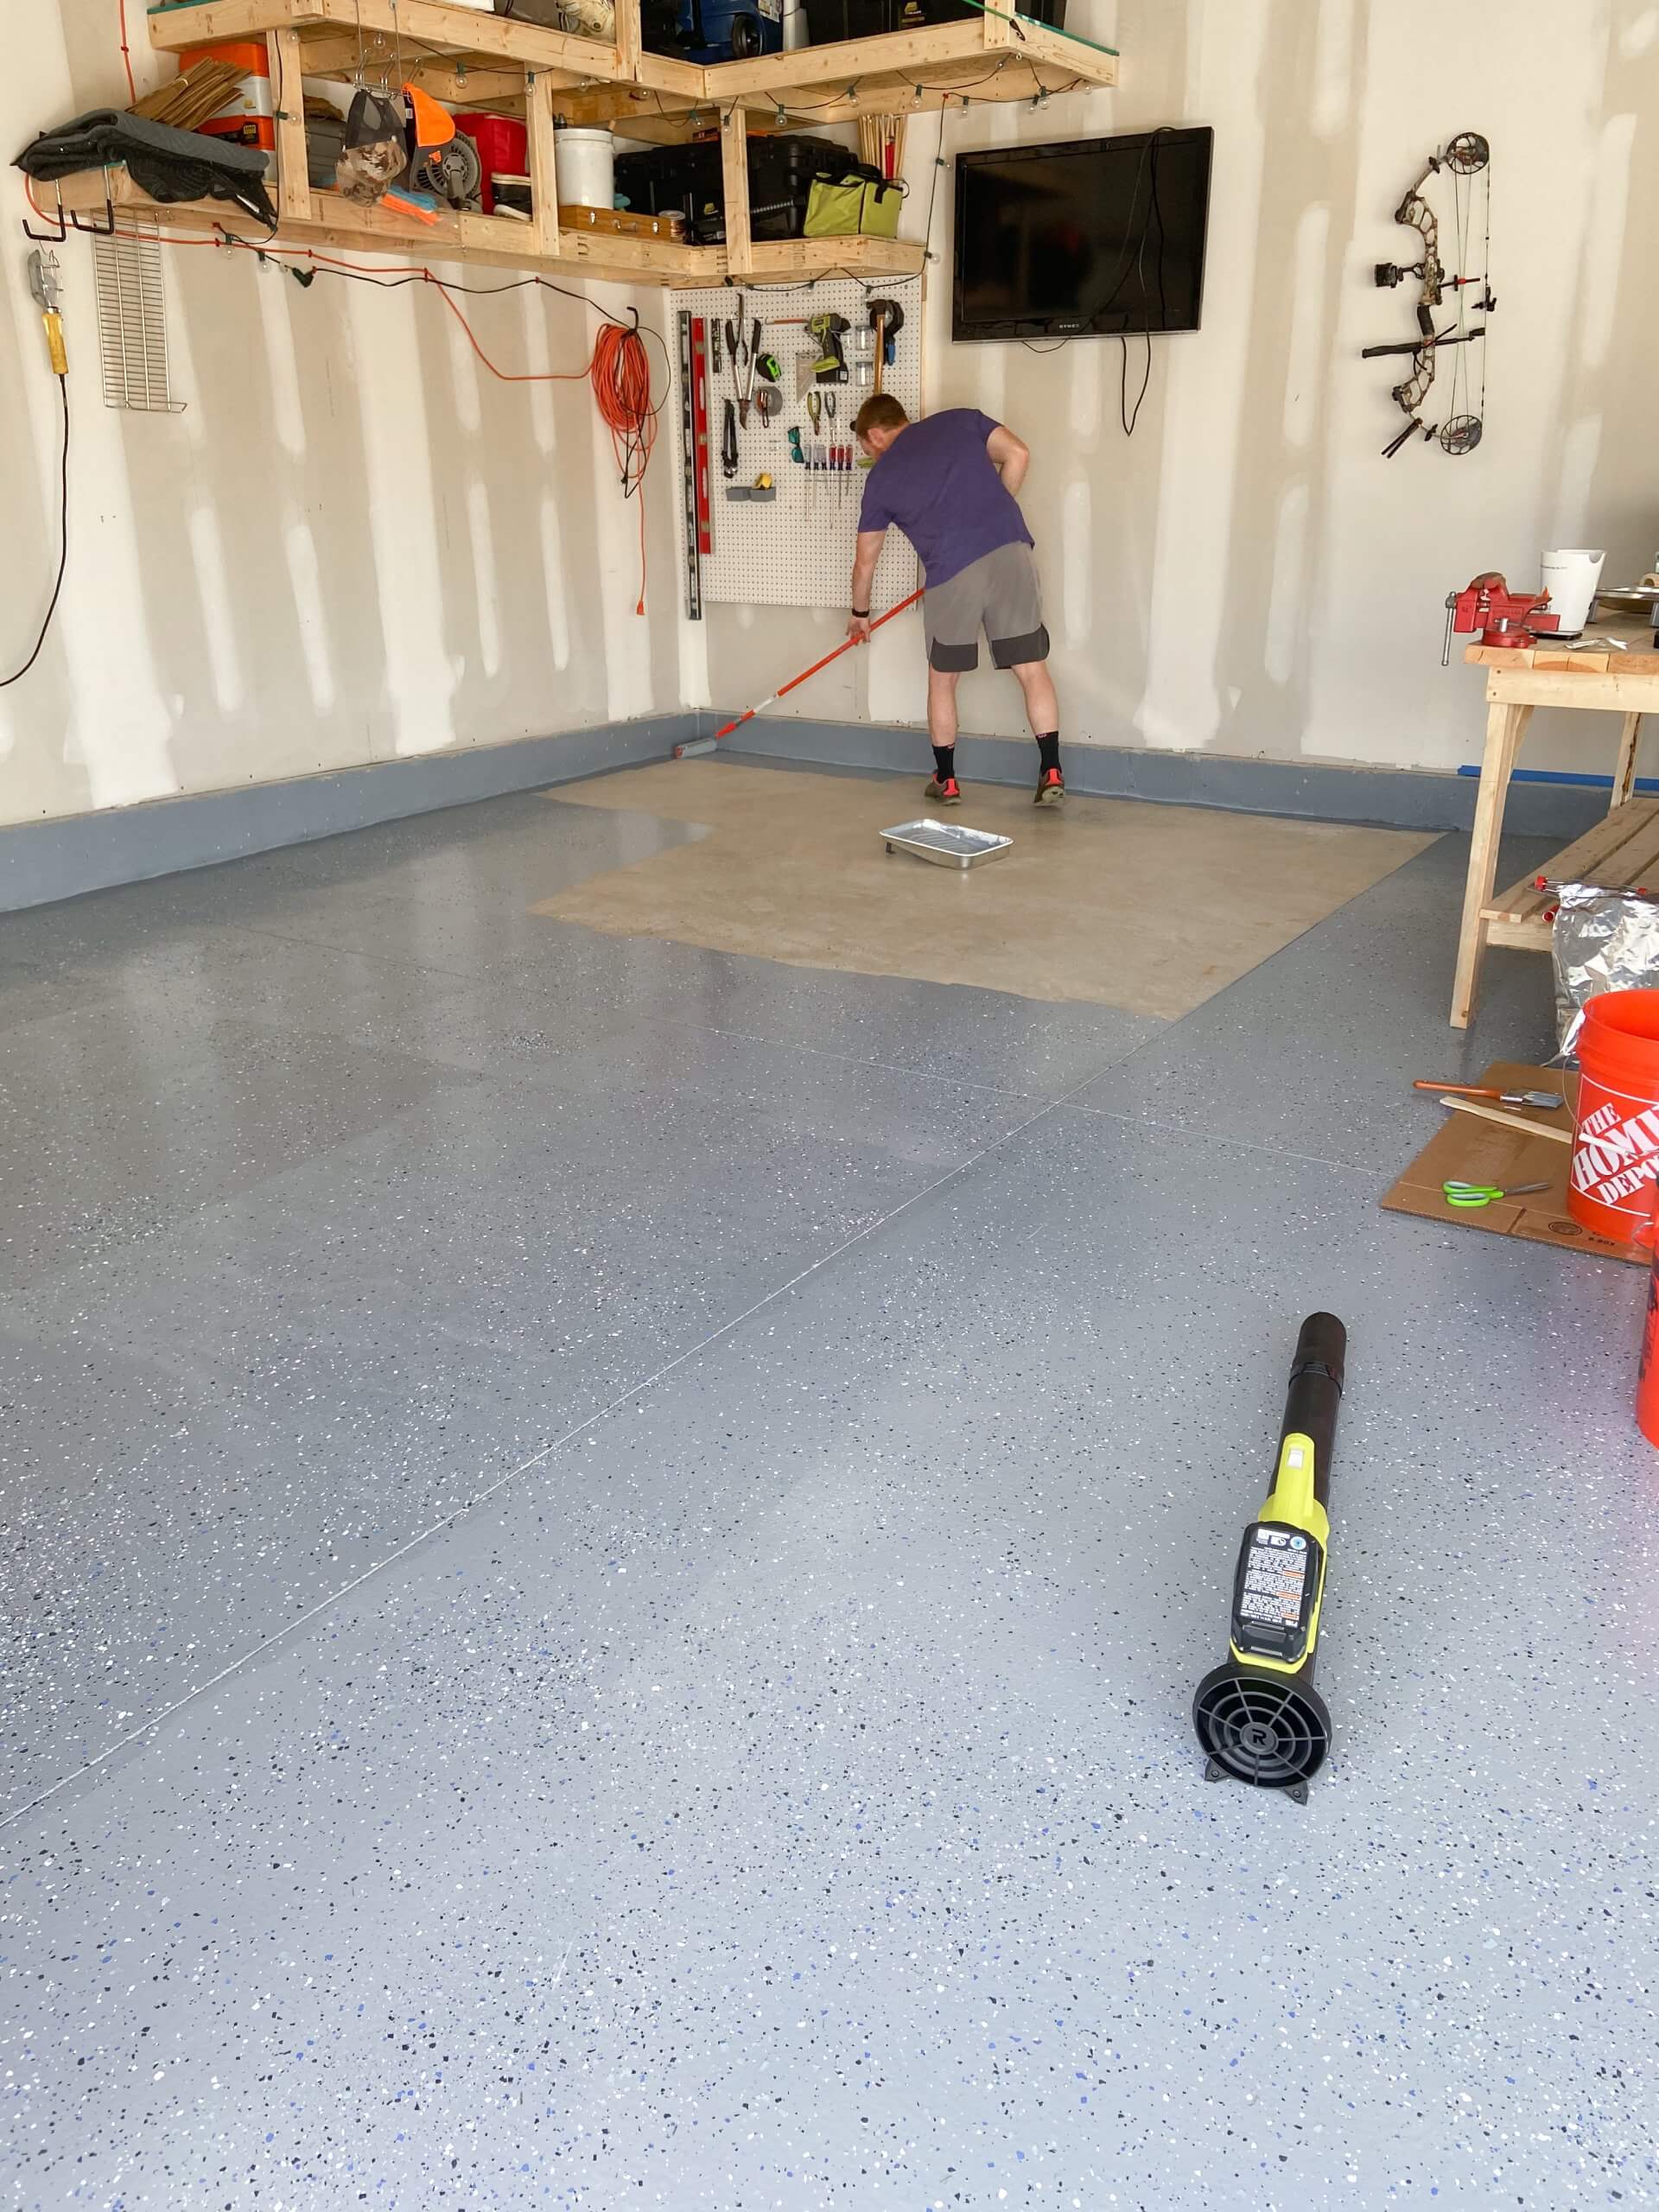
I used a combination of a 9-inch roller on an extension pole for the main floor area and a 3-inch brush for cutting in around the edges and corners. Working in 4×4 foot sections, I poured epoxy onto the floor and rolled it out in overlapping passes, maintaining a wet edge to prevent visible seam lines. The coverage rate was roughly 250 square feet per gallon of mixed epoxy, though porous or rough concrete uses more. My 400-square-foot garage required about two gallons total, which I applied in two coats with 12 hours between them.
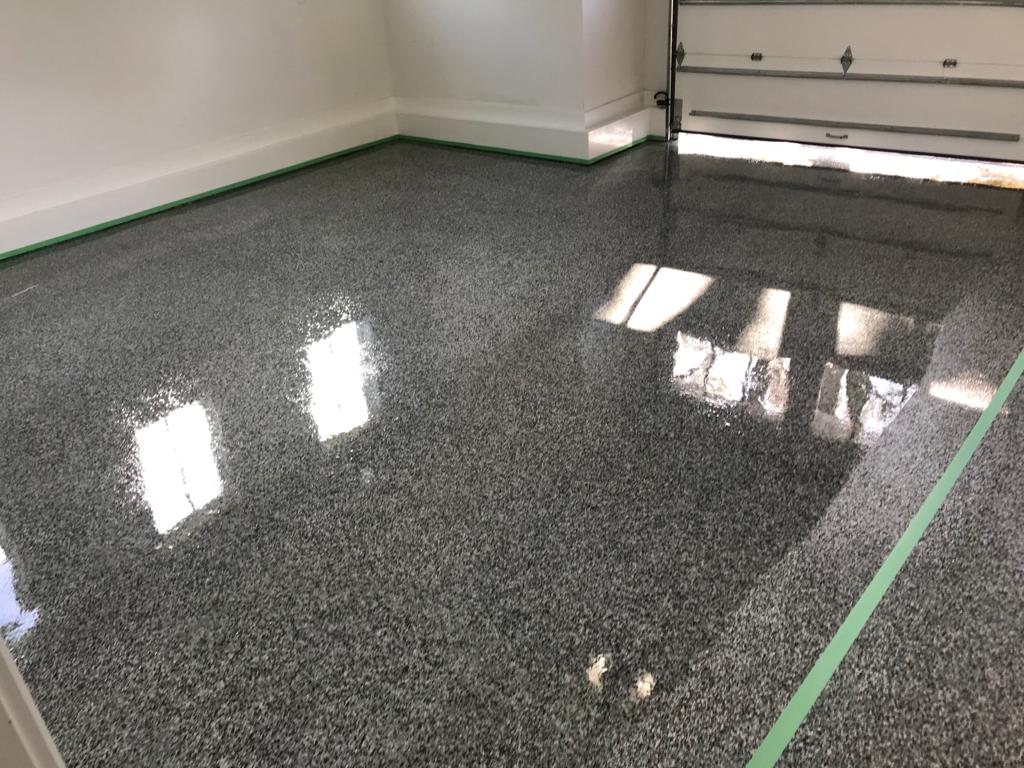
Broadcasting the decorative flakes onto wet epoxy requires working quickly and systematically. I tossed handfuls of flakes upward with a flicking wrist motion, letting them rain down onto the wet coating. The goal is even, random distribution, which is harder than it sounds. I went back over sparse areas and added more flakes until I achieved roughly 80% coverage. After the epoxy cured for 24 hours, I scraped off any loose flakes and applied a clear polyurethane topcoat for extra protection and gloss. This final topcoat also encapsulated the flakes completely, preventing any from coming loose later.
![]()
Problems I Encountered and How I Fixed Them
Despite my careful preparation, I still hit a few snags that taught me valuable lessons. About a third of the way through my first epoxy coat, I noticed the coating was setting up faster than expected. The garage was warming up as morning progressed, and the increased temperature accelerated the cure time. I had to work faster and switched to mixing smaller batches more frequently. This is why starting early in cooler morning temperatures is genuinely smart advice, not just a suggestion.
I also discovered a few small spots where the epoxy didn’t adhere properly, creating tiny bubbles that I didn’t notice until the next morning. These were all in areas where I’d apparently missed spots during my cleaning and degreasing. I carefully scraped out the bad spots with a putty knife, cleaned them thoroughly with degreaser, and patched them during my second coat. This is why a two-coat system is valuable, it gives you a chance to fix small errors from the first coat and achieve a more even, professional final result.
The flake broadcasting process created more of a mess than I anticipated. Flakes bounced off the wet epoxy and scattered everywhere, landing on my car, tools, workbench, and even in my hair. I should have covered or removed everything in the garage before starting. I also should have worn a full protective suit because epoxy and flakes got on my clothes despite my attempts at being careful. Future tip: assume everything in and near your garage will get coating material on it, and plan accordingly with drop cloths and protective covering.
Living With My DIY Coated Garage Floor After 18 Months
The results after all that work have been genuinely worth the effort. My garage floor went from embarrassingly stained and dingy to looking like a high-end professional space. The light gray with multicolored flakes brightens the entire garage so much that I actually need less artificial lighting for working on projects. The smooth, sealed surface means spills wipe up instantly instead of soaking into porous concrete and staining permanently. Oil drips, antifreeze spills, and dropped paint have all cleaned up completely with just a paper towel.
Durability has exceeded my expectations honestly. My wife parks her crossover in the garage daily, driving over the same path hundreds of times. That high-traffic area shows absolutely zero wear, no dulling, no tire marks that won’t clean off, and no coating degradation. I dropped a heavy toolbox from waist height once and braced for a huge chip, but the coating didn’t even scratch. Hot tires from summer driving haven’t caused any pickup or marking. The coating has proven genuinely tough in ways that surprised me given this was my first attempt.
Maintenance is minimal and satisfying. I sweep the garage floor weekly with a dust mop, which takes maybe three minutes. Every few months I clean more thoroughly with a mild detergent solution and a mop, and the floor looks brand new afterward. The smooth surface means dirt and grit don’t get trapped like they did in the rough concrete before. I’ve had neighbors ask if I had it professionally done and seem genuinely surprised when I tell them it was a DIY project. The pride I feel every time I pull into my garage and see that clean, glossy floor makes every hour of prep work feel completely worthwhile.

Can I really do garage floor coating myself or should I just hire professionals?
You can absolutely DIY it successfully, but you need to commit to proper surface prep and follow instructions precisely. The actual coating application is straightforward, it’s the preparation that determines success or failure. I saved roughly $2,000 by doing it myself versus professional quotes I received. If you’re patient, detail-oriented, and willing to invest a full weekend, DIY makes excellent financial sense.
How long does DIY epoxy garage floor coating actually last?
Quality 100% solids epoxy properly applied should last 10 to 20 years in a residential garage with normal use. My floor is 18 months old and shows zero signs of wear. Thin water-based kits from big-box stores might only last 2 to 5 years before showing significant wear. The longevity difference between cheap and quality epoxy products is substantial and worth the extra upfront cost.

What’s the biggest mistake DIYers make with garage floor coatings?
Inadequate surface preparation is the overwhelming #1 mistake. People rush the cleaning, skip the etching or grinding, or don’t wait for the concrete to dry completely. The coating can look fine initially but will peel or delaminate within months. Spending three full days on prep for a one-day coating application feels excessive but it’s genuinely the secret to long-term success.
Is epoxy garage floor coating slippery when wet?
With decorative flakes broadcast into the coating, the textured surface provides good traction even when wet. My floor is less slippery than bare sealed concrete was. If you use a smooth epoxy coating without flakes or texture, it can be quite slippery when wet. Adding fine silica sand or aluminum oxide grit to the final topcoat also increases slip resistance effectively if traction is a concern.

Can I coat my garage floor if it has cracks or surface damage?
Small hairline cracks are fine, you just fill them with epoxy crack filler before coating. Larger structural cracks or areas with significant spalling need proper concrete repair first. My floor had several small cracks that I filled during the coating process and they’re now completely sealed and protected. If your concrete is severely damaged, address the underlying issues before considering coating or you’ll just be coating a damaged surface.
How bad is the smell during epoxy application and how long does it last?
The smell during mixing and application is strong and chemical, definitely requiring good ventilation. I opened both garage doors and used fans to create airflow throughout the process. The strong smell lasted about 8 hours during application and initial cure. After 24 hours the smell was minimal, and after 48 hours it was completely gone. Plan to keep the garage well-ventilated and avoid the space during application if chemical odors bother you significantly.
Related Posts: