When I decided to finally do something about my cracked, stained concrete garage floor, I assumed it was going to cost a fortune. I had visions of professional epoxy coatings and custom tile work that were way outside my budget. But after a lot of research and a few weekends of hands-on experimenting, I found that there are genuinely good-looking, budget-friendly options that hold up well under real garage conditions. If your garage floor has seen better days and you don’t want to spend a lot, let me share what actually worked for me.
Concrete Paint and Sealers: The Most Budget-Friendly Starting Point
When I first looked into garage floor options, concrete paint kept coming up as the cheapest entry point, and for good reason. A gallon of quality concrete floor paint typically runs between twenty and forty dollars and can cover a standard two-car garage with room to spare. It won’t give you the glossy, showroom finish of epoxy, but it cleans up the look dramatically for very little money.
The key, I learned, is prep work. I spent more time cleaning and etching my concrete than I did actually painting it, and that made all the difference. A good acid etch opens up the concrete’s pores so the paint bonds properly. Skip this step and you’ll be repainting within a year, which I almost found out the hard way after rushing through my first attempt in a small section.
Sealing over the paint once it cures adds durability and makes cleanup much easier. I used a basic concrete sealer from the hardware store and applied two thin coats after the paint dried. The finished floor handles oil drips, foot traffic, and the occasional dropped tool without chipping or peeling. For a first-time garage upgrade on a tight budget, this combination is hard to beat.
Garage Floor Epoxy Kits: A Step Up Without Breaking the Bank
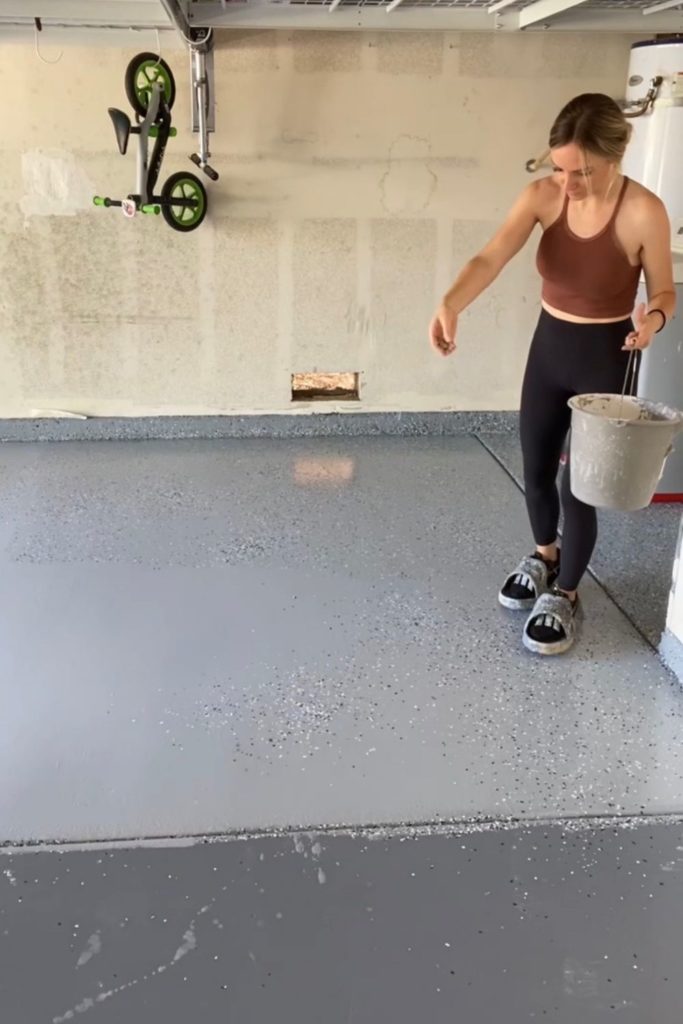
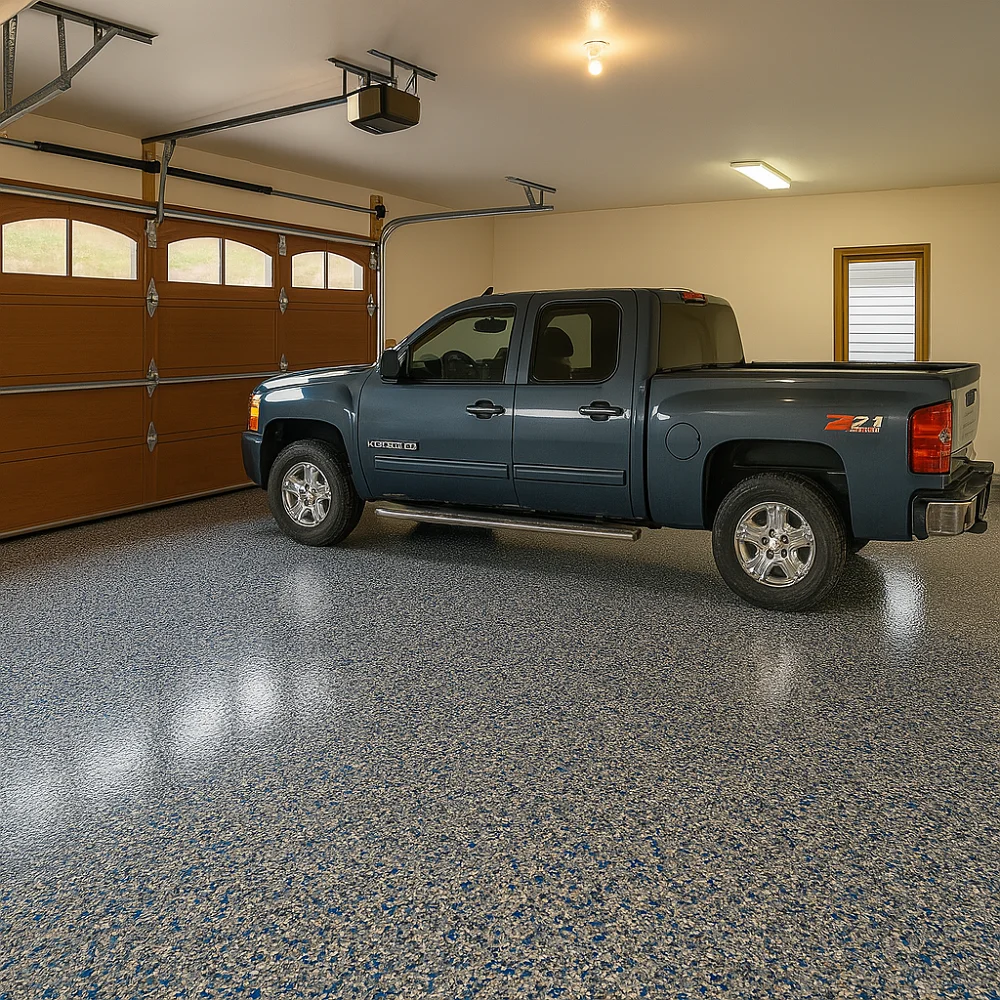
Once I had a taste of what a cleaner garage floor could look like, I wanted something more durable for my main workspace area. That’s when I looked into DIY epoxy coating kits. You can find decent two-part epoxy kits at home improvement stores for anywhere between fifty and one hundred fifty dollars for a two-car garage, which is a fraction of what professional installation costs.
The application process is more involved than paint, but very manageable over a weekend. I did one car bay at a time so I could still use part of the garage while sections cured. The trick is working quickly once you mix the two components, because the pot life is limited and you can’t stop halfway through a section without getting lap marks in the finish.
Most kits come with decorative color flakes you broadcast onto the wet epoxy, and this detail alone transformed how my garage looked. The flakes hide imperfections, add texture for slip resistance, and give the floor a professional appearance. My neighbors assumed I had hired someone. When I told them I did it myself for under a hundred dollars, they couldn’t believe it. The durability has impressed me too, holding up well after two years of regular use.

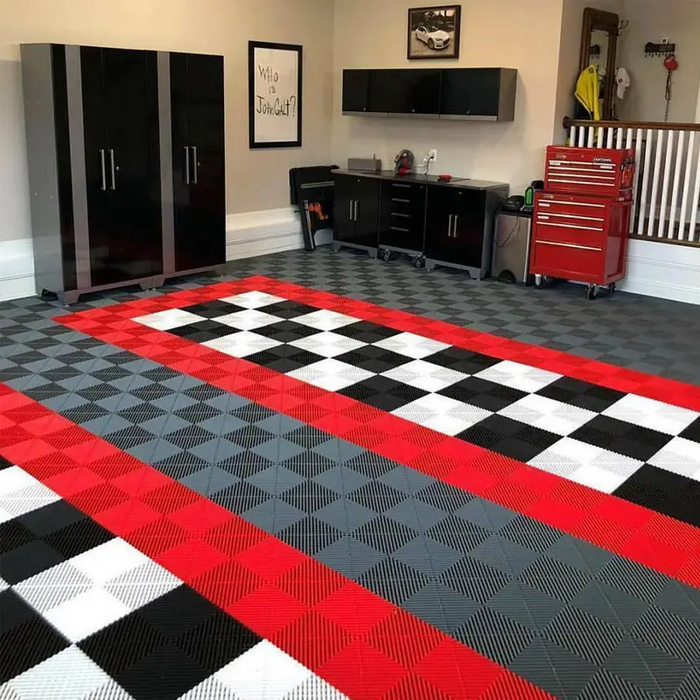
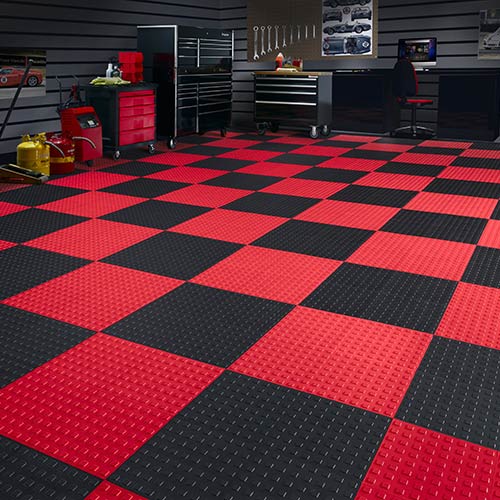
Interlocking Garage Floor Tiles: Easy, Removable, and Surprisingly Affordable
I installed interlocking polypropylene tiles in a corner of my garage that I use as a workout area, and they’ve been one of my favorite budget upgrades. These tiles typically run between one and three dollars per square foot and snap together without any adhesive. You can lay them yourself in an afternoon and take them back up just as easily if you move or want to change things around.
The raised, perforated design of most polypropylene tiles lets air circulate underneath and allows moisture and debris to drain away, which is a smart feature for a garage environment. I had some concern about water pooling under them during rainy seasons, but the drainage channels handle it well. The floor underneath stays dry and the tiles themselves are easy to pop up and clean individually.
These tiles come in a range of colors and textures, including diamond plate and coin patterns that look genuinely sharp. I mixed two colors to create a defined zone in my workout area and it looks intentional and clean. For anyone who wants a quick, tool-free flooring upgrade or needs to cover a specific area without committing to a permanent solution, interlocking tiles are absolutely worth considering.
Rubber Flooring Rolls: Tough, Comfortable, and Cheap Per Square Foot
I added rubber flooring rolls to my garage gym area after the interlocking tiles, and I wish I had done it sooner. Rolled rubber flooring is sold by the linear foot and typically costs between one and two dollars per square foot for standard quarter-inch thickness. It’s the same material used in commercial gyms and it handles heavy equipment, dropped weights, and constant foot traffic without complaint.
Installation is about as simple as flooring gets. You unroll it, cut it to size with a utility knife and straightedge, and lay it down. No adhesive is required in most cases, though I used a few strips of double-sided tape along the edges to keep things from shifting. The whole process took me less than two hours for a 200-square-foot section, which felt almost too easy.
The cushioning underfoot is a genuine comfort benefit, especially if you spend a lot of time standing in your garage. It’s also surprisingly good at dampening sound and vibration, which matters if your garage is attached to your home. Cleaning is effortless, just a damp mop or hose-down, and the material doesn’t absorb stains or odors. For utility and value, rubber rolls might be the most practical inexpensive option on this list.
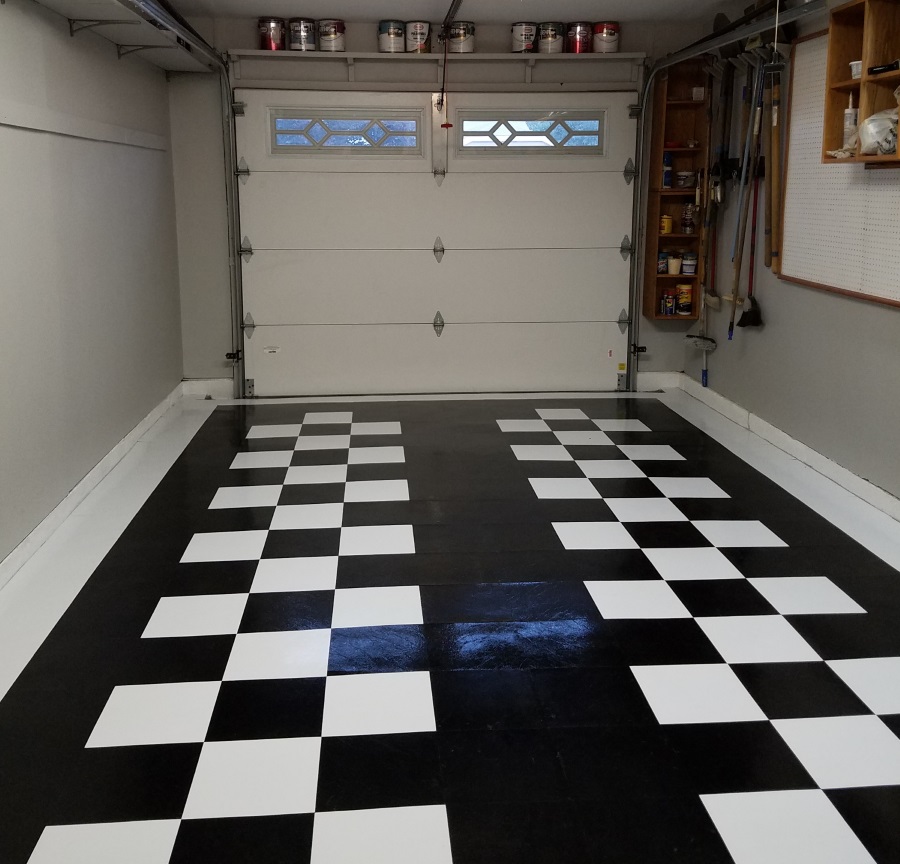
Peel-and-Stick Vinyl Tiles: A Surprisingly Decent Option for Light-Use Garages
I’ll be upfront: peel-and-stick vinyl tiles aren’t the most heavy-duty choice for a garage, but in the right situation they work better than you’d expect. I used them in a small attached garage section I converted into a hobby space, and for that light-use application they’ve held up well for over a year. They’re extremely cheap, often less than a dollar per square foot on sale.
The key is surface prep, just like with paint or epoxy. The concrete needs to be clean, dry, and as smooth as possible. I filled in cracks with concrete filler and let it cure fully before laying tiles. On a well-prepped surface, the adhesive sticks firmly and the tiles stay flat even with temperature changes, which I was initially worried about.
Choose a thicker tile if you go this route. The flimsy bargain-bin versions crack and curl quickly, but a 45-mil or thicker tile handles light foot traffic and the occasional rolling cart much better. The visual options are also genuinely nice now, with wood-look and stone-look patterns that make the space feel less like a garage and more like a finished room. For a hobby space, workshop, or light storage area, this budget option is worth a look.
Bare Concrete Makeovers: When Smart Prep Is the Upgrade
Sometimes the most inexpensive garage floor option is working with what you already have. I spent about thirty dollars on supplies to deep-clean, patch, and seal my bare concrete in a storage section of my garage, and the difference was remarkable. Clean, sealed concrete actually looks intentional and clean rather than neglected.
I started with a concrete degreaser and a stiff brush to scrub out years of oil and grime. Then I used a concrete crack filler to address the surface damage, smoothing it flush with a putty knife. Once everything dried, a single coat of penetrating concrete sealer brought out a slight sheen and made the surface much easier to wipe clean going forward.
You can take this approach further by renting a floor grinder to smooth rough patches, or applying a concrete stain for color. Acid stains create a mottled, marbled appearance that looks genuinely beautiful and costs a fraction of other flooring options. The whole bare-concrete route requires effort and patience, but if budget is your primary concern, it delivers a clean, finished look without spending much at all.

What is the cheapest garage floor option overall?
In my experience, sealing and painting bare concrete is the most affordable route, often under fifty dollars total for a single-car garage. If you want something removable or tool-free, interlocking polypropylene tiles come in close behind. Both options look far better than untreated concrete and handle typical garage use well when installed correctly with good surface prep.
Can I apply epoxy myself or do I need a professional?
I did mine completely solo and it turned out great. DIY epoxy kits are designed for homeowners and come with clear instructions. The most important thing is prep: clean, etch, and dry the concrete thoroughly before you start. The application itself is straightforward if you work quickly and methodically. Save professional installation for very large spaces or specialty coatings.
How do I handle moisture and condensation under my garage floor covering?
Moisture is a real concern, especially with glued-down materials. I always do a moisture test by taping plastic sheeting to the concrete for 24 hours and checking for condensation underneath. For moisture-prone garages, interlocking tiles or rubber rolls are smarter choices since they allow airflow underneath. Avoid peel-and-stick tiles if you have a moisture problem.
Will any of these options hold up to car traffic?
Epoxy coatings and properly sealed concrete are your best bets for areas where vehicles park. Rubber rolls and polypropylene tiles can handle the weight but may shift under repeated tire movement unless secured. Peel-and-stick vinyl is not ideal for car traffic zones. I keep my vehicle area epoxy-coated and use other materials only in the walking and workspace sections.
How long do inexpensive garage floors actually last?
It varies by material and use. My DIY epoxy has held up two years strong with no signs of wear. Rubber rolls in commercial gyms last a decade or more. Concrete paint needs touch-ups every two to three years depending on traffic. Interlocking tiles are nearly indefinite since individual damaged tiles can be swapped out. Longevity improves dramatically with good prep and proper sealing.
Are these flooring options safe for a garage with kids or pets?
Most of them, yes. Rubber and polypropylene tiles are soft, non-slip, and non-toxic once fully cured, making them good choices for family-friendly spaces. Epoxy and paint need full cure time before use, usually 72 hours, but are safe afterward. I’d avoid peel-and-stick tiles in areas where pets or kids spend a lot of time, just because of the adhesive and thinner material construction.
Related Posts: