When I decided to paint my garage floor, I thought it would be a simple weekend project. Slap down some paint, let it dry, done. What actually happened was a two-weekend process full of lessons I’m now very glad I learned the hard way so you don’t have to.
Painted garage floors look fantastic and hold up incredibly well when done correctly, but the preparation work is where most people, including past me, go wrong. Here’s the full story of what I did, what worked, and what I’d change if I were starting over today.
Choosing the Right Paint or Coating for Your Garage Floor
The first decision I had to make was whether to use standard floor paint, epoxy paint, or a true two-part epoxy coating. These are not the same thing, and the difference matters more than most product labels make obvious. Standard concrete floor paint is the most affordable option but also the least durable, and in a garage that sees vehicle traffic and chemical spills, it tends to peel within a year or two.
Epoxy paint is a single-component product that has some epoxy resin mixed in for improved durability. It’s easier to apply than true epoxy and works reasonably well for light-use garages.
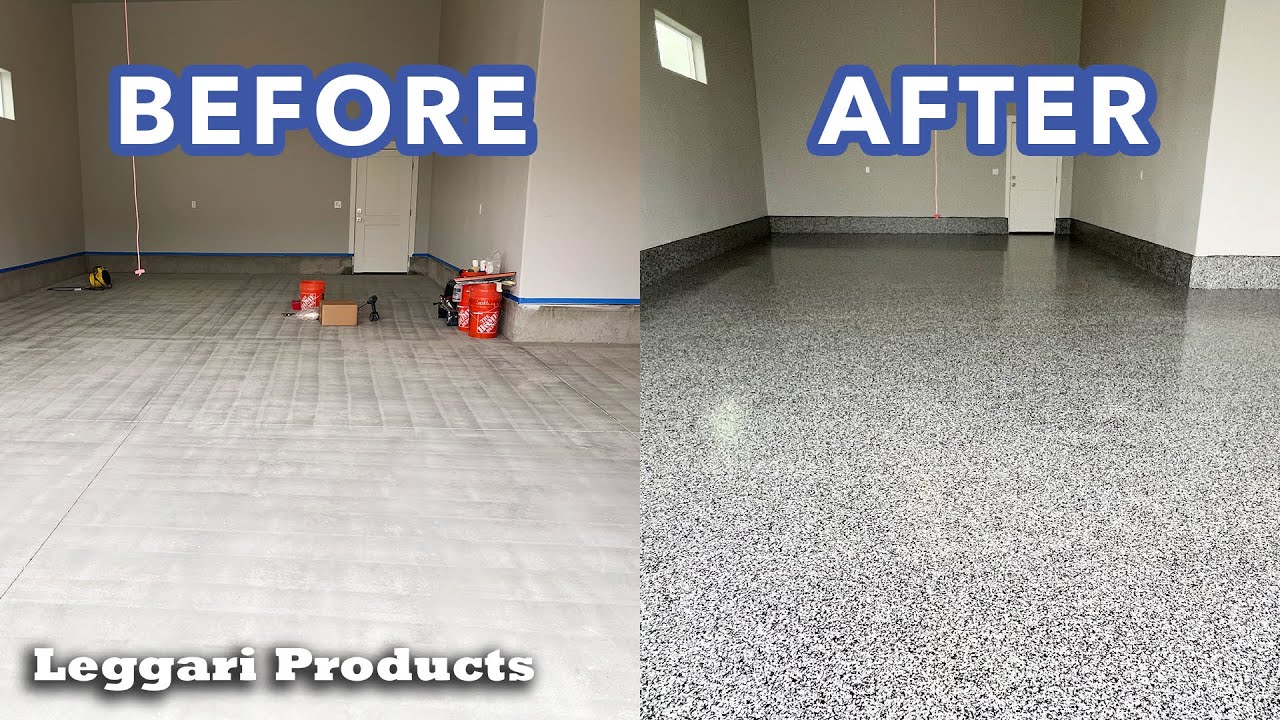
I initially went this route for my first attempt and was reasonably happy with the results for about 18 months before I started seeing wear in the tire tracks. For a garage that sees daily driving, it’s a decent middle-ground option at a lower cost.
Two-part epoxy coating is what I switched to on my second application, and the difference in hardness and longevity was immediately obvious once it cured.
You mix a resin and a hardener together just before application, which triggers a chemical reaction that creates an incredibly tough, chemical-resistant surface. It costs more and requires more careful handling, but if you want a floor that truly lasts, this is the product worth the investment.
Testing Your Concrete Before You Buy a Single Can of Paint
Before I bought anything for my second application, I did a simple water test that my contractor friend had told me about years earlier and that I’d foolishly skipped the first time. You pour a small amount of water onto the concrete and watch what happens. If it beads up and sits on the surface, you have a sealer or previous coating that needs to be removed or etched before new paint will bond properly.
There’s also a moisture test worth running if your garage is on a slab that sits directly on soil. Tape a square of plastic sheeting to the floor, seal all four edges, and leave it for 24 hours. If you find condensation or dampness under the plastic, you have moisture migrating up through the concrete, and no paint or coating will bond reliably until you address that. I had mild moisture coming through in one corner and had to apply a penetrating concrete sealer before moving forward.
Oil stains are another thing to identify and treat before painting. Engine oil soaks deep into concrete and acts like a barrier that prevents paint adhesion. I scrubbed my worst stains with a dedicated degreaser and a stiff brush, then let the area dry completely before moving on. Some very deep stains needed two applications before they stopped showing through. Don’t skip this step or you’ll be peeling paint back up in exactly those spots six months later.

Cleaning and Etching the Concrete Properly
Cleaning the floor thoroughly before etching was the step that took the most time and felt the least glamorous, but my second application looked dramatically better than my first largely because I did it properly. I swept, vacuumed, and degreased the entire floor before touching any etching solution. Any dirt, oil, or dust left behind will create adhesion problems that show up later as bubbles or peeling patches.
Acid etching opens up the pores of the concrete so the epoxy or paint can penetrate and bond mechanically rather than just sitting on top of the surface. I used a diluted muriatic acid solution applied with a watering can and scrubbed with a stiff push broom. The surface bubbled and fizzed, which told me the acid was reacting with the concrete. I let it sit for several minutes before rinsing thoroughly with clean water.
An alternative to acid etching is mechanical grinding or shot blasting, which some professionals prefer because it doesn’t introduce moisture to the slab. I rented a floor grinder for my second project and used it on a stubborn section near the garage door where acid hadn’t fully opened up the surface. The grinder gave me a more consistent texture across the entire floor, and the coating bonded noticeably better in that area compared to my earlier acid-only approach.

Applying the Epoxy Coating Step by Step
Temperature and humidity are two factors that can make or break your application day, and I learned this the hard way during my first attempt. Epoxy needs temperatures between roughly 50 and 90 degrees Fahrenheit to cure properly, and humidity above 85 percent can prevent it from hardening correctly. I picked a mild spring day with low humidity for my second application and the results were so much better that I genuinely couldn’t believe it was the same product.
I mixed my two-part epoxy according to the manufacturer’s instructions, which specified a precise ratio and a mixing time of at least two minutes. After mixing, there’s a working window, typically two to four hours depending on temperature, during which the product needs to be applied. I poured the mixed epoxy into a roller tray and worked in sections across the floor using a 3/8 inch nap roller on an extension pole, cutting in edges and around any floor drains with a brush first.
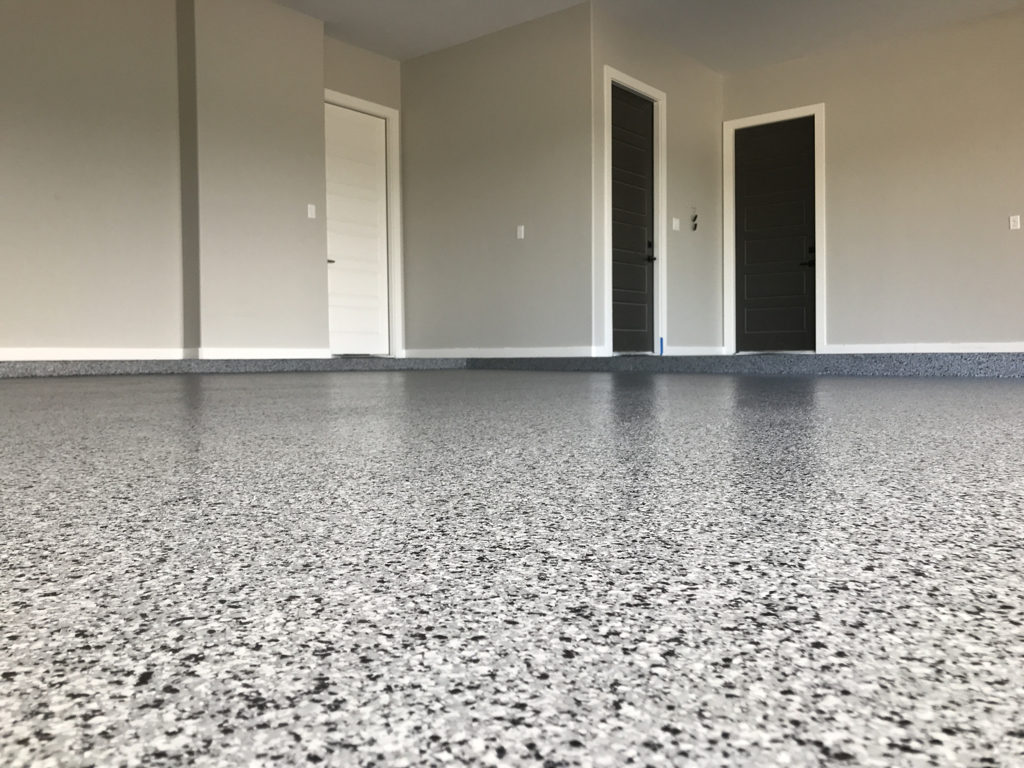
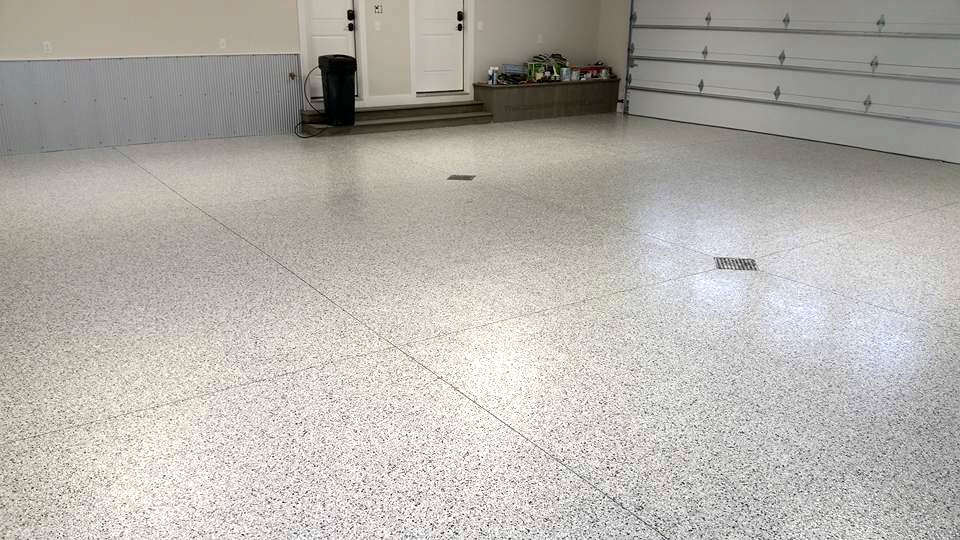
Decorative flake or chip media can be broadcast into the wet epoxy if you want that professional-looking finish that also adds texture and grip. I scattered chips generously across each section immediately after rolling it out, then went back and swept up the excess after the epoxy had cured. Adding a clear topcoat over the cured epoxy and embedded chips is optional but worth doing if you want maximum protection and a glossy, polished look that’s easy to clean.

Drying and Curing Times You Actually Need to Respect
One of the most common mistakes I see people make with garage floor coatings is walking on them too soon or, worse, driving on them before they’ve fully cured. Drying and curing are two different things, and the distinction matters enormously with epoxy. The surface may feel dry to the touch within 12 to 24 hours, but the chemical curing process that gives epoxy its hardness and chemical resistance takes significantly longer.
For foot traffic, I waited a full 24 hours after my topcoat was applied before walking carefully on the surface in clean shoes. For vehicle traffic, I waited a full 72 hours before driving my car back in, and even then I tried to avoid sharp turns that drag tire rubber across the surface. Some manufacturers recommend waiting up to seven days for full cure before subjecting the floor to heavy loads or chemical exposure like tire marks and motor oil.
Cold temperatures slow the curing process significantly, which is worth knowing if you’re doing this project in fall or early spring. My garage is not insulated, and temperatures dropped into the 40s one night during my cure window, which extended the overall time before I felt comfortable using the space normally. I used a portable propane heater to keep the temperature above 60 degrees for the first 24 hours, which helped move things along without rushing the chemistry.

Maintaining Your Painted Garage Floor So It Lasts for Years
Once my floor was fully cured and I’d moved everything back in, I was genuinely surprised by how much easier it was to keep clean compared to bare concrete. Dust, dirt, and fluids all sit on top of the epoxy surface rather than soaking in, which means a quick sweep and occasional mop with a mild cleaner keeps everything looking sharp. That alone felt like a huge quality-of-life improvement in a space I use daily.
I do a more thorough cleaning every few months where I move items off the floor, sweep carefully, and mop with a diluted floor cleaner that’s safe for epoxy. Avoid harsh acids, bleach, or citrus-based cleaners on epoxy surfaces because they can dull the finish over time. A simple pH-neutral cleaner and warm water is all you really need for routine maintenance, and I’ve found that prompt attention to oil drips or chemical spills prevents any long-term staining.
Touch-ups are possible on epoxy floors if you get a chip or scratch deep enough to notice. I keep a small amount of my original coating in a sealed container for exactly this purpose. Lightly sand the damaged area, clean it thoroughly, and apply a thin patch of fresh epoxy. Feathering the edges carefully makes the repair nearly invisible once it cures. A well-maintained epoxy garage floor can realistically last 10 to 20 years before needing a full recoat, which makes the upfront effort feel very worthwhile in the long run.

How long does painting a garage floor typically take from start to finish?
Plan for at least two full weekends. The first is for cleaning, degreasing, and etching the concrete, then letting it dry completely. The second is for applying your coating and waiting for proper cure time. Rushing either phase leads to peeling and adhesion failures. I’ve done it in a weekend before and regretted it, so give yourself proper time to do it right.
Can I paint a garage floor that already has paint or epoxy on it?
It depends on the condition. If the existing coating is peeling or flaking, you need to remove it first using a floor grinder or chemical stripper. If it’s firmly adhered and in good shape, you may be able to scuff the surface and apply a new coat directly over it. I always recommend testing adhesion in a small area first and consulting the new product’s instructions before committing to the full floor.

What’s the best temperature for applying garage floor paint or epoxy?
Most products work best between 55 and 85 degrees Fahrenheit. Too cold and the epoxy won’t cure properly, leaving a soft, tacky surface. Too hot and it can cure too quickly, causing bubbles or an uneven finish. I apply mine on mild days in spring or early fall and use a thermometer to monitor both air and concrete surface temperature before starting.
How do I prevent my garage floor paint from peeling?
Proper prep is everything. Clean and degrease thoroughly, etch the concrete to open its pores, and make sure the surface is completely dry before applying any coating. Use a quality two-part epoxy rather than single-component paint for better adhesion and durability. Peeling almost always traces back to inadequate surface prep or applying the product in poor temperature or humidity conditions.
Is it worth adding decorative flakes to an epoxy garage floor?
Absolutely, in my opinion. Flakes add grip, hide minor imperfections, and make the floor look far more finished and professional. They’re broadcast into the wet epoxy and then sealed under a clear topcoat. Cost is minimal since a small bag covers a large area. I added them to my second application and the floor looks like something out of a showroom compared to my first plain gray attempt.
How much does it cost to paint a garage floor yourself?
A quality two-part epoxy kit for a standard two-car garage typically runs $150 to $400 depending on brand and coverage. Add another $50 to $100 for supplies like rollers, brushes, degreaser, and etching solution. Professional installation runs $3 to $7 per square foot. DIY is very doable and saves significant money, but invest in quality materials rather than the cheapest option available if you want results that last more than a couple of years.
Full flake garage floor. Garage floor, Glitter floor, Garage

Are Epoxy Flake Floors Smooth? – Glossy Floors – Call (888) 99-SHINE

Related Posts: