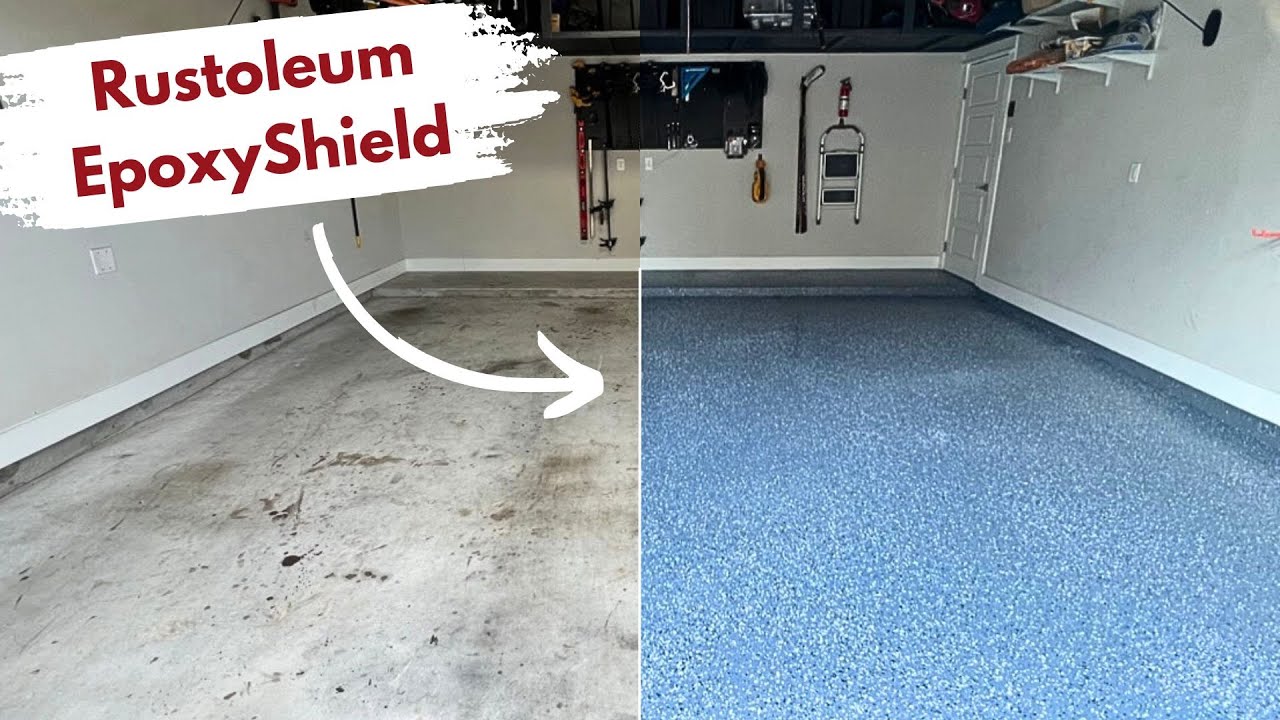
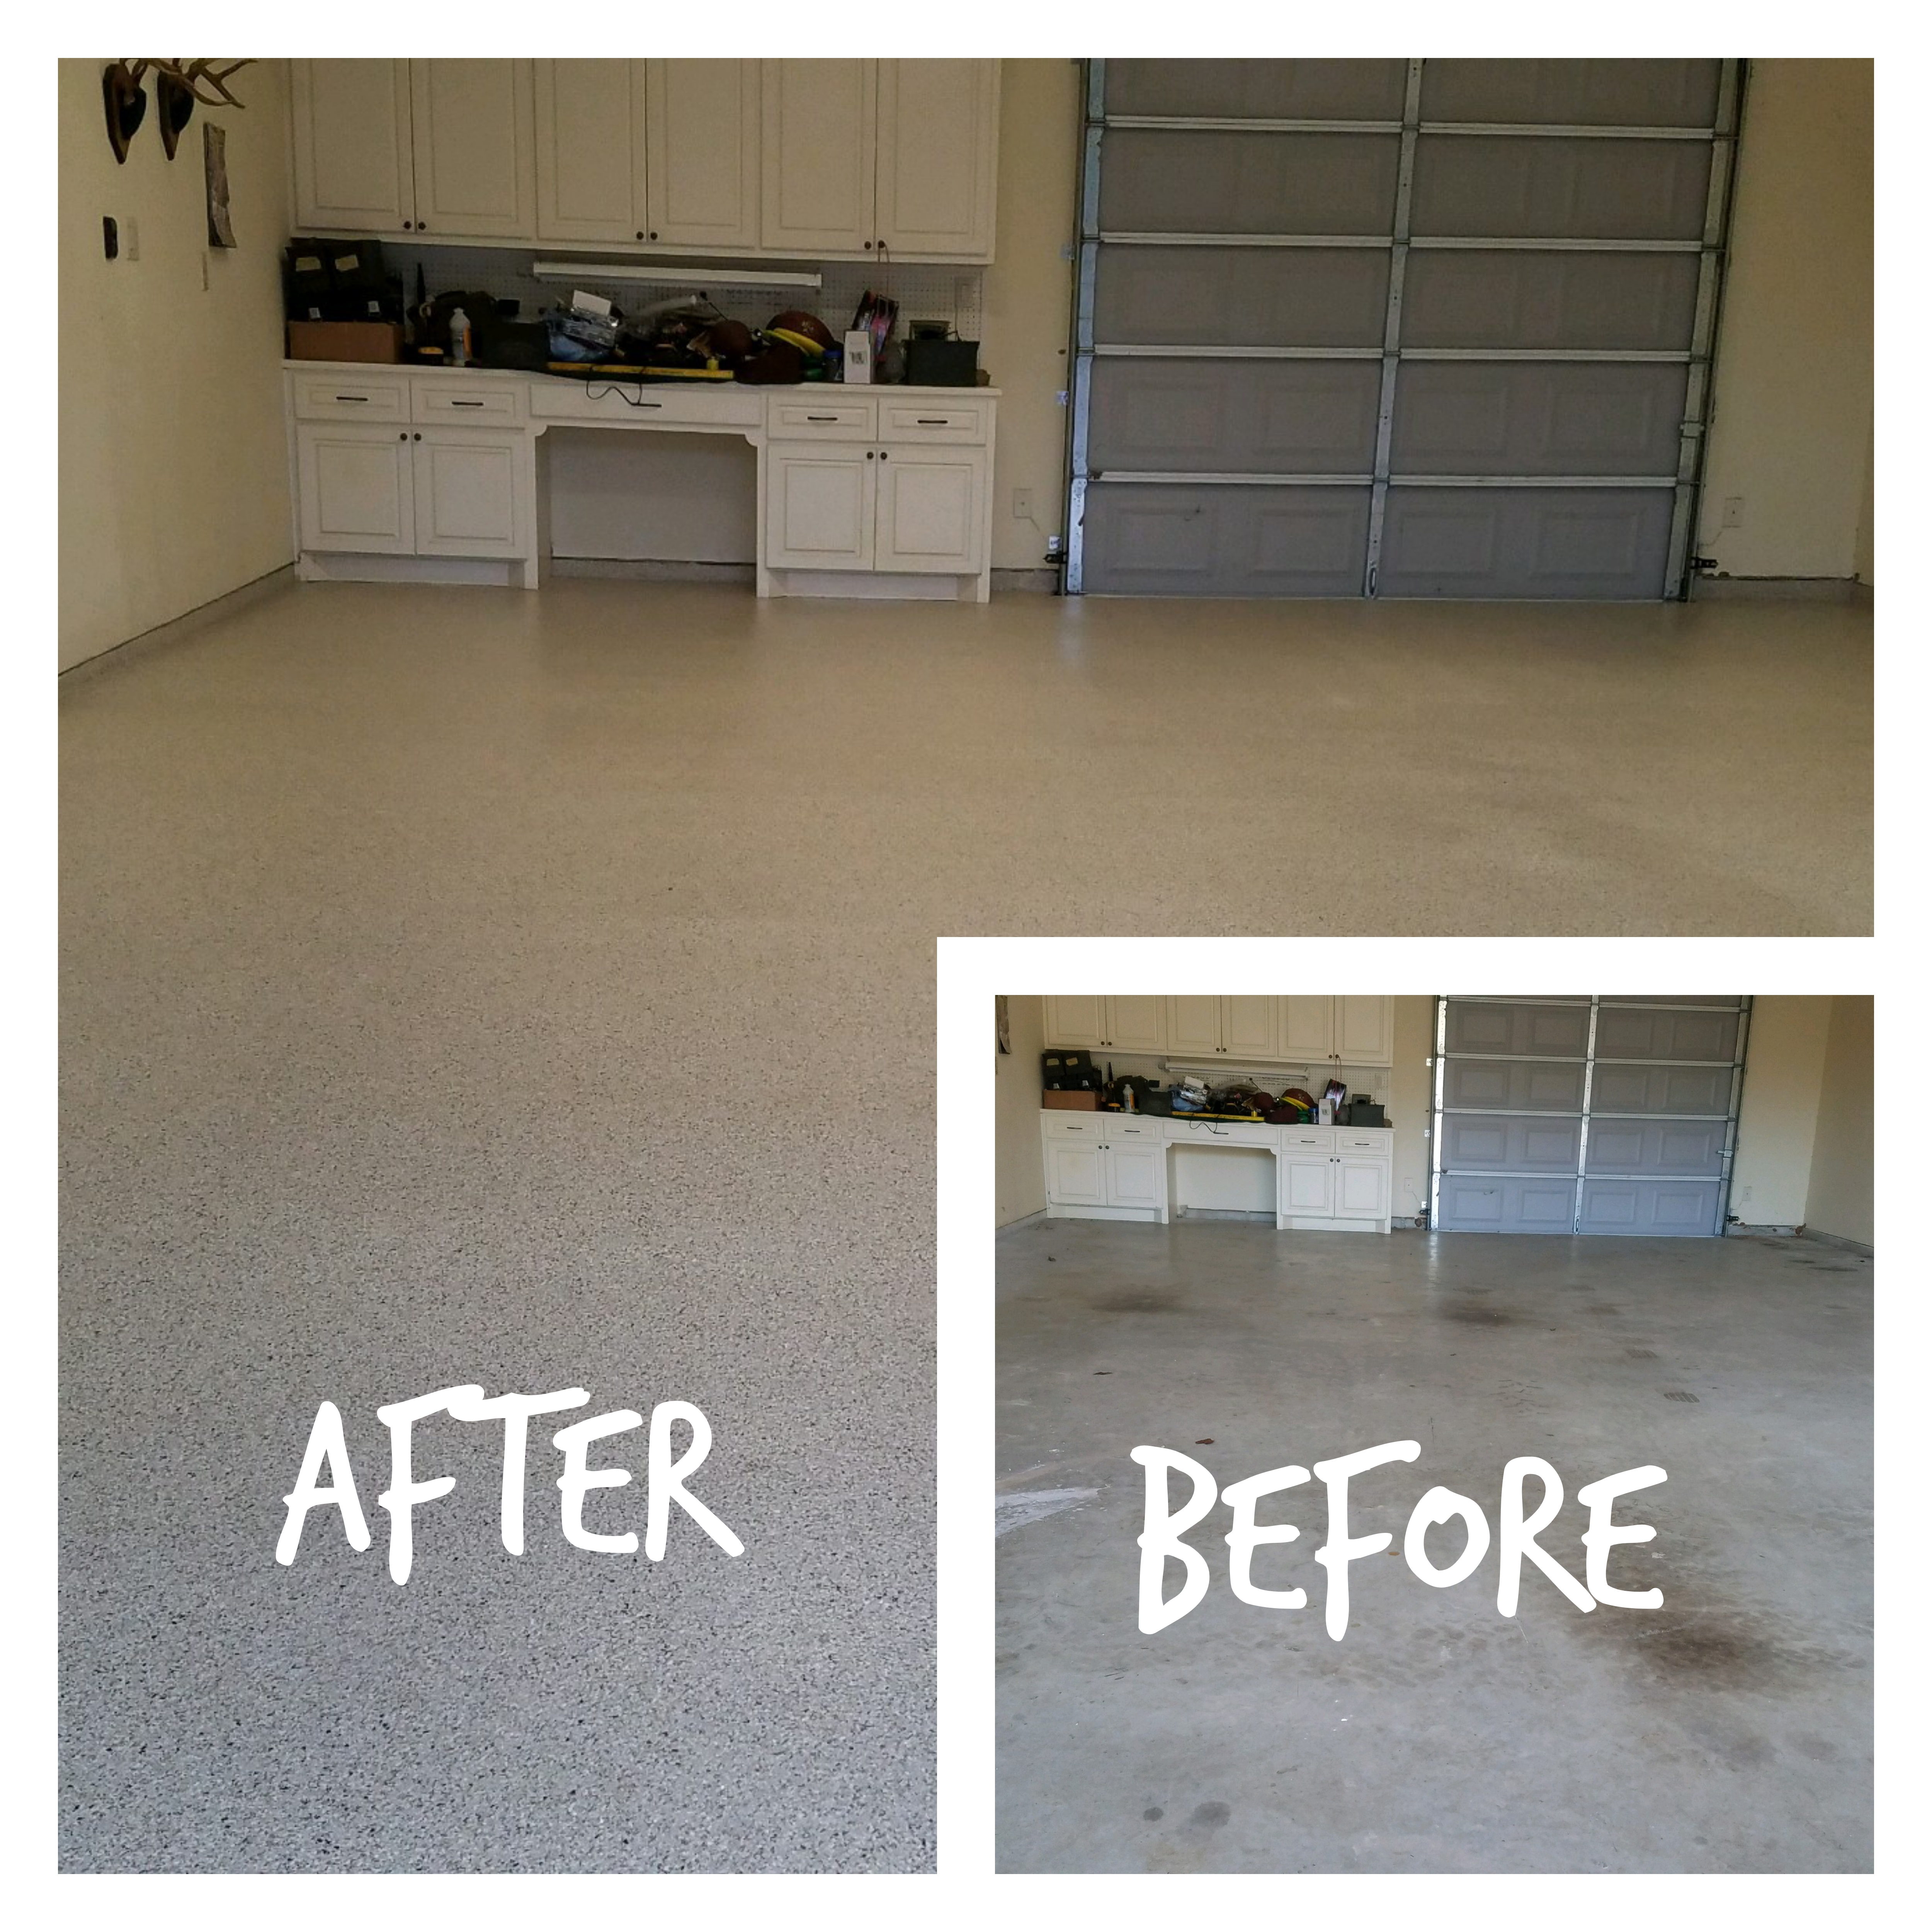
My garage floor had seen better days when I finally decided to do something about it. Years of oil drips, tire marks, salt residue from winter, and general neglect had left it looking permanently grimy no matter how much I swept and scrubbed.
I knew painting it would make a difference, but I had no idea how much difference until I finished the project and stood back to look at the result. If you’re thinking about painting your concrete garage floor, let me save you some time and some frustration by sharing exactly what worked, what didn’t, and what I wish someone had told me before I started.
Why Painting Your Garage Floor Is Worth the Effort
The most immediate benefit of painting a concrete garage floor is purely visual, and I don’t want to understate how much that matters. My garage went from looking like a neglected utility space to something I was actually proud to show people. A clean, uniformly colored floor makes the entire garage look more organized and intentional even before you touch a single shelf or storage system.
Beyond aesthetics, painted concrete is meaningfully easier to keep clean. Raw concrete is porous and soaks up oil, grease, and water immediately. Painted concrete has a sealed surface that resists staining and allows spills to be wiped up rather than absorbed.
I noticed within weeks of finishing my project that sweeping became faster and more effective because dust and grit sat on the surface rather than embedding into it.
There’s also a safety dimension that I didn’t think about until after the fact. A good garage floor paint or coating with anti-slip additives creates better traction than raw concrete, especially when the floor is wet.
I added anti-slip granules to my topcoat and the difference in grip when walking in with wet shoes after rain is noticeable and reassuring. For a space where you’re often carrying heavy items, that extra traction is genuinely valuable.
Choosing the Right Type of Garage Floor Paint
When I started shopping, I quickly learned that not all garage floor paints are created equal, and the differences between them matter quite a bit for longevity and performance. The three main categories you’ll encounter are latex floor paint, one-part epoxy paint, and two-part epoxy coating. Each sits at a different price point and delivers a different level of durability and protection.
Latex floor paint is the most affordable and easiest to apply, but it’s also the least durable option for a garage. It doesn’t bond as strongly to concrete and tends to peel under hot tire traffic, which is the specific condition that destroys most garage floor coatings prematurely. I tried a latex product in my first garage paint attempt years ago and was repainting within eighteen months. I don’t recommend it for a garage used by actual vehicles.
Two-part epoxy coating is what I ultimately used and what I recommend for most garages. You mix a resin and a hardener together, which triggers a chemical curing process that creates a hard, durable surface far tougher than any single-component paint. It’s more expensive and requires more careful application timing since the mixture has a limited working window, but the performance difference is substantial. My two-part epoxy has held up through three winters and regular vehicle traffic without peeling.
Surface Preparation, The Step That Determines Everything
If I could go back and give my earlier self one piece of advice about painting a garage floor, it would be this: spend more time on preparation than you think you need to. I cannot overstate how much surface prep determines the outcome of a garage floor painting project. The best paint in the world will fail on a poorly prepared surface, and I’ve seen that failure firsthand.
Start by cleaning the floor completely. Degrease any oil spots with a dedicated concrete degreaser, not just dish soap, since oil prevents bonding at a chemical level. I used a stiff brush and let the degreaser sit for fifteen minutes before scrubbing and rinsing thoroughly. Any oil contamination left behind will cause your coating to bubble and peel in that spot within months, no matter how many coats you apply over it.
After degreasing, the concrete needs to be etched to open its pores and create a mechanical profile that the coating can grip. Acid etching with muriatic acid is the traditional method and works very well, but it requires careful handling since muriatic acid is corrosive. Diamond grinding with a rented floor grinder is my preferred method now because it gives more consistent results and removes previous failed coatings efficiently. Either method works, but skipping etching entirely is the single most common reason garage floor coatings fail.

Applying Garage Floor Paint for the Best Results
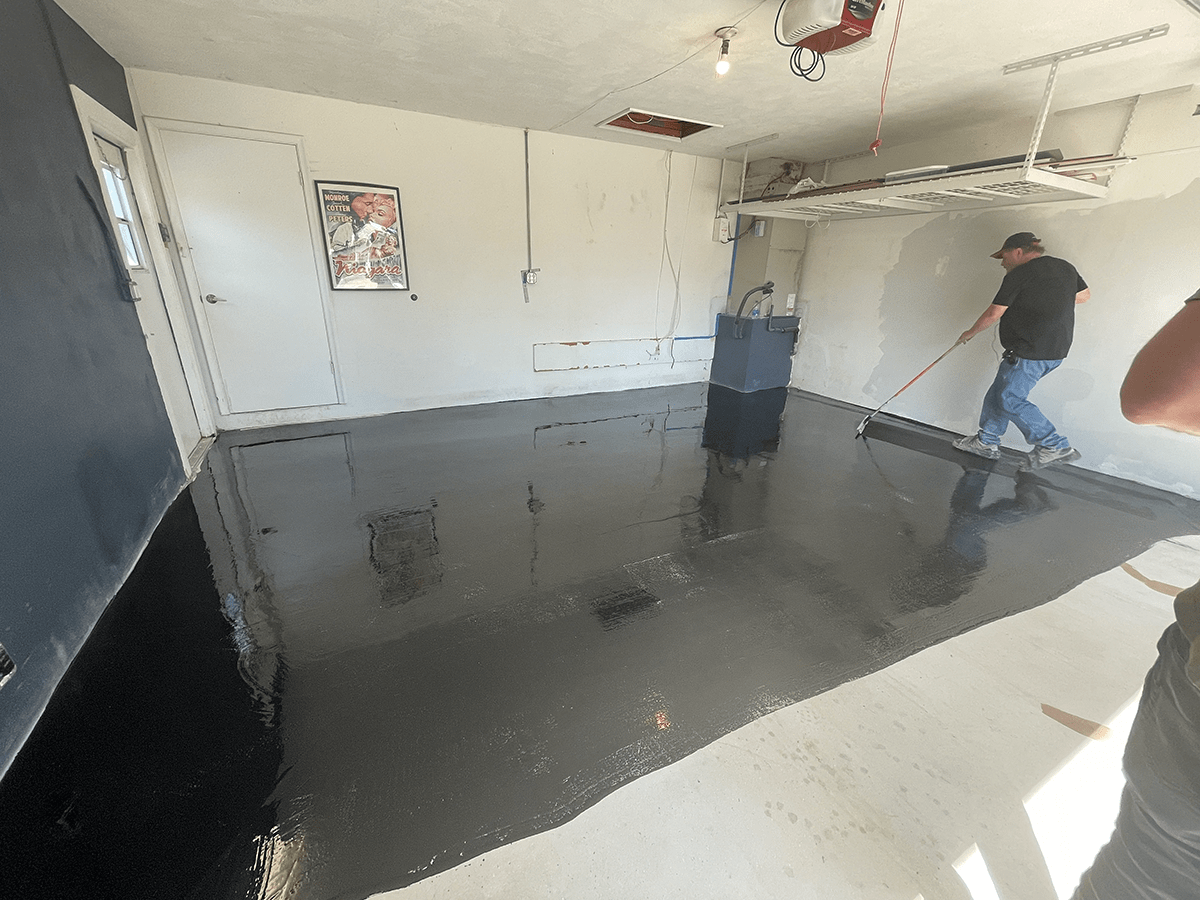
The application process itself is where patience and attention to detail pay off visually. Before you open a single can, read the application instructions for your specific product from start to finish. Temperature ranges, humidity restrictions, and recoat windows vary between products and matter enormously for proper curing. I once applied a second coat outside the recommended window and ended up with adhesion problems between the layers.
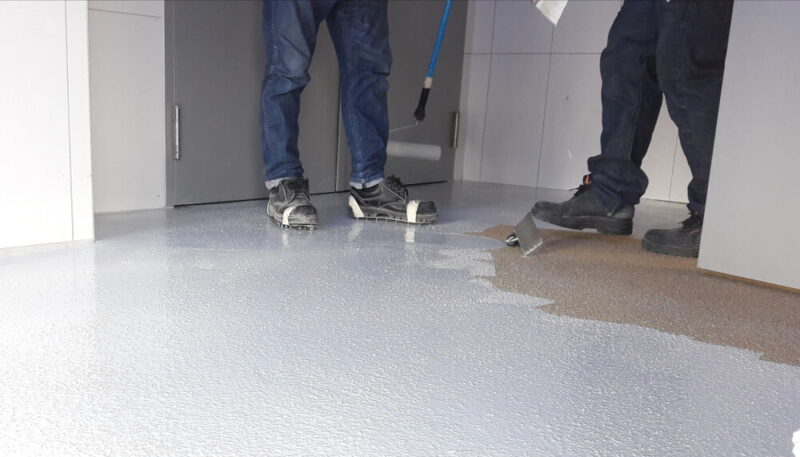
I apply garage floor coatings with a nine-inch roller on an extension pole, which lets me work standing up and cover ground efficiently without missing sections. Cut in around the perimeter and any columns or floor drains with a brush first, then roll the main field in overlapping passes. Maintain a wet edge as you work to avoid lap marks where sections of coating overlap in different stages of drying.
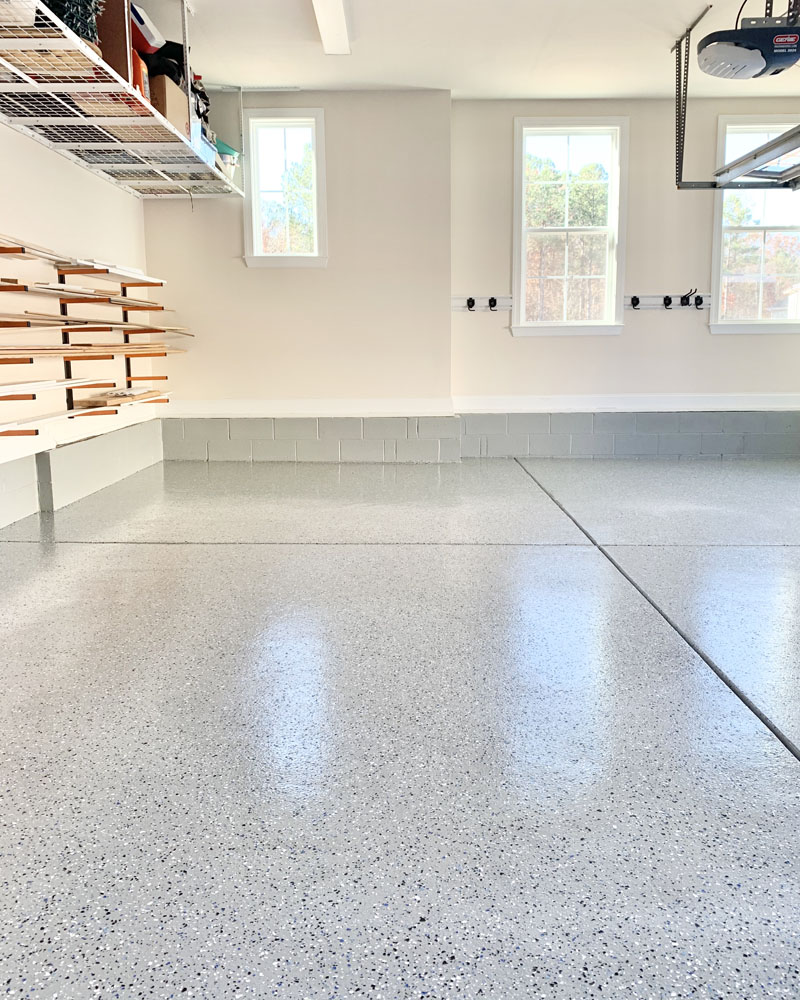
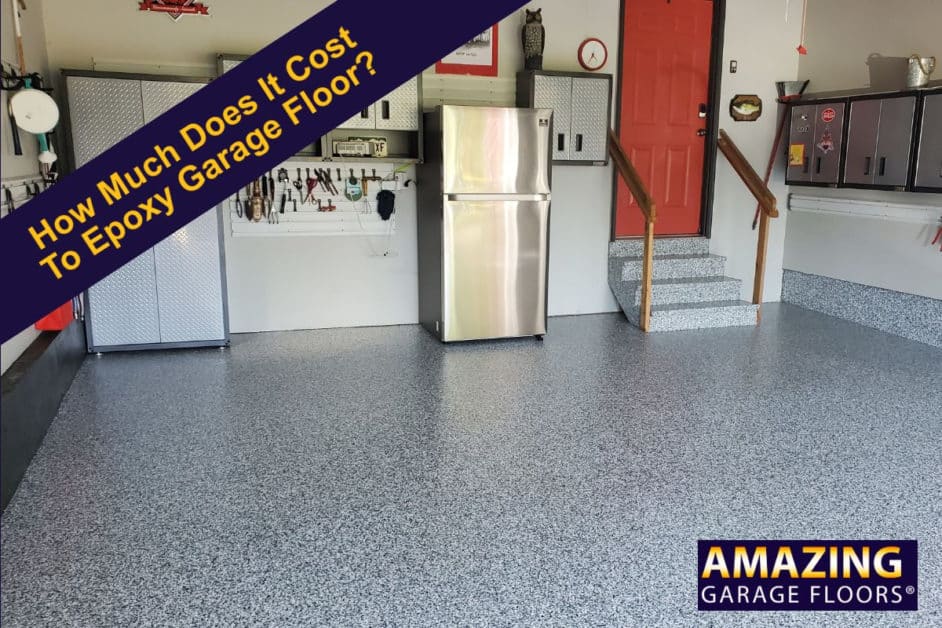
If you’re using decorative flakes, broadcast them into the wet first coat before it skins over. Hold them about waist height and let them fall naturally for the most even distribution. I like to slightly over-apply flakes and then sweep up the excess after the coat cures, which gives you a denser, more uniform coverage than trying to apply them sparingly. The topcoat applied over the flakes locks them in and creates the final finished surface.

Dealing With Moisture and Common Application Problems
Moisture is the enemy of any concrete coating, and garages are particularly vulnerable because the slab is typically in direct contact with the ground. Before I painted my floor, I did the plastic sheet test I mentioned in a previous project, taping plastic to the floor for seventy-two hours to check for moisture vapor transmission. Finding condensation on the underside would have told me I had a moisture problem to address before coating.
If your moisture test shows significant transmission, a moisture-blocking primer or vapor barrier coating applied before the main paint system can help. These products penetrate into the concrete and slow vapor transmission from below. They’re not a complete solution for a slab with serious water intrusion issues, but for normal levels of vapor transmission they provide a meaningful improvement in coating adhesion and longevity.
Temperature matters more than most people realize during application. Most epoxy products require temperatures above fifty degrees Fahrenheit both during application and for the full curing period. I painted my garage in late spring specifically to hit that window, and I kept the garage door closed with a small heater running overnight during the first critical curing phase. Coating in cold conditions causes improper curing that leads to a chalky, weak surface film rather than the hard, durable coating you’re after.
How Long Your Painted Garage Floor Will Last
A properly applied two-part epoxy coating on a well-prepared concrete surface should last five to ten years in a typical residential garage. The variables that affect that range most significantly are traffic level, whether you use the garage for vehicle parking, and how well you maintain the surface over time. My three-year-old coating still looks excellent and shows no signs of significant wear, which aligns with the performance range I expected when I chose the product.
Hot tire pickup is the most common way garage floor coatings fail prematurely, and it’s worth understanding why. When you park a hot car on an epoxy surface, the tire heat softens the coating slightly and creates adhesion between the tire and the floor. When the car moves, it can peel the coating up in sheets. High-quality two-part epoxies are much more resistant to this than single-component paints, and using a topcoat with additional chemical resistance adds another layer of protection.
When your coating eventually does show significant wear, recoating is straightforward if the underlying coating is still well-bonded. Light scuffing with a floor buffer and a fresh topcoat can refresh the surface without a full strip and repaint. If the coating has peeled or delaminated significantly, you’ll need to remove the failed material before recoating. Staying ahead of wear with periodic maintenance coats extends the total lifespan considerably and keeps the floor looking consistently good between major projects.
How long do I need to stay off my garage floor after painting it?
Most two-part epoxy coatings allow light foot traffic after twenty-four hours, but I wait a full seventy-two hours before driving on it. Full chemical cure, which is when the coating reaches maximum hardness and chemical resistance, typically takes five to seven days. During that full cure period I avoid parking hot vehicles on it and keep chemical spills off the surface. Patience during curing is what determines long-term durability.
Can I paint my garage floor if it has existing stains or old paint?
Oil stains need thorough degreasing before coating, as any residual oil prevents adhesion. For old paint or coatings, you need to assess whether they’re well-bonded or peeling. Well-bonded existing coatings can sometimes be scuff-sanded and recoated. Peeling or flaking coatings must be removed completely first, either by grinding or chemical stripping. Coating over a failing surface just traps the problem underneath and causes the new coating to fail in the same spots.
What is the best color to paint a garage floor?
Light gray is the most popular choice and the one I used because it brightens the space and hides dust while making oil drips visible for quick cleanup. Medium gray tones are very forgiving and look clean for longer between sweepings. Darker colors show dust more readily but hide stains better. The decorative flake system lets you blend multiple colors for a terrazzo-like appearance that hides imperfections beautifully. Choose based on your lighting and how much maintenance effort you want to commit to.
How much does it cost to paint a standard two-car garage floor?
A DIY two-part epoxy kit for a two-car garage runs roughly one hundred fifty to four hundred dollars depending on the brand and whether you choose a flake system. Add the cost of etching supplies, brushes, rollers, and any concrete repairs and the total typically lands between two hundred and five hundred dollars. Professional application of higher-grade coatings runs one thousand to three thousand dollars. The DIY route offers excellent value if you’re willing to invest a weekend in proper preparation.
Can I apply garage floor paint myself or should I hire a professional?
Most homeowners can successfully DIY a garage floor painting project with a two-part epoxy kit. The critical factor is commitment to proper surface preparation. If you’re willing to degrease thoroughly, etch or grind the surface correctly, and follow the product instructions carefully, the results can be excellent. Hire a professional if you want a warranty-backed polyurea or polyaspartic coating, if your slab has significant damage or moisture issues, or if you simply want the job done in one day without the weekend commitment.
How do I maintain a painted garage floor to extend its life?
Regular sweeping to remove grit and abrasive debris is the most important maintenance habit. Grit underfoot gradually abrades the finish over time. Clean oil spills promptly with a degreaser before they penetrate the coating at seams or thin spots. Avoid using harsh solvents or wire brushes that can damage the finish. Every few years, apply a fresh clear topcoat over the existing surface to restore gloss and chemical resistance. That simple maintenance routine can add years of life to your coating.

Related Posts: