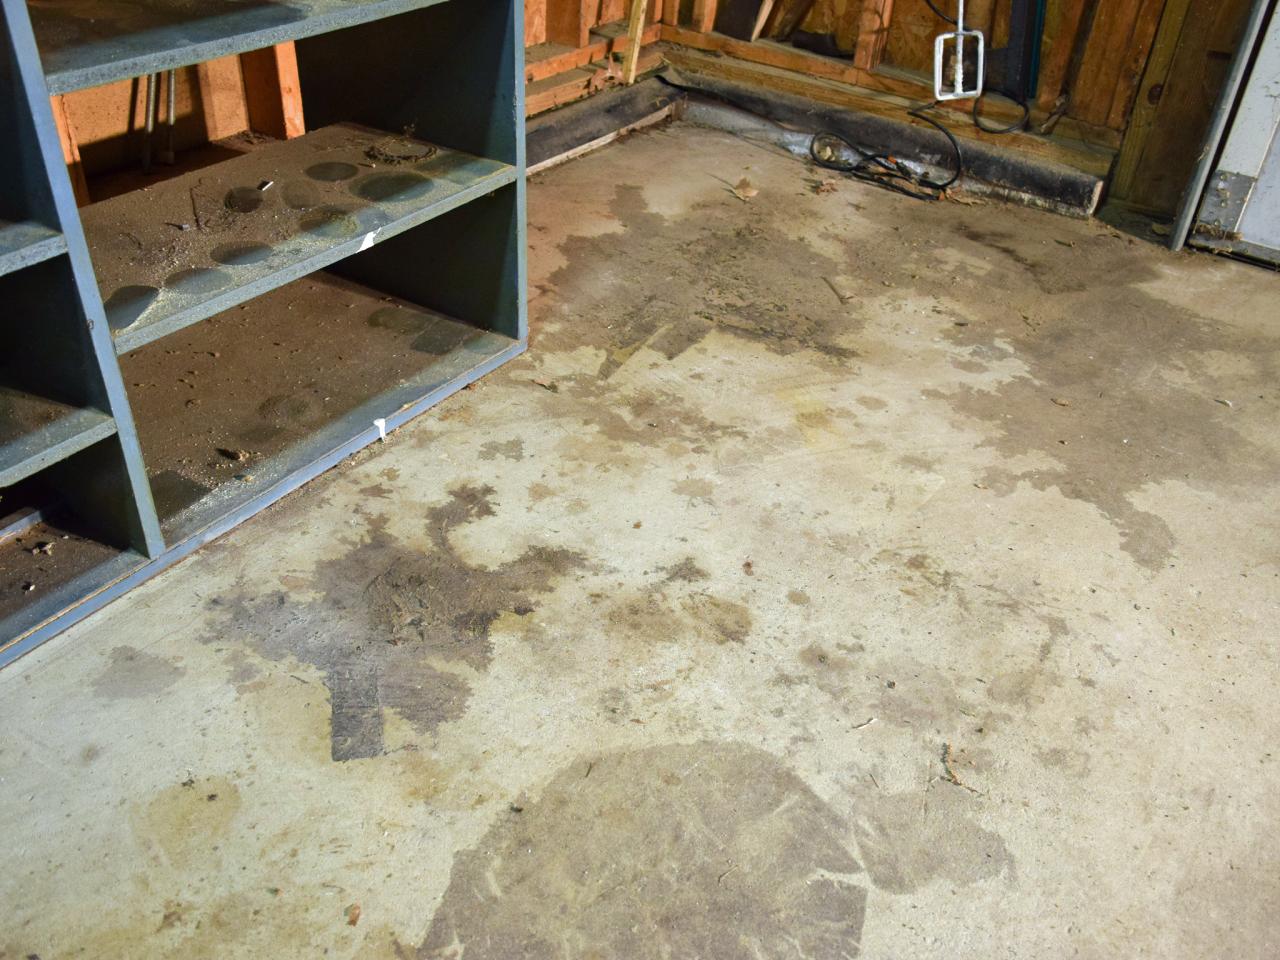
When I bought my house five years ago, the garage was an embarrassment. Oil stains, cracked concrete, and decades of neglect made it a space I avoided whenever possible. I parked outside rather than subject my car to the dusty, depressing cave that came with the property. But after watching countless home improvement shows and getting tired of scraping ice off my windshield every winter, I decided enough was enough. What started as a simple weekend project to make my garage presentable turned into an obsession with creating a space I actually enjoyed spending time in. Through trial, error, and plenty of research, I discovered that transforming a garage floor doesn’t require professional help or a massive budget.
Epoxy Coating Systems: My Gateway to Garage Transformation
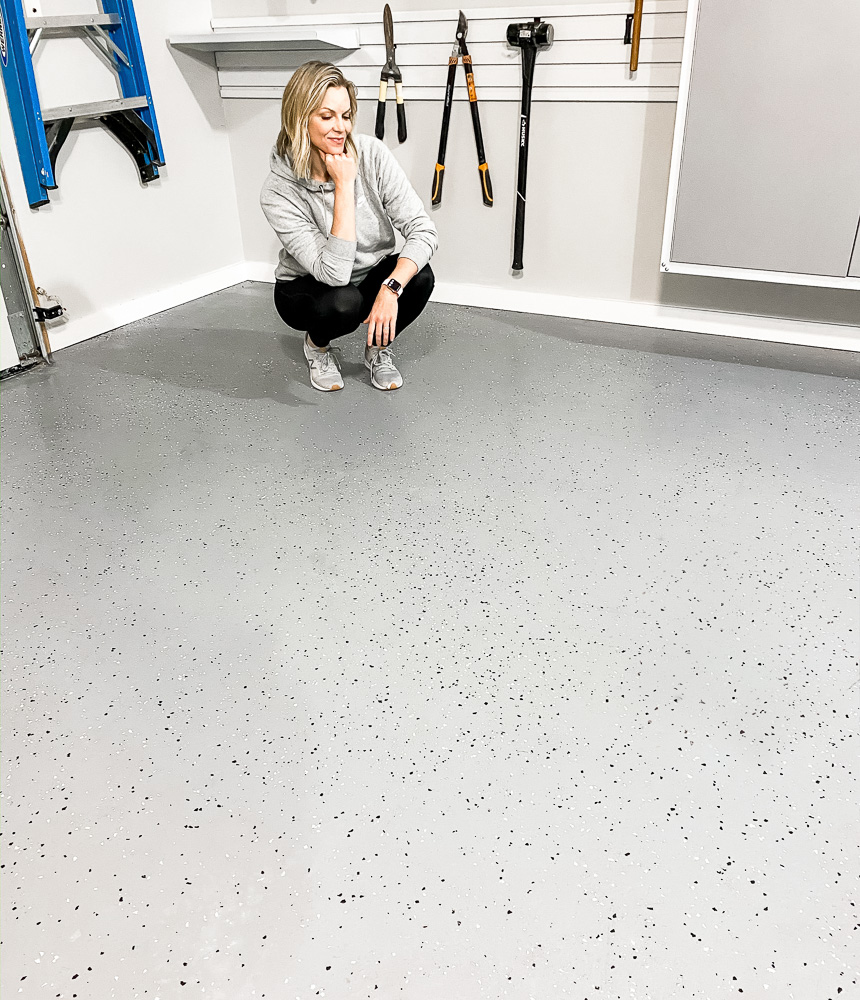
My first serious attempt at garage floor improvement involved a basic epoxy kit from the hardware store. I’ll be honest, I was skeptical that a $50 kit could make a real difference, but the before-and-after photos on the package were compelling enough to convince me to try. The preparation process was more involved than I expected, requiring thorough cleaning, degreasing, and etching the concrete with muriatic acid. I spent an entire Saturday just getting the surface ready, but I learned that preparation accounts for about 80% of the final result’s success.
The application process taught me patience and planning skills I didn’t know I had. Working with epoxy means you can’t stop halfway through; the material has a limited working time that demands full commitment once you start mixing. I enlisted my neighbor to help with the broadcasting of decorative flakes, which turned out to be both fun and crucial for achieving even coverage. The flakes not only added visual interest but also helped hide minor imperfections in my concrete and provided better traction on what could otherwise be a slippery surface.
Living with my first epoxy floor for two years showed me both the potential and limitations of basic systems. The transformation was dramatic, turning my ugly concrete into something that actually looked intentional and clean. However, hot tire pickup became an issue during the summer months when my car’s tires would leave marks on the coating. I learned that higher-quality epoxy systems with better heat resistance cost more initially but perform significantly better long-term, especially in climates with extreme temperatures.
Interlocking Tile Solutions: The Flexible Approach I Wish I’d Known About
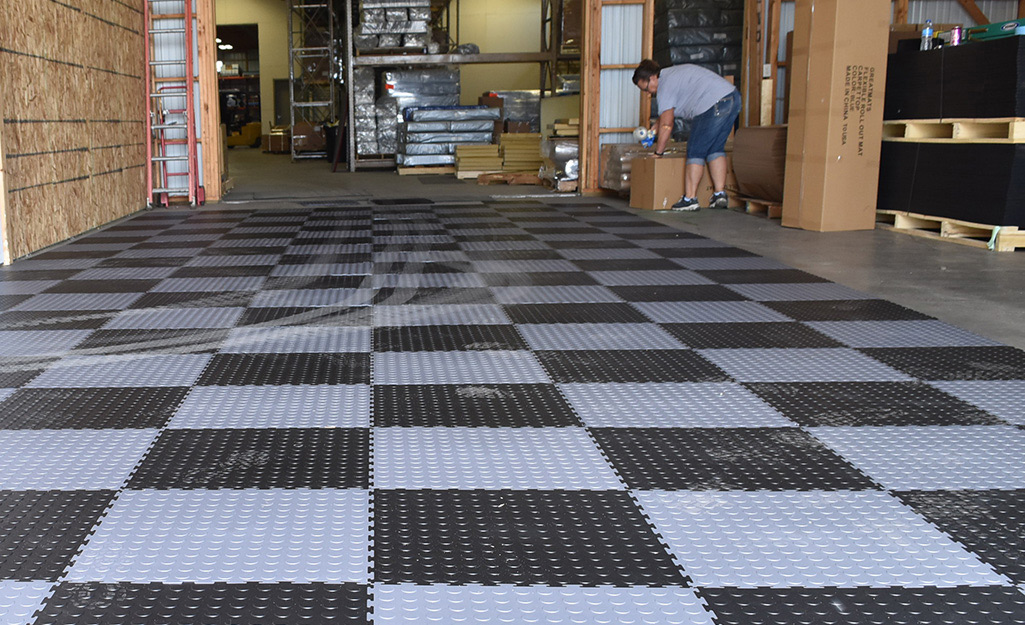
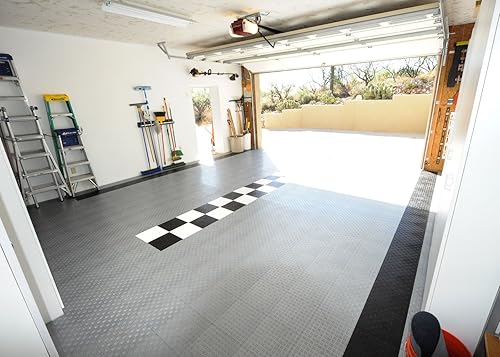
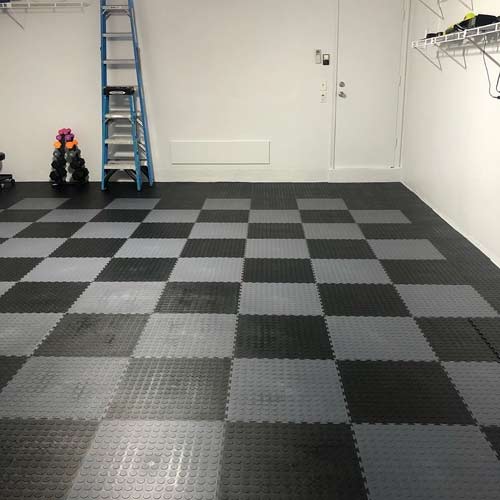
After researching alternatives to permanent coatings, I discovered interlocking garage floor tiles that completely changed my perspective on DIY flooring options. These modular systems appealed to my practical side because they require no surface preparation beyond basic cleaning, and they’re completely reversible if I ever want to change designs or move to a different house. I tested a small section first, laying tiles in one bay of my two-car garage to see how they performed under real-world conditions.
Installation couldn’t have been simpler, the tiles literally snap together like giant puzzle pieces, requiring no tools beyond a rubber mallet for ensuring tight seams. I was amazed that I could transform 200 square feet of garage floor in about three hours, including the time spent arranging different color combinations to create a custom pattern. The raised surface design allows air circulation underneath, which helps with moisture management and makes the tiles more comfortable to stand on during long projects.
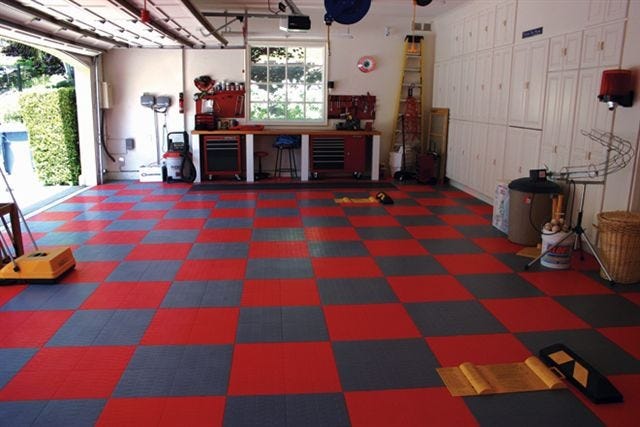
The modular nature of tile systems offers advantages I hadn’t considered initially. When I spilled automotive paint in one corner, I simply popped out the affected tiles, cleaned them thoroughly, and snapped them back into place. Individual tiles can be replaced if damaged, making long-term maintenance much more manageable than permanent coatings. The variety of colors and patterns available allows for creative designs that can be changed seasonally or whenever I get bored with the current look.
Polished Concrete: My Most Ambitious DIY Challenge
Inspired by industrial design trends, I decided to tackle concrete polishing in my workshop area, a separate single-car garage that I use primarily for woodworking. This project pushed my DIY skills to their limits and required renting specialized equipment, but the results justified every hour of hard work. The process involves progressively finer grinding and polishing steps that gradually transform rough concrete into a smooth, glossy surface that rivals expensive stone flooring.
The equipment learning curve was steep but manageable with patience and practice. I rented a floor grinder with various diamond grinding pads, starting with coarse grits to remove surface imperfections and progressing to fine grits for the final polish. The dust control was crucial, both for visibility and health reasons, so I invested in a good dust collection system that attached to the grinder. Each grinding stage required multiple passes to achieve uniform results, making this a marathon project rather than a sprint.
The final polished surface exceeded my expectations, creating a floor that’s both beautiful and incredibly functional for my workshop needs. The smooth surface makes sweeping up sawdust effortless, and the reflective properties help bounce light around the space, improving visibility for detailed work. The concrete sealer I applied as a final step provides stain resistance while maintaining the natural beauty of the polished concrete. Three years later, it still looks as good as the day I finished it, proving that ambitious DIY projects can deliver professional-quality results.

Staining and Decorative Techniques: Adding Character on a Budget
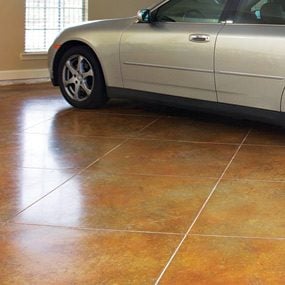
Concrete staining opened up creative possibilities I never imagined when I started my garage transformation journey. Acid stains create chemical reactions with the concrete, producing unique, variegated colors that can’t be replicated with regular paint. I experimented with different application techniques, from spraying for subtle, uniform color to sponge application that created more dramatic texture and variation. The unpredictable nature of acid staining means each project is unique, adding character that manufactured materials can’t match.
Color layering became my favorite technique after mastering basic staining applications. I learned to apply lighter base colors first, then add darker accent colors using various application methods to create depth and visual interest. Masking tape allowed me to create geometric patterns and borders, while natural sponges produced organic, stone-like textures. The key was building up colors gradually, since acid stains can’t be removed once they react with the concrete.
Protective sealing became crucial for maintaining the beauty of stained concrete floors. I tested several sealer types and found that penetrating sealers preserve the natural appearance while providing necessary protection against oil stains and moisture. Topical sealers create more gloss but can show wear patterns in high-traffic areas. The sealing process requires careful application and proper drying conditions, but it’s essential for long-term durability and easy maintenance of decorative concrete finishes.
![]()
Rubber Flooring Options: Comfort and Performance Combined
My introduction to rubber garage flooring came through a friend who installed it in his home gym area of the garage. The cushioned surface immediately impressed me with its comfort underfoot during long project sessions, and the non-slip properties provided excellent safety even when the floor was wet from washing cars. I decided to install rubber flooring in my main garage, choosing a coin-pattern design that provides both visual interest and additional traction.
Installation flexibility made rubber flooring appealing for my particular situation. I could install it directly over my existing concrete without extensive preparation, and the material conforms to minor surface irregularities without creating problems. Some rubber products come in interlocking tiles similar to plastic systems, while others are available in large rolls that create seamless installations. I chose the roll system for my main area and supplemented it with tiles in corners where custom fitting was necessary.
Maintenance proved remarkably simple compared to other flooring options I’ve tried. Regular sweeping removes debris, and occasional mopping with mild detergent keeps the surface looking new. The rubber material resists most automotive fluids, though I learned to clean up spills promptly to prevent potential staining. The cushioned surface reduces fatigue during long work sessions and provides excellent impact absorption if tools or parts are dropped. After two years of heavy use, the floor shows minimal wear and continues to provide the comfort and performance that sold me on rubber flooring.
Paint and Coating Alternatives: Budget-Friendly Quick Fixes
Sometimes the simplest solutions provide the best results, especially when budget constraints limit options or time doesn’t allow for complex projects. I’ve experimented with various paint systems over the years, from basic concrete paint to specialized garage floor coatings that promise durability comparable to epoxy systems. While these solutions may not offer the longevity of more expensive alternatives, they can provide dramatic improvements at a fraction of the cost and with minimal time investment.
Surface preparation remains crucial even with basic paint systems, though the requirements are less stringent than with epoxy coatings. I learned that thorough cleaning and light etching with muriatic acid significantly improve paint adhesion and longevity. The primer application became standard practice after experiencing premature failure on my first attempt to paint directly over concrete. The extra time spent on proper preparation pays dividends in both appearance and durability of the finished surface.
Color selection and application technique can make budget paint jobs look surprisingly professional. I discovered that lighter colors help brighten the garage and show dirt less than darker shades, while adding a simple border color creates visual interest without additional cost. Rolling technique matters more with paint than with thicker coatings, requiring consistent pressure and overlap to avoid texture variations. While painted floors may need refreshing every few years, the low cost and easy application make this a viable option for maintaining attractive garage floors on a tight budget.

How long do DIY garage floor treatments typically last before needing replacement or maintenance?
Based on my experience with different systems, epoxy coatings last 3-7 years depending on quality and use, interlocking tiles can last 10+ years with individual replacement as needed, and polished concrete can last decades with proper maintenance. Paint systems typically need refreshing every 2-4 years, while rubber flooring shows minimal wear after 5+ years in my garage.
What’s the most cost-effective garage floor solution for someone on a tight budget?
Concrete paint offers the biggest visual impact for the smallest investment, typically costing $1-2 per square foot, including materials. I’ve achieved great results with quality concrete paint and proper surface prep. While it requires more frequent maintenance than expensive systems, the low initial cost makes it accessible for most budgets and provides immediate improvement.
Can these DIY solutions handle hot tires from cars parked immediately after driving?
This varies significantly by material. Basic epoxy and paint can soften under hot tires, causing pickup and marking. Higher-end epoxy systems with better heat resistance perform much better. Interlocking tiles and rubber flooring handle hot tires without issues. Polished concrete is completely unaffected by tire heat. Consider your parking habits when choosing materials.
How do I choose between permanent and removable flooring options for my garage?
Consider your long-term plans and risk tolerance. If you rent or might move soon, removable options like interlocking tiles make sense. If you’re settled and want maximum durability, permanent coatings or polished concrete provide better long-term value. I’ve used both approaches successfully, choosing removable systems where flexibility matters and permanent solutions where performance is priority.
What tools and equipment do I need for different DIY garage floor projects?
Basic paint projects need rollers, brushes, and cleaning supplies. Epoxy systems require mixing tools and broadcast equipment for flakes. Interlocking tiles need only a rubber mallet. Polished concrete requires rented grinding equipment and dust collection. I recommend starting with simpler projects and building skills before tackling equipment-intensive options like concrete polishing.
How do I handle oil stains and existing damage before installing new garage flooring?
Oil stains require degreasing with TSP or commercial degreasers, followed by etching for better adhesion. I’ve had success with oil stain primers under paint systems. Cracks need filling with concrete crack filler or self-leveling compound. Severe damage might require professional concrete repair. Proper preparation is crucial; I’ve learned that cutting corners on prep work always shows in the final results.
Home Garage Coin Top PVC Black Ever 3/16 Inch x 20×20 Inches
How to Choose the Right Garage Flooring

Garage Flooring Options (DIY) Family Handyman
Related Posts: