Rolling a marble across my garage floor revealed the shocking truth about my concrete’s condition. The small sphere traveled in unpredictable directions, highlighting dips, rises, and slopes I hadn’t noticed during casual inspection. What started as a simple flooring project suddenly required addressing serious leveling issues before I could install anything decent. My DIY concrete leveling adventure taught me valuable lessons about patience, preparation, and the satisfaction of transforming a problematic surface into something truly functional.
Assessment and Planning That Saved Me Money
Initial evaluation revealed problems worse than I expected when I started measuring elevation differences throughout my concrete slab. Using a long straight edge and measuring tape, I discovered variations exceeding two inches across the twenty-foot span. Some areas had settled significantly, while others remained at original height, creating an obstacle course that would ruin any flooring installation. Professional estimates for correction exceeded my budget, motivating me to research DIY solutions.
Mapping problem areas became essential for planning material quantities and attack strategies for this challenging project. I created a detailed floor plan marking high spots, low areas, and transition zones that needed attention. Taking photographs from multiple angles helped me visualize the scope and complexity of corrections needed. This documentation proved invaluable when ordering materials and planning work sequences that would minimize disruption.
Material research consumed weeks as I compared different leveling compounds, tools, and techniques available for DIY concrete correction. Self-leveling compounds promised easy application but cost significantly more than traditional methods. Grinding high spots seemed labor-intensive but potentially more permanent than adding layers. I ultimately chose a combination approach using grinding for major high spots and self-leveling compound for depression areas.
Tools and Materials That Made the Difference
Concrete grinder rental became my first major tool investment for tackling raised areas that couldn’t be corrected with leveling compounds alone. The powerful machine removed high spots efficiently, though dust control required extensive plastic sheeting and ventilation planning. Learning proper grinding techniques took practice to avoid creating new problems while solving existing ones. Safety equipment including respirators, eye protection, and hearing protection proved absolutely essential during grinding operations.
Self-leveling compound selection required careful evaluation of different products designed for varying thickness applications and setting times. I chose a high-quality polymer-modified compound that could handle thickness variations from feather edge to two inches in single applications. The material cost seemed expensive initially, but coverage calculations showed reasonable value compared to alternative correction methods. Mixing tools including heavy-duty drill attachments became necessary for proper compound preparation.
Measuring and layout tools enabled precise application and quality control throughout the leveling process from start to finish. Long straight edges, laser levels, and string lines helped establish reference points for consistent results. Mixing buckets, trowels, and spreading tools needed careful selection for compatibility with chosen compounds. Having backup tools prevented project delays when equipment failed or became unusable during critical application phases.
Surface Preparation Lessons I Learned
Cleaning became far more intensive than anticipated before any leveling work could begin successfully. Years of oil stains, paint drips, and general contamination required aggressive degreasing and mechanical preparation. I used TSP solution followed by pressure washing to remove surface contaminants that could prevent proper adhesion. Multiple cleaning cycles ensured the concrete surface would accept leveling compounds properly without bonding failures.
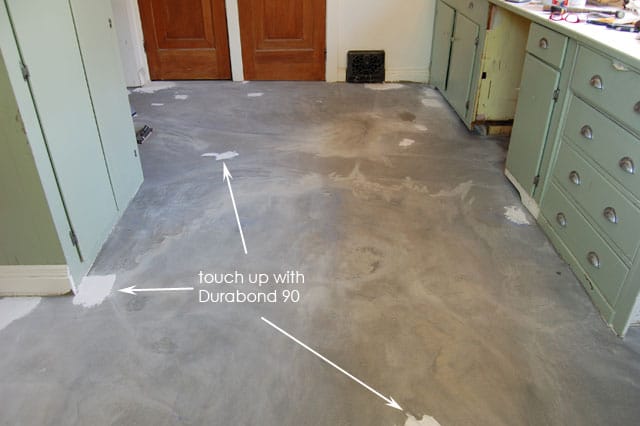
Crack repair demanded attention before applying any leveling materials to prevent underlying problems from telegraphing through new surfaces. I cleaned out loose debris from cracks using wire brushes and compressed air, then filled gaps with appropriate concrete crack filler. Allowing proper curing time for crack repairs prevented premature failure of leveling compound applications. This patience paid dividends in long-term performance.
Priming concrete surfaces improved adhesion between old concrete and new leveling compounds significantly. I applied concrete bonding agent according to manufacturer specifications, ensuring complete coverage of all areas receiving leveling treatment. The primer tackiness indicated proper application timing for leveling compound placement. This step cost extra time and money but prevented costly adhesion failures later.
My Step-by-Step Leveling Process
Grinding high spots required systematic approach to avoid creating new problems while solving existing elevation issues. I marked areas needing removal with chalk lines, then ground systematically using overlapping passes to maintain consistent surface texture. Frequent checking with straight edges ensured I didn’t remove excessive material or create new depressions. Dust collection became critical for visibility and health protection throughout grinding operations.
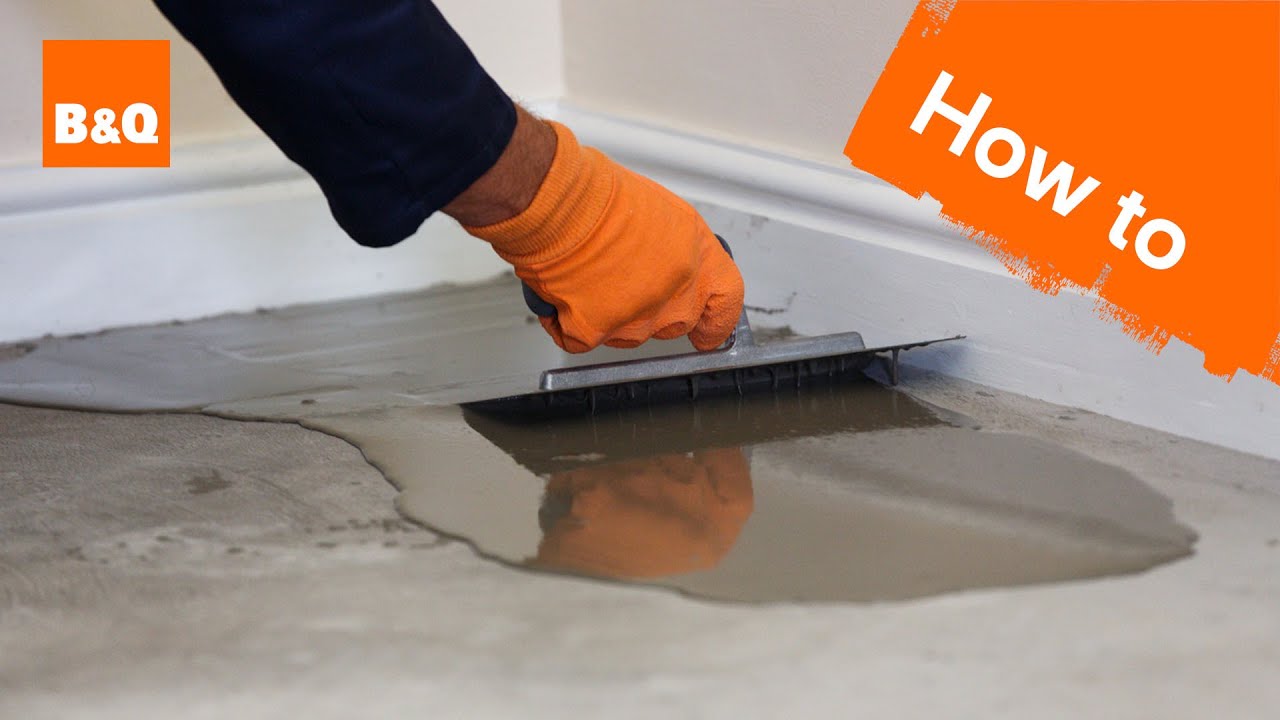
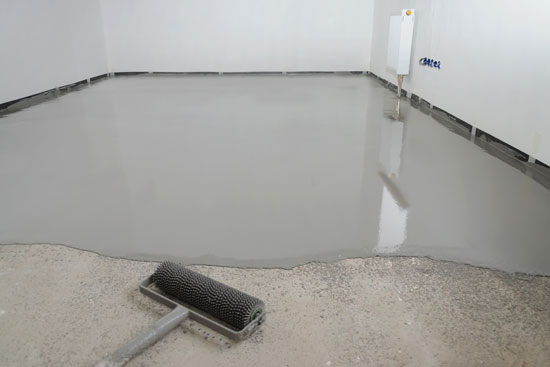
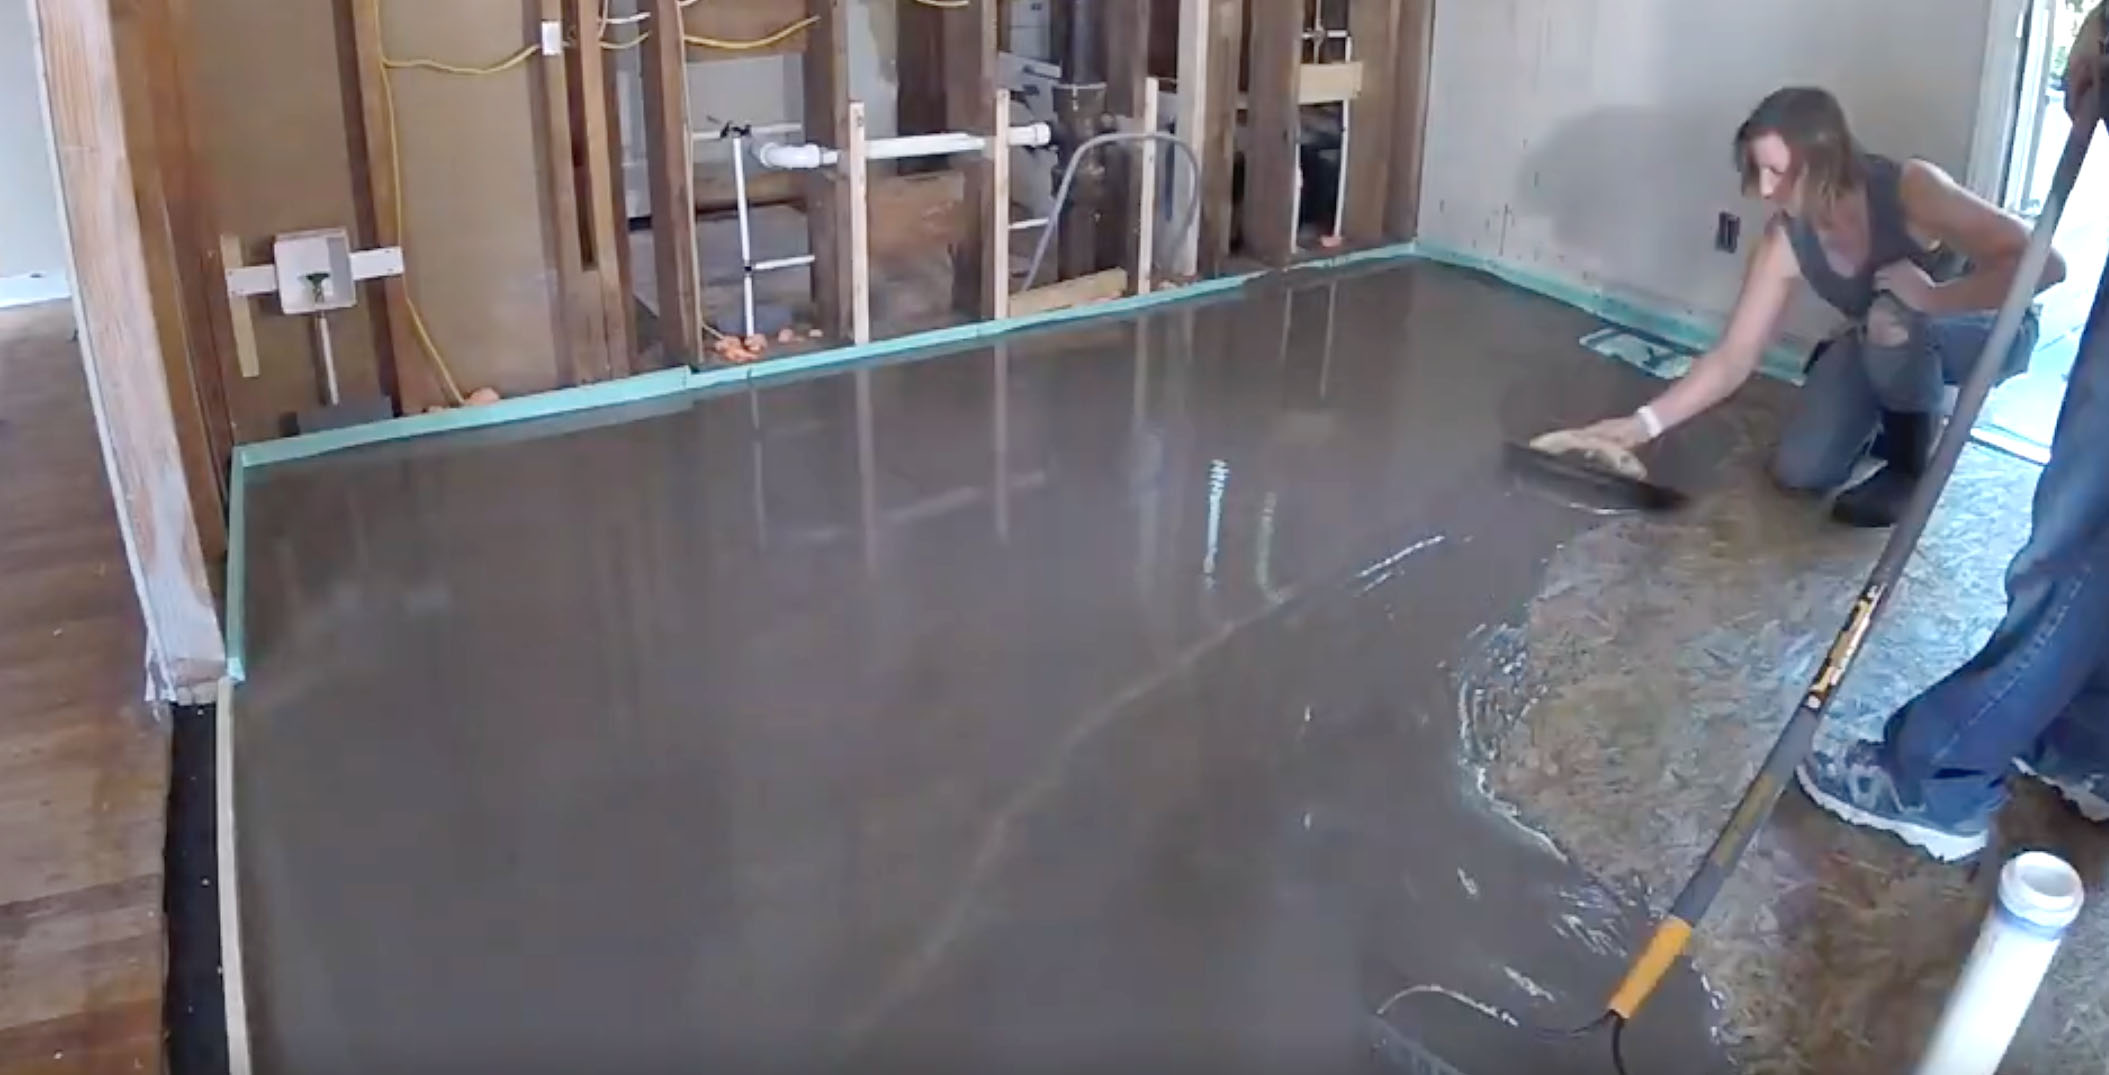
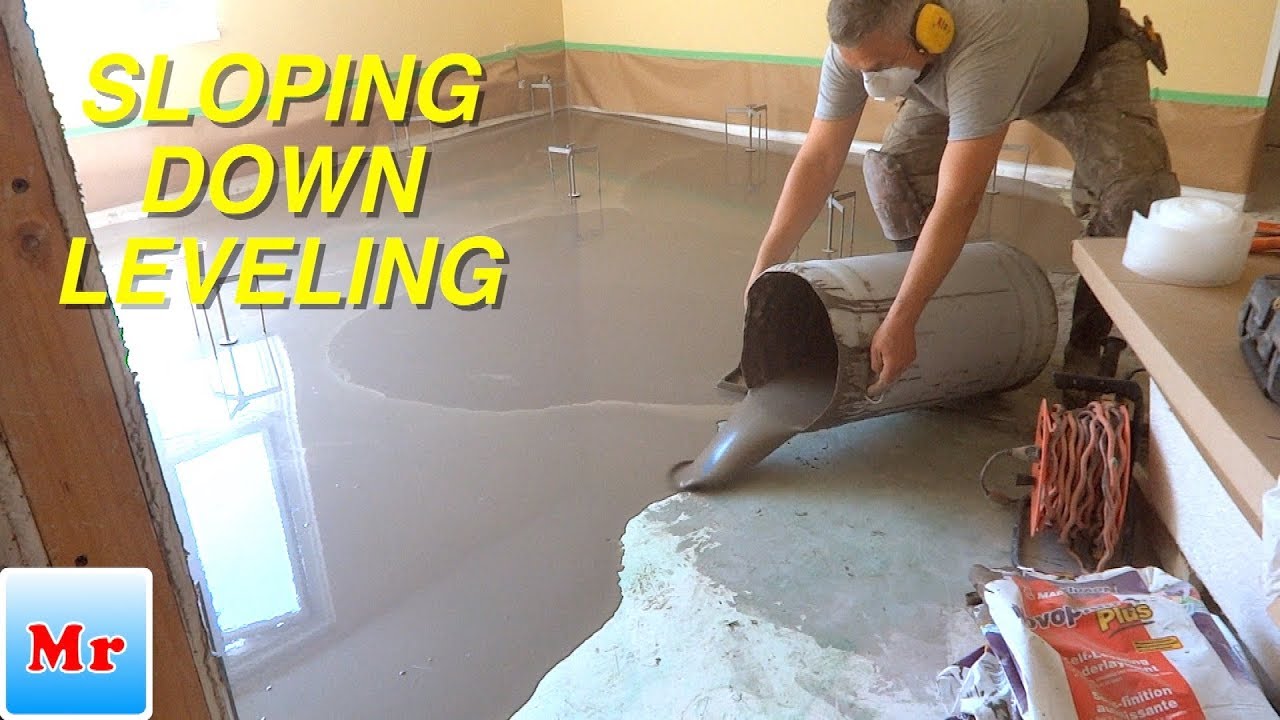
Mixing self-leveling compound demanded precise water ratios and thorough blending to achieve proper consistency and performance characteristics. I followed manufacturer instructions exactly, using clean water and measuring carefully to ensure consistent results between batches. Working time limitations required efficient mixing and application techniques to complete sections before material began setting. Practice with small batches helped perfect techniques before tackling large areas.
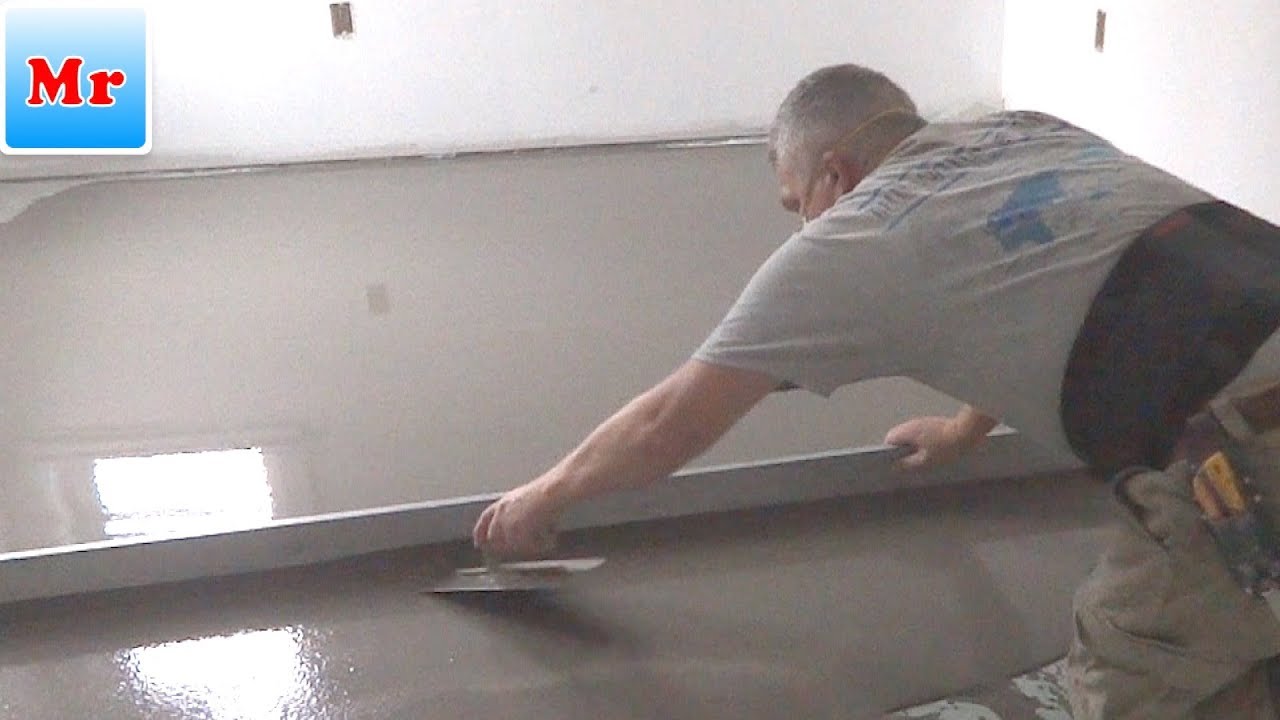
Application technique determined final surface quality and required careful attention to timing, temperature, and environmental conditions. I poured mixed compound in ribbons across low areas, then used spreading tools to guide flow and eliminate air bubbles. Working quickly but deliberately ensured even coverage before material began setting. Multiple thin applications proved more successful than attempting thick single pours.

Common Mistakes I Almost Made
Temperature control became critical for successful self-leveling compound performance, though I initially underestimated its importance. Extreme temperatures affect setting times, flow characteristics, and final strength of leveling materials. I learned to monitor ambient conditions and adjust work schedules accordingly for optimal results. Cold weather required longer curing times, while hot conditions shortened working time dramatically, affecting application success rates.
Moisture content in existing concrete affected adhesion and curing of leveling compounds more than I expected. I tested moisture levels using plastic sheet method and electronic meters to ensure acceptable conditions before application. High moisture content could cause bonding failures or extended curing times that delayed project completion. Proper moisture testing prevented costly mistakes and ensured reliable long-term performance.
Working too fast compromised quality when I rushed to complete large areas before compound setting times expired. I learned to work in manageable sections that matched my skill level and available working time. Overlapping wet edges required careful timing to prevent visible seams in final surface. Breaking large areas into smaller sections produced better results than attempting to complete everything in single pours.
Results and Long-Term Performance
Final surface quality exceeded my expectations after completing the multi-step leveling process with patience and attention to detail. The marble test showed dramatic improvement, with smooth rolling in all directions across previously problematic areas. Elevation differences reduced to less than 1/8 inch over ten-foot spans, meeting standards for quality flooring installations. The time and effort invested in proper preparation and application produced professional-looking results.
Durability has proven excellent after two years of garage use including vehicle traffic, workshop activities, and storage loading. The leveled areas show no signs of cracking, delamination, or wear that would indicate application problems. Regular cleaning maintains the smooth surface that makes sweeping and maintenance much easier than before. The investment in quality materials and careful application continues paying dividends in daily use.
Cost savings compared to professional services justified the DIY approach despite significant time investment required for proper completion. Material costs totaled approximately 40% of professional estimates, with tool rental adding another 20% for substantial overall savings. The learning experience provided valuable skills for future projects and increased confidence in tackling complex home improvement challenges. Personal satisfaction from completing difficult project successfully proved invaluable beyond monetary considerations.

How do I determine if my concrete floor needs leveling before installing new flooring?
Use a long straight edge or laser level to check for variations greater than 1/4 inch over 10 feet, which indicates leveling needs. I discovered my problems using a simple marble roll test and measuring tape to quantify elevation differences. Most flooring manufacturers specify maximum allowable variations, typically 1/8 to 1/4 inch depending on material type. Visual inspection for obvious dips, cracks, or raised areas provides initial assessment before precise measurements. Professional flooring installation requires meeting specific flatness standards.
What’s the difference between self-leveling compound and traditional concrete patching for floor leveling?
Self-leveling compound flows to create smooth surfaces automatically, while traditional patching requires manual spreading and finishing techniques. I found self-leveling compounds easier for large areas but more expensive per square foot than conventional methods. Traditional patching works well for small areas but requires more skill to achieve smooth transitions and consistent thickness. Self-leveling products cure faster and typically provide better final surface quality for flooring installations. Choose based on area size, budget, and skill level.
Can I level a concrete floor that has existing coatings or sealers on the surface?
Existing coatings must be removed before applying leveling compounds to ensure proper adhesion and prevent future failures. I learned this lesson after testing adhesion in small areas and discovering poor bonding over sealed surfaces. Mechanical grinding, chemical strippers, or shot blasting can remove coatings, though each method has specific applications and limitations. Some specialized primers can bond over certain existing coatings, but removal typically provides better long-term results. Always test adhesion before committing to full application.
How long should I wait before installing flooring over newly leveled concrete areas?
Most self-leveling compounds require 24-48 hours before foot traffic and 3-7 days before flooring installation, depending on thickness and environmental conditions. I waited one full week before installing my flooring to ensure complete curing and moisture stabilization. Temperature and humidity affect curing times significantly, with cooler conditions requiring longer wait periods. Moisture testing ensures compounds have dried sufficiently for flooring installation. Follow manufacturer recommendations and test moisture levels before proceeding with flooring installation.
What tools do I absolutely need for a successful DIY concrete floor leveling project?
Essential tools include mixing drill with paddle attachment, measuring devices like laser level or long straight edge, and spreading tools for compound application. I rented a concrete grinder for high spot removal and invested in quality measuring tools for accurate results. Dust collection equipment, safety gear, and proper ventilation became critical for health and visibility during grinding operations. Mixing buckets, trowels, and cleaning supplies complete the basic tool requirements. Quality tools produce better results and make the job safer and more efficient.
How much does DIY concrete floor leveling typically cost compared to hiring professionals?
DIY leveling typically costs 40-60% of professional installation when including materials and tool rental expenses. My project saved approximately $2000 compared to contractor estimates, though it required significant time investment and learning curve. Material costs vary by compound type and area size, ranging from $1-4 per square foot for quality products. Tool rental adds $200-500 depending on equipment needs and rental duration. Consider your available time, skill level, and project complexity when deciding between DIY and professional installation.

How to Make a Concrete Subfloor Leveling with Sloping Down Side DIY MrYoucandoityourself
DIY Moment- Concrete Slab Leveling

DIY self-leveling underlayment

Related Posts: