Walking into my friend’s garage and seeing his gleaming, mirror-like floor stopped me in my tracks. The surface looked more like polished marble than concrete, reflecting overhead lights with stunning clarity. When he mentioned it was epoxy resin floor paint applied over a weekend, I knew I had found the solution for my own dingy basement floor. My journey with epoxy paint taught me about preparation, patience, and the incredible transformation possible with the right materials and techniques.
Why I Chose Epoxy Over Other Floor Coatings
Durability ratings convinced me that epoxy resin paint offered superior protection compared to standard concrete paints or sealers. The chemical-resistant properties meant my floor could handle automotive fluids, cleaning chemicals, and workshop spills without staining or deteriorating. I researched various coating options and discovered that epoxy creates a harder, more resilient surface than acrylic or latex alternatives. This long-term protection justified the higher initial cost and more complex application process.
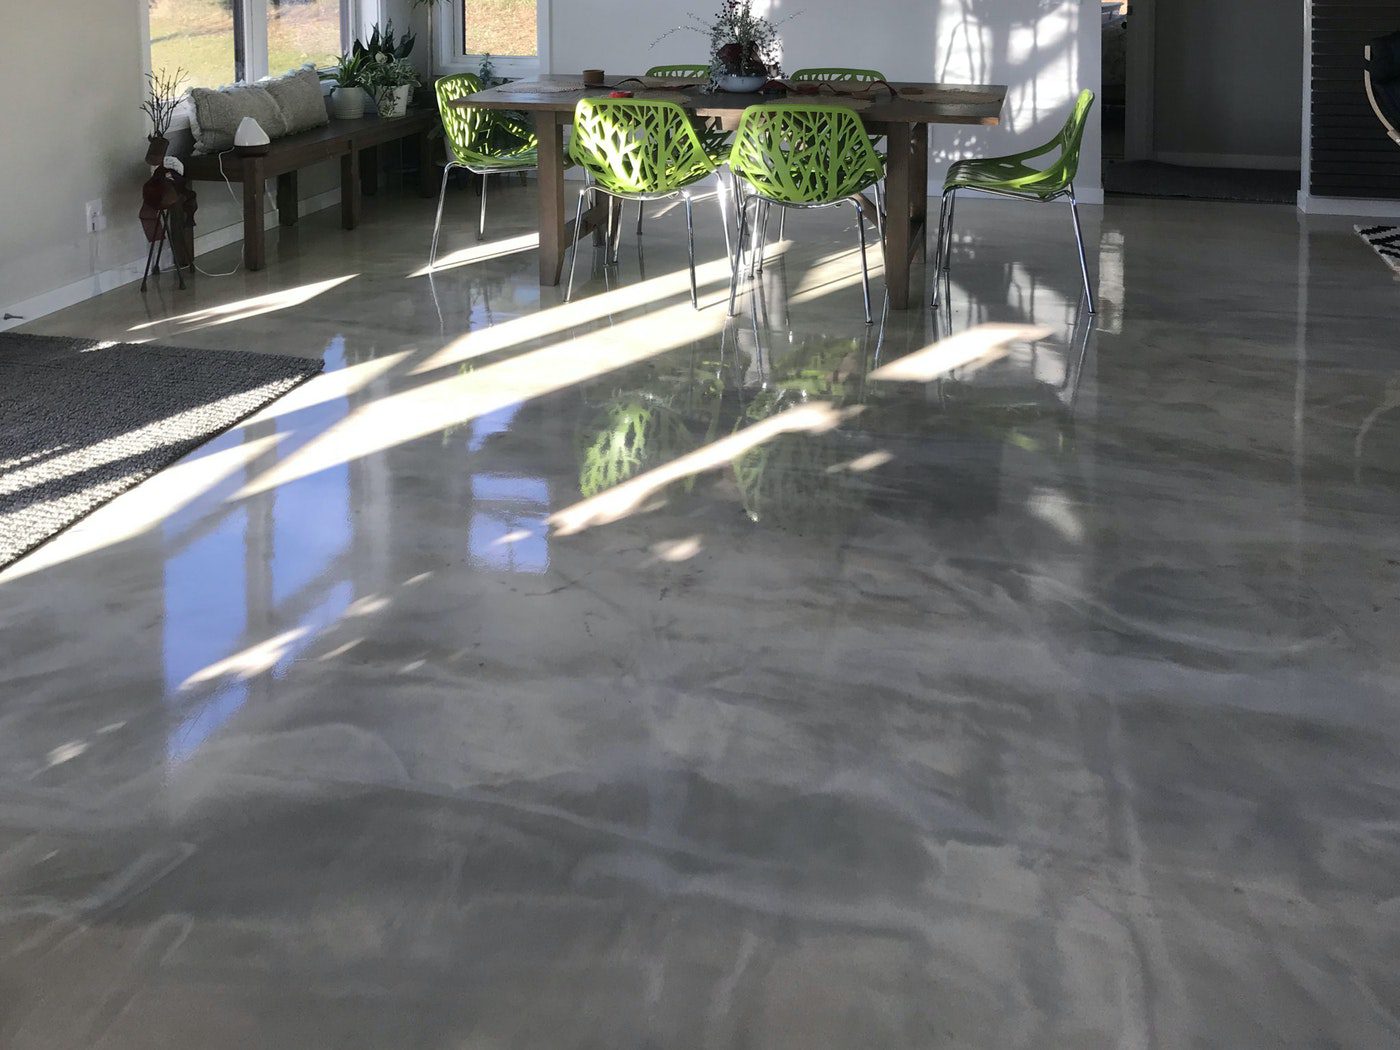
Aesthetic possibilities excited me beyond simple floor protection, offering design opportunities I hadn’t considered with other coating types. Epoxy systems allow for color blending, decorative flakes, and even metallic effects that create stunning visual appeal. I could transform my utilitarian basement into something that looked professionally finished and inviting. The high-gloss finish reflects light beautifully, making dark spaces appear brighter and more welcoming than flat paint alternatives.
Maintenance benefits became apparent as I researched long-term care requirements for different floor coating systems available. Epoxy creates a seamless, non-porous surface that resists dirt penetration and cleans easily with standard mopping. Unlike porous concrete that harbors stains and odors, epoxy allows spills to wipe away without permanent damage. The smooth surface eliminates dust accumulation common with bare concrete, reducing cleaning frequency and improving air quality in enclosed spaces.
Surface Preparation That Determines Success
Concrete assessment revealed the critical importance of starting with sound, properly prepared substrate for successful epoxy adhesion. I tested for loose material, previous coatings, and contamination that could prevent proper bonding between concrete and epoxy. Using a simple tape test, I checked existing paint or sealer adhesion to identify areas needing removal. This evaluation phase took longer than expected but prevented costly application failures later in the process.
Cleaning became an intensive multi-step process far beyond simple sweeping or mopping that I initially anticipated. Oil stains required degreasing with TSP solution and multiple rinse cycles to remove all residue completely. I pressure washed the entire surface, then allowed complete drying for several days before proceeding. Any remaining contamination would create fisheyes or poor adhesion in the final coating, so thoroughness became essential for professional results.
Etching opened the concrete pores to create mechanical bonding sites for optimal epoxy adhesion and long-term performance. I used muriatic acid solution, following safety protocols with proper ventilation and protective equipment throughout the process. The acid treatment roughened the smooth concrete surface, allowing epoxy to grip mechanically rather than relying solely on chemical bonding. After neutralizing and rinsing thoroughly, the prepared surface felt noticeably rougher and ready for coating application.
Mixing and Application Techniques I Mastered
Temperature control became crucial for successful epoxy mixing and application, affecting both working time and final cure properties. I learned that cooler temperatures extend working time but slow curing, while heat accelerates both processes dramatically. My basement maintained ideal conditions between 65-75°F during application, allowing adequate time for spreading while ensuring proper cure. Monitoring ambient temperature prevented rushed application or incomplete curing that could compromise final results.
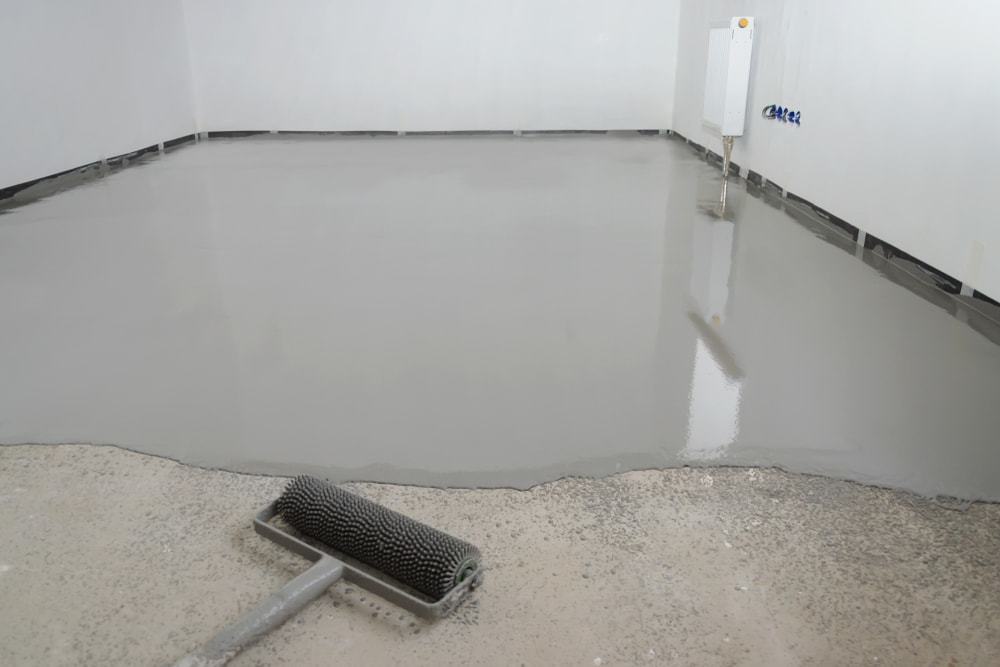
Mixing ratios required precise measurement and thorough blending to achieve optimal chemical reaction and performance characteristics. I used digital scales rather than volume measurements for accuracy, ensuring proper catalyst ratios for complete curing. Inadequate mixing creates soft spots or incomplete cure, while over-mixing introduces air bubbles that mar the final surface. Working with small batches initially helped perfect techniques before attempting large coverage areas.
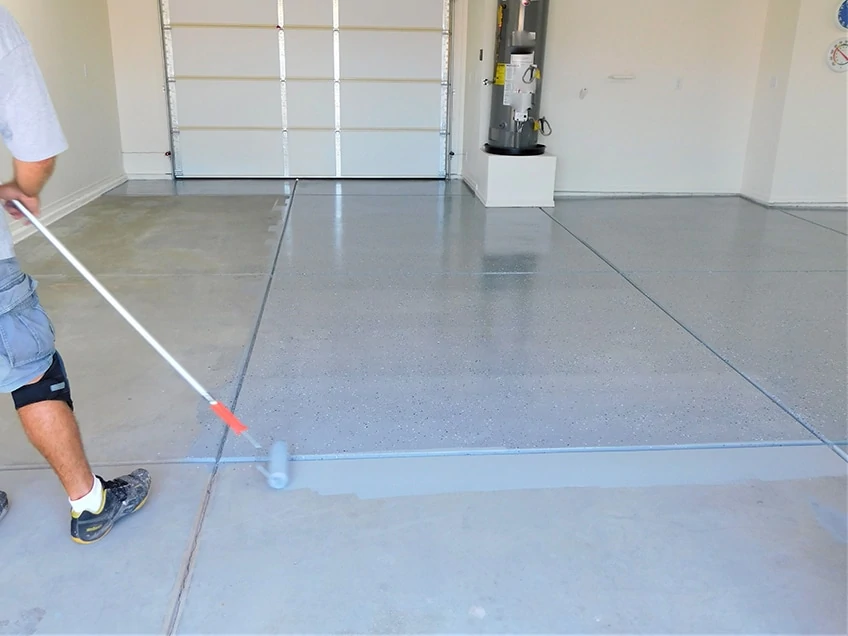
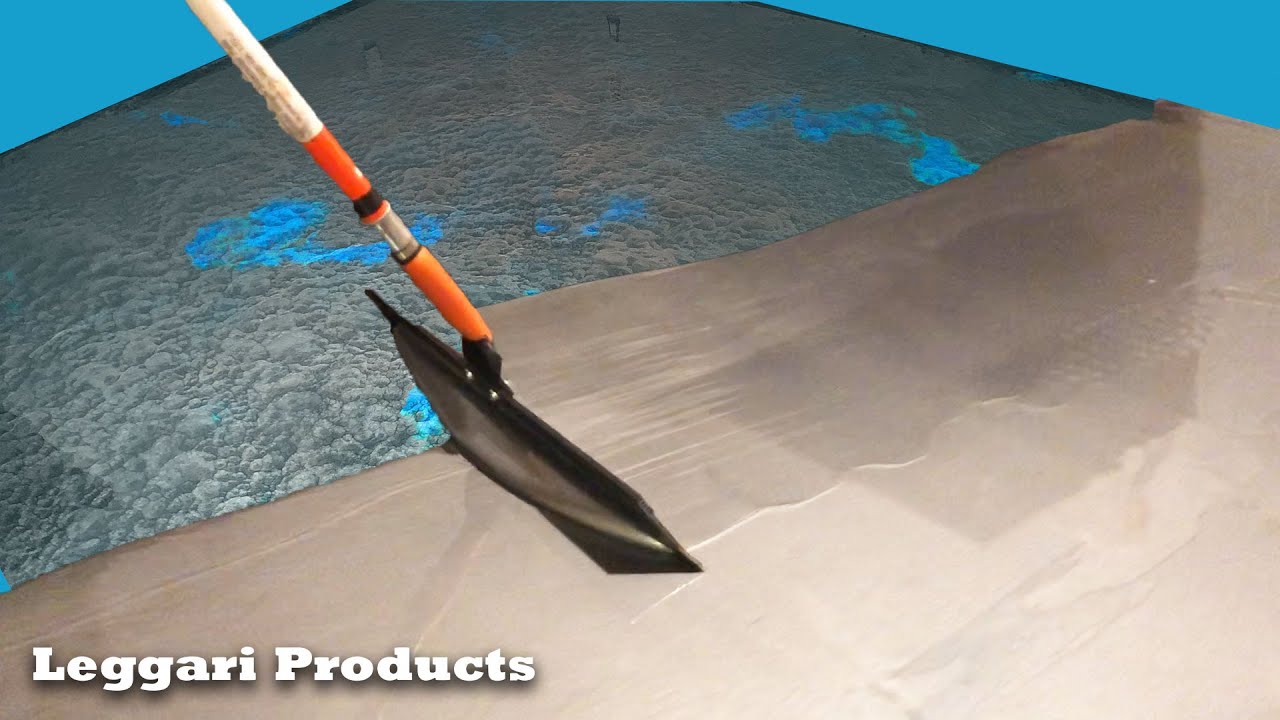
Application timing demanded careful coordination between mixing, spreading, and edge work before epoxy began setting up. I worked systematically from back corners toward exits, maintaining wet edges to prevent visible lap marks in the final surface. Rolling technique affected final texture and gloss levels, requiring consistent pressure and overlap patterns. The narrow working window created pressure but produced superior results when executed properly with advance planning.

Color Options and Design Effects I Explored
Solid colors offered the safest starting point for my first epoxy project, providing consistent coverage and professional appearance. I chose a medium gray that would hide minor imperfections while reflecting light to brighten the basement space effectively. The color remained uniform throughout mixing and application, eliminating concerns about streaking or variation that could occur with more complex systems. This conservative choice delivered excellent results while building confidence for future projects.
Decorative flakes added texture and visual interest beyond solid color applications, creating depth and helping camouflage minor surface imperfections. I broadcast colored vinyl flakes while the base coat remained tacky, then sealed with clear topcoat for durability. The random pattern eliminated concerns about precise application techniques required for geometric designs. Multiple flake colors created custom blends that complemented my basement’s overall color scheme perfectly.
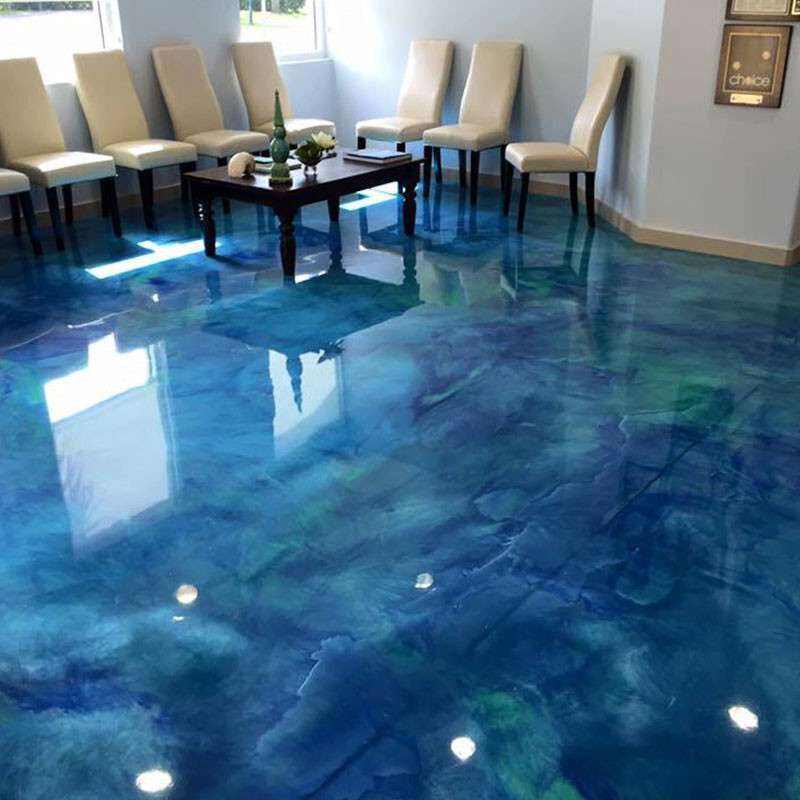
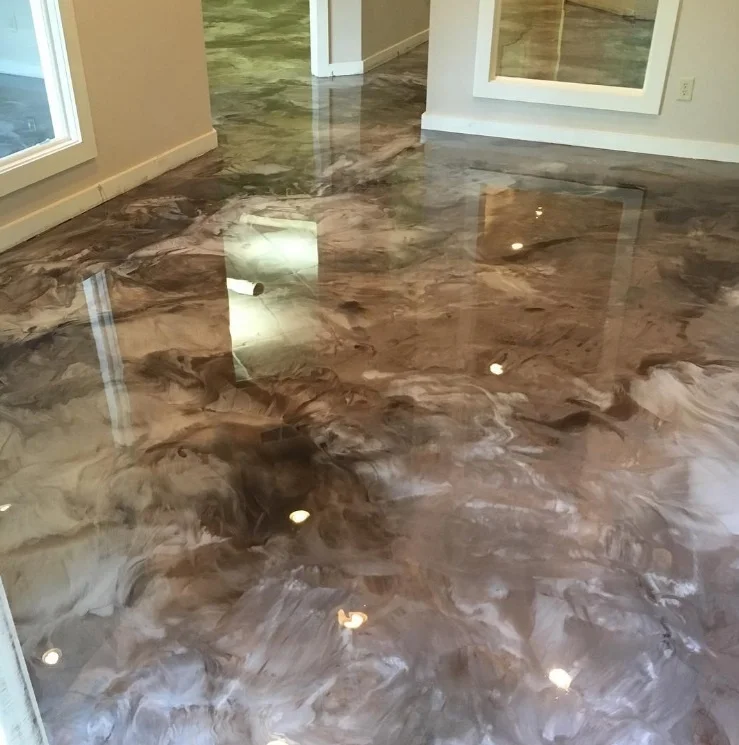
Metallic effects intrigued me for future projects after seeing dramatic results in showroom displays and online galleries. These specialized systems create marble-like patterns with depth and movement that change with viewing angle and lighting conditions. The application requires advanced techniques including multiple metallic layers and careful timing for proper pattern development. While beyond my current skill level, metallic epoxy represents an exciting possibility for future renovation projects.

Common Problems I Avoided Through Research
Moisture issues plague many epoxy applications, causing adhesion failure, clouding, or complete coating failure in extreme cases. I tested concrete moisture content using plastic sheet method and electronic meters before application began. High moisture areas required additional drying time and improved ventilation to reach acceptable levels. Sealing concrete moisture sources prevented problems that could develop months after apparently successful application, protecting my investment long-term.
Temperature extremes during application or curing create various problems including incomplete cure, surface defects, or premature failure. I monitored conditions carefully and postponed application when temperatures fell outside recommended ranges for optimal results. Hot conditions shortened working time dramatically, while cold temperatures prevented proper chemical reaction and curing. Patience with weather conditions prevented problems that could require complete removal and reapplication.
Contamination from oils, previous coatings, or cleaning residues prevents proper adhesion and creates lasting problems in epoxy applications. I spent extra time removing all traces of previous treatments and allowed complete drying before epoxy application. Testing small areas first revealed potential adhesion problems before committing to full coverage. This thorough preparation eliminated most common failure modes that plague rushed or inadequately prepared epoxy installations.
Long-Term Performance After Two Years
Durability exceeded expectations despite heavy use including vehicle traffic, workshop activities, and storage of various materials and equipment. The epoxy surface shows minimal wear after two years, maintaining its original gloss and color integrity throughout different seasons. Minor scratches from dropped tools remain barely visible due to the coating’s hardness and self-healing properties. Chemical spills from automotive fluids and workshop chemicals clean up easily without staining or surface damage.
Maintenance remains simple with weekly sweeping and monthly damp mopping sufficient to maintain the floor’s attractive appearance. The non-porous surface prevents dirt and grime from penetrating, allowing easy cleanup of spills and tracked-in debris. I use pH-neutral cleaners to preserve the coating’s gloss and avoid harsh chemicals that could dull the surface over time. This minimal maintenance requirement makes epoxy an excellent long-term flooring solution.
Aesthetic appeal continues impressing visitors who comment on the professional appearance and ask about installation details. The glossy surface reflects light effectively, making the basement feel brighter and more welcoming than before coating application. Color consistency remains excellent with no fading or discoloration despite exposure to fluorescent lighting and occasional sunlight. The investment in quality materials and careful application continues paying dividends in daily enjoyment and functionality.

How long does epoxy resin floor paint typically last before needing reapplication?
Quality epoxy floor coatings last 5-10 years with proper application and reasonable care, though high-traffic commercial areas may require recoating sooner. My residential basement application shows excellent performance after two years with minimal wear or degradation. Factors affecting longevity include surface preparation quality, coating thickness, UV exposure, and maintenance practices. Industrial-grade epoxy systems can last decades, while consumer products typically provide 3-7 years of service life depending on usage conditions and application quality.
Can I apply epoxy resin paint over existing concrete paint or sealers?
Existing coatings must be removed or properly prepared before epoxy application to ensure adequate adhesion and prevent future failure. I tested small areas first and discovered that most previous coatings required removal through grinding or chemical stripping. Some specialized bonding primers allow epoxy application over certain existing coatings, but mechanical preparation typically provides better results. Poor adhesion between coatings causes peeling, bubbling, or complete failure that requires expensive removal and reapplication.
What temperature and humidity conditions are ideal for applying epoxy floor paint?
Optimal conditions include temperatures between 65-85°F and relative humidity below 85% for best application and curing results. I monitored conditions carefully and postponed application when conditions fell outside recommended ranges to ensure proper cure. High humidity can cause clouding or surface defects, while extreme temperatures affect working time and final properties. Consistent conditions throughout application and initial cure period produce the best results and prevent common problems like incomplete cure or surface defects.
How do I repair scratches or damage to cured epoxy resin floor coating?
Minor scratches often disappear with polishing compound and buffing, while deeper damage requires sanding and spot recoating with matching material. I keep leftover epoxy for repairs, ensuring perfect color matching when touch-ups become necessary. Surface scratches can be wet-sanded with fine grits and polished to restore gloss, while gouges need filling with fresh epoxy. Major damage may require professional refinishing or complete recoating depending on extent and location of the affected area.

What safety precautions should I take when working with epoxy resin floor paint?
Proper ventilation, respiratory protection, and skin contact prevention are essential when working with epoxy materials due to chemical sensitization risks. I used respirators rated for organic vapors and maintained cross-ventilation throughout application and curing periods. Nitrile gloves prevent skin contact that could cause allergic reactions or sensitization over time. Eye protection and appropriate clothing protect against splashes during mixing and application. Working outdoors or in well-ventilated areas reduces exposure risks significantly.
Can epoxy resin floor paint be applied over cracked or damaged concrete?
Cracks and damage must be repaired before epoxy application to prevent problems from telegraphing through the coating system. I filled cracks with appropriate concrete repair materials and allowed complete curing before coating application. Small hairline cracks can often be filled with epoxy itself, while larger damage requires concrete patching compounds. Structural cracks or actively moving joints need professional evaluation and may require flexible repair systems. Proper preparation prevents future coating failure and ensures long-term performance.

Resin floor coating

Wholesale Metallic Epoxy Resin Floor Paint for Concrete

Best Epoxy Floor Paint – Complete Guide for Epoxy Painting
DIY Epoxy Resin Flooring Easy Installation Process Done Over Concrete Industrial Grade Coating
Metallic Power With Clear Epoxy Floor Paint Resin System 200sqft
DIY: Homeowner Installs Designer Metallic Epoxy Floor Coating
Related Posts: