When I first looked at our garage three years ago, I saw nothing but a dark, oil-stained concrete slab that made the entire space feel like a dungeon. My husband used it for car maintenance, I needed storage space for holiday decorations, and our kids wanted room for their bikes and sports equipment. The concrete was cracked, permanently stained, and impossible to keep clean despite my best efforts.
After researching various flooring options and nearly hiring contractors for epoxy coating, I discovered garage floor tiles and decided to tackle the project myself over a weekend. Now, our garage has become one of my favorite spaces in our home, serving as everything from a workout area to a party venue, all thanks to the incredible transformation these tiles provided.
Choosing Between Interlocking and Adhesive Tile Systems
When I started researching garage floor tiles, I quickly discovered two main installation methods that would dramatically affect both the project timeline and long-term performance. Interlocking tiles appealed to me because they required no adhesives, could be installed immediately over existing concrete, and offered the flexibility to replace individual tiles if damaged. The click-together system reminded me of laminate flooring, but with heavy-duty materials designed for garage environments. I could literally start installing in the morning and park my car that same evening.
Adhesive tile systems offered different advantages, including a more permanent installation and a slightly thinner profile that wouldn’t interfere with garage door clearances. However, they required more extensive surface preparation, including grinding away oil stains and applying primer to ensure proper adhesion. The installation time would stretch over several days due to adhesive curing requirements, and removing tiles later would be nearly impossible without damaging the concrete underneath. For my first garage flooring project, the reversible nature of interlocking tiles felt like the safer choice.
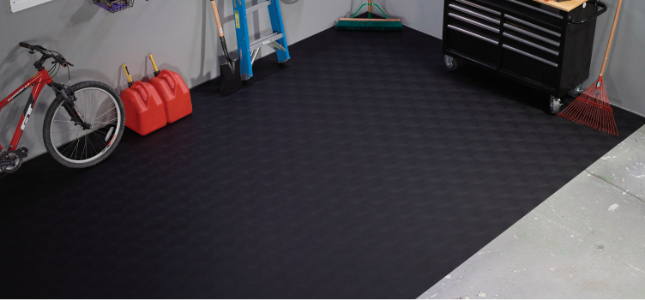
I ultimately chose interlocking polypropylene tiles after comparing samples from several manufacturers and testing them under various conditions. The tiles I selected featured a unique design with built-in drainage channels that allow moisture to flow underneath rather than pooling on the surface.
This feature proved crucial during wet winter months when snow and ice melt from our vehicles would otherwise create standing water. The interlocking system also allowed me to create custom patterns and incorporate different colors to define parking areas, walkways, and storage zones within our garage space.

Material Options: Plastic, Rubber, and Composite Tiles
Understanding the different materials available for garage floor tiles helped me make an informed decision based on our specific needs and budget constraints. Plastic tiles, typically made from polypropylene or PVC, offered the most affordable option with good chemical resistance and easy maintenance. However, some plastic tiles felt flimsy and hollow underfoot, especially the cheaper versions that might crack under the weight of heavy vehicles or dropped tools. I tested several samples by driving over them and dropping wrenches to evaluate their durability before making my final selection.
Rubber garage tiles provided superior comfort underfoot and excellent impact absorption, making them ideal for areas where I might be standing for extended periods during projects or workouts. The natural cushioning effect reduced fatigue and made dropped tools less likely to bounce and potentially cause injury. However, rubber tiles cost significantly more than plastic alternatives and could potentially retain odors from automotive chemicals or fuel spills. Some rubber compounds also showed tendency to shrink or expand with temperature changes, creating gaps between tiles during extreme weather conditions.
Composite tiles combining recycled materials with binding agents offered an interesting middle ground between plastic and rubber options. These tiles provided good durability and environmental benefits while maintaining reasonable costs and easy installation. I appreciated the eco-friendly aspect of using recycled materials, and the composite construction provided better sound dampening than solid plastic tiles. After comparing all options, I chose high-quality polypropylene tiles that offered the best combination of durability, chemical resistance, and value for our family’s diverse garage usage needs.

Installation Process: Easier Than I Expected
The installation process for my garage floor tiles turned out to be surprisingly straightforward, even for someone with limited DIY experience like myself. I started by thoroughly cleaning the concrete floor with degreaser and pressure washing to remove years of accumulated oil stains, dirt, and residue. While the tiles could technically be installed over existing stains, I wanted the best possible foundation and took time to address the worst problem areas with concrete cleaner and etching solution to improve the surface texture and cleanliness.
Planning the layout proved more important than I initially realized, requiring careful measurements and consideration of how the tile pattern would interact with garage features like floor drains, support posts, and door openings. I used chalk lines to establish reference points and dry-laid several rows to ensure the pattern would result in reasonably sized border tiles around the perimeter. Starting from the center of the garage and working outward helped ensure balanced borders on all sides, though I did need to cut some tiles to fit around obstacles and irregular spaces.
The actual installation moved quickly once I established the pattern and rhythm of connecting the interlocking edges. Each tile snapped securely into place with satisfying clicks that confirmed proper alignment and connection. I used a rubber mallet for stubborn connections and a circular saw with a fine-tooth blade for cutting border tiles and fitting around posts. The entire 500-square-foot garage was completed in about eight hours over a weekend, including cleanup time. By Sunday evening, I was parking on my new floor and marveling at the dramatic transformation of the space.
Dealing with Moisture, Temperature, and Chemical Challenges
Living in a climate with significant seasonal temperature variations taught me important lessons about how garage floor tiles respond to environmental changes. During summer months, the tiles expanded slightly, creating tighter connections between pieces but occasionally causing slight buckling in areas where I hadn’t left adequate expansion space around the perimeter. I learned to leave a small gap along walls and fixed objects to accommodate this natural movement, which prevented any permanent damage or installation problems during extreme heat periods.
Winter conditions presented different challenges, particularly with moisture management from snow and ice melting off vehicles parked on the tile surface. The drainage channels I mentioned earlier proved their worth during these conditions, allowing water to flow underneath the tiles rather than pooling on top and potentially freezing. However, I did need to ensure adequate ventilation and occasionally use a shop vacuum to remove excess moisture that accumulated in low areas to prevent long-term humidity issues in the enclosed garage space.
Chemical resistance became critically important when my husband spilled brake fluid during a routine maintenance project. I was initially panicked about permanent damage, but the high-quality tiles I’d chosen handled automotive chemicals remarkably well. The spill wiped up cleanly without staining or softening the tile material. Similarly, occasional gasoline drips, motor oil, and even battery acid spills have cleaned up easily with standard garage floor cleaners. The chemical resistance has exceeded my expectations and justified the investment in higher-quality tiles over cheaper alternatives that might not handle automotive fluids as effectively.

Customization Options: Colors, Patterns, and Design Features
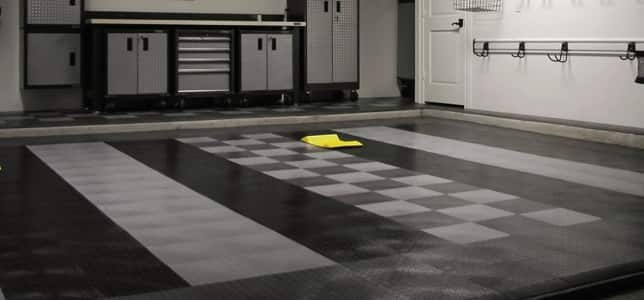
One of the most enjoyable aspects of my garage floor tile project was exploring the creative possibilities for customization and design. Basic colors like black, gray, and red were readily available, but I discovered more interesting options, including metallic finishes, diamond plate textures, and even wood grain patterns that could transform a utilitarian garage into a more finished living space. I chose a combination of dark gray base tiles with red accent strips to create defined parking spaces and traffic flow patterns that also added visual interest to the large expanse of flooring.
The ability to create custom patterns without cutting or waste was a huge advantage of the interlocking tile system. I incorporated red border tiles around the entire perimeter and used them to create designated zones for different activities, tool storage, and vehicle parking. This color-coding system has proven practical for organizing our garage activities and helps family members understand where different items belong. The visual organization created by the tile pattern has actually improved our garage’s functionality beyond just the flooring upgrade.
Some tile manufacturers offer specialized features like coin patterns for enhanced traction, smooth surfaces for easier cleaning, or even transparent tiles that can be backlit for unique aesthetic effects. While I kept my design relatively simple, I’ve seen garage installations that rival the most elaborate residential flooring with intricate patterns, logos, and artistic elements. The modular nature of tile systems means I could easily modify or expand my pattern in the future if our garage needs change or if I want to experiment with different design elements.

Long-Term Performance and Maintenance Reality
After three years of daily use, my garage floor tiles continue to perform exceptionally well despite exposure to everything from automotive fluids to workout equipment and holiday storage boxes. The high-traffic areas near our primary parking spots show minimal wear, with only slight surface polish from tire contact that actually makes those areas easier to clean. Individual tiles can be easily replaced if damaged, though I’ve only needed to replace one tile that cracked when I accidentally dropped a heavy toolbox from shoulder height.
Daily maintenance consists of occasional sweeping to remove debris and monthly mopping with standard floor cleaner for deeper cleaning. The textured surface of the tiles provides good traction but doesn’t trap dirt like some heavily textured materials might. Spills clean up easily, and the modular system means I can remove individual tiles for thorough cleaning if necessary, though this has rarely been needed. The maintenance requirements are significantly lower than the constant battle I faced with the original concrete floor, which seemed to absorb every stain permanently.
The thermal properties of the tiles have provided unexpected comfort benefits, particularly during winter months when the garage floor previously felt like walking on ice. The plastic material doesn’t conduct cold as readily as concrete, making barefoot trips to grab stored items more tolerable. During summer, the tiles remain comfortable despite high temperatures and don’t retain heat like dark concrete surfaces might. These comfort improvements have made our garage a more pleasant space for all activities beyond just parking vehicles, contributing to its evolution into a true multi-purpose area.

Can garage floor tiles handle the weight of cars and heavy equipment?
Quality garage floor tiles are designed to support vehicle loads without problems. My tiles have handled two full-size SUVs daily for three years without cracking or permanent deformation. I chose tiles rated for heavy-duty use, which is crucial for automotive applications. Cheaper tiles might crack under vehicle loads, so invest in quality products from reputable manufacturers. The load distribution across multiple interlocking tiles actually handles weight better than you might expect.
How do garage floor tiles perform in extreme temperatures?
I’ve experienced both 100°F summers and below-zero winters with minimal issues. Quality tiles expand and contract slightly but remain stable with proper perimeter spacing. Cheap tiles might become brittle in extreme cold or soft in high heat. The key is leaving expansion gaps around the perimeter and choosing tiles specifically rated for your climate range. My tiles have maintained their integrity and connections through significant temperature swings without problems.
Are garage floor tiles slippery when wet?
The textured surface of quality garage tiles provides excellent traction even when wet from snow melt or washing. Smooth tiles can be slippery, so choose textured options for better safety. The drainage channels in my tiles help water flow away rather than pooling on the surface. Even with wet shoes or small spills, I’ve never had slipping issues. The traction is actually better than the original concrete floor that became dangerously slick when wet.
How difficult is it to replace individual damaged tiles?
Individual tile replacement is surprisingly easy with interlocking systems. I lift the damaged tile and surrounding pieces, remove the broken tile, and snap in a replacement. The process takes maybe five minutes and requires no tools or adhesives. Having a few spare tiles on hand is smart for quick repairs. This replaceability was a major advantage over permanent flooring options that would require professional repair for any damage issues.
Can you install garage floor tiles over cracked or uneven concrete?
Minor cracks and surface imperfections are usually not problematic for floating tile systems. My concrete had several cracks that the tiles bridged successfully without issues. However, major settling, large holes, or severely uneven areas should be addressed before installation. Small level differences actually disappear once tiles are installed. Cleaning and degreasing the concrete is more important than achieving perfect smoothness for most tile systems.
What’s the realistic lifespan of garage floor tiles?
Quality tiles should last 10-15 years with normal garage use, potentially longer with lighter use. My three-year-old installation still looks nearly new despite heavy use. Cheaper tiles might need replacement in 5-7 years, making quality options more cost-effective long-term. The ability to replace individual damaged tiles extends overall system life significantly. UV-resistant formulations prevent fading and degradation, which is important for my south-facing garage with significant sun exposure.

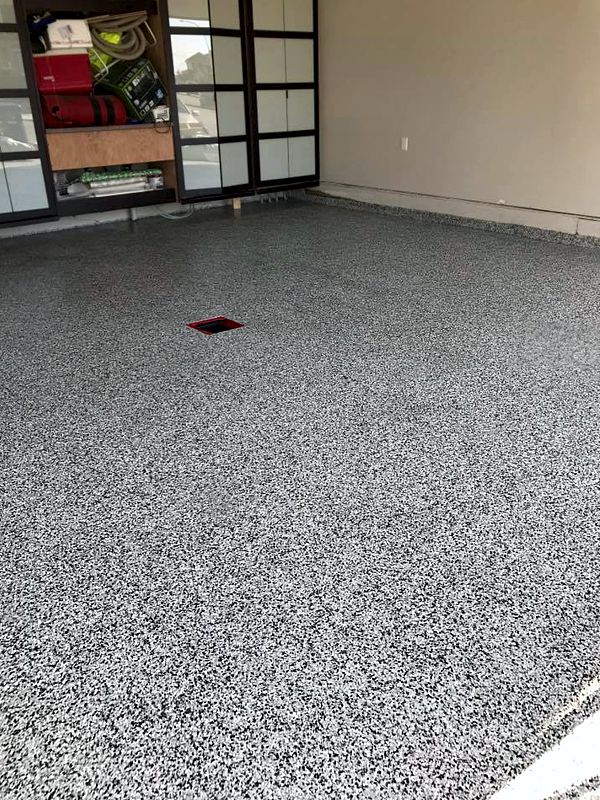
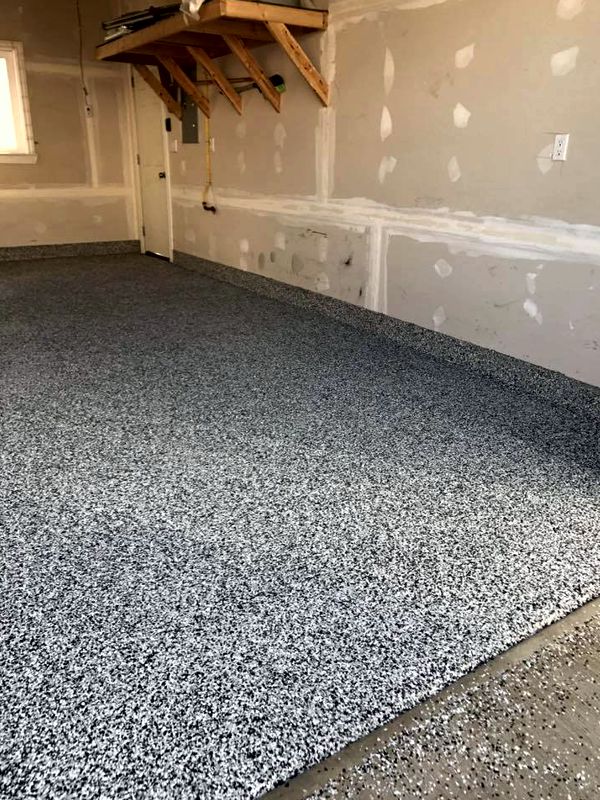
Garage Floor Epoxy Coating High River Big Guns Property
Related Posts: