When I first considered upgrading my garage, I knew I wanted something that would not only look great but also stand up to the wear and tear of daily life. My garage isn’t just a place to park my car; it’s my workshop, my storage area, and sometimes, even a space for entertaining. After a lot of thought and research, I decided to explore epoxy flooring, and let me tell you, it’s been a game-changer.
I’ve learned so much about the different options available, the benefits they offer, and what it takes to get that perfect, durable finish. I’m excited to share my journey and insights with you, so you can transform your garage into a space that’s both functional and visually appealing. It’s a decision that truly enhances the overall utility and aesthetic of your home, and I’m here to guide you through the possibilities.
Why Choose Epoxy for Your Garage Floor?
When I first started looking into garage flooring options, I was really drawn to epoxy because of its reputation for durability. I mean, my garage takes a beating—tools get dropped, cars drive in and out, and sometimes I even spill things. I needed a floor that could handle all of that without showing wear and tear, and epoxy seemed like the perfect solution. It’s incredibly resistant to impacts, abrasions, and even chemicals, which is a huge plus for anyone who uses their garage for more than just parking. I’ve seen firsthand how well it holds up, and it gives me peace of mind knowing my floor can withstand whatever I throw at it.
Beyond just being tough, I also loved the idea of how easy epoxy floors are to clean. My old concrete floor was always a magnet for dust and grime, and trying to get it truly clean felt like an impossible task. With epoxy, spills wipe right up, and a quick sweep or mop makes the whole space look spotless. It’s a seamless surface, so there are no cracks or grout lines for dirt to hide in, which makes maintenance a breeze. I’ve found that I spend far less time cleaning my garage now, and that’s time I can put towards my projects or just relaxing.
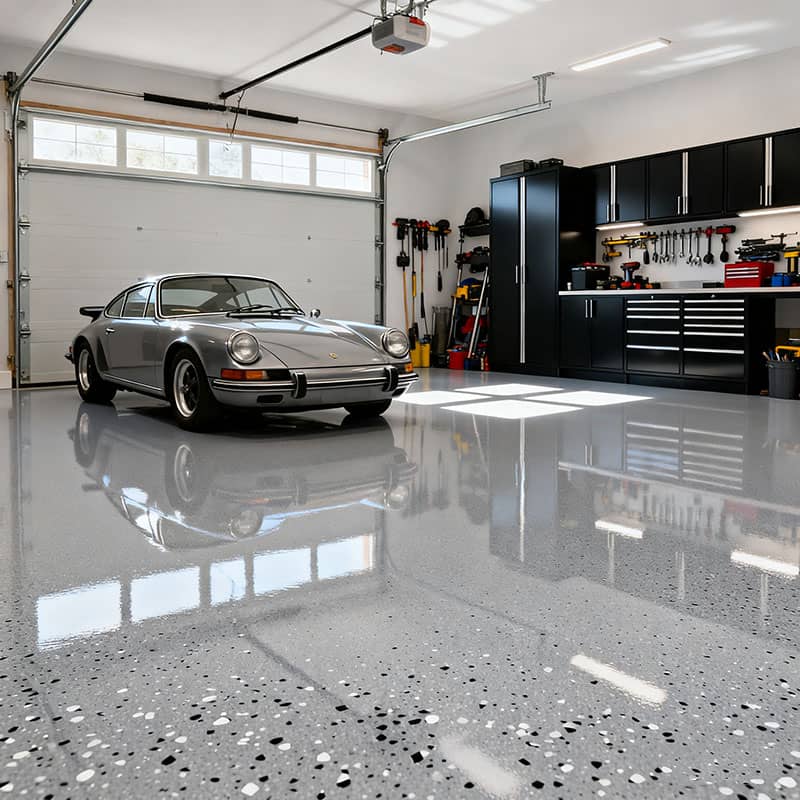
And let’s be honest, the aesthetic appeal of an epoxy floor is undeniable. I wanted my garage to feel like an extension of my home, not just a utilitarian space. Epoxy offers such a wide range of colors and finishes, from solid hues to decorative flakes and metallic effects, that I was able to create a look that perfectly matched my style. It instantly transformed my drab, gray concrete into a bright, inviting area that I enjoy spending time in. It’s amazing how much a beautiful floor can change the entire feel of a space, and I’m so happy with the polished, professional look it gives my garage.
Different Types of Epoxy Coatings
When I started researching epoxy, I quickly realized it wasn’t a one-size-fits-all product. There are several different types of epoxy coatings, each with its own unique properties and best uses. For my garage, I looked closely at 100% solids epoxy, which is known for its incredible durability and thickness. It’s a professional-grade option that provides a robust finish, and I liked the idea of investing in something that would truly last. It’s a bit more challenging to work with due to its fast curing time, but the results are undeniably superior for a high-traffic area like a garage.
Then there are water-based epoxies, which are often marketed as DIY-friendly options. These are thinner and easier to apply, making them a good choice for beginners or those on a tighter budget. While they offer good protection compared to just bare concrete, I learned that they aren’t quite as durable or long-lasting as the 100% solids variety. For me, the trade-off in durability wasn’t worth the easier application, but I can see why they’re popular for less demanding spaces or for homeowners who want a quick refresh without a huge commitment.
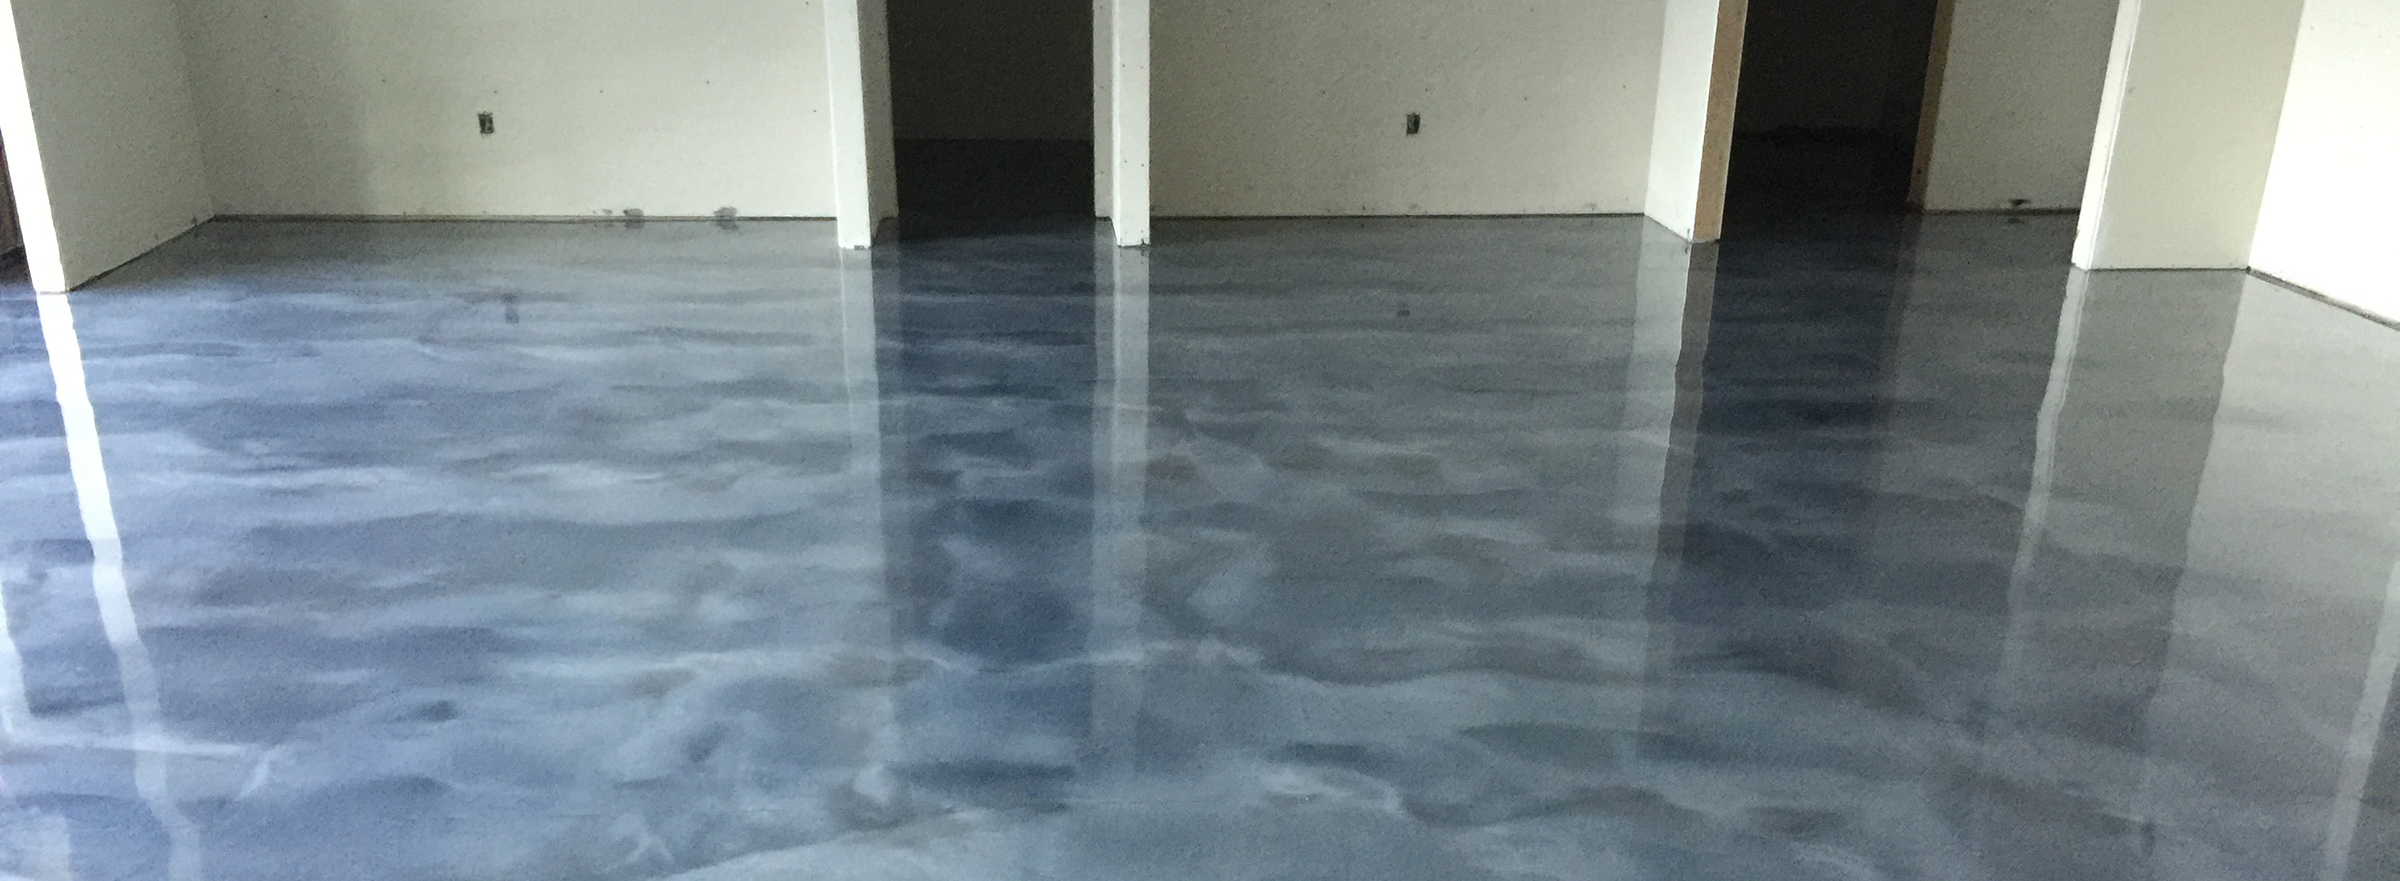
Another type I came across was metallic epoxy, which creates a really stunning, unique look. It uses metallic pigments that swirl and blend to give a three-dimensional effect, almost like liquid metal. While incredibly beautiful, I decided against it for my garage because I needed something more practical and less decorative for my workspace. However, if you’re looking to make a bold statement in a showroom, garage, or even an indoor space, metallic epoxy is an eye-catching option that can transform a floor into a work of art. Each type has its place, and choosing the right one really depends on your specific needs and aesthetic goals for durability, aesthetics, and ease of application.

Preparing Your Garage Floor for Epoxy
Before I even thought about mixing a single drop of epoxy, I knew that proper floor preparation was critical. I’d read countless times that the success of an epoxy coating hinges almost entirely on how well the concrete surface is prepared. My garage floor had years of oil stains, dirt, and old paint, so I started by thoroughly cleaning it. I used a heavy-duty degreaser and a stiff brush, scrubbing every inch to remove any contaminants that could prevent the epoxy from bonding properly. It was a lot of elbow grease, but I knew it would pay off in the long run.
After cleaning, the next crucial step was etching the concrete. This creates a slightly rough profile on the surface, giving the epoxy something to grip onto. I used an acid etching solution, following the instructions carefully, and then rinsed the floor thoroughly to neutralize the acid. It’s important to make sure the floor is completely dry before moving on, so I gave it a good 24-48 hours to air out, even using fans to speed up the process. Any moisture trapped in the concrete can cause adhesion issues down the line, and I wanted to avoid that at all costs.
Finally, I filled any cracks or divots in the concrete with a suitable concrete repair product. A smooth, even surface is essential for a professional-looking epoxy finish. I also made sure to grind down any high spots. This meticulous preparation might seem tedious, but I can’t stress enough how important it is. Skipping these steps is a recipe for disaster, leading to peeling, bubbling, or premature failure of the epoxy. Taking the time to prepare the surface correctly ensures a strong, lasting bond and a beautiful, durable floor that will stand the test of time.

The Epoxy Application Process
Once the floor was prepped and perfectly dry, it was time for the exciting part: applying the epoxy. I opted for a two-part epoxy kit, which means you mix a resin and a hardener right before application. This step is crucial, as the chemical reaction between the two components is what gives epoxy its incredible strength and durability. I made sure to follow the manufacturer’s instructions precisely, mixing for the recommended time and using a drill with a mixing paddle to ensure everything was thoroughly combined. I also worked in small batches, as epoxy has a limited pot life once mixed, meaning it starts to harden fairly quickly.
I started by cutting in the edges of the garage with a brush, just like you would when painting a room. Then, I poured a ribbon of the mixed epoxy onto the floor and used a roller with a long handle to spread it evenly. I worked in sections, making sure to maintain a wet edge to avoid lap marks. It’s important to apply it at the recommended thickness; too thin, and you won’t get the full durability benefits, too thick, and it might not cure properly. I also made sure to wear spiked shoes, which allowed me to walk on the wet epoxy without disturbing it, so I could reach all areas of the floor.
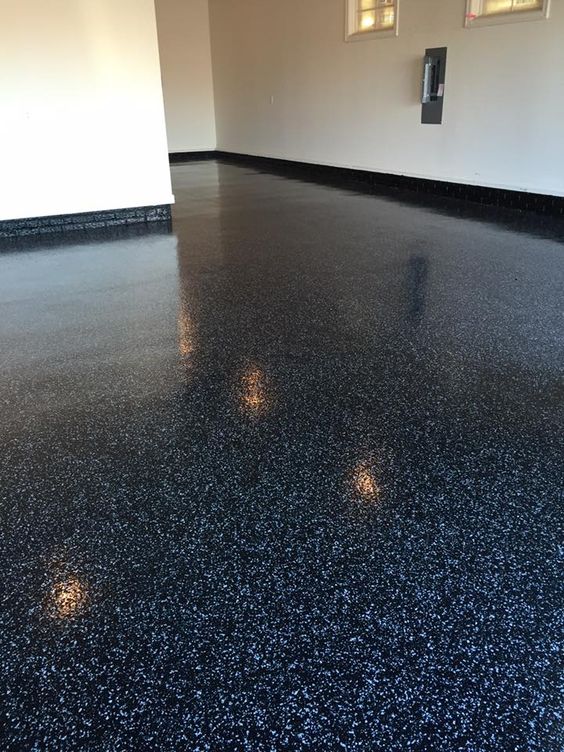
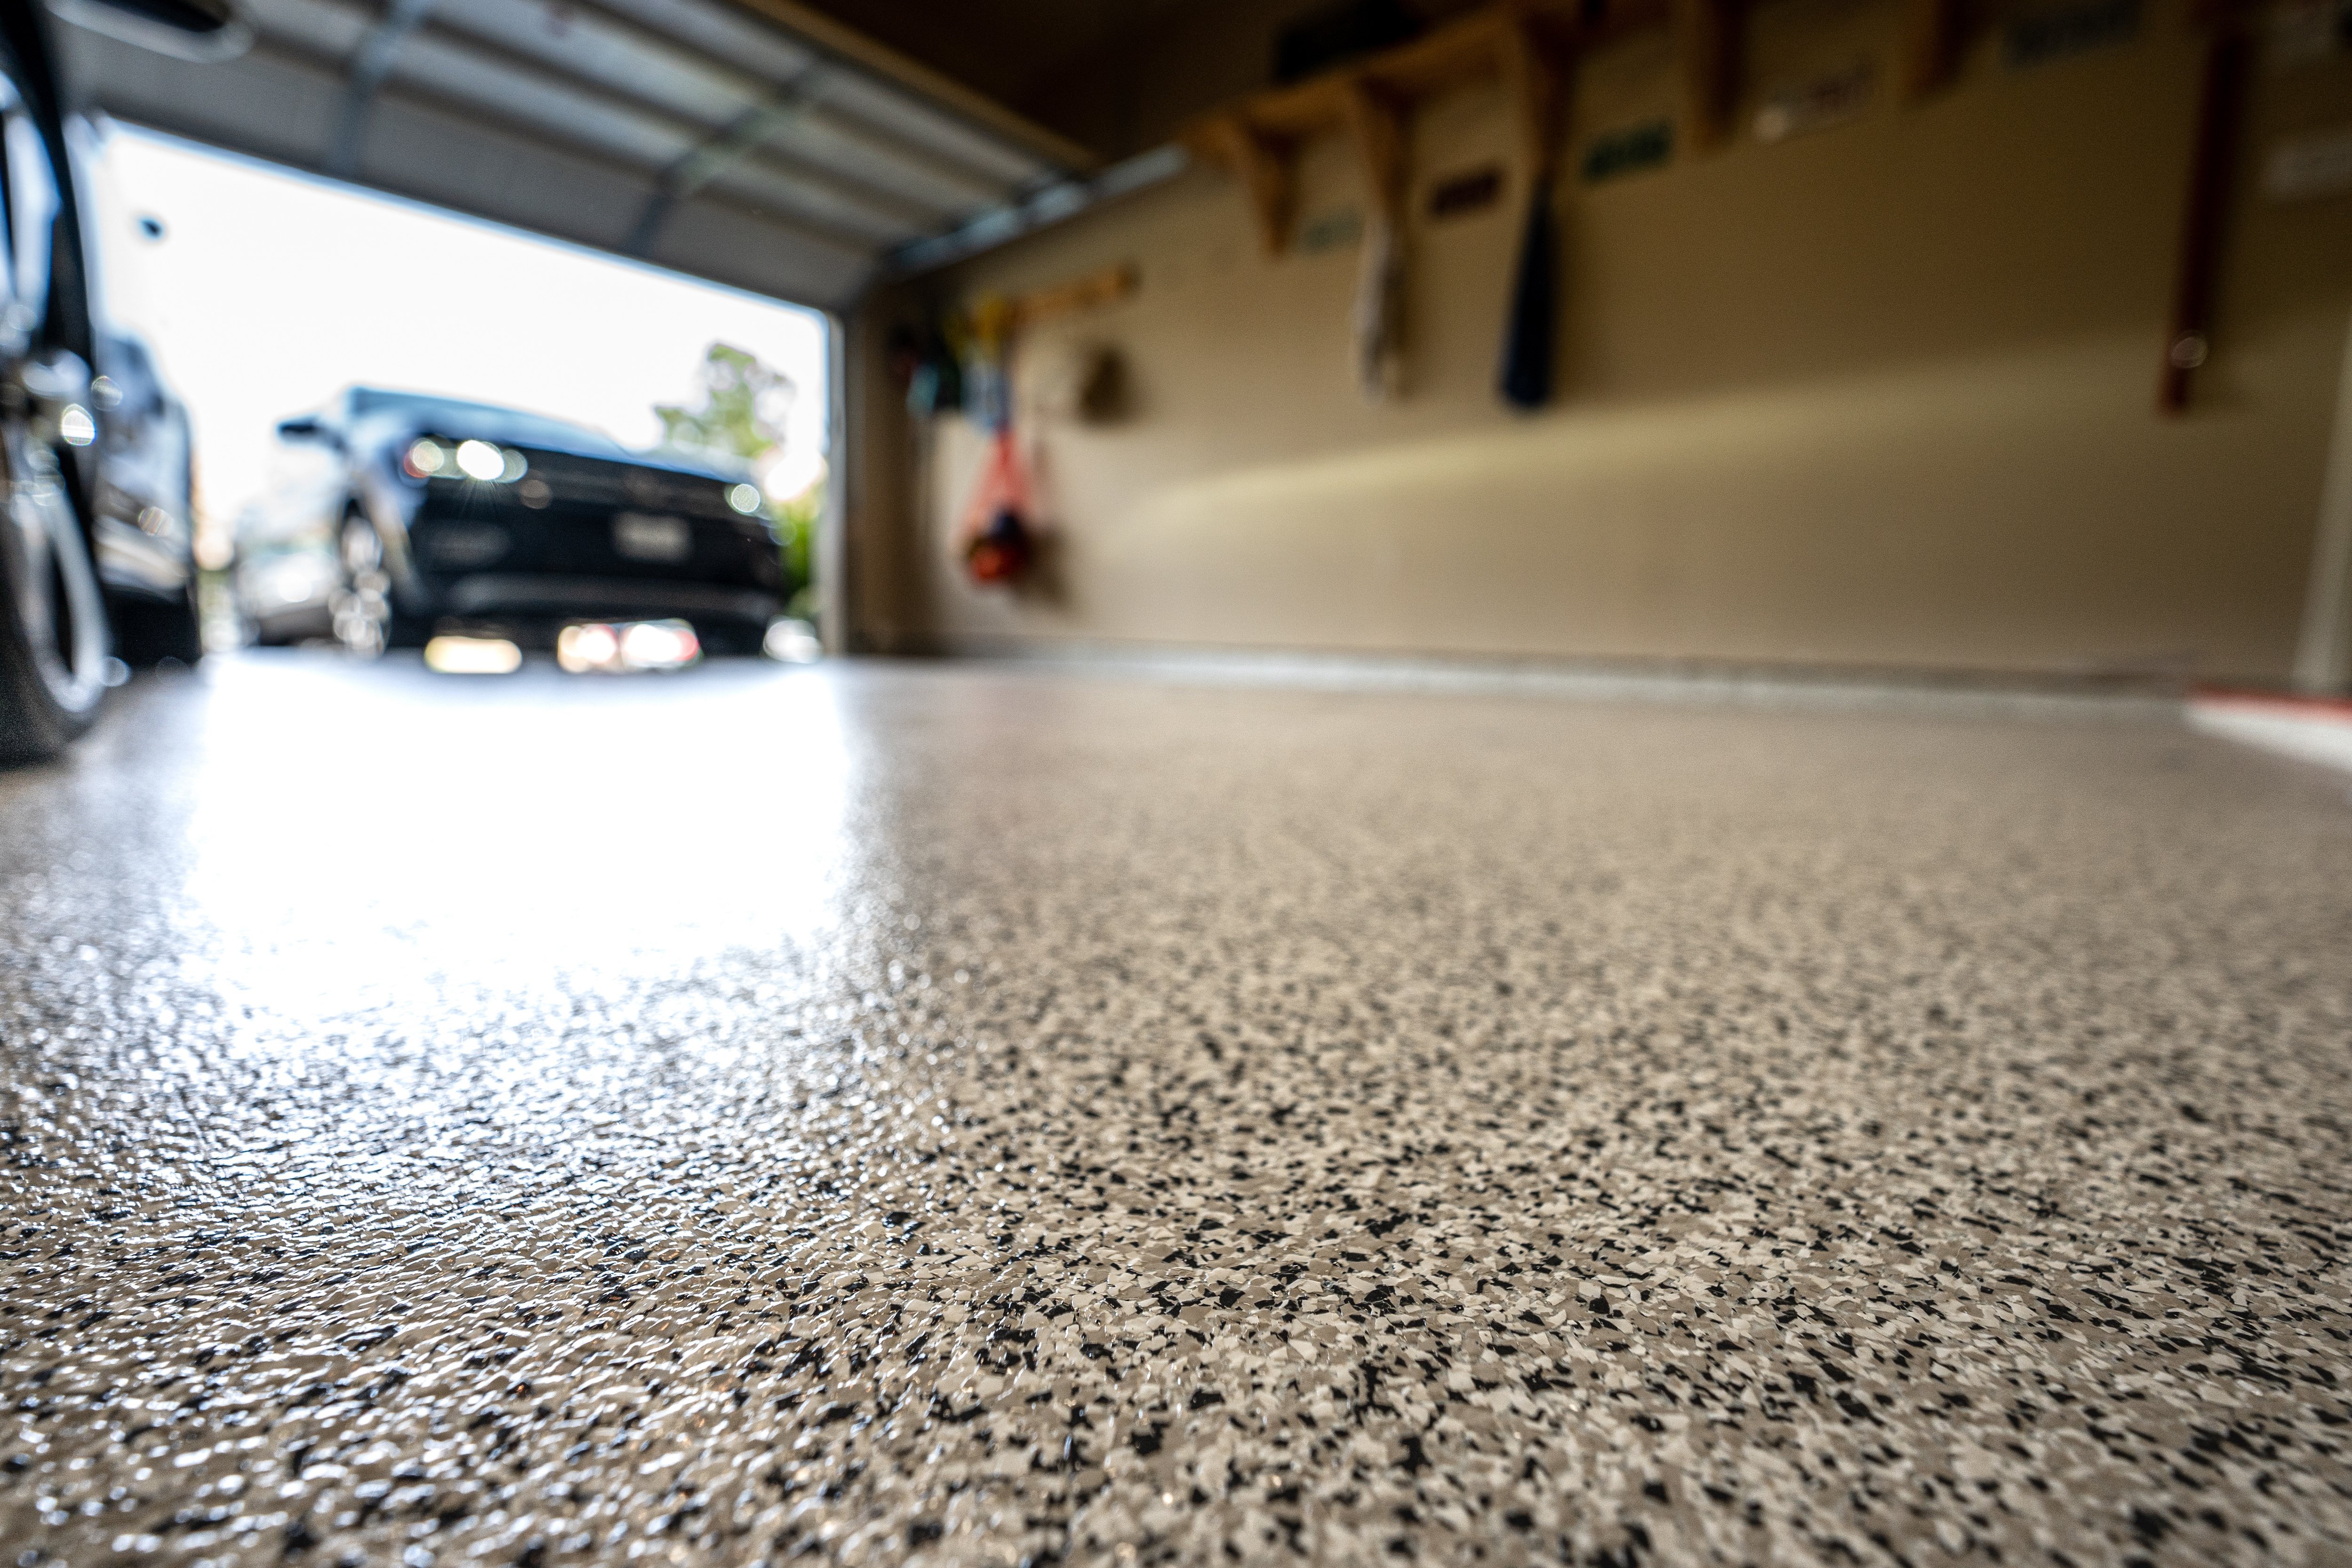
After the first coat, I let it cure for the recommended time, which was about 12-18 hours for my product. Then, I applied a second coat, following the same process. For added slip resistance and a decorative touch, I broadcast decorative flakes into the wet second coat. This step not only adds visual appeal but also provides a subtle texture that helps prevent slips, especially when the floor is wet. Finally, after the second coat had cured, I applied a clear topcoat for extra protection and a high-gloss finish. The entire process required patience and attention to detail, but seeing the transformation unfold was incredibly rewarding, and the result was a floor that looked professionally installed.

Maintaining Your Epoxy Garage Floor
Now that my garage floor is coated with epoxy, I’ve learned that maintaining it is surprisingly simple, which is a huge relief. One of the biggest advantages I’ve found is how easy it is to keep clean. For everyday dust and debris, a quick sweep with a soft broom or a dust mop does the trick. I try to do this regularly to prevent any abrasive particles from scratching the surface over time. It’s much less effort than trying to sweep a rough concrete floor, where dirt seems to cling to every imperfection. This simple routine keeps my garage looking tidy and prevents buildup.
For spills, whether it’s oil, grease, or even just water, I make sure to wipe them up immediately. The epoxy surface is non-porous, so liquids don’t soak in, which is fantastic. I usually just use a mild soap and water solution with a soft mop or cloth for any sticky messes. I avoid harsh chemicals or abrasive cleaners, as these can dull the finish or potentially damage the coating over time. It’s really about being gentle with it, and in return, the floor stays looking new and vibrant. I’ve found that this proactive approach to cleaning keeps my garage in top shape with minimal fuss.
While epoxy is incredibly durable, I still take a few precautions to extend its life. For instance, I use drip pans under my vehicles to catch any potential leaks, even though the floor is resistant to most automotive fluids. I also use soft pads under heavy equipment or furniture to prevent concentrated pressure points that could cause indentations over many years. These small habits ensure that my investment in epoxy flooring continues to pay off, keeping my garage looking fantastic and performing well for a very long time. It’s a low-maintenance solution that truly delivers on its promise of durability and ease.

Popular Epoxy Garage Flooring Design Ideas
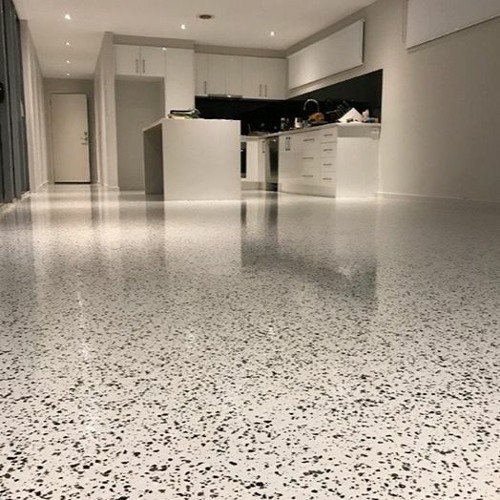
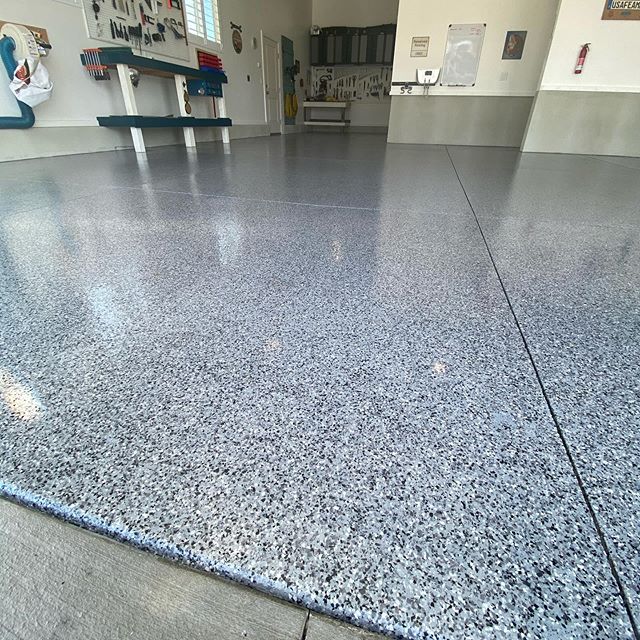
When I was planning my garage floor, I spent a lot of time looking at different design ideas, and it was amazing to see the variety that epoxy offers. I initially thought it was just about solid colors, but I quickly discovered a whole world of possibilities. One of the most popular options I came across, and one I seriously considered, was using decorative flakes. These little vinyl chips are broadcast into the wet epoxy, and they come in so many different color combinations. They not only add a beautiful, speckled look that can mimic granite or terrazzo, but they also provide a bit of texture, which is great for slip resistance. I loved how they could hide minor imperfections and add a touch of sophistication to the space.
Another design trend that caught my eye was metallic epoxy. This is where metallic pigments are mixed into the epoxy, creating stunning, swirling patterns that look almost three-dimensional. It’s like having a piece of abstract art on your floor. While I ultimately decided against it for my functional garage, I can see why it’s so popular for showrooms, man caves, or even interior spaces where you want to make a dramatic statement. The way the light catches the metallic swirls is truly captivating, and each floor ends up being unique, which is a huge appeal for those looking for something truly custom.
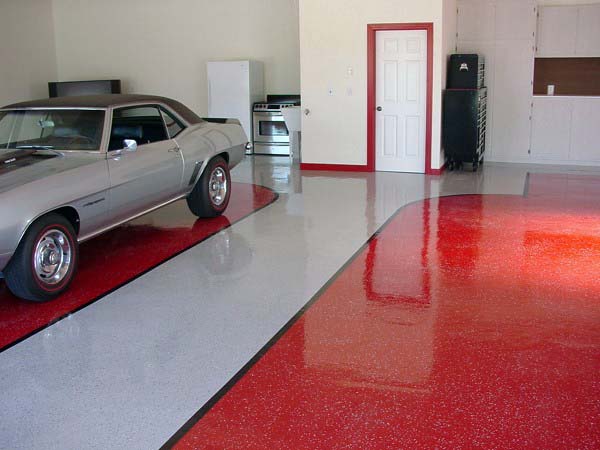
And of course, there’s the classic solid color epoxy, which I ended up choosing for my garage. While it might seem simple, the impact of a clean, uniform color is incredibly powerful. I went with a light gray, and it instantly brightened up the entire space, making it feel larger and more inviting. You can also use different solid colors to create patterns, borders, or even designate specific zones in your garage, like a parking area versus a workbench area. The beauty of solid colors lies in their versatility and timeless appeal; they provide a clean canvas that allows your tools, vehicles, or decor to stand out. It’s a testament to how even the simplest design choice can have a profound effect on the overall feel and functionality of your garage.
How long does epoxy garage flooring last?
From my experience and research, a properly installed epoxy garage floor can last anywhere from 10 to 20 years, sometimes even longer, depending on the quality of the epoxy, the preparation of the concrete, and the amount of traffic and abuse it receives. High-quality, 100% solids epoxy systems tend to be the most durable and long-lasting. Regular maintenance, like keeping it clean and promptly addressing spills, also plays a significant role in extending its lifespan. Factors like UV exposure, heavy vehicle traffic, and chemical spills can affect its longevity, but overall, it’s a very durable solution for a garage.
Is epoxy flooring slippery?
This is a common concern, and while a smooth, high-gloss epoxy finish can be slippery when wet, there are effective ways to mitigate this. Many epoxy systems, especially those designed for garages, incorporate anti-slip additives. These can be fine aggregates or polymer beads that are mixed into the topcoat or broadcast onto the wet surface, creating a subtle texture that significantly improves traction. When I applied my epoxy, I chose to add decorative flakes, which also provide a degree of slip resistance. If you’re particularly concerned about slipperiness, especially in areas prone to moisture, I highly recommend opting for an anti-slip additive to ensure safety.
Can I install epoxy flooring myself, or should I hire a professional?
This is a decision many homeowners face. While there are DIY-friendly epoxy kits available, particularly water-based ones, installing epoxy flooring correctly is a demanding job that requires meticulous preparation and precise application. I chose to do it myself, and I can tell you it requires a lot of patience, attention to detail, and physical effort. If the concrete isn’t properly cleaned, etched, and repaired, or if the epoxy isn’t mixed and applied correctly, you can end up with issues like peeling, bubbling, or an uneven finish. For the best and most durable results, especially with 100% solids epoxy, hiring a professional is often the best route. They have the experience, specialized equipment, and knowledge to ensure a flawless and long-lasting installation.
What kind of maintenance does an epoxy garage floor require?
One of the things I love most about my epoxy garage floor is how low-maintenance it is. For general cleaning, a simple sweep with a soft broom or a dust mop is usually sufficient to remove dirt and debris. For spills, especially oil or chemicals, it’s best to wipe them up immediately with a cloth and a mild cleaner. I use a solution of warm water and a gentle, non-abrasive detergent for deeper cleaning. It’s important to avoid harsh chemicals or abrasive cleaners, as these can damage the finish. Regular cleaning prevents the buildup of grime and helps maintain the floor’s appearance and protective qualities for years to come.

Can epoxy flooring be applied over existing paint or sealers?
Generally, it’s not recommended to apply epoxy directly over existing paint or sealers without proper preparation. The new epoxy needs a clean, porous surface to bond effectively. If you have old paint or a sealer, it’s crucial to remove it first, either by grinding, shot blasting, or chemical stripping, to expose the bare concrete. Any existing coatings that are not fully adhered can cause the new epoxy to delaminate or peel over time. After removal, the concrete still needs to be thoroughly cleaned and etched to create the ideal profile for the epoxy to adhere to. Proper surface preparation is the most critical step for a successful and long-lasting epoxy floor.
What are the common problems with epoxy garage floors and how can they be avoided?
While epoxy floors are fantastic, they can encounter issues if not installed or maintained correctly. The most common problems I’ve heard about or researched include peeling or delamination, bubbling, and yellowing. Peeling is almost always due to improper surface preparation—if the concrete isn’t clean, dry, and properly etched, the epoxy won’t bond. Bubbling often occurs from outgassing (moisture vapor rising from the concrete) or improper mixing of the epoxy components. Yellowing, especially with cheaper epoxies, can happen over time due to UV exposure. To avoid these, ensure meticulous surface preparation, use a high-quality, UV-stable epoxy (especially for areas exposed to sunlight), and follow the manufacturer’s mixing and application instructions precisely. Taking these precautions will significantly reduce the risk of common problems and ensure a beautiful, durable floor.
Garage Flooring – Marvelous Ideas
Epoxy Floor Coatings in Lehi, Utah Lifetime Epoxy
How to Epoxy Your Garage Floor in 9 Steps
Related Posts: