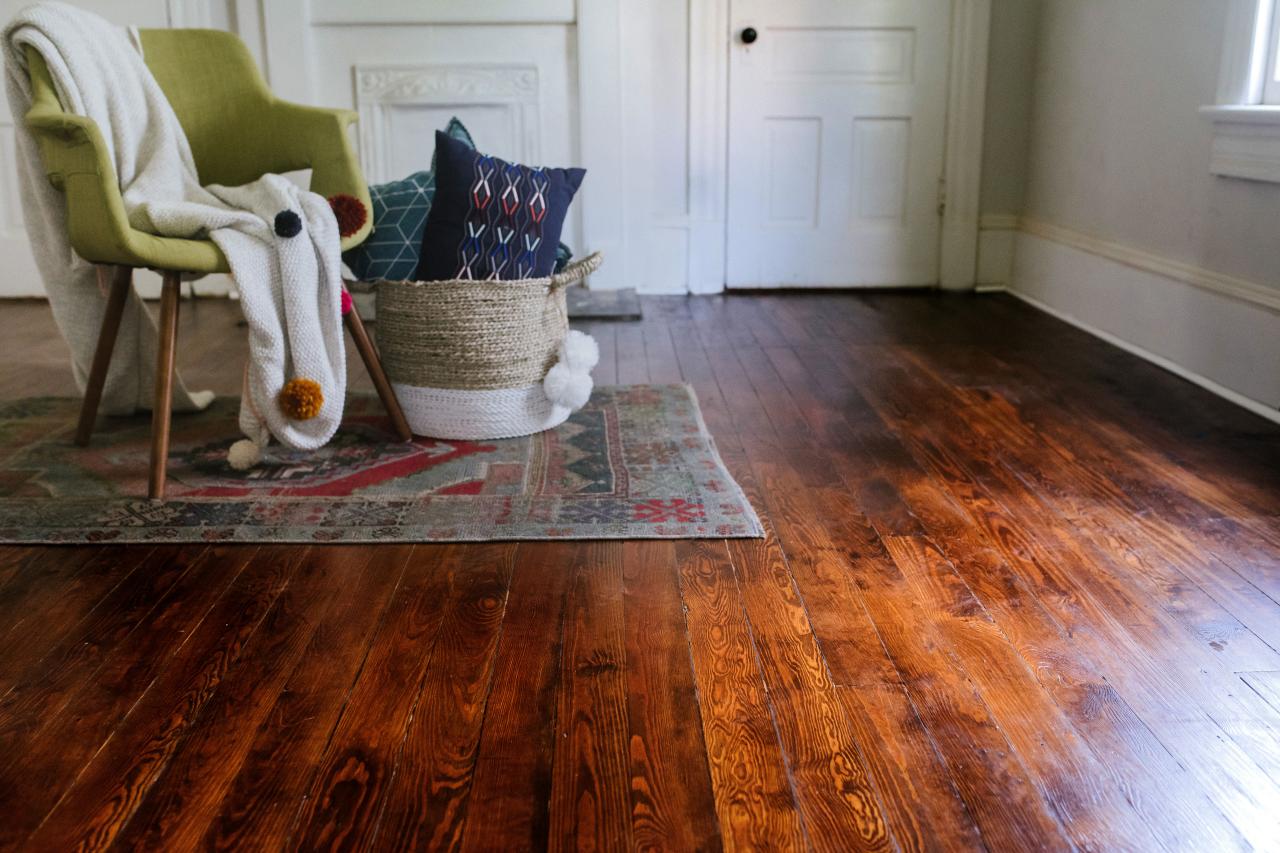
Hardwood flooring provides timeless beauty and value to any home, but it can wear down over time, resulting in scratches, dullness, or discoloration. Restoring your hardwood floors yourself may be a rewarding project that saves money over professional refinishing. With the correct equipment, materials, and patience, you can bring your floors back to life, whether through a deep clean, minor repairs, or a complete sanding and refinishing. Understanding the stages needed and properly preparing can allow you to get professional-looking results without incurring high costs.
Evaluate the Condition of Your Hardwood Floors
Before you begin any repair work, thoroughly inspect your hardwood floors to assess the extent of the damage. Look for significant scratches, gouges, or spots where the finish has worn away. Minor surface scratches and dullness can generally be repaired by cleaning and recoating, however, more severe damage may necessitate sanding and refinishing. Check for loose or noisy boards that need to be repaired; addressing structural issues first provides a smoother restoration procedure.
Consider the type of finish on your floors, whether polyurethane, wax, or oil-based, as this influences the restoration method. Older floors may have numerous layers of finish that need to be stripped, whilst modern floors may only require basic buffing and a fresh coat. Test a tiny, inconspicuous area with a moist cloth to establish whether the finish is water-based or oil-based, as this will affect the cleaning and refinishing materials you employ.
Determine the overall thickness of the wood planks to ensure they can survive sanding. Solid hardwood can usually be refinished several times, whereas engineered wood has a thinner top layer and may only withstand minor sanding. If your floors are too thin or damaged beyond repair, replacement may be required; nevertheless, most hardwood floors may be restored with correct care and expertise.
Gathering the Right Tools and Materials
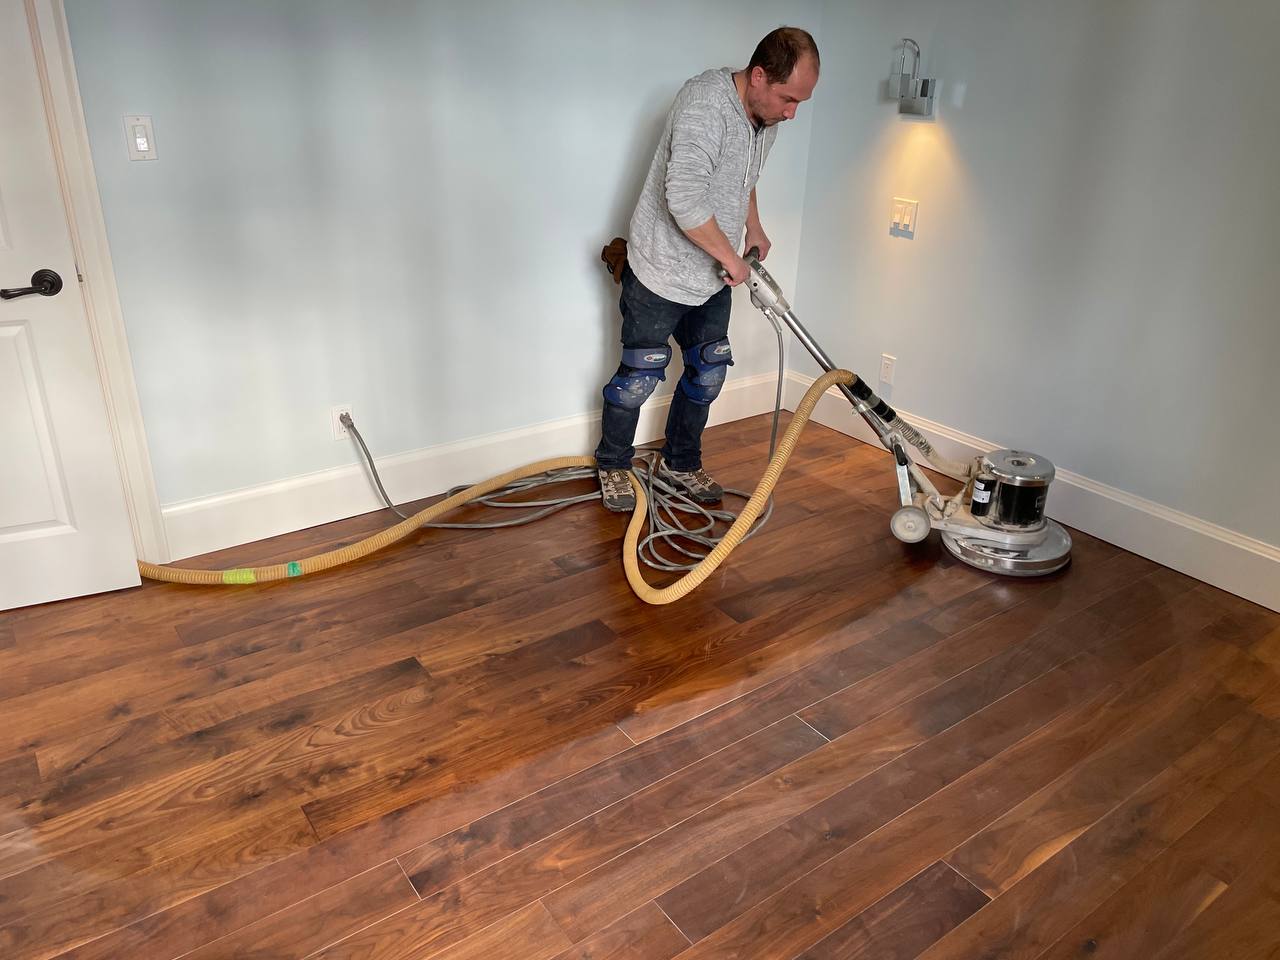
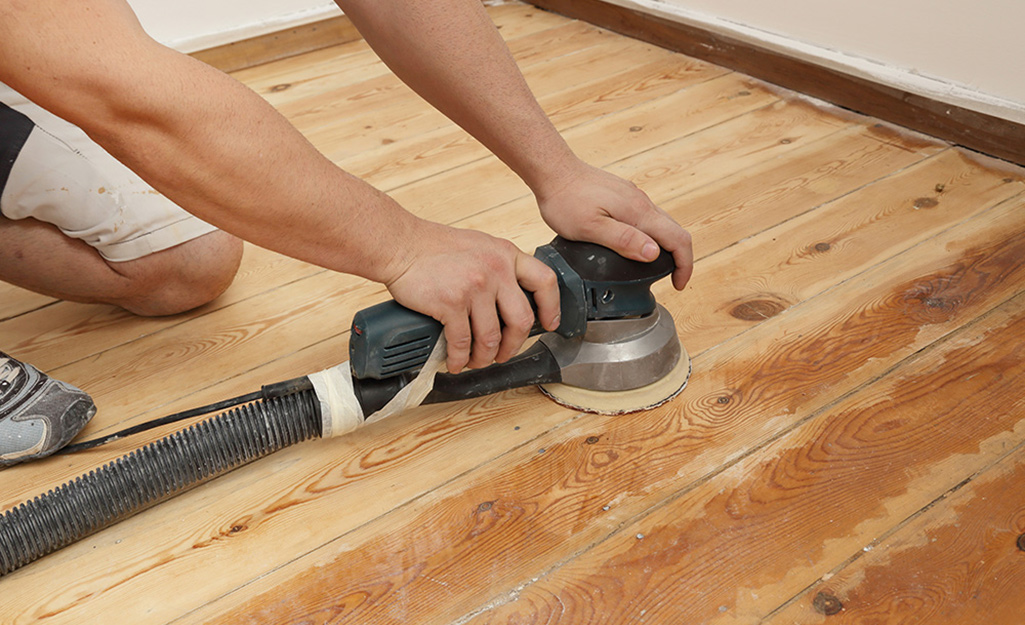
To get the greatest results while restoring hardwood floors, you’ll need specific tools. You’ll need a hardwood floor cleaner, a microfiber mop, and a soft bristle brush to scour tough places. If sanding is required, hire a drum sander for big surfaces and an edge sander for corners and edges. A smooth finish is achieved by using sandpaper with varied grits ranging from coarse to fine. A vacuum and tack cloth are required for dust removal in between sanding steps.
When refinishing, use a high-quality finish that matches your existing floor type. Water-based polyurethane dries rapidly and has a low odor, but oil-based polyurethane provides a more durable surface but requires more drying time. If your floors have a wax finish, use a wax stripper and then reapply fresh wax for repair. Stain may be required if you wish to modify the color of the wood, so try samples in an inconspicuous location first.
Safety equipment is essential throughout the restoration procedure. Sanding generates fine particles and noise, so wear a dust mask, safety goggles, and ear protection when doing so. Knee pads can help make labor more comfortable, especially while sanding or staining for long periods of time. Having all tools and supplies ready before beginning ensures a more efficient process and avoids delays.
Readying the Room and Floor for Restoration
Remove any furniture, rugs, and decorative items from the room. To keep dust out of the HVAC system, cover entrances with plastic sheeting and block vents. If you wish to sand near to the edges, gently remove baseboards with a pry bar to ensure a thorough refinishing job.
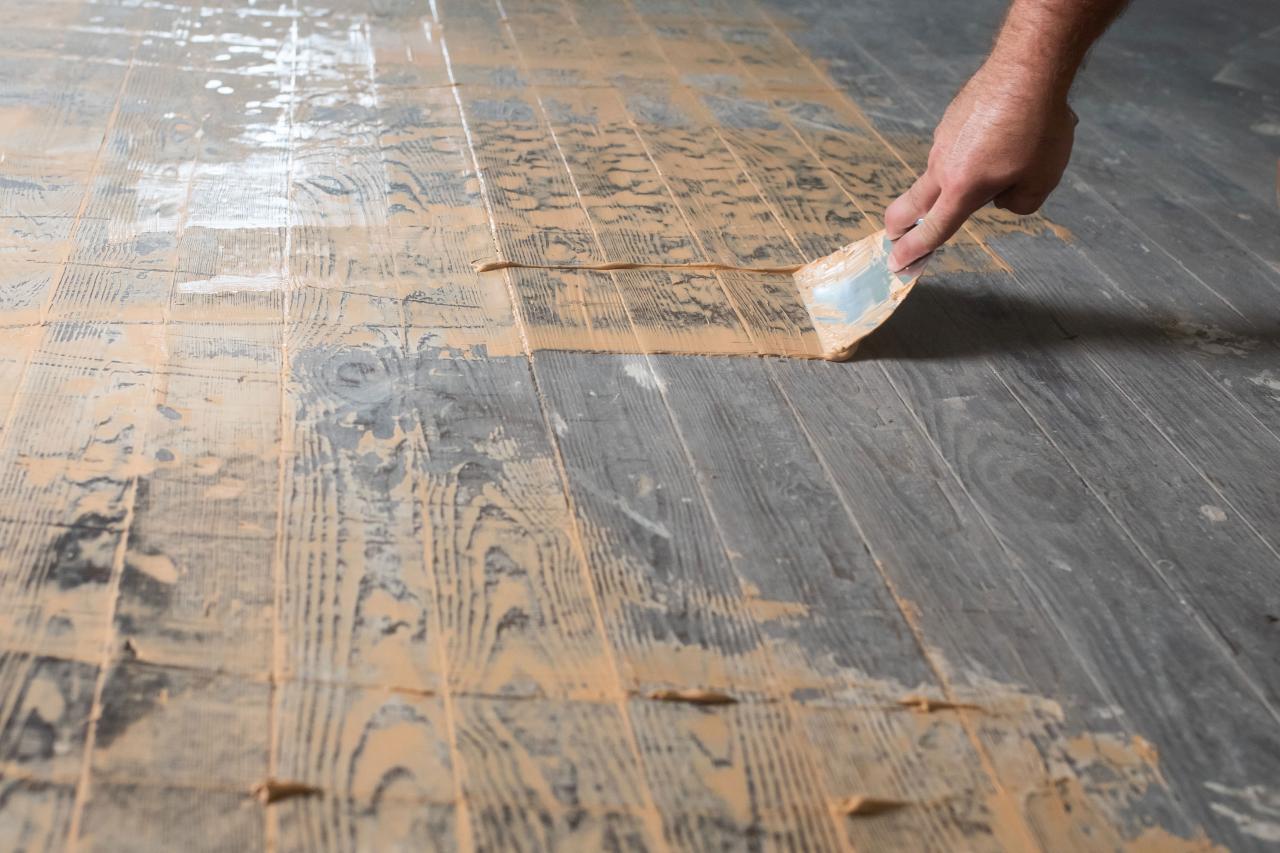
Inspect the floor for protruding nails or staples and hammer them down or remove them to avoid injuring the sanding equipment. Fill any gaps between boards with wood filler that matches your floor color and allow to cure completely before sanding. Sweep and vacuum the floor thoroughly to remove any dirt and debris that could harm the surface when sanding.
Cover nearby rooms and corridors with drop cloths or plastic sheeting. Open windows for airflow, especially when employing chemical strippers or finishes that emit strong smells. Allow ample time for each phase of the process, as haste can result in blunders or inconsistent results. Proper preparation leads to a cleaner and more effective repair process.
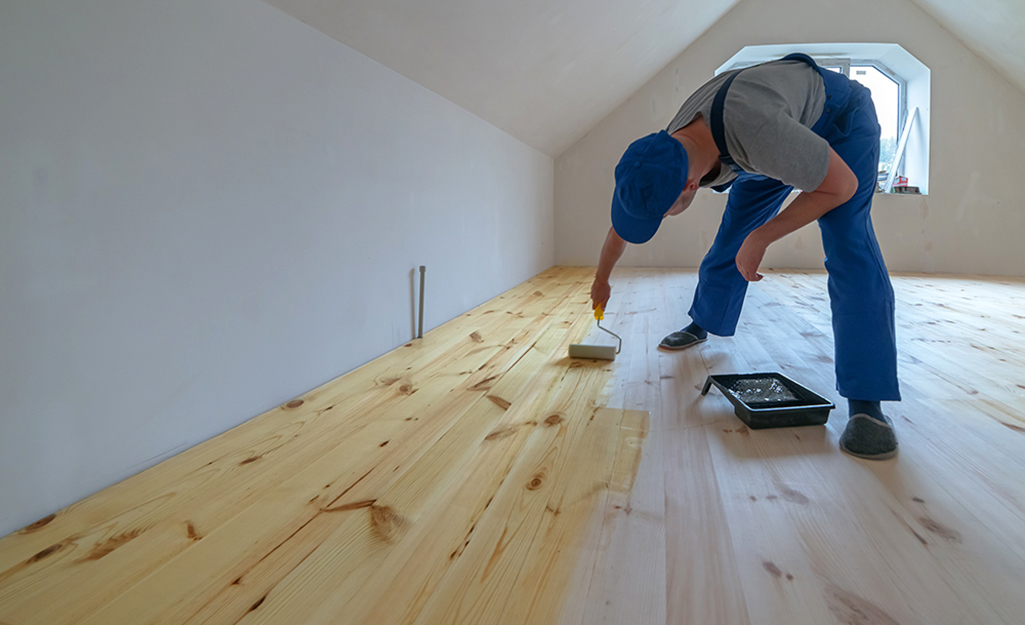
Sanding and Refinishing Hardwood Floors
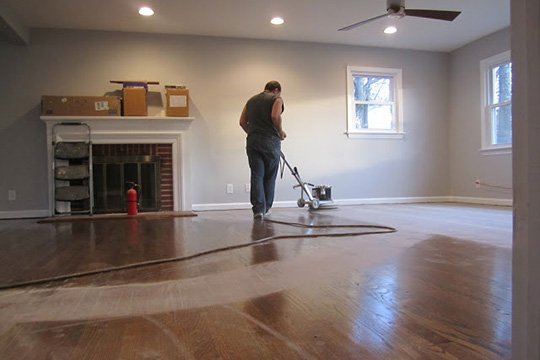
Start sanding with coarse grain sandpaper to remove the old finish and level any uneven surfaces. To eliminate cross grain scratches, move the drum sander in the direction of the wood grain, and slightly overlap each pass to ensure even coverage. To avoid uneven places, use the edge sander on perimeter areas while applying consistent pressure. Vacuum the dust between sanding stages before moving on to a finer grit.
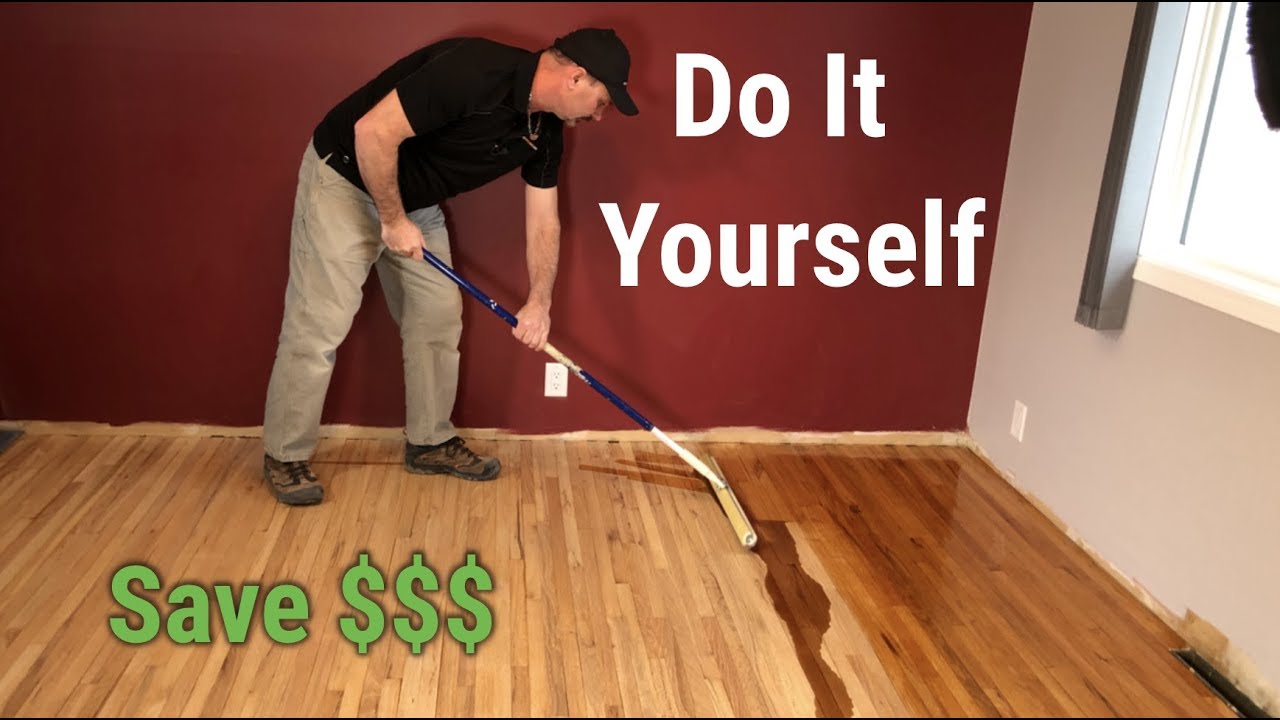
After the final sanding with fine grit paper, wipe the floor with a tack cloth to eliminate any remaining dust. If desired, apply wood stain with a brush or rag, wiping off any excess to get an equal tint. Allow the stain to thoroughly dry according to the manufacturer’s directions before applying the finish. To avoid bubbles, gently stir the polyurethane before applying it thinly and evenly with a lambswool applicator or brush.
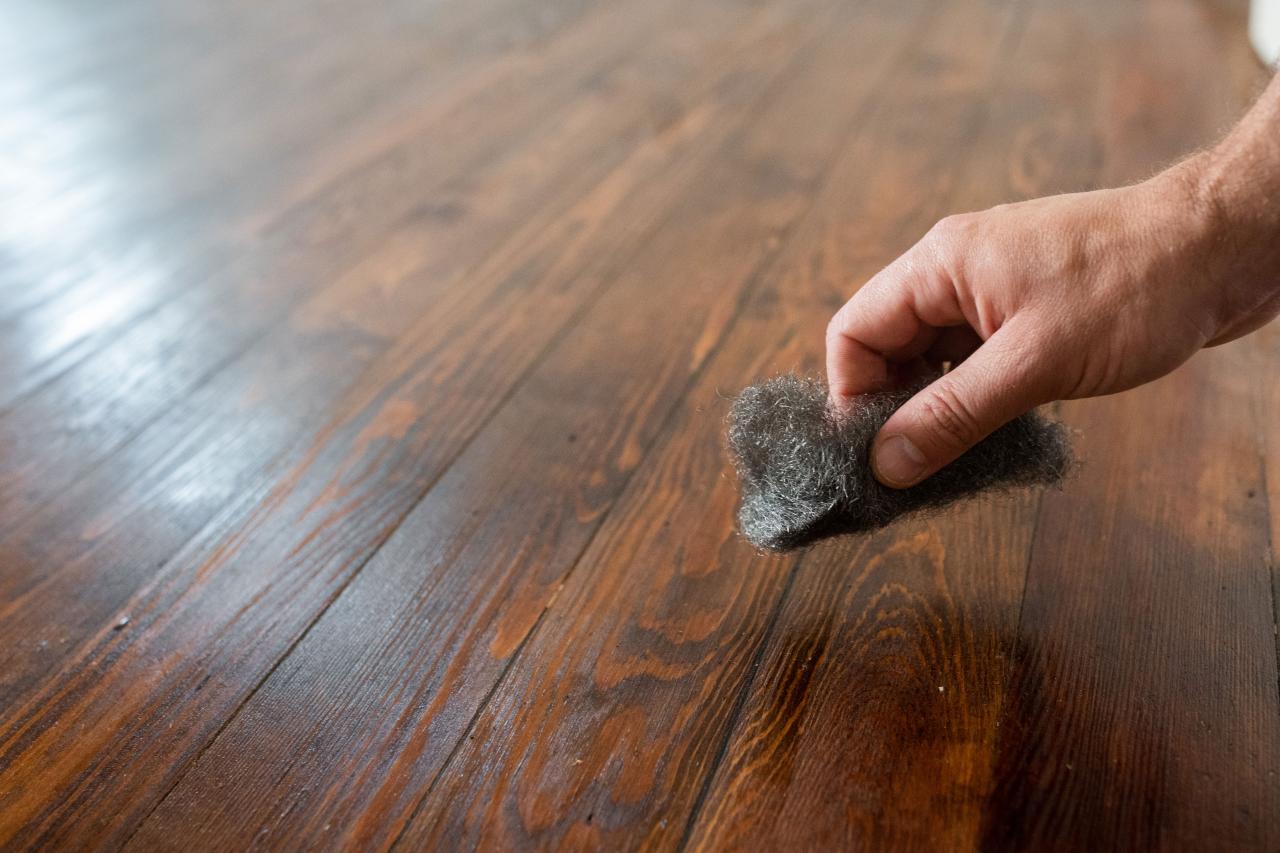
Allow each coat of finish to dry completely before lightly sanding with fine-grit sandpaper or a buffing pad in between coats. This promotes appropriate adherence and a smooth finished surface. For maximum longevity, apply at least two to three coats and avoid walking on the floor until the finish has fully set, which might take several days depending on the product used.
Maintaining Restored Hardwood Floors
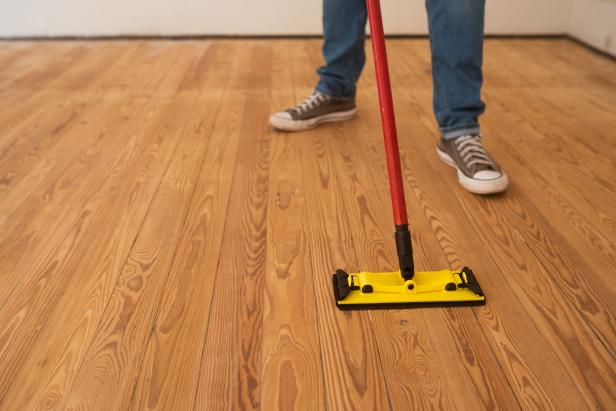
Once your floors have been repaired, frequent upkeep will keep them looking great. Sweep or vacuum frequently to remove dirt and grit that may harm the finish. For deeper cleaning, use a damp mop and a hardwood floor cleanser, being careful not to use too much water, which can damage the wood. To protect furniture legs, place rugs in high-traffic areas and felt pads under them.
Spills should be cleaned up immediately to avoid moisture from soaking into the wood and creating warping or staining. Apply a maintenance coat of finish every few years to renew the protective layer and extend the life of your floors. Avoid using harsh chemicals or abrasive cleaners, which can remove the finish or diminish the wood’s inherent sheen.
Monitor your home’s humidity levels, since excessive dryness or wetness can cause wood to shrink or bulge. To keep temperatures stable, use a humidifier in the winter and a dehumidifier in humid climes. With careful care, your restored hardwood floors may be both beautiful and usable for decades.
Common Mistakes To Avoid During DIY Restoration
One common mistake is to forgo the necessary cleaning and preparation work before sanding. Dust, debris, or old wax residues can block sandpaper, causing uneven results. Another problem is using the incorrect grit sequence, starting too fine or not sanding enough between layers, resulting in a rough or uneven surface. To achieve the best results, always follow the suggested sanding progression.
Applying too much stain or finish in a single layer can result in drips, streaks, and longer drying times. Thin, even coats create a smoother, more professional appearance. Rushing the drying process between applications or before moving furniture back will damage the finish, so patience is essential for long-lasting results.
Failure to test stains or finishes in a hidden location first can result in unexpected color or shine changes. Always test goods to ensure they fit your expectations and the current floor tone. Finally, failure to protect nearby areas from dust and odors can result in additional cleanup labor and significant health risks, so effective containment is critical.

How long will it take to refinish hardwood floors yourself?
The amount of time required is determined on the size of the area and the extent of the necessary restoration. A single room may take 3 to 5 days to complete, including sanding, staining, and applying numerous finish coats, plus drying time. Larger sections or more intricate repairs may take longer to complete. Proper preparation and allowing each phase to completely dry are critical for quality results, therefore speeding the procedure might lead to flaws.
Can engineered hardwood floors be restored the same way that solid hardwood floors are?
Engineered hardwood has a thinner top layer, therefore sanding must be done with caution to avoid destroying the veneer. Light sanding and recoating are OK, but complete sanding is riskier than with solid wood. Always according to the manufacturer’s instructions, as certain engineered floors can only survive one or two refinishing treatments before the wear layer is damaged.
Is it necessary to sand the flooring before refinishing?
Sanding is required if the present finish is damaged, flaking, or severely scratched. However, if the finish is intact but dull, screening (mild abrasion) and recoating may be enough. Always carefully clean the floor before making a decision, since some floors can be restored with just a deep clean and a fresh topcoat.
Which finish is best for DIY hardwood floor restoration?
Water-based polyurethane is popular in DIY projects due to its minimal odor, quick drying time, and ease of application. Oil-based polyurethane is more durable, but produces harsher fumes and requires longer drying times. Choose according to your priorities, such as convenience vs. long-term wear resistance.
How can I repair deep scratches or gouges on hardwood floors?
For deep scratches, add wood filler that matches your floor color with a putty knife and smooth it out. After drying, sand the surface lightly before refinishing. Gouges may necessitate more extensive repairs, such as replacing a damaged board or applying a wood patch kit to significant defects.
Can I repair my hardwood floors without removing the baseboards?
Yes, although sanding along the borders will be less thorough, and you may need to use a hand scraper or a detail sander in small spots. Removing baseboards enables for a more consistent refinishing process, but it requires extra caution when reinstalling to avoid damaging the restored floor.

Refinishing Hardwood Floors DIY Wood Floor Refinishing Tips
How To Refinish Hardwood Floors – DIY Home Improvement
How To Refinish Hardwood Floors
Related Posts: