Victorian kitchens boasted some of the most beautiful and long-lasting flooring options of the nineteenth century, with elaborate designs and high-quality materials that have endured the test of time. Whether you have genuine Victorian tiles, wood plank flooring, or want to reproduce an accurate historical look, you must understand the materials and techniques employed in these floors. Proper repair preserves the historical charm while creating a useful surface for modern use. This book covers the identification, repair, and care of Victorian kitchen floors.
Identifying Victorian Floor Materials
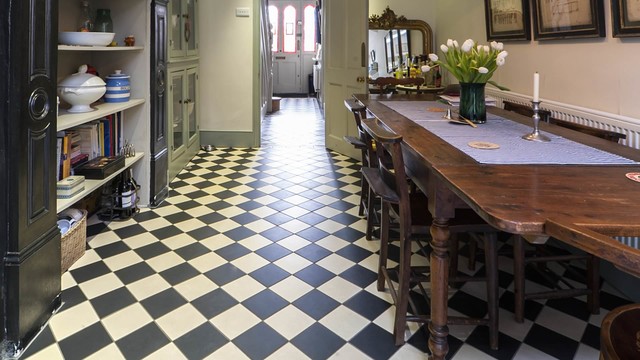
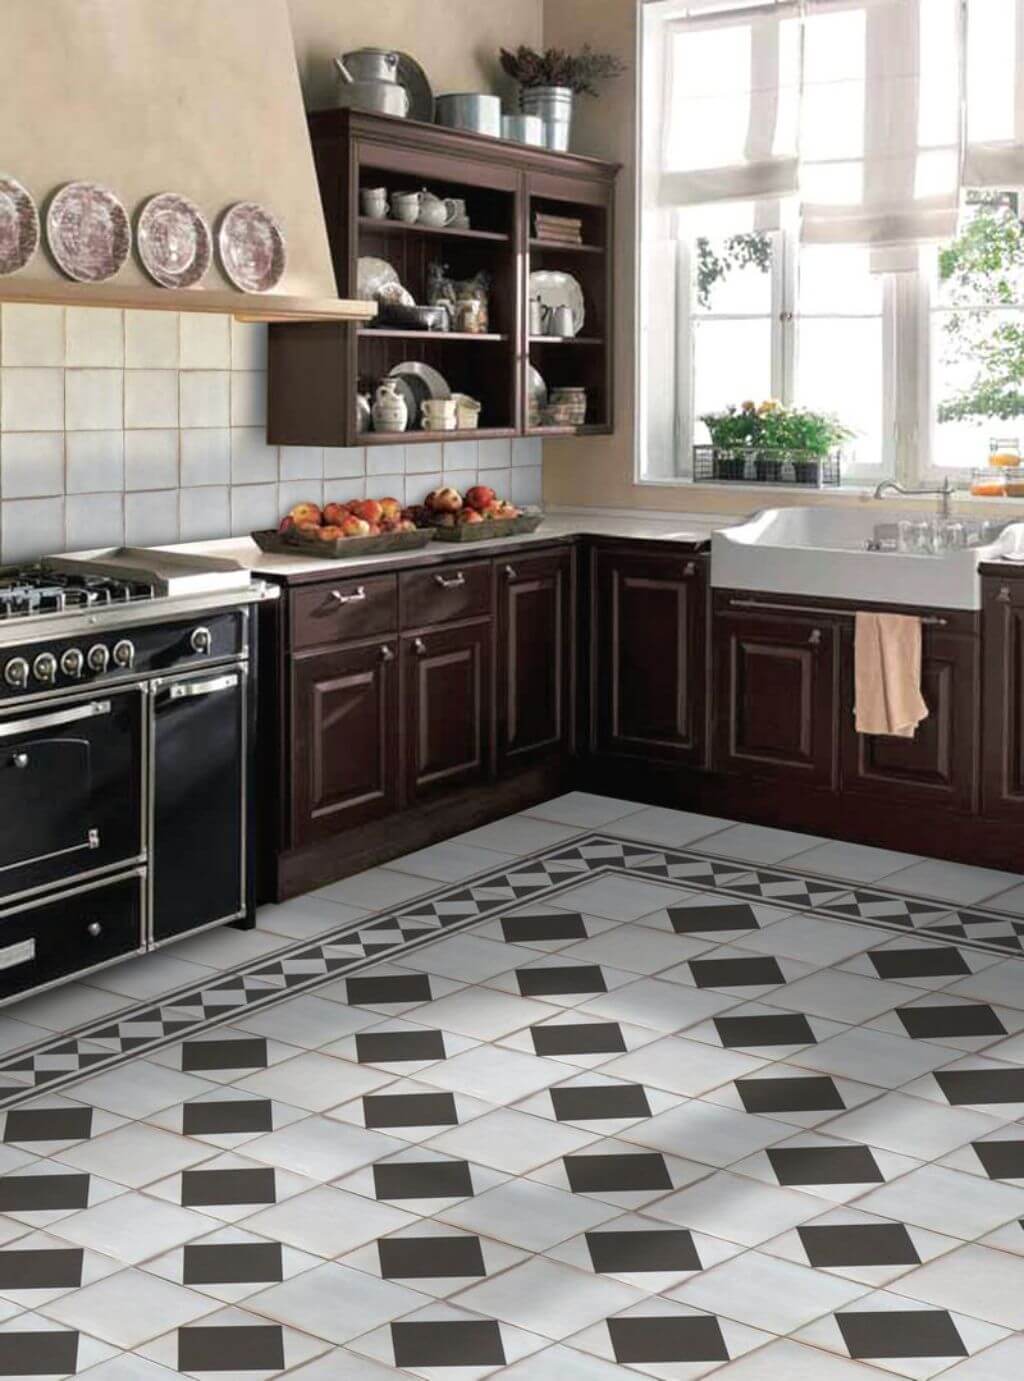
Victorian kitchens typically featured three types of flooring: encaustic or geometric tiles, wide plank pine or oak boards, and, on occasion, stone flagstones. Encaustic tiles have vivid clay patterns that run throughout their thickness, making them durable yet prone to surface deterioration. Geometric tiles combined cement and pigments to produce mosaic-like designs that were less expensive but less durable. Both tile styles frequently included intricate borders and central medallions that typified the Victorian look.
Wood floors in Victorian kitchens were commonly made of softwoods like pine or harder woods like oak, and came in wide boards up to 12 inches across. These were frequently left unpainted or coated with linseed oil rather than current polyurethanes. The wood frequently displays evidence of wear, staining, and nail patterns, which help date the flooring. Original boards may be thicker than modern equivalents, allowing for more sanding and refinishing cycles during their lifetime.
Stone flooring first emerged in wealthy Victorian mansions, with slate, limestone, and marble being popular options. These materials were praised for their longevity and natural cooling characteristics in kitchens. Stone floors frequently exhibit distinctive wear patterns from decades of use, with smoothing occurring in high activity areas. Identification entails inspecting the stone type, thickness, and any original finishing processes, such as honing or polishing, that differ from modern methods.
Assessing Floor Condition and Damage
Begin restoration by thoroughly documenting the floor’s existing state with images and schematics that highlight damaged areas. Inspect tile floors for cracked or missing pieces, degraded grout, and surface pitting. Loose tiles may signal a failing substrate or moisture issues, which must be addressed first. Color fading in patterned areas should be noted and compared to protected parts under appliances to determine the original appearance.
Wood floors should be inspected for rot, insect infestation, and excessive wear. Look for warped boards, extensive stains, and mismatched materials from prior restorations. Victorian kitchens frequently display considerable deterioration around original work areas such as stoves and sinks. Measure the remaining wood thickness to see if sanding is possible or if a board replacement is required. The subfloor should also be evaluated for levelness and ventilation difficulties.
Check for cracks, chips, and acid etching on the surface of the stone flooring. Uneven settling might create tripping risks that need to be addressed. Historical stone frequently bears tool marks from original quarrying and shaping, which should be kept during restoration. To find appropriate cleaning procedures that do not damage the original surface, test a tiny area.

Traditional Repair Techniques
When possible, employ historically correct ways to repair tile floors. To remove broken pieces from encaustic tiles, soften the surrounding grout with a dental pick or tiny chisel. Replace tiles from specialized salvagers or have new copies manufactured utilizing original clay formulas and firing procedures. New tiles may require aging treatments to match the patina. Geometric tile repairs require equal care in removal, but with the added problem of replicating cement-based hues that match the original palette.
Wood floor repairs are carried out using traditional carpentry procedures. Replace badly damaged boards with salvaged period-appropriate wood of same species, width, and thickness. Use hand tools such as drawknives and planes to replicate the original surface textures. To do partial repairs, carefully splice in new parts with period correct joinery such as tongue and groove rather than modern shortcuts. When refinishing, avoid using power sanders, which can obliterate previous tool marks, instead opting for hand scraping and gentle sanding.
Stone floor refinishing processes have remained unaltered for millennia. Cracked flagstones are carefully raised and replaced using lime mortar rather than contemporary cement. Small chips are repaired with epoxy stained to match the stone, however larger damaged areas may necessitate replacement stones cut to the original size. Surface polishing should be done by hand using progressively finer abrasives to preserve historical character rather than reaching a factory perfect gloss.

Cleaning and Surface Treatment
Before moving on to heavier products, begin by washing tiles gently. Begin by eliminating surface debris with soft brushes and mild soap, then apply clay or paper pulp poultices soaked in pH neutral cleaners to persistent stains. Avoid acidic cleaners, which can etch tile surfaces. To remove wax buildup following years of maintenance, use proper wax removers followed by thorough rinsing. After washing, seal the tiles with breathable sealers that do not provide an artificial plastic appearance.
Wood floor cleaning begins with removing old finishes and grime with suitable strippers. Traditional linseed oil coatings require different removal methods than current polyurethanes. After stripping, apply oxalic acid solutions to remove water and iron stains from your nails. For final cleaning, use traditional methods such as scrubbing with vinegar and water solutions or fine sand and natural fiber pads. Finish with period-appropriate treatments such as beeswax or tung oil, rather than modern plastic coatings.
Stone floor cleaning procedures progress gradually from the least to the most harsh. Begin with pH neutral stone soap and stiff bristle brushes, then progress to poultices for oil stains or rust marks. Avoid pressure washers, which can destroy historic surfaces. After washing, reapply traditional sealers such as linseed oil to slate or leave limestone permeable as intended. Pay close attention to the patina that has formed over decades of use.

Protecting Historical Details
Victorian floors frequently have distinctive design aspects that are worth keeping. Before any work begins on tile borders or medallions, it is critical to meticulously document them. When doing repairs, capture patterns on tracing paper to ensure exact reproduction. Pay attention to original color schemes, which may appear faded but can be explored using historical paint analysis or archived images of comparable properties.
For wood floors, keep saw marks, nail patterns, and other traces of original construction. These production traces provide historical value and authenticity. When rebuilding portions, strive to imitate the old milling qualities rather than using flawlessly smooth modern lumber. Leave suitable wear patterns in high-traffic areas rather than giving the floor a uniformly new appearance that contradicts its age.
Stone floors should keep their natural wear patterns, which indicate years of use. Avoid excessive polishing, which destroys the lived-in character. Preserve genuine tool marks from quarrying and shaping to show era construction methods. Any new stone additions should be purposefully differentiated as current repairs while being aesthetically consistent with the entire floor.
Modern Maintenance Strategies
Create a care plan that protects your Victorian floor while allowing for modern use. Protective mats for tile floors should be used in high-traffic areas, but avoid rubber backings that might trap moisture. Make a regular mild cleaning program using pH neutral solutions. Monitor grout condition and repair using lime-based formulas rather than current Portland cement grouts, which can harm antique tiles.
Area rugs provide surface protection while allowing wood floors to breathe. Maintain humidity levels between 40 and 60% to avoid excessive expansion and contraction. Use furniture pads beneath all legs to prevent scratches. Reapply traditional oil finishes once a year rather than waiting for total wear through and progressively building up layers, as has been done historically.
To avoid discoloration, spills on stone floors must be cleaned thoroughly. Use walk-off mats at outdoor doorways to prevent abrasive dirt from being tracked in. Consider using detachable protective coverings in kitchens during intensive cooking periods. Reapply breathable sealers as needed, usually every 3 to 5 years depending on use. Always try new cleaning products in inconspicuous places first.
How can I know whether my kitchen floor is original Victorian?
Examine the construction details, such as board width, nail types, and tool markings. Instead of modern wire nails, Victorian wood flooring were often installed with manually forged square nails or early cut nails. Tile flooring will display manufacturing characteristics such as modest size variances and a handcrafted appearance. Look beneath floor coverings or along edges for the most untouched areas. Consult historical building documents or have a specialist analyze the situation to get solid answers.
What is the best technique to clean 19th century encaustic tiles?
Begin with dry methods, such as gently brushing, to remove loose dirt. Continue to damp mop with pH neutral cleansers designed specifically for historic tiles. For obstinate stains, apply a poultice comprised of kaolin clay and distilled water as a paste and let it dry before carefully removing. Avoid using acidic cleansers, abrasive pads, or high-pressure cleaning, since they can damage the delicate clay surface and artistic patterns.

Can I install underfloor heating on Victorian floors?
This deserves considerable consideration. Radiant heat can cause wood flooring to dry up and crack. Tile flooring may be able to withstand low temperature systems if correctly placed and allow for expansion. Always consult a specialist who is experienced with historic structures, as inappropriate heating can cause lasting harm. In many circumstances, alternate heating systems, such as correctly placed radiators, are more effective for preservation.
How can I match replacement wood planks to the existing floor?
For the greatest results, use salvaged wood from the same species, age, and growth region. Pay attention to the original milling characteristics, such as saw marks and board width. Hand planing, wire brushing, and controlled staining are examples of processes for artificially aging new wood. Always try finishes on sample pieces first, since current cut wood will appear different from centuries-old hardwood.
Is it acceptable to apply current sealers to Victorian floors?
While modern sealers are convenient, they frequently produce a false appearance and can retain moisture that harms ancient materials. Traditional finishes such as linseed oil, beeswax, and lime-based treatments allow materials to breathe while also giving protection. If modern sealers must be used, use breathable formulations that are specifically suited for historic restoration projects.
How frequently should Victorian wood flooring be refinished?
With careful care, original wood floors may only require refinishing every 20-30 years. Sanding old boards on a regular basis shortens their lifespan. Instead of a complete refinishing, try spot repairs and surface rejuvenation with appropriate oils or waxes. Monitor wear patterns and fix problems early to avoid the need for vigorous refinishing that removes significant material.

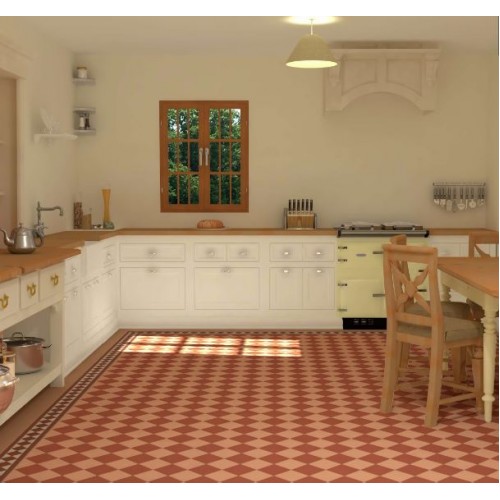
Dorchester (C) with Rochester victorian floor tile design
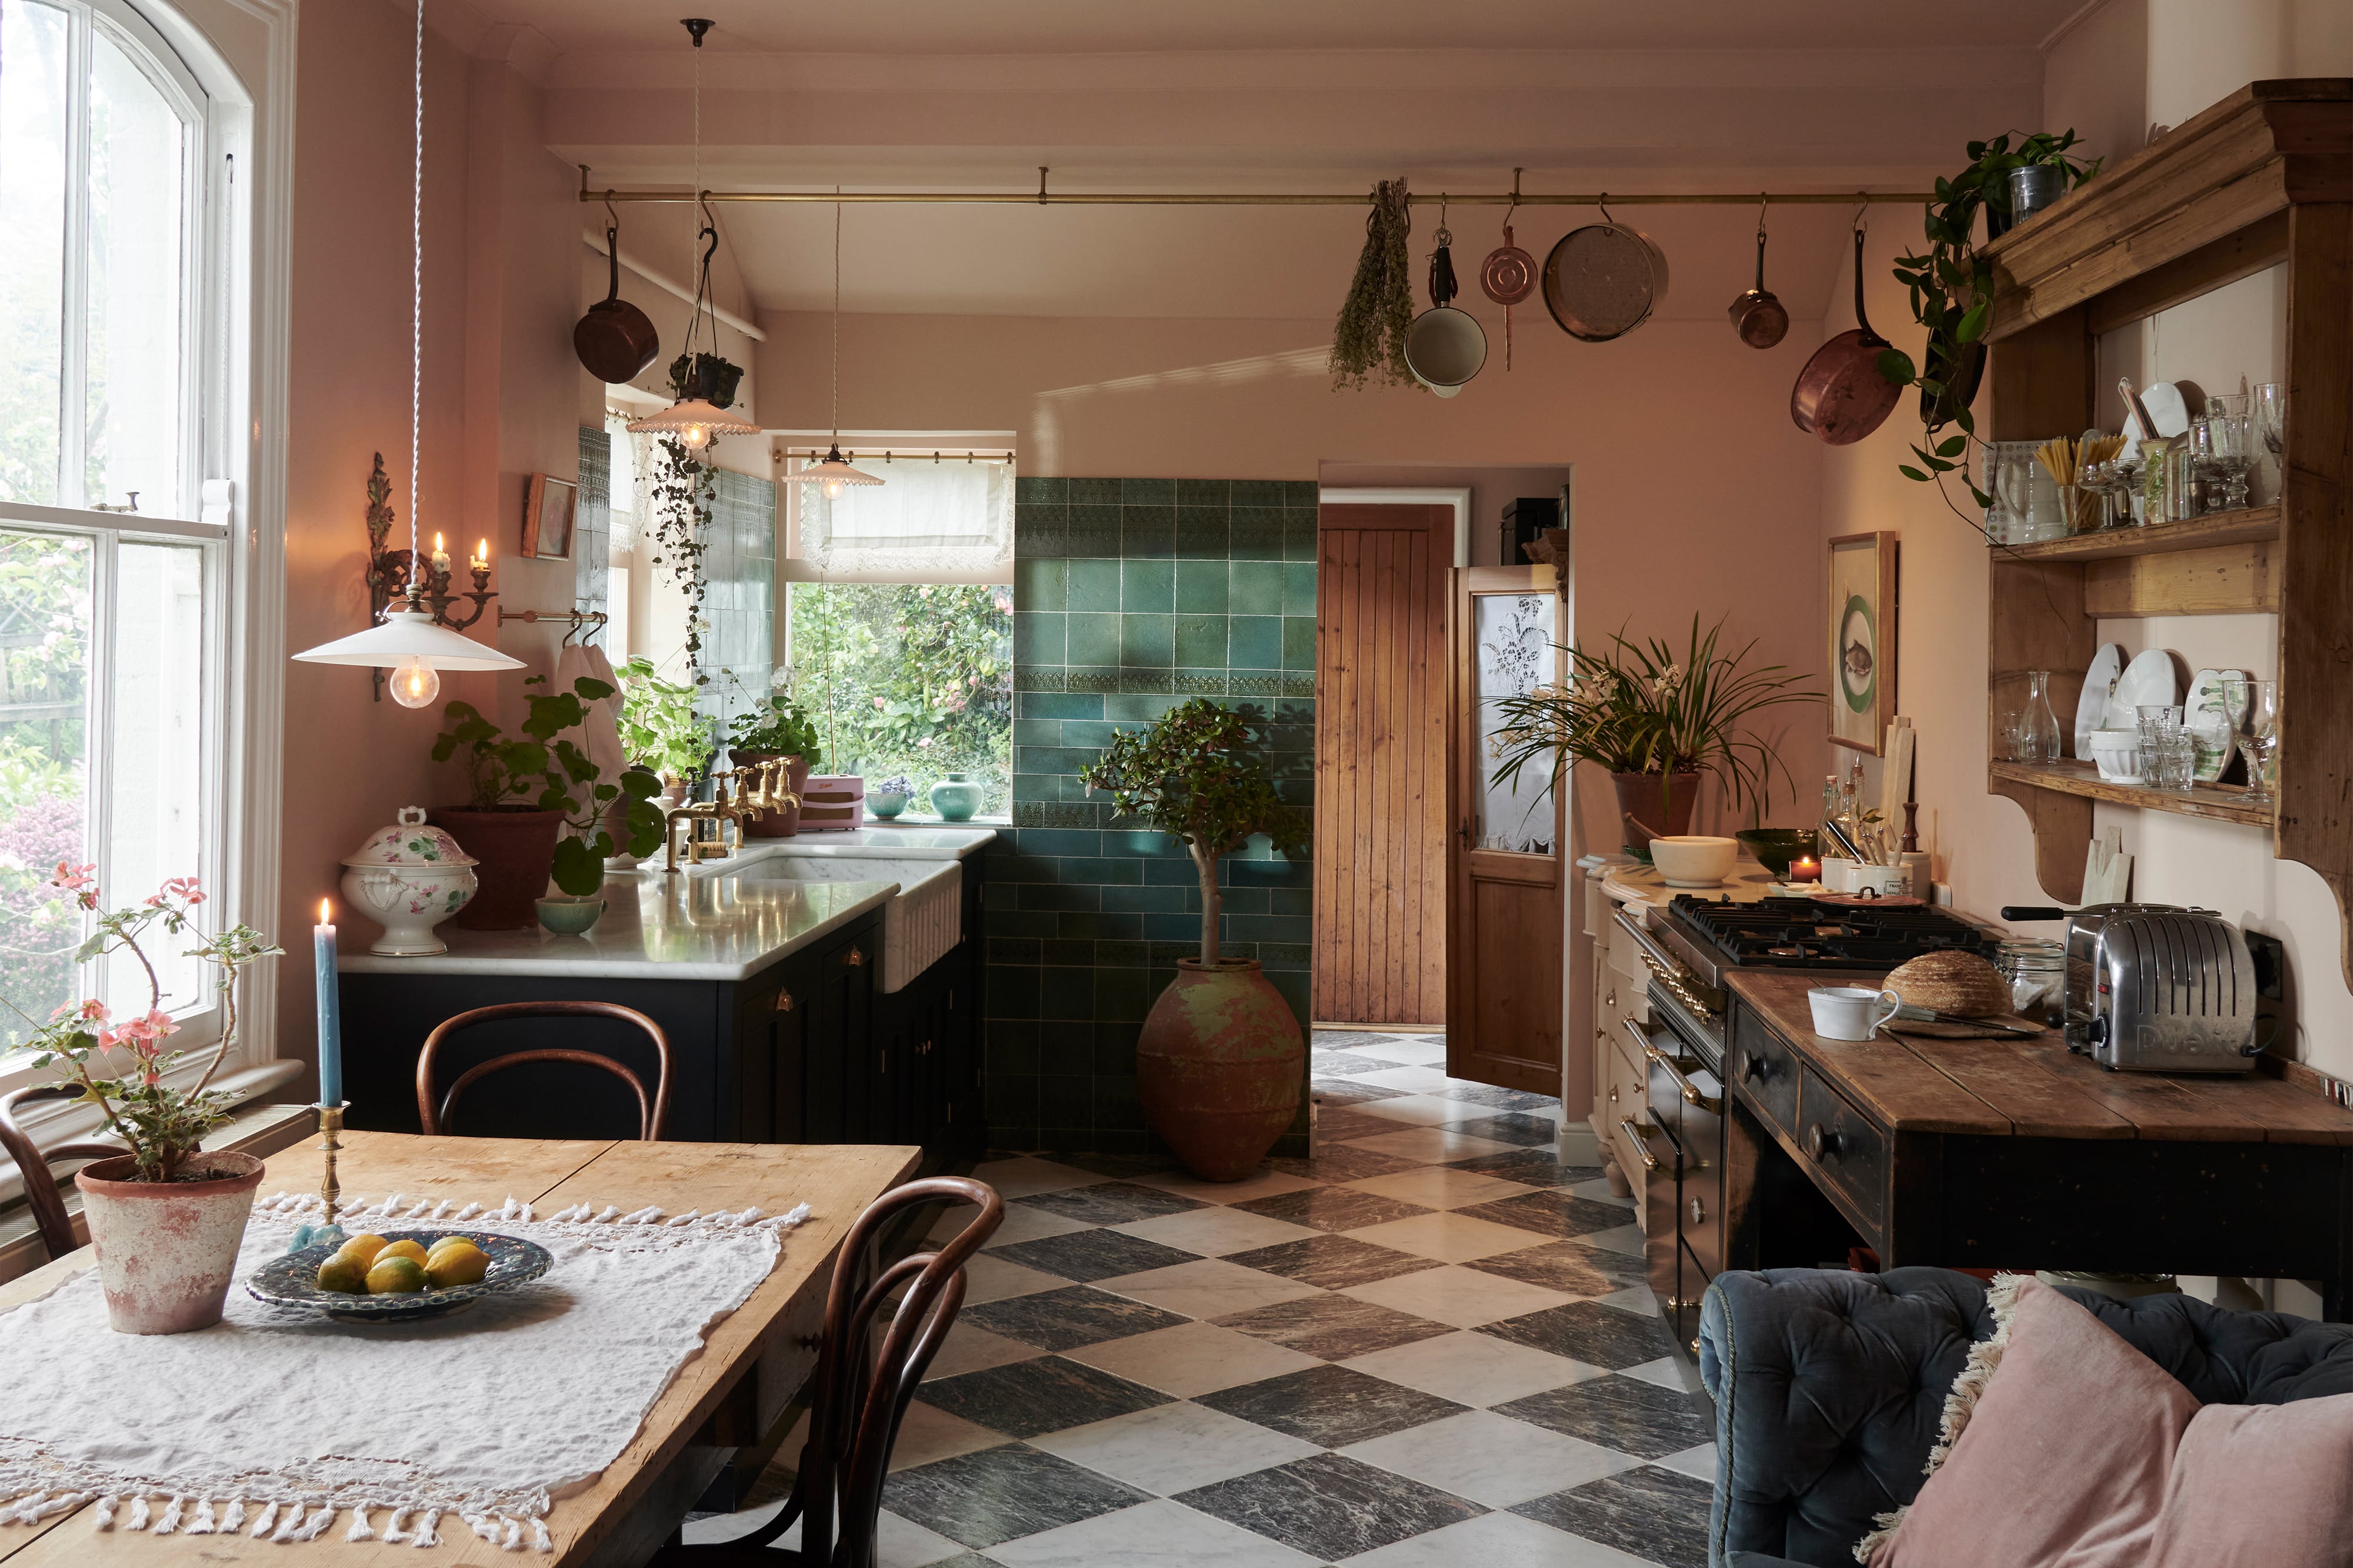
Victorian Kitchen Ideas
Floor kichen quarry Victorian quarry tiled floor Kitchen for

Related Posts: