Installing herringbone bamboo flooring in my living room was simultaneously the most challenging and rewarding home improvement project I’ve ever tackled. I’d admired this classic pattern in design magazines for years, but I assumed it was beyond my skill level and budget. After extensive research and conversations with flooring professionals, I discovered that bamboo’s sustainability and affordability made the herringbone pattern achievable.
The three-week installation process tested my patience and precision, but walking into my living room now and seeing those beautiful zigzag lines never gets old. Every guest who visits comments on the floor first, and I love sharing the story of how I brought this timeless design into my home using an eco-friendly material.
Understanding the Herringbone Pattern and Its Appeal
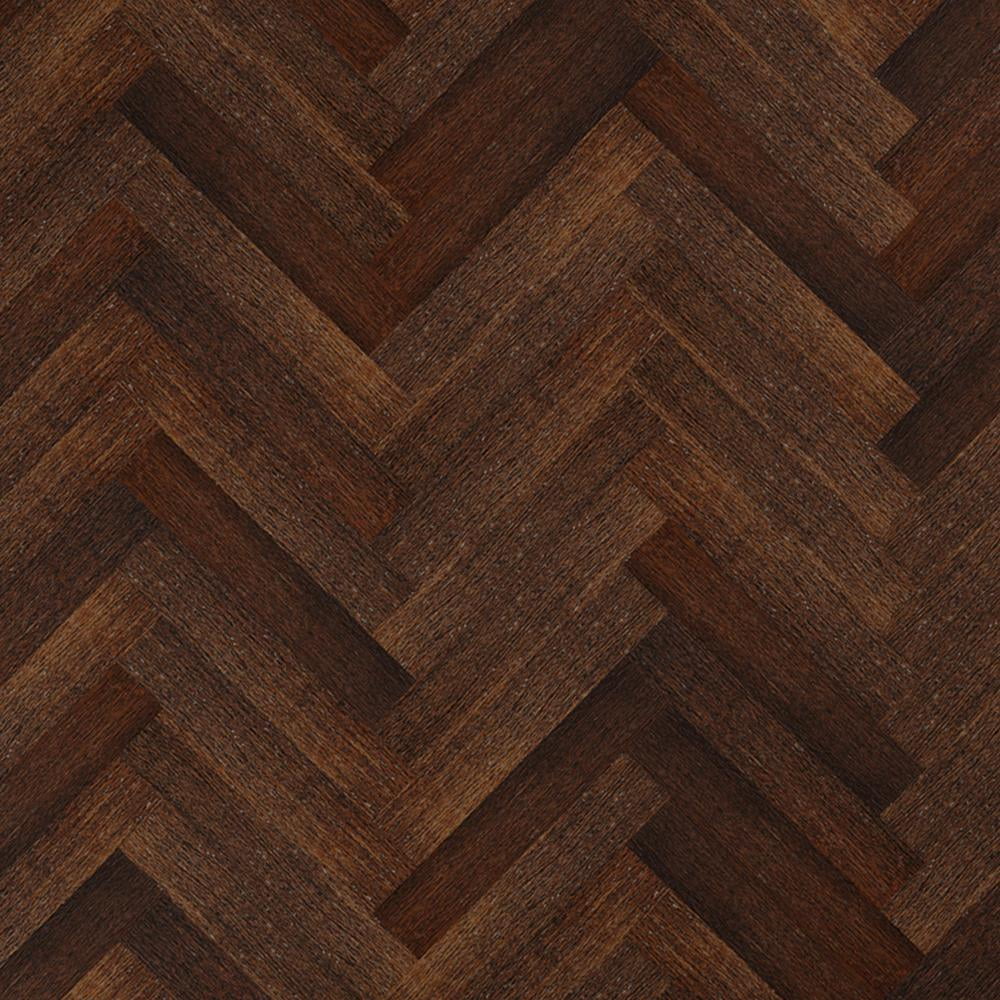
The herringbone pattern consists of rectangular planks arranged at 90-degree angles to create a distinctive V-shaped weaving pattern. Unlike chevron, where planks are cut at angles to form continuous zigzags, herringbone uses straight-cut planks that create broken zigzags with a more intricate, textured appearance.
I chose herringbone specifically because it feels more organic and traditional, perfectly suiting my home’s vintage character. The pattern’s origins trace back to ancient Roman road construction, and it’s been a hallmark of elegant European interiors for centuries.
What drew me to herringbone was its ability to add movement and visual interest without overwhelming a space. The pattern works beautifully in both large and small rooms, though it particularly shines in spaces with good sight lines where you can appreciate the full design.
My living room is roughly 300 square feet, and the herringbone pattern makes it feel larger by creating diagonal lines that draw the eye across the space rather than emphasizing the room’s actual dimensions.
I learned that herringbone installations require significantly more material than standard layouts due to cutting waste. I needed to purchase 20% extra bamboo beyond my room’s square footage to account for all the angled cuts at walls and doorways.
This additional material cost was my biggest budget consideration, but the dramatic impact of the finished floor justified every dollar. The pattern transforms ordinary bamboo flooring into something that looks custom and high-end.
Choosing the Right Bamboo for Herringbone Installation
Selecting bamboo specifically suited for herringbone installation was crucial to my project’s success. I chose strand-woven bamboo because its superior hardness and stability minimize expansion and contraction, essential when working with intricate patterns. The dimensional stability means the carefully aligned pattern stays tight and precise rather than developing gaps or shifts over time. Strand-woven bamboo’s density also made it easier to achieve clean, crisp cuts required for herringbone’s precise angles.
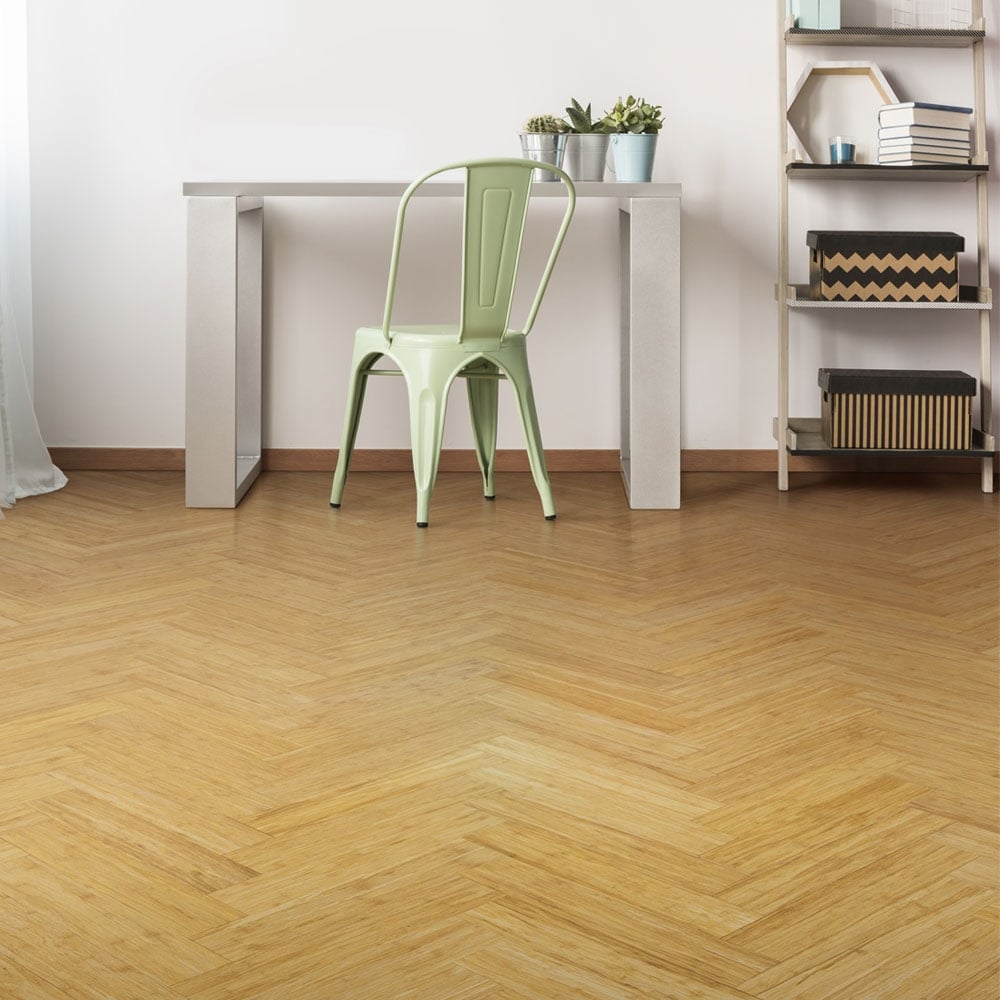
Plank size significantly impacts herringbone’s appearance and installation complexity. I selected 12-inch by 3-inch planks, a manageable size that creates a refined, detailed pattern without being too busy. Larger planks, say 18 inches by 4 inches, create a bolder, more contemporary herringbone with fewer pattern repetitions. Smaller planks make the pattern more intricate but increase installation time considerably. I recommend visiting showrooms to see different plank sizes installed in herringbone before deciding.
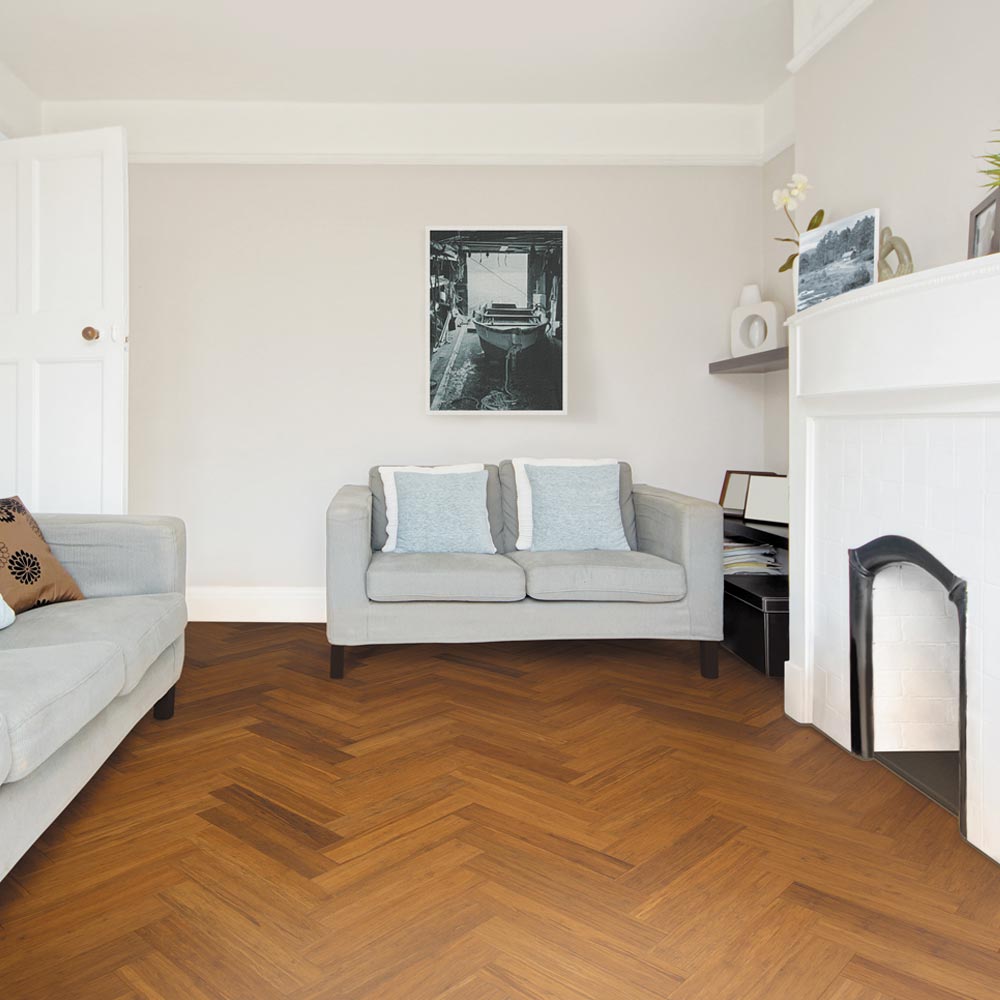
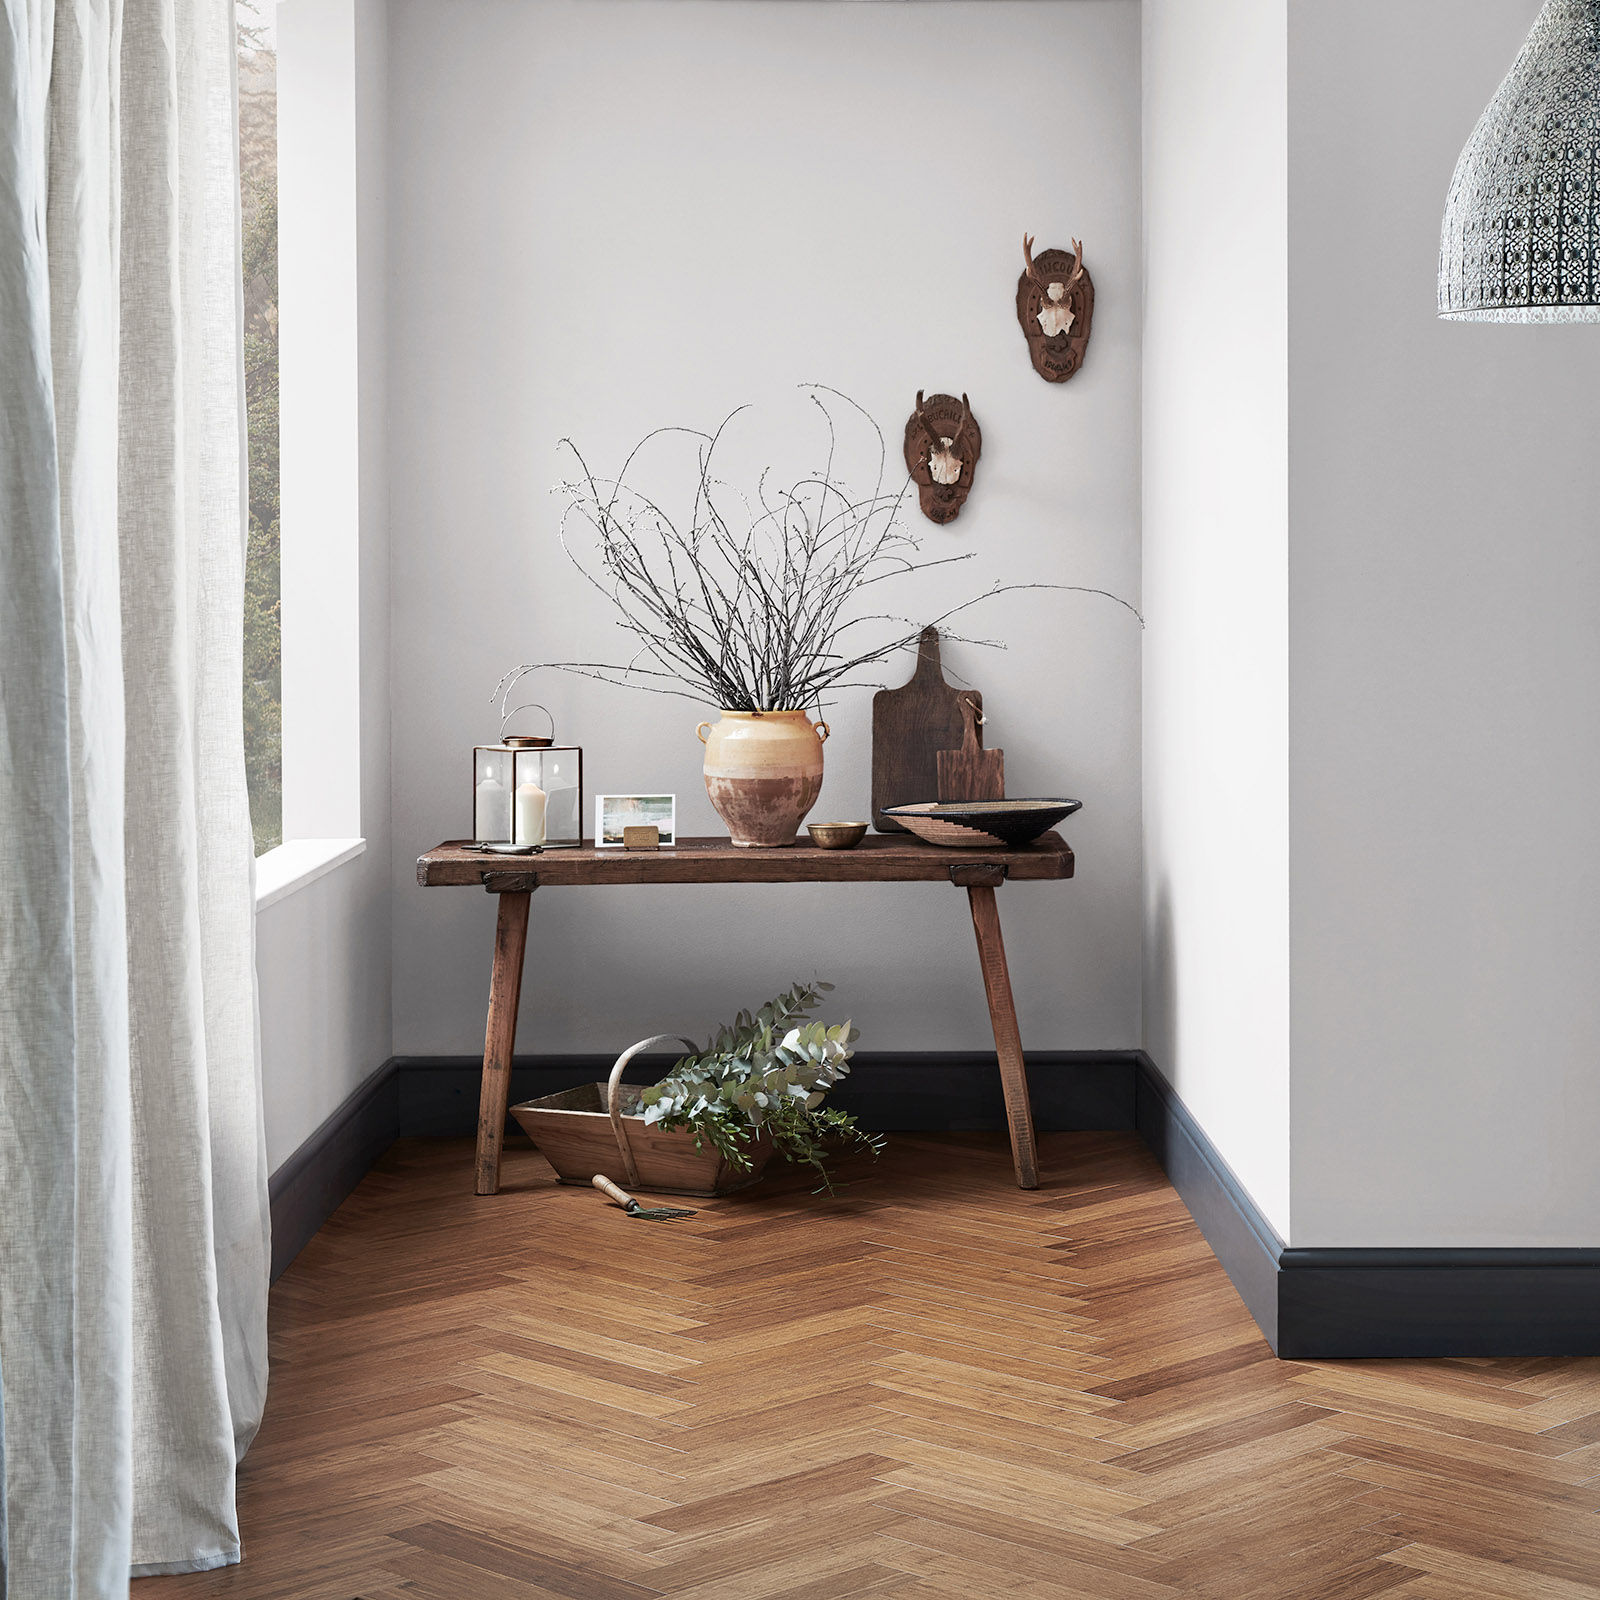
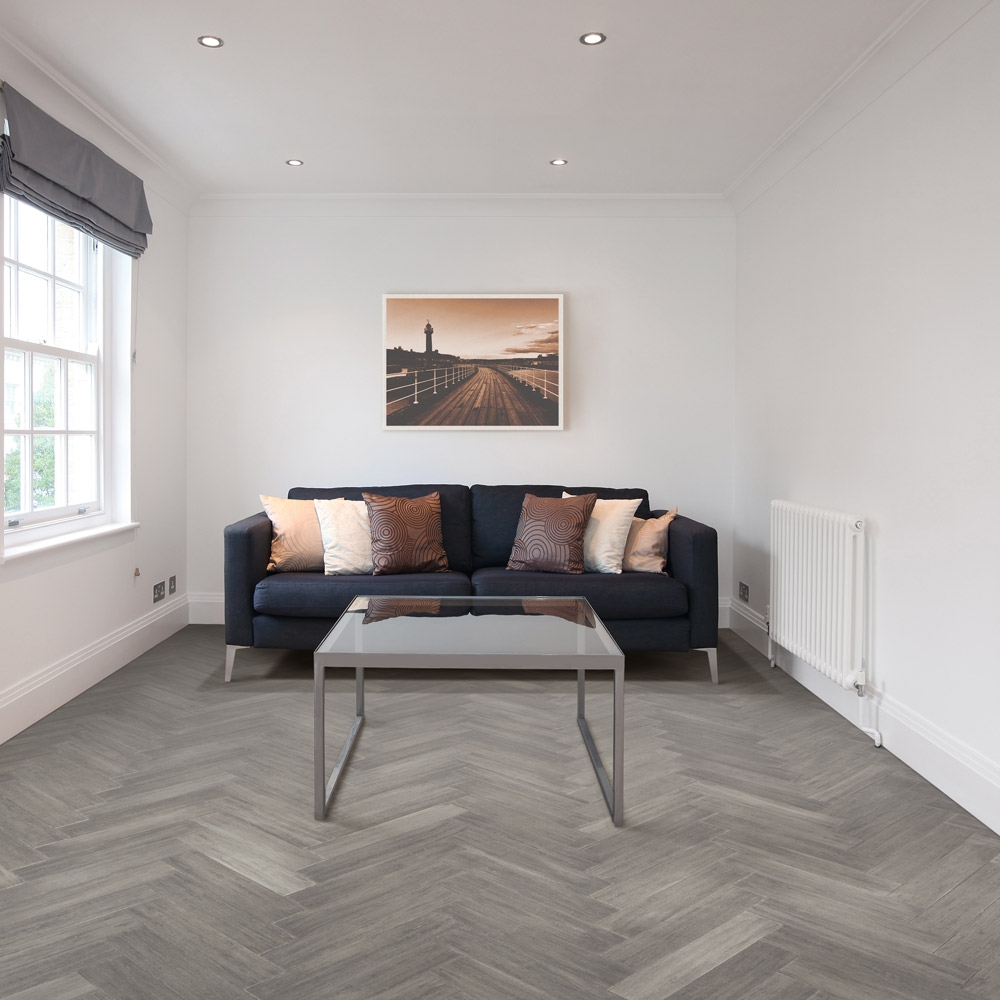
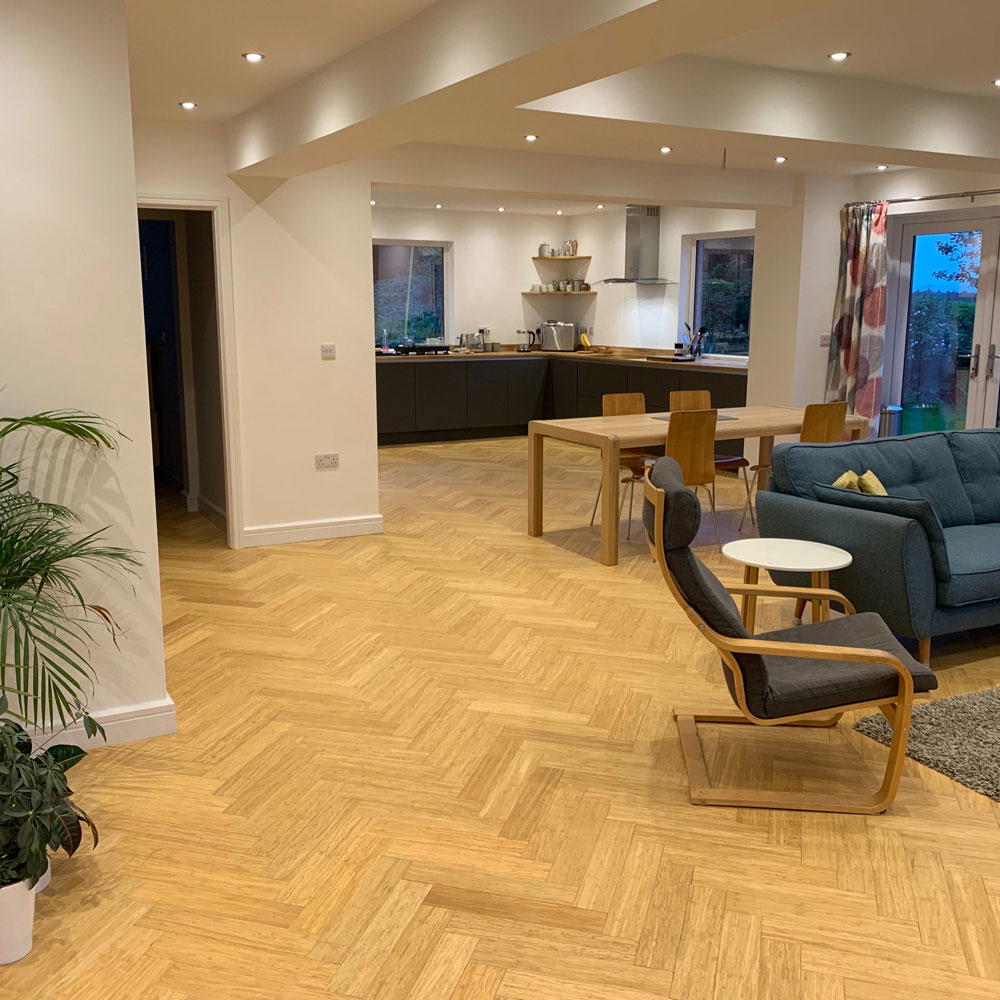
Color selection took careful thought because herringbone’s busy pattern can clash with certain tones. I chose natural blonde bamboo for its light, neutral appearance that makes the pattern prominent without overwhelming my space. Darker carbonized bamboo creates dramatic, moody herringbone that works beautifully in formal dining rooms or studies but felt too heavy for my living area. Medium tones offer a nice compromise, providing warmth while still showcasing the pattern’s geometric beauty.

Planning Your Layout and Finding the Center Point
Before cutting a single plank, I spent hours planning my herringbone layout to ensure the pattern would be centered and balanced in my room. I measured to find the exact center of my living room, marking it clearly with chalk lines. The herringbone pattern radiates from this center point, creating symmetry that makes the room feel harmonious and intentional. Starting from anywhere else would have resulted in awkward partial patterns at the walls or a lopsided appearance.
I created a dry layout using loose planks to visualize the pattern before committing to installation. This mockup revealed issues I needed to address, like how the pattern would meet my doorways and transition to adjacent rooms. I adjusted my center point slightly to avoid having tiny slivers of bamboo at the walls, which would look cheap and be difficult to install securely. This planning phase took an entire day but prevented costly mistakes during actual installation.
Drawing the herringbone pattern on paper helped me calculate exactly how many planks I’d need and understand the cutting requirements. I sketched my room to scale and mapped out the entire pattern, counting planks and identifying where I’d need special cuts. This exercise also helped me determine the best starting corner and sequence for installation. Having this roadmap made the actual installation process much less intimidating and more methodical.
Mastering the Installation Technique
Installing herringbone bamboo flooring requires different skills than standard plank installation. I started with two planks meeting at 90 degrees at my center point, forming the first V. Every subsequent pair of planks built off this foundation, alternating the direction of the V as I worked outward. Maintaining perfect 90-degree angles was absolutely critical because even slight deviations compound across the floor, eventually throwing off the entire pattern.
I invested in a sliding miter saw with a laser guide, which made achieving consistent, accurate cuts possible for someone with my intermediate DIY skills. Every single plank needed at least one angled cut where it met the walls, and many required cuts on both ends. I set up an efficient workspace with the saw positioned for quick access, measuring and cutting planks as I progressed. Pre-cutting all pieces would have been overwhelming, so I worked section by section.
The tongue-and-groove system on my bamboo planks worked perfectly for herringbone installation. I applied wood glue to tongues before fitting each piece, tapping them gently with a rubber mallet to ensure tight connections. The pattern’s geometry means you’re constantly working at awkward angles, so I used straps and weights to hold completed sections while glue dried. I learned to work in small areas, completing and stabilizing each section before moving forward.
Managing Challenges and Problem Areas
Transitioning the herringbone pattern to walls and doorways presented my biggest challenges. At walls, I had to cut planks at various angles to fill the triangular spaces left by the pattern. These filler pieces required careful measurement and precise cutting. Some pieces were tiny and difficult to secure, so I used construction adhesive in addition to the tongue-and-groove system. The end result looks clean and intentional, but achieving it required patience and multiple attempts for some pieces.
Doorways demanded special planning to maintain the pattern’s integrity while creating functional transitions. I chose to end the herringbone pattern just inside each doorway, installing a decorative threshold that complemented the bamboo. Trying to continue the pattern through doorways would have created awkward partial patterns and complicated transitions to other rooms. The thresholds provide clean breaks while protecting the bamboo edges from foot traffic damage.
I encountered several bamboo planks with slight warps or irregularities that disrupted the pattern’s tight fit. I learned to inspect each piece before installation, setting aside problem planks for less visible areas near walls where small gaps wouldn’t be as noticeable. For planks that were almost perfect but slightly stubborn, I used strap clamps to draw them tight while the glue set. This problem-solving became easier as I gained experience and developed techniques for handling tricky pieces.
Finishing Touches and Long-Term Maintenance
After completing installation, I let the floor settle for 48 hours before applying finish. I chose a matte polyurethane specifically formulated for bamboo, which protects the floor without creating excessive sheen that might interfere with the pattern’s visual impact. I applied three coats with a lamb’s wool applicator, sanding lightly between coats with 220-grit paper. The finish deepened the bamboo’s natural color slightly and brought out the grain beautifully.
Installing baseboards and quarter-round molding completed the project and hid the expansion gaps around the perimeter. I selected simple, clean-lined molding that wouldn’t compete with the busy floor pattern. Painting the molding white created crisp contrast that frames the herringbone beautifully. I caulked gaps between molding and walls with paintable caulk for a polished, professional appearance. These finishing touches elevated the entire installation.
Maintaining herringbone bamboo flooring requires no special techniques beyond standard bamboo care. I sweep daily with a soft-bristle broom to remove grit that could scratch the finish. Weekly, I vacuum using a hardwood floor attachment without a beater bar. Monthly deep cleaning involves damp mopping with bamboo floor cleaner, wrung nearly dry to avoid excess moisture. The pattern’s texture actually helps hide minor scratches and wear better than straight-laid flooring, a bonus I appreciate with my active household.

Is herringbone installation significantly harder than standard bamboo flooring?
Yes, herringbone requires more skill, time, and patience than straight installation. I spent three weeks on my 300-square-foot room versus maybe five days for standard installation. Every plank needs custom cutting, and maintaining precise angles is crucial. However, if you’re comfortable with basic woodworking and have a quality miter saw, it’s achievable for dedicated DIYers. Professional installation costs 50-100% more than standard patterns due to increased labor.
How much extra bamboo should I purchase for a herringbone pattern?
I bought 20% extra beyond my square footage, which proved accurate. Standard installations need 10% extra for waste, but herringbone’s angled cuts at walls create significantly more scrap. I actually used closer to 18% extra, but having the buffer prevented mid-project material shortages. Buying from the same production batch ensures color consistency, so over-ordering is smarter than underestimating and potentially facing discontinued products later.

Does herringbone bamboo flooring show scratches and wear more than regular patterns?
Actually, I’ve found the opposite. The pattern’s visual texture and varying grain directions camouflage minor scratches and scuffs that would be obvious on straight-laid flooring. Light scratches get lost in the pattern’s complexity. The busy design is more forgiving for households with pets or kids. However, deep gouges or damage are equally visible regardless of pattern, so normal care and protection remain important.
Can herringbone patterns work in small rooms or just large spaces?
Herringbone works beautifully in rooms of all sizes. Small spaces actually benefit because the diagonal lines create visual expansion, making rooms feel larger. I’ve seen stunning herringbone in powder rooms, entryways, and hallways. The key is selecting appropriate plank sizes for your space. Smaller rooms look best with smaller planks creating a refined pattern, while large rooms can handle bigger, bolder herringbone.

What’s the best starting point for herringbone installation in rectangular rooms?
I started at my room’s exact center point, which created balanced symmetry. For rectangular rooms, some installers prefer centering the pattern on the room’s longest dimension, letting it be slightly off-center width-wise. Either approach works, but centering both dimensions creates the most balanced appearance. I recommend doing a dry layout to visualize both options before committing, as room proportions and furniture placement affect which looks better.
How do I transition herringbone bamboo flooring to other rooms with different flooring?
I used decorative threshold strips at doorways to create clean transitions and protect edges. T-moldings work well for transitions to other hardwood or bamboo at equal heights. For transitions to carpet or tile at different heights, reducer strips create smooth grade changes. I matched threshold materials to my bamboo color. The key is ending the herringbone pattern completely at transitions rather than trying to continue it.

Solid Stone Grey Strand Woven 90mm Parquet Block BONA Coated Bamboo Flooring 1.134m²
Bamboo flooring herringbone pattern

Solid Natural Strand Woven Parquet Block Bamboo
Related Posts: