These elements are around the outside of your home and shouldn't be a pricey fix. Leave it for 1 day or 2 and then check to find out if there's some condensate on the under side of the plastic, if not, you're ready to go. No matter whether it is a wash area, a gym, an entertainment region, if not an underground bedroom will call for different floor features.
Images about How To Repair Concrete Cracks In Basement Floor
How To Repair Concrete Cracks In Basement Floor
/cdn.vox-cdn.com/uploads/chorus_asset/file/19495119/00_concrete_xl.jpg)
You might just mix and match the colors of the walls and ceilings and so as to generate a somewhat unique atmosphere since basements are typically enclosed areas with no windows. Moisture can be a major trouble with certain floor overlaying choices: it is able to degrade the adhesive used for tile, it can result in mildew and mold difficulties in carpets as well as carpet pads, and this can make wood flooring warp and buckle.
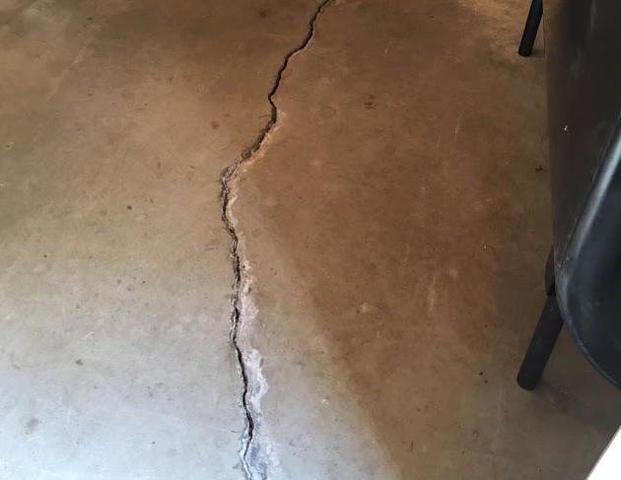
Causes of Basement Floor Cracks and What to Do About Them News
In quite a few cases, you'll also have a decision about the color of chips, as well as the quantity of chips in the covering. It has even better than epoxy floor coating; It is 4 times stronger and more durable. Hence, it's essential that you waterproof your home, like the basement.
Basement Floor Cracks – How To Fix Cracks In A Basement Floor
Basement u0026 Foundation Floor Cracks Repair in Atlanta Georgia

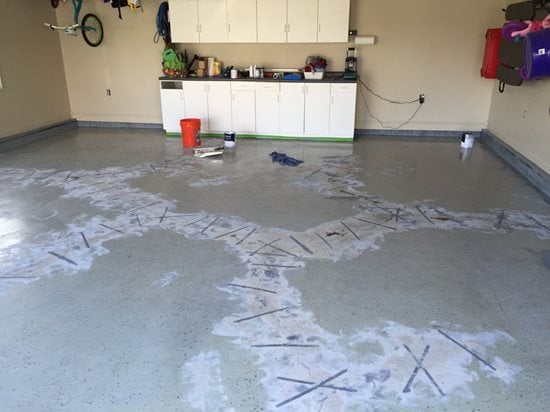
Repairing Common Concrete Slab Problems – Concrete Network
Concrete Basement / Cellar Floor Crack Repair in Worcester, MA

How to Make a Concrete Floor Patch
/Repairing-Concrete-Floor-173836996-56a4a08d5f9b58b7d0d7e412.jpg)
Basement Floor Crack Repair Waterproofing Experts in MI

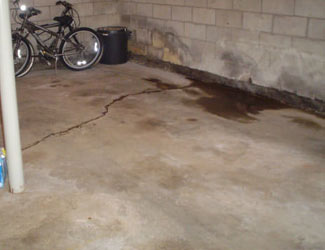
What Causes Cracks in Basement Floors? EverDry Toledo Ohio

Floor Cracks – Complete Basement Systems™

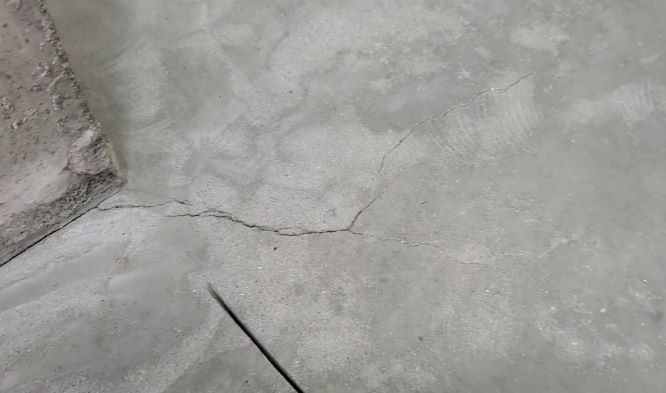
DIY Concrete Crack Repair Family Handyman

Basement Floor Cracks Repair in Connecticut Repairing Basement
Cracks in the Basement Floor? Hereu0027s What They Mean – Bob Vila

Why Cracks in Basement Floors Canu0027t be Fixed by U.S. Waterproofing

Related Posts:
- Vinyl Plank Flooring Basement Installation
- Basement Floor Insulation
- Tile Basement Flooring
- Concrete Basement Floor
- Cleaning Concrete Basement Floor
- Wood Basement Floor
- Basement Laminate Flooring Ideas
- Basement Floor Coating
- Luxury Basement Floor
- Epoxy Paint Basement Floor
How To Repair Concrete Cracks In Basement Floor
The basement floor is one of the areas in a home that is most susceptible to damage from water or other sources. Cracks in the basement floor can lead to water leakage and cause extensive damage if left unchecked. Repairing concrete cracks in the basement floor is an important step in maintaining a safe and healthy home. This article will provide a detailed guide on how to repair concrete cracks in a basement floor.
Preparing for the Repair
Before beginning any repair work, it is important to ensure that the area around the crack is completely dry. If there is any standing water or moisture present, it should be removed using a wet/dry vacuum or by mopping up the area with a mop and bucket. Once the area is dry, use heavy-duty masking tape to cover all areas of the floor surrounding the crack. This will help to protect these areas from any debris that may be created during the repair process.
Cleaning the Crack
Once the area has been prepared, it is time to clean out the crack itself. The best way to do this is by using a power washer with an adjustable nozzle. Start at one end of the crack and move slowly along its length, keeping the nozzle of the power washer at a 45-degree angle to ensure that all debris and dirt are removed from within it. Once all debris has been cleared, allow the area to dry completely before continuing with the repair process.
Applying Caulk
Once the area has dried, it is time to apply caulk to fill in any gaps or voids in the crack. A good quality outdoor silicone caulk should be used for this step as it is designed to withstand extreme temperatures and won’t shrink when exposed to moisture. Apply a generous amount of caulk along both sides of the crack and then use a putty knife or trowel to spread it evenly into place. Allow this first layer of caulk to set for 24 hours before continuing with the repair process.
Applying Patching Material
Once the first layer of caulk has set, it is time to apply patching material over top of it. Choose a patching material that is designed for use on concrete and follow the manufacturer’s instructions for application. Apply enough patching material so that it completely covers the caulk and extends about an inch beyond both sides of it. Allow this second layer of patching material to set for 24 hours before continuing with the repair process.
Sealing the Crack
Once both layers of patching material have set, it is time to seal the crack with an acrylic sealant. This type of sealant helps to prevent moisture from entering into the crack and will help protect against future cracking or damage. Apply a generous amount of sealant along both sides of the crack and then use a brush or trowel to spread it evenly into place. Allow this sealant layer to set for 24 hours before continuing with the repair process.
Finishing Touches
Once all layers have been applied and allowed to set, you can now begin putting on any finishing touches such as painting or staining if desired. Once all desired steps have been completed, your concrete crack repair project will be complete!
FAQs
Q: What type of caulk should I use for repairing concrete cracks?
A: Outdoor silicone caulk is best for repairing concrete cracks as it can withstand extreme temperatures and won’t shrink when exposed to moisture. Q: How long should I wait between applying each layer of patching material?
A: It is best to allow each layer of patching material to set for 24 hours before applying additional layers. This will ensure that each layer has had enough time to properly bond with the previous layer before being covered up by additional materials.
Q: How often should I seal my concrete cracks?
A: It is best to check your concrete cracks every few months and reseal