When I was planning my basement renovation, flooring was the decision I kept coming back to. I looked seriously at vinyl plank, carpet, engineered hardwood, and even polished concrete before landing on tile.
Several friends tried to talk me out of it, warning me it would be cold and hard underfoot and more work to install than I was ready for. Two years later, with a finished basement that gets used every single day by my family, I can tell you that tile was absolutely the right call, and the reasons go well beyond what I initially considered when I was standing in the flooring aisle trying to decide.
Why Tile Makes So Much Sense for a Basement Environment
Basements present a specific set of challenges that tile handles better than almost any other flooring material. Moisture is the biggest concern below grade, and ceramic and porcelain tile are completely impervious to water. They don’t swell, warp, grow mold within the material itself, or degrade from humidity. In a space where moisture transmission through the slab is always a background concern, choosing a flooring material that simply doesn’t care about water is a fundamentally smart approach.
I had a minor water intrusion event in my basement about eight months after finishing it, when a heavy rainstorm overwhelmed my window well drainage and let a small amount of water in along one wall.
The tile floor got wet, I mopped it up, let it dry, and the floor looked exactly the same afterward. Had I installed laminate or engineered hardwood, that event would have been a costly disaster requiring replacement. Tile just shrugged it off completely.
Tile is also one of the most durable flooring materials in existence. It doesn’t dent, scratch, or wear through the way softer materials do. In a basement that doubles as a playroom, workshop, or gym, that indestructibility matters.
I’ve had heavy equipment, kids’ bikes, and furniture dragged across my basement tile floor without a single crack or visible scratch. That durability over the long term makes the higher upfront investment feel very reasonable.

Choosing Between Ceramic and Porcelain Tile for a Basement
When I started shopping for basement tile, I quickly learned that ceramic and porcelain are the two main categories and that the differences between them matter specifically for a below-grade application. Ceramic tile has a higher water absorption rate than porcelain, which means it’s more susceptible to damage in environments with significant moisture. Porcelain has a much denser, less porous composition that makes it the better technical choice for basements.
The porosity difference shows up in the tile’s PEI rating and its water absorption percentage listed on the product specifications. Porcelain typically absorbs less than 0.5 percent water, while ceramic can absorb significantly more. For a basement where moisture vapor transmission through the slab is a constant background condition, that lower absorption rate in porcelain provides meaningful long-term protection. I chose porcelain for my basement specifically for this reason.
Porcelain is also harder and more resistant to cracking under load than most ceramic tile, which matters in a basement where heavy items get moved around. The tradeoff is that porcelain is more difficult to cut during installation, requiring a quality wet saw with a diamond blade rather than a basic tile cutter. That added installation complexity is worth accepting for the performance advantages, especially since you’re investing in a floor you want to last for decades.

Picking the Right Tile Size and Style for Your Basement
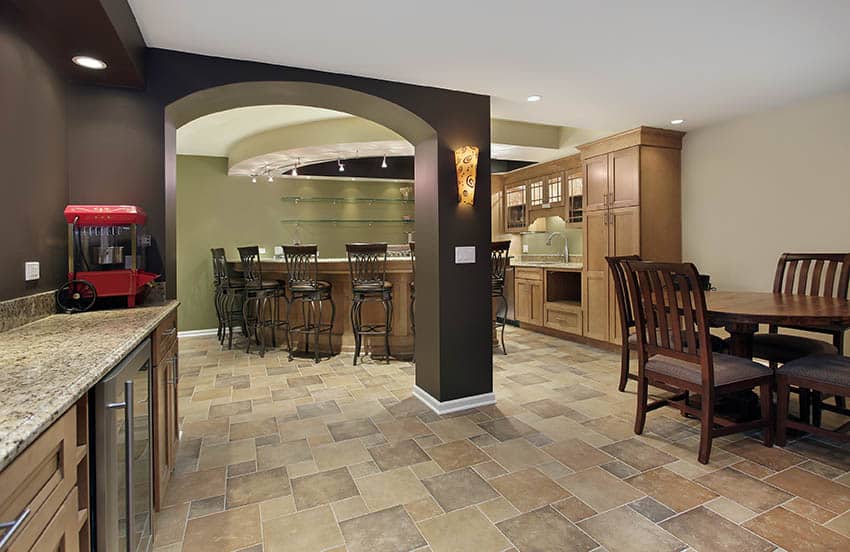
Tile size has a bigger impact on the finished look of a basement than most people anticipate, and I spent real time on this decision before buying. Large format tiles, anything twelve inches square or larger, make a basement feel more expansive and reduce the number of grout lines, which creates a cleaner visual. My basement is roughly eight hundred square feet, and I used twenty-four-by-twenty-four-inch porcelain tiles that make the space feel genuinely open and modern.
Smaller tiles have their own advantages. Mosaic and smaller format tiles are more forgiving on floors that aren’t perfectly level, since smaller tiles bridge minor variations more easily without lippage, which is the term for when adjacent tile edges sit at slightly different heights. If your concrete slab has significant undulation, a smaller tile format can make installation easier and the finished result more professional-looking without extensive leveling work.
For style, I chose a light concrete-look porcelain that has a subtle texture and a matte finish. The concrete aesthetic felt appropriate for a basement and kept the design feeling contemporary without being trendy. Wood-look porcelain planks are enormously popular for basements right now and look surprisingly realistic. Stone-look tiles in travertine or slate patterns add warmth and visual interest. The range of realistic options available today means you can get almost any aesthetic you want from a porcelain tile product.
Addressing the Cold and Hard Reputation of Basement Tile
The two most common objections I hear about tile in basements are that it’s cold and that it’s hard underfoot. Both criticisms are valid to a degree, and I want to address them honestly rather than brush them aside. Tile is a thermal conductor, meaning it feels cold when the room is cold because it draws heat away from your feet quickly. In a basement that stays around sixty degrees in winter, bare tile can feel uncomfortably cold without some mitigation.
My solution was a combination of approaches. I installed electric radiant heat mats beneath the tile in the main seating area of my basement, covering about two hundred square feet. The mats sit in the thinset layer during installation and connect to a thermostat on the wall. The radiant heat transforms the tile from a cold surface to a genuinely warm and comfortable one, and the operating cost is modest since I only run it in the cooler months. For a basement family room, it was absolutely worth the additional installation cost.
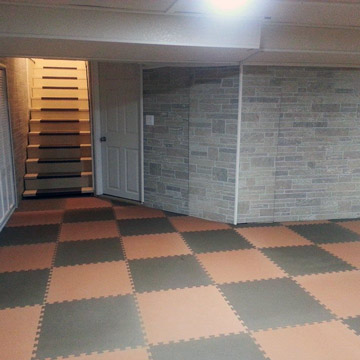
For the hardness concern, area rugs placed in seating and play areas do an enormous amount of work toward comfort. My kids spend hours playing on the basement floor, and the combination of tile plus a thick area rug is comfortable enough that I never hear complaints. The rugs also add visual warmth and define zones within the open space. If radiant heat isn’t in your budget, rugs alone make a significant difference in how livable a tiled basement floor feels throughout the year.
Installing Tile in a Basement Correctly
Basement tile installation has some specific requirements that differ from tiling an above-grade floor, and understanding those differences before you start saves significant frustration. The concrete slab needs to be clean, structurally sound, and properly prepared before any tile goes down. I tested for moisture with the plastic sheet method before starting, which showed acceptable vapor transmission levels that allowed me to proceed with standard installation methods.
Cracks in the concrete slab need to be addressed before tiling over them. Unchecked cracks that continue moving will telegraph through the tile and grout above, eventually cracking your new floor. I filled static cracks with a flexible polyurethane caulk and used an uncoupling membrane over one area where I was less confident about movement. An uncoupling membrane, the most popular brand being Schluter Ditra, creates a layer between the slab and the tile that isolates the two and prevents slab cracks from transferring upward into the finished floor.
Setting the tile correctly with the right mortar is critical in a basement. I used a modified thinset with good flexibility, applied with a notched trowel in the size recommended for my tile format. Large format tiles require a larger notch trowel and back-buttering the tile itself to ensure full coverage beneath. Hollow spots under large tiles are a common installation defect that leads to cracking over time. I checked coverage by occasionally pulling up a freshly set tile and confirming full contact, which gave me confidence in the installation.

Grouting, Sealing, and Long-Term Tile Maintenance
Grout selection in a basement matters more than people typically expect. I chose an epoxy grout for my basement rather than traditional cement-based grout, and it was one of the better decisions of the project. Epoxy grout is completely non-porous, highly stain resistant, and doesn’t require sealing. In a basement where the grout lines might encounter moisture, tracked-in dirt, and potential spills regularly, those properties are genuinely valuable.
If you use cement-based sanded grout, sealing it thoroughly after installation and resealing every one to two years is essential in a basement. Unsealed cement grout in a below-grade environment absorbs moisture, stains easily, and can develop mildew over time. The initial sealing takes about an hour and periodic resealing is straightforward. I still sealed my epoxy grout as an extra precaution since the cost of sealer is minimal compared to the effort of cleaning stained grout lines.
Routine maintenance for my tiled basement is simple and quick. I sweep weekly and damp mop with a pH-neutral cleaner every couple of weeks. The porcelain surface is incredibly easy to clean and shows no signs of wear after two years of active family use. The grout lines stay clean with occasional scrubbing using a stiff grout brush and a baking soda paste. Compared to carpet, which I had in a previous finished basement and which trapped allergens and required professional cleaning, tile maintenance feels effortless and genuinely satisfying.

Is tile flooring too cold for a finished basement living space?
Tile can feel cold in a basement, but it’s very manageable. I installed electric radiant heat mats under tile in my seating area, which made the floor comfortably warm even in winter. For a more budget-friendly approach, thick area rugs over tile make a significant comfort difference. Tile over a heated basement also feels warmer than in an unheated space. The cold reputation is real but easily addressed with the right combination of heating and soft furnishings.
Will tile crack if my basement slab has cracks in it?
Existing slab cracks can telegraph through tile if they continue moving. Fill static cracks with flexible polyurethane caulk before tiling. For areas where you’re uncertain about slab movement, install an uncoupling membrane like Schluter Ditra between the concrete and the tile. This layer isolates the tile from the slab and prevents crack transfer. It adds modest cost but provides real insurance against one of the most frustrating tile installation failures you can encounter.

Is porcelain or ceramic tile better for a basement floor?
Porcelain is the better choice for basements because of its much lower water absorption rate, typically under 0.5 percent. Basements have inherently higher moisture conditions than above-grade spaces, and porcelain’s denser composition handles that environment more reliably over the long term. Ceramic works in basements with very low moisture, but if moisture is any concern at all, the modest price difference between ceramic and porcelain is worth spending for better protection.
How much does tiling a basement floor cost?
Porcelain tile for a basement runs roughly two to six dollars per square foot for materials depending on size, quality, and style. Professional installation adds four to eight dollars per square foot given the prep work involved. For a five-hundred-square-foot basement, materials and installation typically run three thousand to seven thousand dollars total. DIY installation saves significantly on labor but requires a quality wet saw, proper tools, and patience. The long lifespan of tile makes the investment very cost-effective per year of use.
Can I install tile over an existing basement floor covering?
Installing tile over existing vinyl or linoleum is sometimes possible if the existing floor is well-bonded, flat, and structurally sound. However, I’d always recommend removing the existing covering first in a basement so you can inspect the slab, address cracks, and test for moisture properly. Installing over an unknown substrate in a basement introduces risk that’s hard to justify when removal is manageable. Starting with a clean, inspected slab gives you the best foundation for a tile installation meant to last decades.
How do I keep basement tile grout clean and looking good?
Epoxy grout is the easiest option since it’s non-porous and stain resistant by nature. For cement-based grout, seal it at installation and reseal annually. Regular sweeping prevents grit from grinding into grout lines. For routine cleaning, a pH-neutral floor cleaner and damp mop handles most soil effectively. For stubborn grout stains, a stiff grout brush with baking soda paste works well without damaging the grout. Avoid acidic cleaners like vinegar, which degrade cement grout over time with repeated use.

Related Posts: