When I first bought my house, the basement was exactly what you’d expect: a raw concrete slab that was cold, dusty, and about as inviting as a parking garage. I knew I wanted to finish the space eventually, but I had no idea how many options existed for dealing with that concrete floor, whether sealing it, coating it, covering it, or pouring something entirely new over it.
After going through the process myself and making a few expensive mistakes along the way, I put together everything I learned so you can approach your own concrete basement floor project with confidence and clarity.
Understanding What You’re Actually Working With
Before you do anything to a concrete basement floor, you need to understand what kind of slab you have and what condition it’s in. I made the mistake of skipping this step on my first attempt and paid for it later. Concrete slabs vary in age, thickness, porosity, and moisture content, and each of those factors affects which treatments and coverings will work well and which ones will fail.
Start by looking for cracks. Hairline cracks are common and usually not structural, but wide or growing cracks can signal foundation movement that needs professional evaluation before you do anything else to the floor.
I had two hairline cracks in my slab that a concrete filler handled easily. Had I just covered them without addressing them first, they could have telegraphed through any finished flooring above.
Moisture is the most critical factor in any concrete basement floor project. Concrete is porous and wicks moisture up from the ground beneath it constantly. I did the plastic sheet test, taping a square of plastic to the floor for seventy-two hours, and found visible condensation on the underside.
That told me I had active moisture transmission to address before choosing any finish or flooring. Skipping that test is one of the most common and costly mistakes basement renovators make.

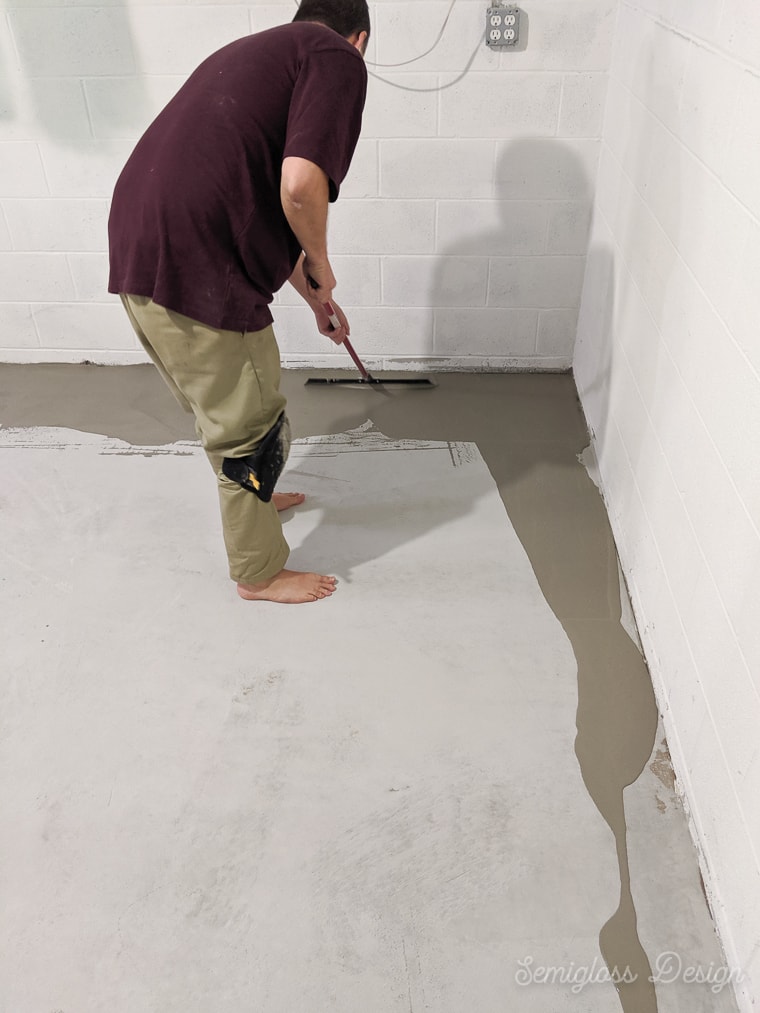
Concrete Sealing as Your First Line of Defense
Sealing the concrete was the first real improvement I made to my basement floor, and I wish I had done it years earlier. A penetrating concrete sealer soaks into the slab and chemically bonds with the material, hardening the surface and significantly reducing moisture vapor transmission. It doesn’t change the appearance dramatically, but the difference in how the basement feels is immediate. That dusty, cold quality softens noticeably.
There are two broad categories of sealers worth knowing: penetrating sealers and topical sealers. Penetrating sealers go into the concrete and work from within, making them very long-lasting and resistant to peeling since there’s no surface film to delaminate. Topical sealers sit on top of the concrete and can provide a light sheen, but they’re more vulnerable to wear and need reapplication more frequently. For a basement floor, I strongly prefer penetrating sealers for their durability and minimal maintenance.
Application is straightforward enough for a confident DIYer. Clean the floor thoroughly, let it dry completely, then roll or spray the sealer on in overlapping passes. Most penetrating sealers need to be reapplied every three to five years depending on traffic and conditions. The cost of materials is low, typically fifty to one hundred fifty dollars for a standard basement, making it one of the highest-value improvements you can make to a raw concrete floor before deciding on any further treatment.

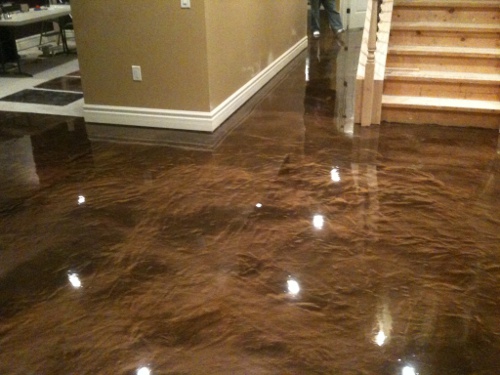
Epoxy Coating for a Durable and Attractive Finish
When I wanted to go beyond basic sealing and give my basement floor a finished, polished appearance, epoxy coating was the direction I chose. A two-part epoxy system transforms a dull concrete floor into a smooth, glossy surface that’s resistant to chemicals, stains, and abrasion. The visual difference before and after is genuinely dramatic, and it made my basement feel like a real room rather than a utility space.
Surface preparation is everything with epoxy. The concrete needs to be properly etched, either with a muriatic acid wash or mechanical grinding, to open the pores and give the epoxy something to bond to. I did a half-hearted etch on my first attempt with a different product years ago in a rental property and the coating peeled within six months. On my current home I was meticulous about prep and the epoxy has been solid for three years without a single peel or bubble.
The decorative flake system that most epoxy kits include is both practical and attractive. You broadcast the flakes into the wet epoxy and they create a textured, speckled surface that adds grip and hides minor imperfections beautifully. I chose a gray and white blend that looks clean and modern. The final topcoat seals the flakes in and adds an additional layer of chemical and abrasion resistance. The whole project took one weekend and completely changed the character of my basement.

Concrete Staining for a Decorative and Unique Look
Acid staining was something I considered seriously before ultimately going with epoxy, and I still think about it when I see a beautifully done stained concrete floor. The acid reacts chemically with minerals in the concrete to create rich, variegated tones that look like natural stone or aged leather. No two acid-stained floors look exactly the same, which gives you a genuinely unique result that can’t be replicated by any manufactured flooring product.
The color palette with acid staining leans toward earthy, organic tones rather than bright or cool colors. Warm browns, terracottas, olive greens, and slate blues are the typical range. The exact result depends on the mineral content of your specific concrete, which means there’s an element of beautiful unpredictability to the process. Most contractors recommend doing a test patch in an inconspicuous corner before committing to the full floor, and I think that’s wise advice.
Water-based concrete stains are an alternative to acid staining that offer more color predictability and are easier to apply without professional experience. They don’t react chemically with the concrete but instead penetrate and tint the surface. The results are less naturally variegated than acid staining but still far more attractive than bare concrete. Either type of stain needs to be sealed afterward to protect the color and create a cleanable surface.
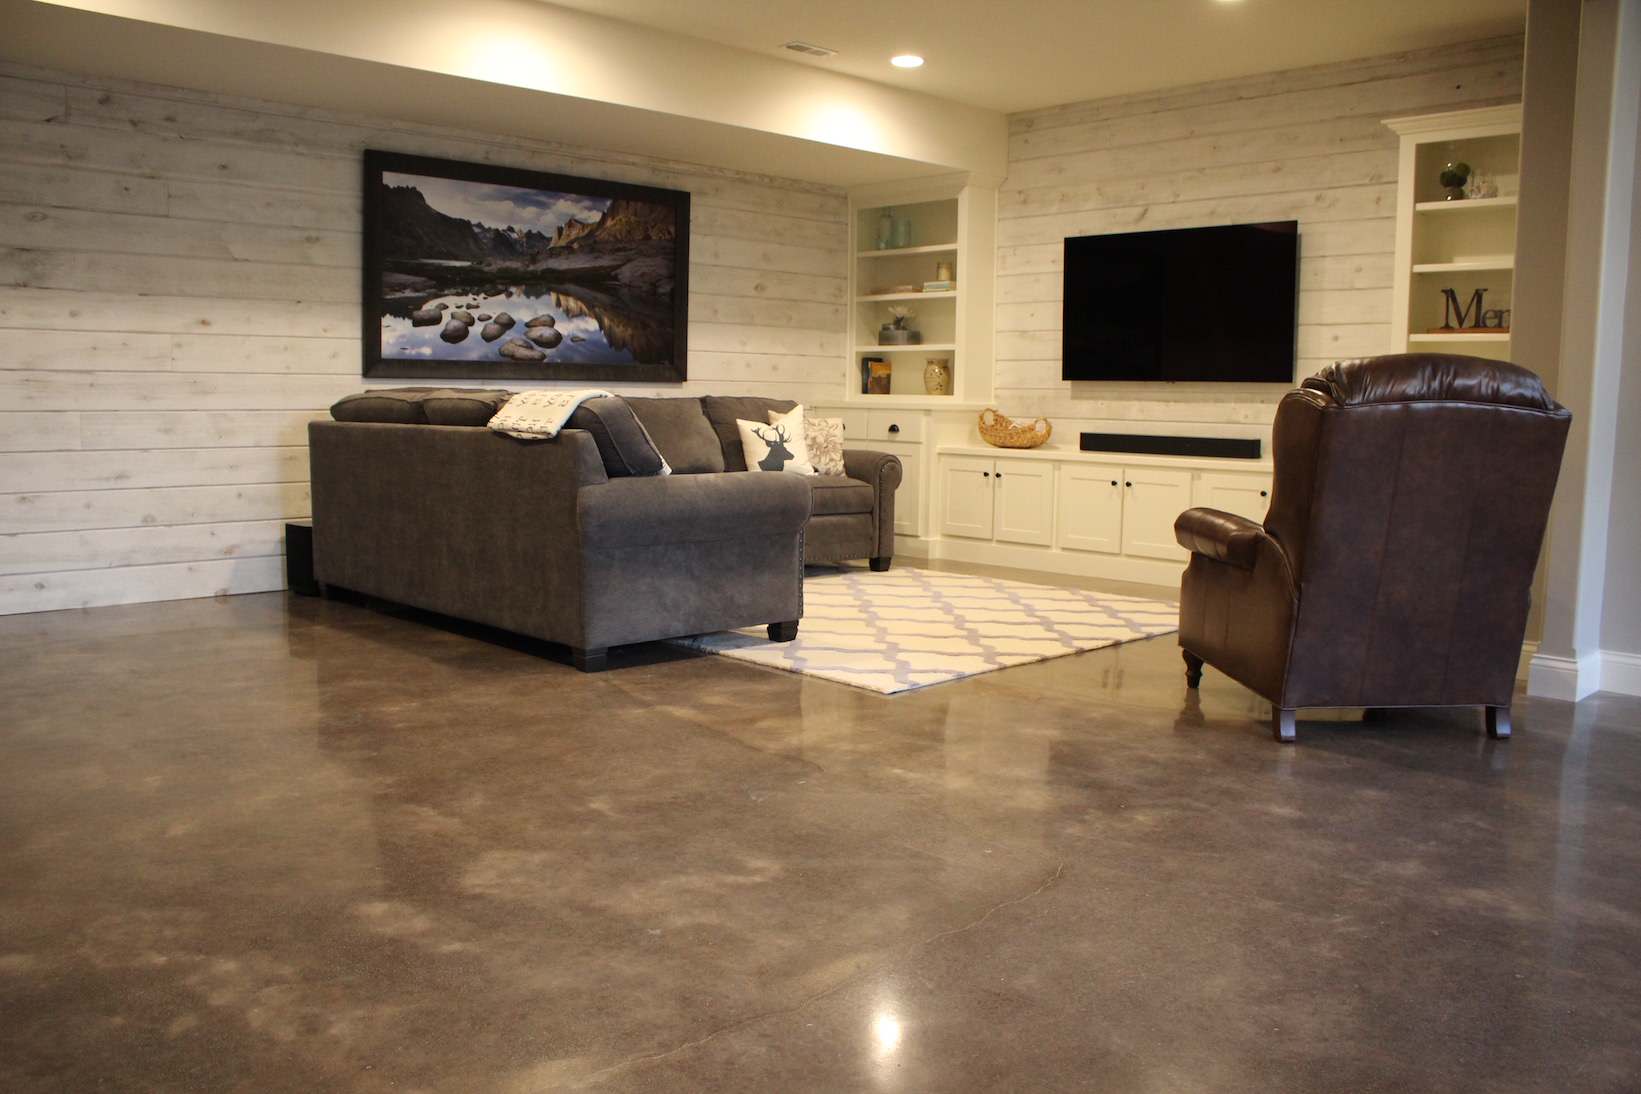
Covering Concrete With Subfloor and Finished Flooring
When I finished the main living area of my basement, I wanted something warmer and more comfortable than any concrete treatment could provide. That’s when I learned about sleeper systems and floating subfloor panels that create a raised, insulated platform above the concrete slab. This approach opens up almost every flooring option imaginable, from hardwood to laminate to luxury vinyl, for a space that would otherwise be too cold and moisture-prone for those materials.
Dimple mat underlayment is the approach I ultimately used beneath my subfloor panels. The dimpled plastic creates an air gap between the concrete and the subfloor above, allowing any moisture vapor that passes through the slab to dissipate rather than getting trapped against wood. This system is specifically designed for basement applications and dramatically reduces the risk of mold and subfloor deterioration over time.
Over the dimple mat I installed interlocking subfloor panels, which are oriented strand board bonded to a plastic base. These create a flat, stable surface that feels substantially warmer underfoot than concrete alone and provides a proper nailing or gluing surface for finished flooring. Once those panels were down, my basement floor felt completely different, firm, insulated, and ready to receive whatever finished flooring I chose to install on top of it.
Insulating and Warming a Cold Concrete Basement Floor
Cold floors were one of my biggest quality-of-life complaints about my basement before I addressed the insulation situation. Concrete conducts cold very efficiently, and in winter my basement was noticeably uncomfortable, even with the heating system running. Adding thermal break insulation beneath any flooring system makes an enormous difference in how livable the space feels throughout the year.
Rigid foam insulation panels placed directly on the concrete before the subfloor provide excellent thermal resistance. I used two-inch XPS foam, which has a high R-value per inch and is also resistant to moisture absorption, making it well-suited for basement conditions. The foam panels cut easily with a utility knife and lay flat without adhesive for floating systems. That layer of foam made my basement floor go from cold and uninviting to comfortable enough to walk on barefoot in winter.
Radiant floor heating is the premium option for basement floor warmth, and it’s something I’ve seriously considered adding in the future. Electric radiant mats can be installed over the concrete before a self-leveling compound or under certain finished flooring types. Hydronic radiant systems are more complex and costly but incredibly efficient in well-insulated spaces. If comfort is your top priority and you’re doing a full basement renovation, pricing out radiant heat is absolutely worth the conversation with your contractor.

How do I know if my concrete basement floor has a moisture problem?
The plastic sheet test is your best starting point. Tape a twelve-inch square of plastic sheeting to the floor, seal all four edges completely, and leave it for seventy-two hours. Condensation on the underside indicates active moisture transmission. You can also hire a professional to conduct a calcium chloride test for a more precise measurement of moisture vapor emission rates before choosing any flooring or coating product.
Can I paint my concrete basement floor instead of using epoxy?
Regular paint will not hold up on a concrete basement floor. It peels quickly under foot traffic and moisture pressure from below. If you want an affordable colored finish, use a product specifically formulated for concrete floors, such as a concrete porch and floor paint with etching primer, or invest in a proper two-part epoxy system. The prep and product matter enormously, and the right materials make a significant difference in how long the finish lasts.
What is the most affordable way to improve a raw concrete basement floor?
A penetrating concrete sealer is the most cost-effective first step, typically costing fifty to one hundred fifty dollars in materials for a standard basement. It reduces dust, hardens the surface, and slows moisture transmission. If you want more visual impact on a tight budget, a single-part concrete floor paint with proper primer runs slightly more but transforms the look significantly. Neither requires professional installation and both make the space noticeably more functional and pleasant.
How do I fix cracks in my concrete basement floor before finishing it?
For hairline cracks, a concrete crack filler or self-leveling polyurethane caulk works well. Clean the crack thoroughly, apply the filler, and allow it to cure completely before proceeding with any coating or flooring. For wider cracks or cracks that show signs of ongoing movement, consult a structural engineer before attempting a cosmetic fix. Covering a structural crack without addressing its cause leads to recurring problems and wasted investment in flooring above it.
Is it worth hiring a professional for basement floor epoxy or should I DIY?
For a standard basement with good concrete condition, DIY epoxy is very manageable if you follow the prep steps carefully. Renting a floor grinder for proper surface preparation is the key investment that separates a long-lasting DIY epoxy job from one that peels prematurely. If your slab has significant damage, moisture issues, or you want a professional polyurea coating with a warranty, hiring a professional is worth the higher cost for the quality and accountability it provides.
How long does it take to complete a concrete basement floor project?
Timeline depends heavily on which approach you choose. A basic penetrating sealer can be applied and cured within a day or two. A full epoxy coating project typically takes one weekend, with the first coat needing twenty-four hours to cure before the topcoat. Installing a subfloor system with finished flooring on top is a multi-day project depending on the size of the space. Factor in extra time for concrete moisture testing and any crack repairs before the clock starts on your actual installation work.

Related Posts: